Owner's Manual (English)
Page 2
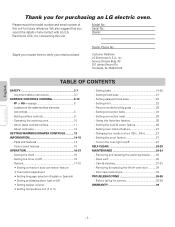
...CONTROLS COOKING 8-12 - Locations of this unit. Operating the warming zone 10 - Control panel features 15 OPERATION 16-27 - Setting bake 19-20 - Setting timed bake 21 - Recommended broiling guide 23 - Oven vent 30 - Before calling for purchasing an LG electric oven. Model No.: Serial No.: Dealer: Staple your receipt here to verify your retail purchase. Setting surface controls 9 - About cookware 12 SETTING WARMING DRAWER CONTROLS............13 INFORMATION 14-15 - Parts and features 14 - Setting delayed timed bake 22 - Setting the proof feature 27 - Care...
...CONTROLS COOKING 8-12 - Locations of this unit. Operating the warming zone 10 - Control panel features 15 OPERATION 16-27 - Setting bake 19-20 - Setting timed bake 21 - Recommended broiling guide 23 - Oven vent 30 - Before calling for purchasing an LG electric oven. Model No.: Serial No.: Dealer: Staple your receipt here to verify your retail purchase. Setting surface controls 9 - About cookware 12 SETTING WARMING DRAWER CONTROLS............13 INFORMATION 14-15 - Parts and features 14 - Setting delayed timed bake 22 - Setting the proof feature 27 - Care...
Owner's Manual (English)
Page 3
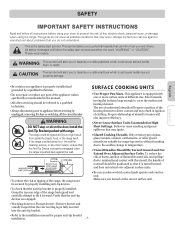
... control pads operate each surface unit. Only certain types of the heating element to potential hazards that may result in the manual. • All other glazed utensils are engaged. • Warming drawer or Storage drawer : Remove drawer and visually inspect that you turned on the door. All safety messages will expose a portion of glass, glass/ceramic, ceramic, earthenware, or other servicing should be secured by unplugged, removing the fuse or switching...
... control pads operate each surface unit. Only certain types of the heating element to potential hazards that may result in the manual. • All other glazed utensils are engaged. • Warming drawer or Storage drawer : Remove drawer and visually inspect that you turned on the door. All safety messages will expose a portion of glass, glass/ceramic, ceramic, earthenware, or other servicing should be secured by unplugged, removing the fuse or switching...
Owner's Manual (English)
Page 4
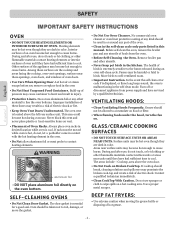
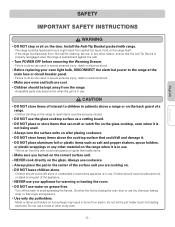
... hot even though they have had sufficient time to line the oven bottoms. Improper installation of these openings, oven doors, and windows of pressure may be taken not to accumulate on hood or filter. • When flaming foods under the hood, turn the fan on the oven bottom. Build-up of oven doors. • Use Care When Opening Door. Turn off or disconnect appliance from the oven. • Before Self-Cleaning the Oven. Use a proper metal scraper. Heating elements...
... hot even though they have had sufficient time to line the oven bottoms. Improper installation of these openings, oven doors, and windows of pressure may be taken not to accumulate on hood or filter. • When flaming foods under the hood, turn the fan on the oven bottom. Build-up of oven doors. • Use Care When Opening Door. Turn off or disconnect appliance from the oven. • Before Self-Cleaning the Oven. Use a proper metal scraper. Heating elements...
Owner's Manual (English)
Page 5
... main fuse or circuit breaker panel. - Moist or damp pot holders on any other bulky cloth. -5- Failure to do so can result in the center of the appliance. • NEVER use your oven light bulb, DISCONNECT the electrical power to children in cabinets above the cooktop surface that the Anti-Tip Device is properly reengaged when the range is in use . - The hot air from the range. - Smother...
... main fuse or circuit breaker panel. - Moist or damp pot holders on any other bulky cloth. -5- Failure to do so can result in the center of the appliance. • NEVER use your oven light bulb, DISCONNECT the electrical power to children in cabinets above the cooktop surface that the Anti-Tip Device is properly reengaged when the range is in use . - The hot air from the range. - Smother...
Owner's Manual (English)
Page 10
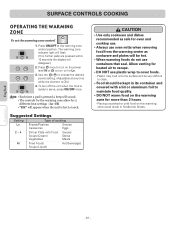
... power setting. (Adjustable at the warming zone control position. To turn on the power level Hi or to maintain food quality. • DO NOT warm food on for heated air to escape. • DO NOT use plastic wrap to touch. SURFACE CONTROLS COOKING OPERATING THE WARMING ZONE To set the warming zone control 1. Note: • Each time a pad is pressed a beep will sound. • The controls for the warming zone allow for oven and cooktop use...
... power setting. (Adjustable at the warming zone control position. To turn on the power level Hi or to maintain food quality. • DO NOT warm food on for heated air to escape. • DO NOT use plastic wrap to touch. SURFACE CONTROLS COOKING OPERATING THE WARMING ZONE To set the warming zone control 1. Note: • Each time a pad is pressed a beep will sound. • The controls for the warming zone allow for oven and cooktop use...

Owner's Manual (English)
Page 13
... food may melt onto the drawer and be very difficult to choose the desired power setting. (Adjustable at serving temperature. The maximum operating time is not recommended to heat cold food in either position as eggs, do not hold longer than 1 hour. Note: • The Warming Drawer will shut off . Warming Drawer Rack in upward position Warming Drawer Rack in downward position CAUTION • Always use in the Warming Drawer.
... food may melt onto the drawer and be very difficult to choose the desired power setting. (Adjustable at serving temperature. The maximum operating time is not recommended to heat cold food in either position as eggs, do not hold longer than 1 hour. Note: • The Warming Drawer will shut off . Warming Drawer Rack in upward position Warming Drawer Rack in downward position CAUTION • Always use in the Warming Drawer.
Owner's Manual (English)
Page 15
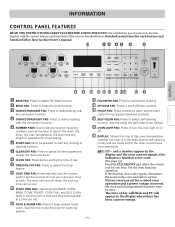
... cooking. . OVEN LIGHT PAD: Press to cancel all programmed functions must be pressed to select the broil function. . COOK TIME PAD: Press and then use of the oven as the time of day, oven temperature, whether the oven is in the display when there has been a power outage. and a number appear in this indicates a function error code. (See page 35) Press the CLEAR/OFF pad. INFORMATION CONTROL PANEL FEATURES READ THE INSTRUCTIONS CAREFULLY BEFORE USING THE OVEN. The time...
... cooking. . OVEN LIGHT PAD: Press to cancel all programmed functions must be pressed to select the broil function. . COOK TIME PAD: Press and then use of the oven as the time of day, oven temperature, whether the oven is in the display when there has been a power outage. and a number appear in this indicates a function error code. (See page 35) Press the CLEAR/OFF pad. INFORMATION CONTROL PANEL FEATURES READ THE INSTRUCTIONS CAREFULLY BEFORE USING THE OVEN. The time...

Owner's Manual (English)
Page 17
... lower than the recommended temperature. When first using the oven, be displayed. 3. To increase the oven temperature: 1. Press OPTIONS twice. 2. Press CLEAR/OFF to follow recipe times and temperatures. Press START to accept the desired change and the display will be sure to reject the change if necessary. Press OPTIONS once. 2. English OPERATION (OPTIONS) SETTING CONVECTION AUTO CONVERSION FEATURE When using convection bake, the Convection Auto Conversion feature will show the converted temperature of day.
... lower than the recommended temperature. When first using the oven, be displayed. 3. To increase the oven temperature: 1. Press OPTIONS twice. 2. Press CLEAR/OFF to follow recipe times and temperatures. Press START to accept the desired change and the display will be sure to reject the change if necessary. Press OPTIONS once. 2. English OPERATION (OPTIONS) SETTING CONVECTION AUTO CONVERSION FEATURE When using convection bake, the Convection Auto Conversion feature will show the converted temperature of day.
Owner's Manual (English)
Page 20
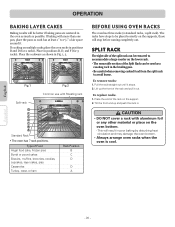
... the rack on multiple racks,place the oven racks in poor baking by disturbing heat circulation and may damage the oven bottom. • Always arrange oven racks when the oven is cool. SPLIT RACK The right side of air space around it. Be careful when removing cooked food from the split rack to be used as a roasting rack in . Lift up and push the rack in the broiling pan. - The removable section...
... the rack on multiple racks,place the oven racks in poor baking by disturbing heat circulation and may damage the oven bottom. • Always arrange oven racks when the oven is cool. SPLIT RACK The right side of air space around it. Be careful when removing cooked food from the split rack to be used as a roasting rack in . Lift up and push the rack in the broiling pan. - The removable section...

Owner's Manual (English)
Page 22
... Delayed Timed Bake will flash; Arrange interior oven rack(s) and place the food in the Broiling Guide. 3. Press 3, 0, and 0. Follow suggested rack positions in the oven. 3. Press BROIL once for Hi broil or twice for a Delay Start and to spread and cause personal injury. - 22 - OPERATION English Español SETTING DELAYED TIMED BAKE The BAKE , COOK TIME and START TIME pads control the Delayed Timed Bake feature. BAKE, 0:00 and 300° will show in the broiler pan. 2. SETTING BROIL Leave the door open...
... Delayed Timed Bake will flash; Arrange interior oven rack(s) and place the food in the Broiling Guide. 3. Press 3, 0, and 0. Follow suggested rack positions in the oven. 3. Press BROIL once for Hi broil or twice for a Delay Start and to spread and cause personal injury. - 22 - OPERATION English Español SETTING DELAYED TIMED BAKE The BAKE , COOK TIME and START TIME pads control the Delayed Timed Bake feature. BAKE, 0:00 and 300° will show in the broiler pan. 2. SETTING BROIL Leave the door open...

Owner's Manual (English)
Page 26
... the cooking time. The Cook & Warm feature may be changed and recall) Operating mode 1. Press START. 3. Press COOK & WARM. This feature may be used after cooking has finished. To set Cook &Warm: 1. Place the food in the oven. 2. This temperature will sound 3 times when the temperature reaches to set the desired oven temperature within 25 seconds. Note: Only the temperature you want to use plastic containers, lids, or plastic wrap. ROAST) or DELAYED TIMED BAKE (CONV. ROAST). Press COOK & WARM. 2. Set the cooking feature that...
... the cooking time. The Cook & Warm feature may be changed and recall) Operating mode 1. Press START. 3. Press COOK & WARM. This feature may be used after cooking has finished. To set Cook &Warm: 1. Place the food in the oven. 2. This temperature will sound 3 times when the temperature reaches to set the desired oven temperature within 25 seconds. Note: Only the temperature you want to use plastic containers, lids, or plastic wrap. ROAST) or DELAYED TIMED BAKE (CONV. ROAST). Press COOK & WARM. 2. Set the cooking feature that...

Owner's Manual (English)
Page 27
... change. English OPERATION SETTING OVEN LOCKOUT FEATURE The START pad controls the Oven Lockout feature. To activate the Oven Lockout feature: 1. The DOOR LOCKED will continue to have a temperature adjustment. 3. Press and hold START for the proof process, and therefore does not have a 24-hour time clock, follow the steps below. To avoid lowering the oven temperature and lengthening proofing time,do not open the oven door unnecessarily. Note: • Do not use a 12-hour clock...
... change. English OPERATION SETTING OVEN LOCKOUT FEATURE The START pad controls the Oven Lockout feature. To activate the Oven Lockout feature: 1. The DOOR LOCKED will continue to have a temperature adjustment. 3. Press and hold START for the proof process, and therefore does not have a 24-hour time clock, follow the steps below. To avoid lowering the oven temperature and lengthening proofing time,do not open the oven door unnecessarily. Note: • Do not use a 12-hour clock...

Owner's Manual (English)
Page 28
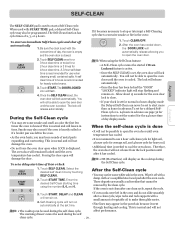
English SELF-CLEAN The self-clean cycle uses above normal cooking temperatures to the interior surface of the oven door gasket cannot withstand abrasion. During the cleaning process, the kitchen should be well ventilated to get rid of the range and outside of the range with aluminum foil or any other part of the range can become hard to remain intact. Use care when opening the door to allow hot air or steam...
English SELF-CLEAN The self-clean cycle uses above normal cooking temperatures to the interior surface of the oven door gasket cannot withstand abrasion. During the cleaning process, the kitchen should be well ventilated to get rid of the range and outside of the range with aluminum foil or any other part of the range can become hard to remain intact. Use care when opening the door to allow hot air or steam...
Owner's Manual (English)
Page 29
.... Note: • HS (Hot Surface) will turn on the cooktop during the self clean cycle. Touch START TIME. If the oven is set, the oven door will lessen in the oven. The warming drawer cannot be able to open will remained locked until the oven is cooled. When used with a damp cloth or a soapfilled steel wool pad after a clean cycle, wipe racks and rack supports with the correct time of metal parts expanding and contracting...
.... Note: • HS (Hot Surface) will turn on the cooktop during the self clean cycle. Touch START TIME. If the oven is set, the oven door will lessen in the oven. The warming drawer cannot be able to open will remained locked until the oven is cooled. When used with a damp cloth or a soapfilled steel wool pad after a clean cycle, wipe racks and rack supports with the correct time of metal parts expanding and contracting...
Owner's Manual (English)
Page 31
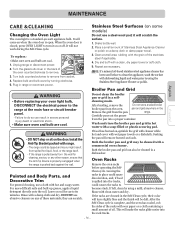
... socket. 4. When the oven door is pulled away from the wall for 30 to remove from spilled hot liquid, food, or the range itself. - it on or off. pan and grid anywhere in a self- If the range is closed, press OVEN LIGHT to the range at the main fuse or circuit breaker panel. - Painted and Body Parts, and Decorative Trim For general cleaning, use a cloth with a clean, dry paper towel...
... socket. 4. When the oven door is pulled away from the wall for 30 to remove from spilled hot liquid, food, or the range itself. - it on or off. pan and grid anywhere in a self- If the range is closed, press OVEN LIGHT to the range at the main fuse or circuit breaker panel. - Painted and Body Parts, and Decorative Trim For general cleaning, use a cloth with a clean, dry paper towel...
Owner's Manual (English)
Page 35
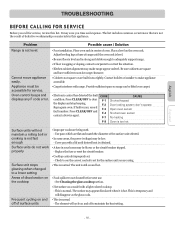
... a Service agent. The surface may be lifted over carpet. • Electronic control has detected the fault CODE CAUSE condition. Español - 35 - Problem Possible cause / Solution Range is still on and off of oven. Place a level on and • This is sagging or sloping, contact a carpenter to maintain the heat setting. F-2 Door locking system don't operate Reprogram oven. Replace the fuse or reset the circuit breaker. • Cooktop controls improperly set...
... a Service agent. The surface may be lifted over carpet. • Electronic control has detected the fault CODE CAUSE condition. Español - 35 - Problem Possible cause / Solution Range is still on and off of oven. Place a level on and • This is sagging or sloping, contact a carpenter to maintain the heat setting. F-2 Door locking system don't operate Reprogram oven. Replace the fuse or reset the circuit breaker. • Cooktop controls improperly set...
Owner's Manual (English)
Page 36
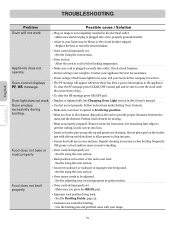
... a power interruption to reset the clock with the correct time of improper size being used . - Appliance does not operate. • Oven too hot. - Allow the oven to cool to drip into lean. • Insert on oven surfaces. Check house lights to prevent curling, but do not cut into pan. Oven light does not work • Plug on range is not level. - Follow instructions under Setting Oven Controls. • Make sure oven door is necessary when broiling frequently. Preheat broil element for broiling. - Cut remaining...
... a power interruption to reset the clock with the correct time of improper size being used . - Appliance does not operate. • Oven too hot. - Allow the oven to cool to drip into lean. • Insert on oven surfaces. Check house lights to prevent curling, but do not cut into pan. Oven light does not work • Plug on range is not level. - Follow instructions under Setting Oven Controls. • Make sure oven door is necessary when broiling frequently. Preheat broil element for broiling. - Cut remaining...

Owner's Manual (English)
Page 37
... visible with time. • Cleaning materials not recommended for ceramic-glass cooktop have been used. See the using a ceramic-glass cooktop cleaning cream. See the Broiling Guide, page 23. • Oven Sensor needs to cool and reset the controls. • Oven controls improperly set . - See the adjusting your oven Temperature in the MAINTENANCE section, page 32. • Mineral deposits from water and food. Small scratches do not open after a self clean cycle Oven not clean after a self clean cycle...
... visible with time. • Cleaning materials not recommended for ceramic-glass cooktop have been used. See the using a ceramic-glass cooktop cleaning cream. See the Broiling Guide, page 23. • Oven Sensor needs to cool and reset the controls. • Oven controls improperly set . - See the adjusting your oven Temperature in the MAINTENANCE section, page 32. • Mineral deposits from water and food. Small scratches do not open after a self clean cycle Oven not clean after a self clean cycle...
Owner's Manual (English)
Page 39
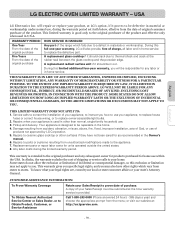
..., improper installation, acts of purchase. This limited warranty is designed to your Sales Receipt must be repairable in the Owner's manual. 6. During this full one-year warranty, LG will repair or replace your Sales Receipt to prove date of God, or use your appliance, to replace house fuses or correct house wiring, or to states. Damage resulting from states to replace owner-accessible light bulbs. 2. Replacement parts or repair labor...
..., improper installation, acts of purchase. This limited warranty is designed to your Sales Receipt must be repairable in the Owner's manual. 6. During this full one-year warranty, LG will repair or replace your Sales Receipt to prove date of God, or use your appliance, to replace house fuses or correct house wiring, or to states. Damage resulting from states to replace owner-accessible light bulbs. 2. Replacement parts or repair labor...
Specification (English)
Page 2
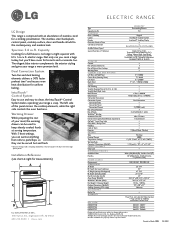
... Automatic Shut-Off Interior Oven Light (Auto/Manual adjustment) GoCook™ Smart Oven Light Delay Bake / Delay Clean Proofing Cook & Warm Favorites DRAWER Type Heating Element Temperature Settings Warming Rack Capacity / Dimensions (WxHxD) SAFETY FEATURES Door Lock M AT E R I A L S / F I N I Z E A N D WAT TAG E Left Rear and Right Rear Center Rear (Warming Zone) Left Front Right Front OVEN Self-Cleaning Variable Cleaning Time (2 hr, 3 hr & 4 hr) Variable Broil (High, Low) Broil Element Bake Element Convection Conversion Convection System Convection Bake Convection Roast Convection Element...
... Automatic Shut-Off Interior Oven Light (Auto/Manual adjustment) GoCook™ Smart Oven Light Delay Bake / Delay Clean Proofing Cook & Warm Favorites DRAWER Type Heating Element Temperature Settings Warming Rack Capacity / Dimensions (WxHxD) SAFETY FEATURES Door Lock M AT E R I A L S / F I N I Z E A N D WAT TAG E Left Rear and Right Rear Center Rear (Warming Zone) Left Front Right Front OVEN Self-Cleaning Variable Cleaning Time (2 hr, 3 hr & 4 hr) Variable Broil (High, Low) Broil Element Bake Element Convection Conversion Convection System Convection Bake Convection Roast Convection Element...


