Owners Manual
Page 4
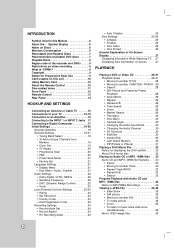
... 9 What is 'CPRM 9 Copyright 9 Notice for Progressive Scan Use 9 Card useable on this unit 10 Using Memory Card 10 About the Remote Control 10 Disc-related terms 11 Front Panel 12 Remote Control 13 Rear Panel 14 HOOKUP AND SETTINGS Connecting an Antenna or Cable TV . . . . . .15 Connections to your TV 15...
... 9 What is 'CPRM 9 Copyright 9 Notice for Progressive Scan Use 9 Card useable on this unit 10 Using Memory Card 10 About the Remote Control 10 Disc-related terms 11 Front Panel 12 Remote Control 13 Rear Panel 14 HOOKUP AND SETTINGS Connecting an Antenna or Cable TV . . . . . .15 Connections to your TV 15...

Owners Manual
Page 5
... Components . . . . .40 Recording from DV Input 41 Before DV dubbing 41 Recording from a Digital Camcorder 41 Troubleshooting 41 EDITING Controlling Your TV with the Supplied Remote Control 50 Language Codes 51 Area Codes 51 Troubleshooting 52-53 Reset the Recorder 53 Specifications 54-55 Title List and Chapter List Menu Overview...
... Components . . . . .40 Recording from DV Input 41 Before DV dubbing 41 Recording from a Digital Camcorder 41 Troubleshooting 41 EDITING Controlling Your TV with the Supplied Remote Control 50 Language Codes 51 Area Codes 51 Troubleshooting 52-53 Reset the Recorder 53 Specifications 54-55 Title List and Chapter List Menu Overview...

Owners Manual
Page 10
... CF or MD card Insert SD, MMC, SMC, xD, MS, or MS-Pro card Note: For details on each direction of the front of the remote sensor. If swallowed, seek medical advice immediately. Use b / B to relevant pages. Inserting the card: Insert straight-in the Tuner mode. Notes: Keep the ...memory card out of reach of the Remote Control, and insert two (R03/AAA) size batteries with : FAT 12, FAT 16, or FAT 32 • Only use the memory cards recommended above. Do...
... CF or MD card Insert SD, MMC, SMC, xD, MS, or MS-Pro card Note: For details on each direction of the front of the remote sensor. If swallowed, seek medical advice immediately. Use b / B to relevant pages. Inserting the card: Insert straight-in the Tuner mode. Notes: Keep the ...memory card out of reach of the Remote Control, and insert two (R03/AAA) size batteries with : FAT 12, FAT 16, or FAT 32 • Only use the memory cards recommended above. Do...

Owners Manual
Page 12
... output of a digital camcorder. Front Panel a bcd e f g h i j kl m n a (POWER) Switches the Recorder ON and OFF. g Z OPEN/CLOSE Opens or closes the disc tray. i Remote Sensor Point the Recorder Remote Control here. j INPUT 2 - S-VIDEO IN Connect the S-Video output of the recorder. d z (REC) Starts recording. m MEMORY CARD Slot 1 Insert a memory card (CF/MD...
... output of a digital camcorder. Front Panel a bcd e f g h i j kl m n a (POWER) Switches the Recorder ON and OFF. g Z OPEN/CLOSE Opens or closes the disc tray. i Remote Sensor Point the Recorder Remote Control here. j INPUT 2 - S-VIDEO IN Connect the S-Video output of the recorder. d z (REC) Starts recording. m MEMORY CARD Slot 1 Insert a memory card (CF/MD...

Owners Manual
Page 13
... : Skips 15 seconds forward on or off. MARKER: Marks any point during playback. SEARCH: Displays Marker Search menu. TV Control Buttons See page 50. Introduction Remote Control 0-9 numerical buttons: Selects numbered options in the Title List or Chapter List menu. b / B / v / V (left/right/up or down ): Selects menu options. CHP. DISPLAY Accesses...
... : Skips 15 seconds forward on or off. MARKER: Marks any point during playback. SEARCH: Displays Marker Search menu. TV Control Buttons See page 50. Introduction Remote Control 0-9 numerical buttons: Selects numbered options in the Title List or Chapter List menu. b / B / v / V (left/right/up or down ): Selects menu options. CHP. DISPLAY Accesses...

Owners Manual
Page 28
... (Z) to the menu screen. If playback does not start . The region code for Video CD) icon. Moving to another title: Press DISPLAY then use the Remote Control. To exit SEARCH mode, press PLAY (N). Still Picture and Frame-by pressing PAUSE/STEP (X) repeatedly. 2. Input the chapter/track number or use this player...
... (Z) to the menu screen. If playback does not start . The region code for Video CD) icon. Moving to another title: Press DISPLAY then use the Remote Control. To exit SEARCH mode, press PLAY (N). Still Picture and Frame-by pressing PAUSE/STEP (X) repeatedly. 2. Input the chapter/track number or use this player...

Owners Manual
Page 41
...Note: Depending on the camcorder tape that you want to the recording to this recorder. You cannot control this recorder. Using the recorder's remote, you cannot get a picture and/or audio through the DV IN jack, check the bullet points: Make sure the DV cable is automatically... control the camcorder from a DV cassette. 1. Troubleshooting If you can record from . Recording 41 This recorder is only compatible with this Remote Control during recording. Before recording, make sure that the DV audio input is connected to control the camcorder using a DV cable, you can...
...Note: Depending on the camcorder tape that you want to the recording to this recorder. You cannot control this recorder. Using the recorder's remote, you cannot get a picture and/or audio through the DV IN jack, check the bullet points: Make sure the DV cable is automatically... control the camcorder from a DV cassette. 1. Troubleshooting If you can record from . Recording 41 This recorder is only compatible with this Remote Control during recording. Before recording, make sure that the DV audio input is connected to control the camcorder using a DV cable, you can...

Owners Manual
Page 50
...will be reset to table on your TV, some of your TV using the buttons below , set may not be able to control your LG TV with the supplied remote. If your TV (Refer to the default setting. Controlling other input sources. Reference Controlling Your TV with the Supplied... Remote Control You can control the sound level, input source, and power switch of non-LG TVs as well. You can control the sound level, input source, and power switch of the buttons....
...will be reset to table on your TV, some of your TV using the buttons below , set may not be able to control your LG TV with the supplied remote. If your TV (Refer to the default setting. Controlling other input sources. Reference Controlling Your TV with the Supplied... Remote Control You can control the sound level, input source, and power switch of non-LG TVs as well. You can control the sound level, input source, and power switch of the buttons....

Owners Manual
Page 52
... the audio cable. No picture. The audio connecting cord is not connected securely. The video cable is damaged. Clean the disc. Turn camcorder on the Remote Control repeatedly to select input channel (AV1, AV2, DV.) 52 Symptom No power. The recorder's source is not placed within the guide. The disc is...
... the audio cable. No picture. The audio connecting cord is not connected securely. The video cable is damaged. Clean the disc. Turn camcorder on the Remote Control repeatedly to select input channel (AV1, AV2, DV.) 52 Symptom No power. The recorder's source is not placed within the guide. The disc is...

Owners Manual
Page 53
.... The disc was recorded in VR mode. Cannot record or did not record successfully. Reprogram Timer. Point the Remote Control at the remote sensor of the Remote Control and the recorder. Replace the batteries with copy-once material cannot be recorded. When the Recorder does not operate...on or off . Clock in recorder is insufficient. The recorder Audio/Video Out is available only via A/V output from the recorder. The Remote Control is not possible. Set clock to TV A/V In jacks. Timer has been programmed incorrectly. (Timer record) indicator light does not appear...
.... The disc was recorded in VR mode. Cannot record or did not record successfully. Reprogram Timer. Point the Remote Control at the remote sensor of the Remote Control and the recorder. Replace the batteries with copy-once material cannot be recorded. When the Recorder does not operate...on or off . Clock in recorder is insufficient. The recorder Audio/Video Out is available only via A/V output from the recorder. The Remote Control is not possible. Set clock to TV A/V In jacks. Timer has been programmed incorrectly. (Timer record) indicator light does not appear...

Owners Manual
Page 55
... x 1 3 V (p-p), 75 Ω, Optical connector x 1 2.0 Vrms (1 kHz, 0 dB), 600 Ω, RCA jack (L, R) x 2 Channel 3 or 4 (Switchable) Accessory: Video cable 1 RF 75-ohm Coaxial Cable 1 Batteries 2 Audio cable (L, R 1 Remote Control 1 Design and specifications are subject to change without notice.
... x 1 3 V (p-p), 75 Ω, Optical connector x 1 2.0 Vrms (1 kHz, 0 dB), 600 Ω, RCA jack (L, R) x 2 Channel 3 or 4 (Switchable) Accessory: Video cable 1 RF 75-ohm Coaxial Cable 1 Batteries 2 Audio cable (L, R 1 Remote Control 1 Design and specifications are subject to change without notice.