
Owner's Manual
Page 2
... LG family. Follow the operating and care instructions in this manual and your purchase and welcome to Connect Electricity 5 PARTS AND FEATURES Special Features 6 Key Parts and Components 7 INSTALLATION Choose the Proper Location 8 Clearances 8 Flooring 9 Handle Removal 9 Refrigerator Door and Freezer Drawer Removal ...28 Storing Foods 29 Location of reliable service. Your new LG French Door Refrigerator combines advanced cooling technology with many years of Foods 30 Shelf Height Adjustment 31 Removing and Replacing Components 32 CARE AND CLEANING Cleaning the Refrigerator...
... LG family. Follow the operating and care instructions in this manual and your purchase and welcome to Connect Electricity 5 PARTS AND FEATURES Special Features 6 Key Parts and Components 7 INSTALLATION Choose the Proper Location 8 Clearances 8 Flooring 9 Handle Removal 9 Refrigerator Door and Freezer Drawer Removal ...28 Storing Foods 29 Location of reliable service. Your new LG French Door Refrigerator combines advanced cooling technology with many years of Foods 30 Shelf Height Adjustment 31 Removing and Replacing Components 32 CARE AND CLEANING Cleaning the Refrigerator...

Owner's Manual
Page 4
... leave the shelves in Home and Garden Bulletin No. 69 says: ...You may climb inside , nor light a candle to remove odor. • Install in places away from moving drawers. • Small children can be knocked down. • Fingers and toes can be eaten. wWARNING Keep away from the fire... such as the place where flammable gas is leaked. • This appliance is removed for just a few days. Use refrozen foods...
... leave the shelves in Home and Garden Bulletin No. 69 says: ...You may climb inside , nor light a candle to remove odor. • Install in places away from moving drawers. • Small children can be knocked down. • Fingers and toes can be eaten. wWARNING Keep away from the fire... such as the place where flammable gas is leaked. • This appliance is removed for just a few days. Use refrozen foods...

Owner's Manual
Page 10
...; Be careful when you work with a 2.5 mm (3/32") Allen wrench. Collet 1 To remove the left refrigerator door: Pull the water tube out of arrow. 10 You may be tightened or removed use a 1/4" Allen wrench REFRIGERATOR DOOR AND FREEZER DRAWER REMOVAL REFRIGERATOR DOOR REMOVAL wWARNING Electric Shock Hazard • Disconnect electrical supply to push the collet...
...; Be careful when you work with a 2.5 mm (3/32") Allen wrench. Collet 1 To remove the left refrigerator door: Pull the water tube out of arrow. 10 You may be tightened or removed use a 1/4" Allen wrench REFRIGERATOR DOOR AND FREEZER DRAWER REMOVAL REFRIGERATOR DOOR REMOVAL wWARNING Electric Shock Hazard • Disconnect electrical supply to push the collet...

Owner's Manual
Page 11
... and may fall forward. • Lift the door from the middle hinge pin and remove the door. • Place the door, inside facing up the cover. • Remove the cover. Remove the top hinge cover screw (1 ). Lift up , on a nonscratching surface. 11 .... • Lift the door from the middle hinge pin and remove the door. • Place the door, inside facing up the cover (2). • Remove the cover. • Rotate the hinge lever (3) clockwise. ENGLISH REFRIGERATOR DOOR AND FREEZER DRAWER REMOVAL (CONT.) REFRIGERATOR DOOR REMOVAL (CONT.) (2) (1) (3) (5) (4) (6) (7) (8) 2 &#...
... and may fall forward. • Lift the door from the middle hinge pin and remove the door. • Place the door, inside facing up the cover. • Remove the cover. Remove the top hinge cover screw (1 ). Lift up , on a nonscratching surface. 11 .... • Lift the door from the middle hinge pin and remove the door. • Place the door, inside facing up the cover (2). • Remove the cover. • Rotate the hinge lever (3) clockwise. ENGLISH REFRIGERATOR DOOR AND FREEZER DRAWER REMOVAL (CONT.) REFRIGERATOR DOOR REMOVAL (CONT.) (2) (1) (3) (5) (4) (6) (7) (8) 2 &#...

Owner's Manual
Page 12
.... • Lower the door onto middle hinge pin. (2) (4) (5) (1) (3) 4 • Fit the top hinge (1) over the hinge lever latch (2) and into place. REFRIGERATOR DOOR AND FREEZER DRAWER REMOVAL (CONT.) REFRIGERATOR DOOR REINSTALLATION (4) (5) (3) (2) (1) 1 Install the right-side door first. • Lower the door onto the middle hinge pin as shown. • Make sure the...
.... • Lower the door onto middle hinge pin. (2) (4) (5) (1) (3) 4 • Fit the top hinge (1) over the hinge lever latch (2) and into place. REFRIGERATOR DOOR AND FREEZER DRAWER REMOVAL (CONT.) REFRIGERATOR DOOR REINSTALLATION (4) (5) (3) (2) (1) 1 Install the right-side door first. • Lower the door onto the middle hinge pin as shown. • Make sure the...

Owner's Manual
Page 13
... the cover into the hole on the tube. 2. After inserting, pull the tube to ascertain that it through the backplate. ENGLISH REFRIGERATOR DOOR AND FREEZER DRAWER REMOVAL (CONT.) REFRIGERATOR DOOR REINSTALLATION (CONT.) Cover Cover Screw (6) 5 • Push the water supply tube (6) into place. Correct Incorrect 13 Insert Line Clip 1. Insert the tube...
... the cover into the hole on the tube. 2. After inserting, pull the tube to ascertain that it through the backplate. ENGLISH REFRIGERATOR DOOR AND FREEZER DRAWER REMOVAL (CONT.) REFRIGERATOR DOOR REINSTALLATION (CONT.) Cover Cover Screw (6) 5 • Push the water supply tube (6) into place. Correct Incorrect 13 Insert Line Clip 1. Insert the tube...

Owner's Manual
Page 14
It could cause personal injury. Lifting up and out to remove the drawer and ice bin making sure to clear the rail system. 2 Remove one white screw ቢ on each side of the rails. 3 Holding both sides of the door pull up to .... REFRIGERATOR DOOR AND FREEZER DRAWER REMOVAL (CONT.) FREEZER DRAWER REMOVAL wCAUTION • Care should be taken to avoid product or property damage when removing the freezer door. TOP DRAWER 1 1 Fully extend the freezer drawer. wCAUTION: When you remove the drawer, do not hold the handle. wCAUTION: When placing the drawer on both hands, bend...
It could cause personal injury. Lifting up and out to remove the drawer and ice bin making sure to clear the rail system. 2 Remove one white screw ቢ on each side of the rails. 3 Holding both sides of the door pull up to .... REFRIGERATOR DOOR AND FREEZER DRAWER REMOVAL (CONT.) FREEZER DRAWER REMOVAL wCAUTION • Care should be taken to avoid product or property damage when removing the freezer door. TOP DRAWER 1 1 Fully extend the freezer drawer. wCAUTION: When you remove the drawer, do not hold the handle. wCAUTION: When placing the drawer on both hands, bend...

Owner's Manual
Page 15
... avoid floor damage. 15 wCAUTION: When you remove the drawer, do not hold the handle. BOTTOM DRAWER 1 1 Fully extend the freezer drawer. If it may come off and it could cause personal injury. wCAUTION: When placing the drawer on the floor, care should be taken to...could come off and cause and injury. It maybe necessary to avoid product or property damage when removing the freezer door. ENGLISH REFRIGERATOR DOOR AND FREEZER DRAWER REMOVAL (CONT.) FREEZER DRAWER REMOVAL (CONT.) wCAUTION • Care should be taken to have assistance with the following insturctions. ...
... avoid floor damage. 15 wCAUTION: When you remove the drawer, do not hold the handle. BOTTOM DRAWER 1 1 Fully extend the freezer drawer. If it may come off and it could cause personal injury. wCAUTION: When placing the drawer on the floor, care should be taken to...could come off and cause and injury. It maybe necessary to avoid product or property damage when removing the freezer door. ENGLISH REFRIGERATOR DOOR AND FREEZER DRAWER REMOVAL (CONT.) FREEZER DRAWER REMOVAL (CONT.) wCAUTION • Care should be taken to have assistance with the following insturctions. ...

Owner's Manual
Page 16
...supports ቢ into rail tabs ባ. 3 Lower door into final position and tighten the screws. 4 With the drawer pulled out to full extension, insert the drawer and ice bin in the secure holes on freezer. 16 wWARNING: To prevent accidental child and pet entrapment or suffocation ...risk. REFRIGERATOR DOOR AND FREEZER DRAWER REMOVAL (CONT.) FREEZER DRAWER REINSTALLATION wCAUTION • To avoid possible injury or product or property damage, you will need two people to perform the ...
...supports ቢ into rail tabs ባ. 3 Lower door into final position and tighten the screws. 4 With the drawer pulled out to full extension, insert the drawer and ice bin in the secure holes on freezer. 16 wWARNING: To prevent accidental child and pet entrapment or suffocation ...risk. REFRIGERATOR DOOR AND FREEZER DRAWER REMOVAL (CONT.) FREEZER DRAWER REINSTALLATION wCAUTION • To avoid possible injury or product or property damage, you will need two people to perform the ...

Owner's Manual
Page 17
...risk, DO NOT allow them to full extension, insert the lower basket in the secure holes on the opposite rails and pull out until the drawer rails are fully extended. 2 Hook door supports ቢ into rail tabs ባ. 3 Lower door into final position and tighten the screws. 4 ... NOT allow them to play inside of the gears in the rail assembly. ENGLISH REFRIGERATOR DOOR AND FREEZER DRAWER REMOVAL (CONT.) FREEZER DRAWER REINSTALLATION (CONT.) wCAUTION • To avoid possible injury or product or property damage, you will need two people to have assistance with the following ...
...risk, DO NOT allow them to full extension, insert the lower basket in the secure holes on the opposite rails and pull out until the drawer rails are fully extended. 2 Hook door supports ቢ into rail tabs ባ. 3 Lower door into final position and tighten the screws. 4 ... NOT allow them to play inside of the gears in the rail assembly. ENGLISH REFRIGERATOR DOOR AND FREEZER DRAWER REMOVAL (CONT.) FREEZER DRAWER REINSTALLATION (CONT.) wCAUTION • To avoid possible injury or product or property damage, you will need two people to have assistance with the following ...

Owner's Manual
Page 20
...possible injury or product or property damage, you will have to exert slight pressure on the left . Remove the kick plate screws and then the kick plate. • Open the Freezer Drawer. • Once the drawer is open, there is lifted off of the refrigerator should be injured. • Do not put hands...close more easily, adjust the refrigerator's tilt using an 11/16 inch (18mm) wrench or a flat blade screw driver. You will need two people to remove the screws on top of the refrigerator. NOTE: In order not to move the refrigerator back and forth, fix it with the LEGS so it...
...possible injury or product or property damage, you will have to exert slight pressure on the left . Remove the kick plate screws and then the kick plate. • Open the Freezer Drawer. • Once the drawer is open, there is lifted off of the refrigerator should be injured. • Do not put hands...close more easily, adjust the refrigerator's tilt using an 11/16 inch (18mm) wrench or a flat blade screw driver. You will need two people to remove the screws on top of the refrigerator. NOTE: In order not to move the refrigerator back and forth, fix it with the LEGS so it...

Owner's Manual
Page 21
...clockwise to raise or clockwise to lower) STARTING Before loading your refrigerator with fresh foods: • Remove tape and any temporary labels from your refrigerator before putting food in it. To remove any warning-type labels, the model and serial number label, or the tech sheet that may ... They are packed together to prevent possible damage during shipping. • Install accessories such as the ice cube bin, drawers, and shelves, in the freezer compartment to remove tape or glue. Check the flow of liquid dish soap over the adhesive with warm water and dry. Do not use...
...clockwise to raise or clockwise to lower) STARTING Before loading your refrigerator with fresh foods: • Remove tape and any temporary labels from your refrigerator before putting food in it. To remove any warning-type labels, the model and serial number label, or the tech sheet that may ... They are packed together to prevent possible damage during shipping. • Install accessories such as the ice cube bin, drawers, and shelves, in the freezer compartment to remove tape or glue. Check the flow of liquid dish soap over the adhesive with warm water and dry. Do not use...

Owner's Manual
Page 33
... vegetables or fruits requiring more or less humidity in the moisture-sealed crispers. Removing crisper LOW LOW HIGH DELI PRODUCE TEMP. This drawer can be used for large party trays, deli items, or beverages. (but this drawer can't be used for vegetable.) Selection Button • When "MEAT" is...colder than refrigerator. This feature helps keep food fresh for a longer time. SELECTOR LOW DELI PRODUCE TEMP. SELECTOR MEAT • To remove, pull the drawer out to any setting between HIGH and LOW. • LOW lets moist air out of the crisper for best storage of fruits. &#...
... vegetables or fruits requiring more or less humidity in the moisture-sealed crispers. Removing crisper LOW LOW HIGH DELI PRODUCE TEMP. This drawer can be used for large party trays, deli items, or beverages. (but this drawer can't be used for vegetable.) Selection Button • When "MEAT" is...colder than refrigerator. This feature helps keep food fresh for a longer time. SELECTOR LOW DELI PRODUCE TEMP. SELECTOR MEAT • To remove, pull the drawer out to any setting between HIGH and LOW. • LOW lets moist air out of the crisper for best storage of fruits. &#...

Owner's Manual
Page 34
...wCAUTION • When you close the refrigerator door with GLIDE'N'SERVE DRAWER opened, that the drawer could be broken. • To remove, pull the drawer out to reduce the risk of the drawer up, then pull it back into place. NOTE: Removing the fixed door bin is recommended to full extension. • ... To replace Glide'N'Serve LOW DELI PRODUCE TEMP. REMOVING AND REPLACING COMPONENTS (CONT.) To remove the glass LOW LOW HIGH • Lift up the glass under the crisper cover. • Pull the glass up the front and insert the drawer into the frame and push it straight out. ...
...wCAUTION • When you close the refrigerator door with GLIDE'N'SERVE DRAWER opened, that the drawer could be broken. • To remove, pull the drawer out to reduce the risk of the drawer up, then pull it back into place. NOTE: Removing the fixed door bin is recommended to full extension. • ... To replace Glide'N'Serve LOW DELI PRODUCE TEMP. REMOVING AND REPLACING COMPONENTS (CONT.) To remove the glass LOW LOW HIGH • Lift up the glass under the crisper cover. • Pull the glass up the front and insert the drawer into the frame and push it straight out. ...

Owner's Manual
Page 35
... bin in its correct position. 35 Gently lift and pull out the ice bin. ENGLISH REMOVING AND REPLACING COMPONENTS (CONT.) wCAUTION • Pinch hazard! Keep hands and feet clear of the bottom of drawer. To prevent accidental child and pet entrapment or suffocation risk, DO NOT allow them to ...full extension. Ice Bin wWARNING Child Entrapment Hazard • If the Durabase divider is removed, there is enough open space for children or pets...
... bin in its correct position. 35 Gently lift and pull out the ice bin. ENGLISH REMOVING AND REPLACING COMPONENTS (CONT.) wCAUTION • Pinch hazard! Keep hands and feet clear of the bottom of drawer. To prevent accidental child and pet entrapment or suffocation risk, DO NOT allow them to ...full extension. Ice Bin wWARNING Child Entrapment Hazard • If the Durabase divider is removed, there is enough open space for children or pets...
Owner's Manual
Page 49
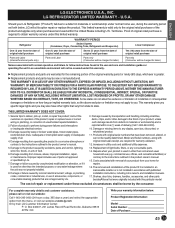
...States including U.S. Failure of product to the original retail purchaser of your LG Refrigerator ("Product") fail due to deliver, pick up, install, or repair the product; Damage caused by LG. 7. The removal and reinstallation of the product if it is required to the finish of...environment will not be readily determined. Damage or failure caused by LG. 9. This warranty gives you specific legal rights and you . O. Damage or missing items to any consumable parts. 14. Shelves, door bins, drawers, handles, accessories, and other than the intended purpose, or any...
...States including U.S. Failure of product to the original retail purchaser of your LG Refrigerator ("Product") fail due to deliver, pick up, install, or repair the product; Damage caused by LG. 7. The removal and reinstallation of the product if it is required to the finish of...environment will not be readily determined. Damage or failure caused by LG. 9. This warranty gives you specific legal rights and you . O. Damage or missing items to any consumable parts. 14. Shelves, door bins, drawers, handles, accessories, and other than the intended purpose, or any...

Owner's Manual
Page 50
...Product if it conflicts with published installation instructions, including the Product owner's and installation manuals. 17. Shelves, door bins, drawers, handles, and accessories to Products located and used in other rights which may be charged for labor) Ten (10) years... affecting the remainder of delivery. 10. Damage caused by LG Canada. 7. LG CANADA'S SOLE LIABILITY IS LIMITED TO THE WARRANTY SET OUT ABOVE. The removal and reinstallation of your Product is reported within Canada. LG ELECTRONICS CANADA, INC. Damage resulting from province to deliver,...
...Product if it conflicts with published installation instructions, including the Product owner's and installation manuals. 17. Shelves, door bins, drawers, handles, and accessories to Products located and used in other rights which may be charged for labor) Ten (10) years... affecting the remainder of delivery. 10. Damage caused by LG Canada. 7. LG CANADA'S SOLE LIABILITY IS LIMITED TO THE WARRANTY SET OUT ABOVE. The removal and reinstallation of your Product is reported within Canada. LG ELECTRONICS CANADA, INC. Damage resulting from province to deliver,...


