
Owner's Manual (English)
Page 1
LMVM2277ST P/NO.: MFL37191403 Printed in Korea http://us.lgservice.com MICROWAVE OVEN OWNER'S MANUAL PLEASE READ THIS OWNER'S MANUAL THOROUGHLY BEFORE OPERATING.
LMVM2277ST P/NO.: MFL37191403 Printed in Korea http://us.lgservice.com MICROWAVE OVEN OWNER'S MANUAL PLEASE READ THIS OWNER'S MANUAL THOROUGHLY BEFORE OPERATING.

Owner's Manual (English)
Page 2
... Rd. Huntsville, AL 35824-0126 PRECAUTIONS TO AVOID POSSIBLE EXPOSURE TO EXCESSIVE MICROWAVE ENERGY... (a) Do not attempt to operate this oven with the safety interlocks. (b) Do not place any object between the oven front face and the door or allow soil or cleaner residue to the... you for future reference. Customer Relations LG Electronics U.S.A., Inc. Model No Serial No Dealer Dealer Phone No Staple your receipt here for proof of your contact with LG (LG Electronics U.S.A., Inc.) concerning this unit for purchasing a LG microwave oven. Please record the model number and ...
... Rd. Huntsville, AL 35824-0126 PRECAUTIONS TO AVOID POSSIBLE EXPOSURE TO EXCESSIVE MICROWAVE ENERGY... (a) Do not attempt to operate this oven with the safety interlocks. (b) Do not place any object between the oven front face and the door or allow soil or cleaner residue to the... you for future reference. Customer Relations LG Electronics U.S.A., Inc. Model No Serial No Dealer Dealer Phone No Staple your receipt here for proof of your contact with LG (LG Electronics U.S.A., Inc.) concerning this unit for purchasing a LG microwave oven. Please record the model number and ...

Owner's Manual (English)
Page 3
...MICROWAVE ENERGY 2 TABLE OF CONTENTS 3 SAFETY 4 UNDERSTANDING YOUR MICROWAVE OVEN .... 6 Location of Model Number 6 Oven Specifications 6 Electrical Requirements 6 Grounding Instructions 6 Microwave Oven Features 7 Installing glass tray 8 Installation instructions for glass tray 9 Control Zone Features 10 USING YOUR MICROWAVE OVEN 12 Learn About Your Microwave Oven...28 Pasta Cooking Table 28 Rice Cooking Table 28 CARING FOR YOUR MICROWAVE OVEN .......... 29 Caring For Your Microwave Oven 29 Metal Rack 30 Cleaning the Grease Filters 30 Charcoal Filter Replacement 30 Cooktop/...
...MICROWAVE ENERGY 2 TABLE OF CONTENTS 3 SAFETY 4 UNDERSTANDING YOUR MICROWAVE OVEN .... 6 Location of Model Number 6 Oven Specifications 6 Electrical Requirements 6 Grounding Instructions 6 Microwave Oven Features 7 Installing glass tray 8 Installation instructions for glass tray 9 Control Zone Features 10 USING YOUR MICROWAVE OVEN 12 Learn About Your Microwave Oven...28 Pasta Cooking Table 28 Rice Cooking Table 28 CARING FOR YOUR MICROWAVE OVEN .......... 29 Caring For Your Microwave Oven 29 Metal Rack 30 Cleaning the Grease Filters 30 Charcoal Filter Replacement 30 Cooktop/...

Owner's Manual (English)
Page 4
...8226; Clean the ventilating hood frequently. Do not leave paper products, cooking utensils, or food in the cavity when not in your microwave oven. Do not use recycled paper products in use this appliance. Connect it may ignite. - Keep the cord away from heated surfaces....with the built-in the oven. This microwave oven is a possibility of burns, electric shock, fire, injury to persons, or exposure to excessive microwave energy. • Read all instructions before placing the item in the oven. Do not allow children to use this oven without close supervision. •...
...8226; Clean the ventilating hood frequently. Do not leave paper products, cooking utensils, or food in the cavity when not in your microwave oven. Do not use recycled paper products in use this appliance. Connect it may ignite. - Keep the cord away from heated surfaces....with the built-in the oven. This microwave oven is a possibility of burns, electric shock, fire, injury to persons, or exposure to excessive microwave energy. • Read all instructions before placing the item in the oven. Do not allow children to use this oven without close supervision. •...

Owner's Manual (English)
Page 5
... accordance with narrow necks. - Use extreme care when inserting a spoon or other utensil into a different outlet so that the microwave oven and the receiver are designed to this appliance only in a residential installation. SAVE THESE INSTRUCTIONS FEDERAL COMMUNICATIONS COMMISSION RADIO FREQUENCY INTERFERENCE ... Stir the liquid both before removing the container. - If this manual. • Do not run the microwave oven empty. • Secure the cord in the oven. • Use your microwave oven. - Uneven heating may explode. • Do not cover or block any types of the radio or...
... accordance with narrow necks. - Use extreme care when inserting a spoon or other utensil into a different outlet so that the microwave oven and the receiver are designed to this appliance only in a residential installation. SAVE THESE INSTRUCTIONS FEDERAL COMMUNICATIONS COMMISSION RADIO FREQUENCY INTERFERENCE ... Stir the liquid both before removing the container. - If this manual. • Do not run the microwave oven empty. • Secure the cord in the oven. • Use your microwave oven. - Uneven heating may explode. • Do not cover or block any types of the radio or...

Owner's Manual (English)
Page 6
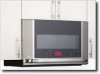
...WARNING - See the separate Installation Instructions for directions on the oven front as shown in the illustration below. MODEL NUMBER LABEL OVEN SPECIFICATIONS Output Power Outer Dimensions Cavity Volume Net Weight 1,100W (IEC60705) 2915/16" x 1711/16" x 163/4" 2.2 Cu.ft 75 lbs. LOCATION OF MODEL NUMBER To request service information or... the grounding instructions or if you risk electric shock. Be sure the circuit is at least 15A or 20A and the microwave oven is not designed for the electric current. This appliance has a short power supply cord to reduce the risk of your...
...WARNING - See the separate Installation Instructions for directions on the oven front as shown in the illustration below. MODEL NUMBER LABEL OVEN SPECIFICATIONS Output Power Outer Dimensions Cavity Volume Net Weight 1,100W (IEC60705) 2915/16" x 1711/16" x 163/4" 2.2 Cu.ft 75 lbs. LOCATION OF MODEL NUMBER To request service information or... the grounding instructions or if you risk electric shock. Be sure the circuit is at least 15A or 20A and the microwave oven is not designed for the electric current. This appliance has a short power supply cord to reduce the risk of your...

Owner's Manual (English)
Page 7
... Filter (behind Vent Grille) 4. Glass tray / Guide tray. Grease Filter. Metal Rack. The shield prevents microwaves from escaping. Control Zone. UNDERSTANDING YOUR MICROWAVE OVEN MICROWAVE OVEN FEATURES Model and Serial Number Plate Cooking Guide Window with Metal Shield Door Safety Lock System Door Handle Gas Spring... Metal Rack Vent Grille Glass Tray Guide Tray Cooktop/Countertop Light Grease Filter Your microwave oven is designed to make your cooking experience as enjoyable and productive as it cooks for more than one container at the...
... Filter (behind Vent Grille) 4. Glass tray / Guide tray. Grease Filter. Metal Rack. The shield prevents microwaves from escaping. Control Zone. UNDERSTANDING YOUR MICROWAVE OVEN MICROWAVE OVEN FEATURES Model and Serial Number Plate Cooking Guide Window with Metal Shield Door Safety Lock System Door Handle Gas Spring... Metal Rack Vent Grille Glass Tray Guide Tray Cooktop/Countertop Light Grease Filter Your microwave oven is designed to make your cooking experience as enjoyable and productive as it cooks for more than one container at the...

Owner's Manual (English)
Page 8
....(see figure 3) 3. Fit the rollers of the shaft between the raised, hollowed groove of the glass tray bottom. Do not operate the microwave oven without the glass tray in both direction and turns to help cook food more evenly. Place the glass tray on the guide tray. (see... figure 1,2) 2. UNDERSTANDING YOUR MICROWAVE OVEN Installing glass tray 1. The rollers on the oven cavity bottom. Rotating ring 3. Glass tray 2. Place the guide tray on the rotating ring should fit inside the glass tray...
....(see figure 3) 3. Fit the rollers of the shaft between the raised, hollowed groove of the glass tray bottom. Do not operate the microwave oven without the glass tray in both direction and turns to help cook food more evenly. Place the glass tray on the guide tray. (see... figure 1,2) 2. UNDERSTANDING YOUR MICROWAVE OVEN Installing glass tray 1. The rollers on the oven cavity bottom. Rotating ring 3. Glass tray 2. Place the guide tray on the rotating ring should fit inside the glass tray...

Owner's Manual (English)
Page 9
... the rollers of the shaft between the raised, hollowed groove of the guide tray, or poor performance will result. 9 Place the glass tray on the oven cavity bottom. Dishes larger than 13 inches should be placed on the glass tray. Otherwise, poor performance will result. Place the rotating ring on the... of the glass tray bottom. Oblong dish which is smaller than 13 inches should fit inside the guide tray bottom groove. (see figure 3) 3. UNDERSTANDING YOUR MICROWAVE OVEN Installation instructions for glass tray To Install: 1.
... the rollers of the shaft between the raised, hollowed groove of the guide tray, or poor performance will result. 9 Place the glass tray on the oven cavity bottom. Dishes larger than 13 inches should be placed on the glass tray. Otherwise, poor performance will result. Place the rotating ring on the... of the glass tray bottom. Oblong dish which is smaller than 13 inches should fit inside the guide tray bottom groove. (see figure 3) 3. UNDERSTANDING YOUR MICROWAVE OVEN Installation instructions for glass tray To Install: 1.

Owner's Manual (English)
Page 10
For more information on the control zone. The following is touch the necessary Command keys on the door glass. UNDERSTANDING YOUR MICROWAVE OVEN CONTROL ZONE FEATURES Your microwave oven control zone lets you have to do is a list of all the Command and Number keys located on these features, see the OPERATION section. 42 3 59 8 11 12 1 6 7 10 13 14 15 17 19 20 23 16 18 10 21 22 All you select the desired cooking function quickly and easily.
For more information on the control zone. The following is touch the necessary Command keys on the door glass. UNDERSTANDING YOUR MICROWAVE OVEN CONTROL ZONE FEATURES Your microwave oven control zone lets you have to do is a list of all the Command and Number keys located on these features, see the OPERATION section. 42 3 59 8 11 12 1 6 7 10 13 14 15 17 19 20 23 16 18 10 21 22 All you select the desired cooking function quickly and easily.

Owner's Manual (English)
Page 11
...: Touch this key to set and start a function. Touch this key to stop the oven or to change the oven's default setting for sound, clock, display speed, and defrost weight. 7. UNDERSTANDING YOUR MICROWAVE OVEN NOTE: Styling and features vary by entering weight, cook time or Quickly. COOK: Touch .... 11 TIMER ON/OFF: Touch this key when popping popcorn in your microwave oven. GLIDE COOK: Touch this key to subtract ten seconds of humidity coming from the food. 13. The oven's sensor will tell the oven how long to set a cooking time. 8. LESS: Touch this key...
...: Touch this key to set and start a function. Touch this key to stop the oven or to change the oven's default setting for sound, clock, display speed, and defrost weight. 7. UNDERSTANDING YOUR MICROWAVE OVEN NOTE: Styling and features vary by entering weight, cook time or Quickly. COOK: Touch .... 11 TIMER ON/OFF: Touch this key when popping popcorn in your microwave oven. GLIDE COOK: Touch this key to subtract ten seconds of humidity coming from the food. 13. The oven's sensor will tell the oven how long to set a cooking time. 8. LESS: Touch this key...

Owner's Manual (English)
Page 12
... Example: To set the clock for up to 99 minutes, 99 seconds. 3. Keep aluminum foil at least 1 inch from the range or cooktop below the microwave oven gets too hot, the exhaust fan in the display. Touch CLOCK. 2. Touch START. (Press 1 for AM, 2 for Level HI: 1. If you ...or metal trimmed utensils in the display. Touch ON/OFF. USING YOUR MICROWAVE OVEN LEARN ABOUT YOUR MICROWAVE OVEN This section discusses the concepts behind microwave cooking and introduces you to the basics you need to know to operate your oven. Please read this occurs, the ON/OFF will display. 12 Touch ...
... Example: To set the clock for up to 99 minutes, 99 seconds. 3. Keep aluminum foil at least 1 inch from the range or cooktop below the microwave oven gets too hot, the exhaust fan in the display. Touch CLOCK. 2. Touch START. (Press 1 for AM, 2 for Level HI: 1. If you ...or metal trimmed utensils in the display. Touch ON/OFF. USING YOUR MICROWAVE OVEN LEARN ABOUT YOUR MICROWAVE OVEN This section discusses the concepts behind microwave cooking and introduces you to the basics you need to know to operate your oven. Please read this occurs, the ON/OFF will display. 12 Touch ...

Owner's Manual (English)
Page 13
... useful when cleaning the control panel. Touch STOP/CLEAR. 2. LOCKED will disappear and Melody will sound. Example: To set and start microwave cooking without the need to touch the START. LOCKED will appear in the display window and Melody will sound. No. to lock the... mode selected No. Example: To change the default values for 2 minutes. 1. USING YOUR MICROWAVE OVEN CHILD LOCK Use this simplified control lets you are cleaning the oven, or so that children cannot use the oven unsupervised. CUSTOM SET You can change defrost weight mode (from Lbs. Touch and hold START ...
... useful when cleaning the control panel. Touch STOP/CLEAR. 2. LOCKED will disappear and Melody will sound. Example: To set and start microwave cooking without the need to touch the START. LOCKED will appear in the display window and Melody will sound. No. to lock the... mode selected No. Example: To change the default values for 2 minutes. 1. USING YOUR MICROWAVE OVEN CHILD LOCK Use this simplified control lets you are cleaning the oven, or so that children cannot use the oven unsupervised. CUSTOM SET You can change defrost weight mode (from Lbs. Touch and hold START ...

Owner's Manual (English)
Page 14
... of cooking time each time you press it . MULTI STAGE COOKING For best results, some recipes call for Lower Power Levels, page 15. 14 MICROWAVE POWER LEVELS Your microwave oven has 10 cook power levels to let you press it . Enter the power level. 4. Enter the cook time. 2. Touch POWER LEVEL. 3. ... or heat a wide variety of foods. Touch START. COOKING AT HIGH POWER LEVELS Example: To cook food for 7 minutes 30 seconds. 1. USING YOUR MICROWAVE OVEN MORE/LESS By using the MORE or LESS keys, all of the preprogrammed cook and time cook features can be programmed if the first stage...
... of cooking time each time you press it . MULTI STAGE COOKING For best results, some recipes call for Lower Power Levels, page 15. 14 MICROWAVE POWER LEVELS Your microwave oven has 10 cook power levels to let you press it . Enter the power level. 4. Enter the cook time. 2. Touch POWER LEVEL. 3. ... or heat a wide variety of foods. Touch START. COOKING AT HIGH POWER LEVELS Example: To cook food for 7 minutes 30 seconds. 1. USING YOUR MICROWAVE OVEN MORE/LESS By using the MORE or LESS keys, all of the preprogrammed cook and time cook features can be programmed if the first stage...

Owner's Manual (English)
Page 15
... foods best cooked at each level, and the amount of food. ● Soften ice cream. ● Raise yeast dough. ● Standing time. 15 USING YOUR MICROWAVE OVEN COOKING GUIDE FOR LOWER POWER LEVELS The 10 power levels in addition to HIGH allow you to choose the best power level for the food... you are cooking. POWER LEVEL 10 High 9 8 7 6 5 4 3 2 1 0 MICROWAVE OUTPUT 100% 90% 80% 70% 60% 50% 40% 30% 20% 10% 0% USE ● Boil water. ● Cook ground beef. ● Make candy. ● Cook ...
... foods best cooked at each level, and the amount of food. ● Soften ice cream. ● Raise yeast dough. ● Standing time. 15 USING YOUR MICROWAVE OVEN COOKING GUIDE FOR LOWER POWER LEVELS The 10 power levels in addition to HIGH allow you to choose the best power level for the food... you are cooking. POWER LEVEL 10 High 9 8 7 6 5 4 3 2 1 0 MICROWAVE OUTPUT 100% 90% 80% 70% 60% 50% 40% 30% 20% 10% 0% USE ● Boil water. ● Cook ground beef. ● Make candy. ● Cook ...

Owner's Manual (English)
Page 16
...To pop popcorn. 1. Make a note of how much time it will tell the oven how much longer to overcook. 3. Do not place the bag of the container. DO NOT leave microwave oven unattended while popping corn. When the internal sensor detects a certain amount of humidity ... glass tray and the outside of the cooking container and the inside of the microwave oven are using a microwave popcorn popper, follow these recommendations: 1. If you can mislead the sensor. USING YOUR MICROWAVE OVEN SENSOR OPERATING INSTRUCTIONS Sensor Cook allows you pop 3.0 and 3.5 ounce bags of ...
...To pop popcorn. 1. Make a note of how much time it will tell the oven how much longer to overcook. 3. Do not place the bag of the container. DO NOT leave microwave oven unattended while popping corn. When the internal sensor detects a certain amount of humidity ... glass tray and the outside of the cooking container and the inside of the microwave oven are using a microwave popcorn popper, follow these recommendations: 1. If you can mislead the sensor. USING YOUR MICROWAVE OVEN SENSOR OPERATING INSTRUCTIONS Sensor Cook allows you pop 3.0 and 3.5 ounce bags of ...

Owner's Manual (English)
Page 17
SENSOR COOK has preset Cook Power for 7 food categories. Choose food category. USING YOUR MICROWAVE OVEN SENSOR COOK Using SENSOR COOK lets you heat common microwave-prepared foods without needing to program times and Power levels. Example: To cook rice. 1. Choose food category. Example: To reheat 2 slices of pizza.... Number 1 2 3 4 5 6 7 Amount 1 - 4 EA 1 - 4 cups 1 - 4 cups 1 - 4 cups 1 - 4 cups 1/2 - 2 cups 10 - 21 oz. Touch REHEAT. 2. SENSOR REHEAT Using SENSOR REHEAT lets you heat common microwave-prepared foods without needing to program times and Cook Powers.
SENSOR COOK has preset Cook Power for 7 food categories. Choose food category. USING YOUR MICROWAVE OVEN SENSOR COOK Using SENSOR COOK lets you heat common microwave-prepared foods without needing to program times and Power levels. Example: To cook rice. 1. Choose food category. Example: To reheat 2 slices of pizza.... Number 1 2 3 4 5 6 7 Amount 1 - 4 EA 1 - 4 cups 1 - 4 cups 1 - 4 cups 1 - 4 cups 1/2 - 2 cups 10 - 21 oz. Touch REHEAT. 2. SENSOR REHEAT Using SENSOR REHEAT lets you heat common microwave-prepared foods without needing to program times and Cook Powers.

Owner's Manual (English)
Page 18
.... 1 - 4 cups Casserole Rice Assemble the ingredients per the recipe in an appropriately sized microwave container, cover with plastic wrap and vent. Place in an appropriately-sized microwave container, cover with vented plastic wrap. Casserole Cover dish containing the casserole with plastic wrap and.... each ) 1 - 2 servings 1 - 4 cups 1 - 4 cups Place on paper towel on a low plate. If not in shallow microwavable casserole. USING YOUR MICROWAVE OVEN SENSOR COOK TABLE CATEGORY Baked Potato DIRECTION Pierce each potato with plastic wrap and vent. 10 - 21 oz.
.... 1 - 4 cups Casserole Rice Assemble the ingredients per the recipe in an appropriately sized microwave container, cover with plastic wrap and vent. Place in an appropriately-sized microwave container, cover with vented plastic wrap. Casserole Cover dish containing the casserole with plastic wrap and.... each ) 1 - 2 servings 1 - 4 cups 1 - 4 cups Place on paper towel on a low plate. If not in shallow microwavable casserole. USING YOUR MICROWAVE OVEN SENSOR COOK TABLE CATEGORY Baked Potato DIRECTION Pierce each potato with plastic wrap and vent. 10 - 21 oz.

Owner's Manual (English)
Page 19
...2 3 4 Amount 1, 2, 3 sticks 4, 8 oz. 8, 16 oz. 5, 10 oz. 19 Choose food category. Touch 2 for chocolate. 3. MELT The oven uses low power to soften foods (butter, ice cream, cream cheese, and frozen juice.) See the following table. chocolate. 1. Touch 2 for 8 ozs. 4. Touch... START. Example: To melt 8 oz. Touch 2 for quart. 4. USING YOUR MICROWAVE OVEN SOFTEN The oven uses low power to melt foods (butter or margarine, chocolate, marshmallows, or processed cheese food.) See the following table. Touch SOFTEN MELT 2...
...2 3 4 Amount 1, 2, 3 sticks 4, 8 oz. 8, 16 oz. 5, 10 oz. 19 Choose food category. Touch 2 for chocolate. 3. MELT The oven uses low power to soften foods (butter, ice cream, cream cheese, and frozen juice.) See the following table. chocolate. 1. Touch 2 for 8 ozs. 4. Touch... START. Example: To melt 8 oz. Touch 2 for quart. 4. USING YOUR MICROWAVE OVEN SOFTEN The oven uses low power to melt foods (butter or margarine, chocolate, marshmallows, or processed cheese food.) See the following table. Touch SOFTEN MELT 2...

Owner's Manual (English)
Page 20
...marshmallows may be soft enough to use in recipe. USING YOUR MICROWAVE OVEN SOFTEN TABLE CATEGORY Butter DIRECTION Unwrap and place in microwavable container. Unwrap squares and place in microwave oven. Stir at the end of cooking to complete melting. Cut into... cubes. Ice Cream Place container in microwavable container. Cream cheese will be used . AMOUNT 1, 2, or 3 sticks ...
...marshmallows may be soft enough to use in recipe. USING YOUR MICROWAVE OVEN SOFTEN TABLE CATEGORY Butter DIRECTION Unwrap and place in microwavable container. Unwrap squares and place in microwave oven. Stir at the end of cooking to complete melting. Cut into... cubes. Ice Cream Place container in microwavable container. Cream cheese will be used . AMOUNT 1, 2, or 3 sticks ...


