
Owner's Manual
Page 5
... strict accordance with the provided installation instructions. • This appliance should be serviced only by one or more of the following items in the microwave oven: whole eggs in the cabinet above floor. Do not heat the oven floor excessively. - Carefully read and follow the instructions for the ... To avoid improperly cooking some foods. - If this appliance only in your oven only for the browning dish. Do not allow the container to part 18 of the radio or television. • Relocate the Microwave Oven with oil or fat, sealed containers, or closed glass jars.
... strict accordance with the provided installation instructions. • This appliance should be serviced only by one or more of the following items in the microwave oven: whole eggs in the cabinet above floor. Do not heat the oven floor excessively. - Carefully read and follow the instructions for the ... To avoid improperly cooking some foods. - If this appliance only in your oven only for the browning dish. Do not allow the container to part 18 of the radio or television. • Relocate the Microwave Oven with oil or fat, sealed containers, or closed glass jars.
Owner's Manual
Page 6
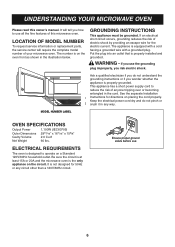
.... See the separate Installation Instructions for directions on the circuit. LOCATION OF MODEL NUMBER To request service information or replacement parts, the service center will tell you risk electric shock. Keep the electrical power cord dry and do not understand the... grounding instructions or if you do not pinch or crush it in the illustration below. WARNING - UNDERSTANDING YOUR MICROWAVE OVEN Please read this microwave oven. MODEL NUMBER LABEL OVEN SPECIFICATIONS Output Power Outer Dimensions Cavity Volume Net Weight 1,100W (IEC60705) 2915/16" x ...
.... See the separate Installation Instructions for directions on the circuit. LOCATION OF MODEL NUMBER To request service information or replacement parts, the service center will tell you risk electric shock. Keep the electrical power cord dry and do not understand the... grounding instructions or if you do not pinch or crush it in the illustration below. WARNING - UNDERSTANDING YOUR MICROWAVE OVEN Please read this microwave oven. MODEL NUMBER LABEL OVEN SPECIFICATIONS Output Power Outer Dimensions Cavity Volume Net Weight 1,100W (IEC60705) 2915/16" x ...
Owner's Manual
Page 24
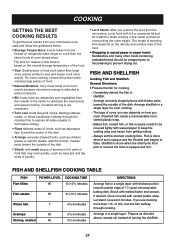
...and leg ends of poultry. ● Let It Stand: After you remove the food from the microwave, cover food with the thicker, meatier parts toward the outside of 11/2 quart microwavable baking dish. Always set the shortest cooking time. Brush with vented plastic wrap. The time for ...foil or casserole lid and let it turns opaque and the thickest part begins to finish cooking in a single layer for cooking. - Let stand covered 2 minutes. The type of turning the shellfish. 24 Poached fish needs a microwavable lid or vented plastic wrap. - FISH AND SHELLFISH Cooking Fish ...
...and leg ends of poultry. ● Let It Stand: After you remove the food from the microwave, cover food with the thicker, meatier parts toward the outside of 11/2 quart microwavable baking dish. Always set the shortest cooking time. Brush with vented plastic wrap. The time for ...foil or casserole lid and let it turns opaque and the thickest part begins to finish cooking in a single layer for cooking. - Let stand covered 2 minutes. The type of turning the shellfish. 24 Poached fish needs a microwavable lid or vented plastic wrap. - FISH AND SHELLFISH Cooking Fish ...
Owner's Manual
Page 31
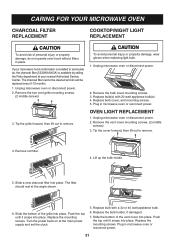
... holder. 5. Replace the mounting screws. Slide the bottom of the vent cover into place. Replace the mounting screws. Plug in microwave oven or reconnect power. Unplug microwave oven or disconnect power. 2. Replace bulb(s) with a 30 or 40 watt appliance bulb. 6. OVEN LIGHT REPLACEMENT 1. Remove the...the cover forward, then lift out to remove. Turn the power back on at your microwave hood combination is installed to recirculate air, the charcoal filter (5230W1A003A) is available by calling the Parts department at the main power supply and set the clock. 5. Push the top until ...
... holder. 5. Replace the mounting screws. Slide the bottom of the vent cover into place. Replace the mounting screws. Plug in microwave oven or reconnect power. Unplug microwave oven or disconnect power. 2. Replace bulb(s) with a 30 or 40 watt appliance bulb. 6. OVEN LIGHT REPLACEMENT 1. Remove the...the cover forward, then lift out to remove. Turn the power back on at your microwave hood combination is installed to recirculate air, the charcoal filter (5230W1A003A) is available by calling the Parts department at the main power supply and set the clock. 5. Push the top until ...
Owner's Manual
Page 35
... / LMVM2075SW / LMVM2075ST LG Electronics Inc. will repair or replace your product, at : http://us .lgservice.com THIS WARRANTY IS IN LIEU OF ANY OTHER WARRANTY, EXPRESS OR IMPLIED, INCLUDING WITHOUT LIMITATION, ANY WARRANTY OF MERCHANTABILITY OR FITNESS FOR A PARTICULAR PURPOSE. LG WILL NOT BE LIABLE...to the original purchaser of the product and effective only when used in the United States, including U.S. LG MICROWAVE OVEN LIMITED WARRANTY - Territories. Replacement Units and Repair Parts are answered 24 hours a day, 365 days per year) and select the appropriate option from the...
... / LMVM2075SW / LMVM2075ST LG Electronics Inc. will repair or replace your product, at : http://us .lgservice.com THIS WARRANTY IS IN LIEU OF ANY OTHER WARRANTY, EXPRESS OR IMPLIED, INCLUDING WITHOUT LIMITATION, ANY WARRANTY OF MERCHANTABILITY OR FITNESS FOR A PARTICULAR PURPOSE. LG WILL NOT BE LIABLE...to the original purchaser of the product and effective only when used in the United States, including U.S. LG MICROWAVE OVEN LIMITED WARRANTY - Territories. Replacement Units and Repair Parts are answered 24 hours a day, 365 days per year) and select the appropriate option from the...


