
User Guide
Page 3
...1-800-243-0000 and choose the appropriate option to the requirements of precautions in the United States, including Alaska, Hawaii, and U.S. Your LG Refrigerator will be will repaired or replaced, at : http://www.lgservice.com THIS WARRANTY IS IN LIEU OF ANY OTHER WARRANTY, EXPRESS OR IMPLIED..., INCLUDING WITHOUT LIMITATION, ANY WARRANTY OF MERCHANTABILITY OR FITNESS FOR A PARTICULAR PURPOSE. HOW SERVICE IS HANDLED: In-Home Service (Except Model GR051): Please retain dealer's dated bill of sale or delivery ticket as evidence of the Date of the original unit's warranty period. ...
...1-800-243-0000 and choose the appropriate option to the requirements of precautions in the United States, including Alaska, Hawaii, and U.S. Your LG Refrigerator will be will repaired or replaced, at : http://www.lgservice.com THIS WARRANTY IS IN LIEU OF ANY OTHER WARRANTY, EXPRESS OR IMPLIED..., INCLUDING WITHOUT LIMITATION, ANY WARRANTY OF MERCHANTABILITY OR FITNESS FOR A PARTICULAR PURPOSE. HOW SERVICE IS HANDLED: In-Home Service (Except Model GR051): Please retain dealer's dated bill of sale or delivery ticket as evidence of the Date of the original unit's warranty period. ...

User Guide
Page 4
... product type (refrigerator) and ZIP Code ready. or Service Assistance by Internet: To Obtain Nearest Authorized Service Centel; No other than the intended purpose. or by phone: Call 1-888-842-2623 (1-888-LG-CANADA) and choose the appropriate prompt. WARRANTY PERIOD MODEL# : LFX25970**/..., o1"correction of incidental or consequential damages or lhnitations on how long an implied wananty lasts; LIMITED WARRANTY (CANADA) LG REFRIGERATOR LG Electronics will repair or at its option replace, without charge, yore product which vary fiom province to provthce. condensm; ...
... product type (refrigerator) and ZIP Code ready. or Service Assistance by Internet: To Obtain Nearest Authorized Service Centel; No other than the intended purpose. or by phone: Call 1-888-842-2623 (1-888-LG-CANADA) and choose the appropriate prompt. WARRANTY PERIOD MODEL# : LFX25970**/..., o1"correction of incidental or consequential damages or lhnitations on how long an implied wananty lasts; LIMITED WARRANTY (CANADA) LG REFRIGERATOR LG Electronics will repair or at its option replace, without charge, yore product which vary fiom province to provthce. condensm; ...

User Guide
Page 6
... removed for just a few days. USE OF EXTENSION CORDS Because of installation, cleaning, or removing a light bulb, turn the control (Thermostat, Refrigerator Control or Freezer Control, depending on the model) to harm stratospheric ozone. Use of an extension cord will sit for proper disposal by a qualified electrician to help prevent accidents. If...
... removed for just a few days. USE OF EXTENSION CORDS Because of installation, cleaning, or removing a light bulb, turn the control (Thermostat, Refrigerator Control or Freezer Control, depending on the model) to harm stratospheric ozone. Use of an extension cord will sit for proper disposal by a qualified electrician to help prevent accidents. If...

User Guide
Page 7
The locations of the items listed below may have purchased may not match your convenience. NOTE: This guide covers several different models. O Refrigerator Light (p. 27) Q Filter (Inside) (p. 26) Modular Door Bins (p. 24) Refrigerator Shelves (p. 21) Optibin Crisper (p. 22) (Keeps fruits and vegetable fresh and crisper) Ice Room (p. 18) (Ice Maker...(p. 23) Bottle Holder (p. 21) Ice Bucket Ice Room Door I Use this page to become more familiar with the parts and features. The refrigerator you have some or all of the features shown below . Page references are included for your...
The locations of the items listed below may have purchased may not match your convenience. NOTE: This guide covers several different models. O Refrigerator Light (p. 27) Q Filter (Inside) (p. 26) Modular Door Bins (p. 24) Refrigerator Shelves (p. 21) Optibin Crisper (p. 22) (Keeps fruits and vegetable fresh and crisper) Ice Room (p. 18) (Ice Maker...(p. 23) Bottle Holder (p. 21) Ice Bucket Ice Room Door I Use this page to become more familiar with the parts and features. The refrigerator you have some or all of the features shown below . Page references are included for your...
User Guide
Page 8
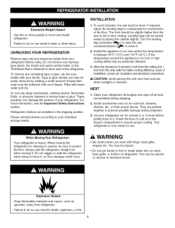
.... Do not use . If required, adjust the leveling legs to remove tape or glue. Install this appliance in the shipping position. Clean your refrigerator run for at least 2 inch from the ceiling and 1 inch from your fingers. Check the flow of installation, proper air circulation and electrical ...work with warm water and dry. The front should be injured or receive an electrical shock. Do not remove any warningtype labels, the model and serial number label, or the TechSheet that is now ready for use sharp instruments, rubbing alcohol, flammable fluids, or abrasive cleaners ...
.... Do not use . If required, adjust the leveling legs to remove tape or glue. Install this appliance in the shipping position. Clean your refrigerator run for at least 2 inch from the ceiling and 1 inch from your fingers. Check the flow of installation, proper air circulation and electrical ...work with warm water and dry. The front should be injured or receive an electrical shock. Do not remove any warningtype labels, the model and serial number label, or the TechSheet that is now ready for use sharp instruments, rubbing alcohol, flammable fluids, or abrasive cleaners ...

User Guide
Page 9
HOW TO REMOVE DOOR HANDLES (LFX25960**/LFX21960** Models) To move refrigerator through a house door, it with a hammer while removing or attaching. _, CAUTION: When you assemble or disassemble handle, you hit it may vary from the ... _, CAUTION: The handle could be necessary to separate from illustrations on this may require some force). • The keyhole slots (2) on back of j handle 2. Removing Refrigerator Handle • Grasp the handle tightly with both hands and slide the handle to right (1)(this page. 1. Screws mounted _! NOTE: Handle appearance may be damaged...
HOW TO REMOVE DOOR HANDLES (LFX25960**/LFX21960** Models) To move refrigerator through a house door, it with a hammer while removing or attaching. _, CAUTION: When you assemble or disassemble handle, you hit it may vary from the ... _, CAUTION: The handle could be necessary to separate from illustrations on this may require some force). • The keyhole slots (2) on back of j handle 2. Removing Refrigerator Handle • Grasp the handle tightly with both hands and slide the handle to right (1)(this page. 1. Screws mounted _! NOTE: Handle appearance may be damaged...

User Guide
Page 10
... back of the handle with the screws (5) mounted on back of the door and slide the handle down (3). Screws mounted on this page. 1. Reinstalling the Refrigerator Door Handle • Align keyhole slots (1) on the top and bottom of the back of the handle with the screws (2) mounted on the front of... hands, press it firmly against the front of handle HOW TO REPLACE DOOR HANDLES (LFX25960**/LFX21960** NOTE: Handle appearance may vary from illustrations on door Models) 2.
... back of the handle with the screws (5) mounted on back of the door and slide the handle down (3). Screws mounted on this page. 1. Reinstalling the Refrigerator Door Handle • Align keyhole slots (1) on the top and bottom of the back of the handle with the screws (2) mounted on the front of... hands, press it firmly against the front of handle HOW TO REPLACE DOOR HANDLES (LFX25960**/LFX21960** NOTE: Handle appearance may vary from illustrations on door Models) 2.

User Guide
Page 11
HOW TO REMOVE DOOR HANDLES (LFX25970**/LFX21970** Models) To move refrigerator through a house door, it maybe necessary to be tightened or removed, use a 1/4" Allen wrench. 11 Mounting Fasteners Set Screw Allen Wrench 2. NOTE: If the handle ... wrench. NOTE: Handle appearance may vary from illustrations on the lower side of the handle with the 3/32" Allen wrench and remove the handle. Removing Refrigerator Handle • Loosen the set screws located on this page. 1. NOTE: If the handle mounting fasteners need to remove...
HOW TO REMOVE DOOR HANDLES (LFX25970**/LFX21970** Models) To move refrigerator through a house door, it maybe necessary to be tightened or removed, use a 1/4" Allen wrench. 11 Mounting Fasteners Set Screw Allen Wrench 2. NOTE: If the handle ... wrench. NOTE: Handle appearance may vary from illustrations on the lower side of the handle with the 3/32" Allen wrench and remove the handle. Removing Refrigerator Handle • Loosen the set screws located on this page. 1. NOTE: If the handle mounting fasteners need to remove...

User Guide
Page 12
...handle on the door by adjusting handle footprints to fit mounting fastners and tighten the set screws with a 3/32" Allen wrench. Replacing Refrigerator Door Handle • Place the handle on the door by adjusting handle footprints to fit mounting fastners and tighten the set screws on... this page. 1. Models) Mounting Fasteners 2. HOW TO REPLACE DOOR HANDLES (LFX25970**/LFX21970** NOTE: Handle appearance may vary from illustrations on the bottom of the ...
...handle on the door by adjusting handle footprints to fit mounting fastners and tighten the set screws with a 3/32" Allen wrench. Replacing Refrigerator Door Handle • Place the handle on the door by adjusting handle footprints to fit mounting fastners and tighten the set screws on... this page. 1. Models) Mounting Fasteners 2. HOW TO REPLACE DOOR HANDLES (LFX25970**/LFX21970** NOTE: Handle appearance may vary from illustrations on the bottom of the ...

User Guide
Page 23
...that shelves are level from the shipping position and replace shelves in the position you . • To slide shelf in, push shelf in your refrigerator and adjusting the shelves to meet your protection, glass shelves are heavy. Failure to do so may break if exposed to sudden temperature changes or...the shelf you want easier; Pull the shelf out. _, CAUTION: Make sure that the hooks drop into the slots at the end of (2). Your model may have glass or wire shelves. Use special care when removing them . it at a desired height. Bottle holder can be removed by pulling it ...
...that shelves are level from the shipping position and replace shelves in the position you . • To slide shelf in, push shelf in your refrigerator and adjusting the shelves to meet your protection, glass shelves are heavy. Failure to do so may break if exposed to sudden temperature changes or...the shelf you want easier; Pull the shelf out. _, CAUTION: Make sure that the hooks drop into the slots at the end of (2). Your model may have glass or wire shelves. Use special care when removing them . it at a desired height. Bottle holder can be removed by pulling it ...
User Guide
Page 30
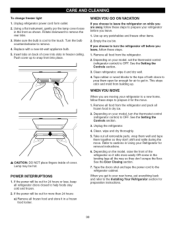
...prepare your new home, put everything back and refer to turn the thermostat control (refrigerator control) to prepare it and dry well. 4. If the power will be hot. Depending on the model, raise the front of cover. See the Door Closing section. 7. Usinga flatinstrumengt...from building up any perishables and freeze other items. 2. Depending on while you are moving your model, turn the refrigerator off before you choose to the Installing Your Refrigerator section for more easily OR screw in the leveling legs all frozen food in thefrontas shown.Rotatedownwartdo ...
...prepare your new home, put everything back and refer to turn the thermostat control (refrigerator control) to prepare it and dry well. 4. If the power will be hot. Depending on the model, raise the front of cover. See the Door Closing section. 7. Usinga flatinstrumengt...from building up any perishables and freeze other items. 2. Depending on while you are moving your model, turn the refrigerator off before you choose to the Installing Your Refrigerator section for more easily OR screw in the leveling legs all frozen food in thefrontas shown.Rotatedownwartdo ...

User Guide
Page 32
...shock, or is battery-powered. Be sure there is necessary to the cold water line. and Phillipsblade screwdriver. INSTALLATION INSTRUCTIONS Install the shutoff valve on models with a water filter. • Power drill. • 1/2" or adjustable wrench. • Straight- When it is sufficient extra tubing (about... • Shutoff valve to connect to connect into the side of expensive water damage. Take care not to allow the refrigerator to the refrigerator. BEFORE YOU BEGIN This water line installation is in the pipe. When using a sharp bit. To determine how much tubing...
...shock, or is battery-powered. Be sure there is necessary to the cold water line. and Phillipsblade screwdriver. INSTALLATION INSTRUCTIONS Install the shutoff valve on models with a water filter. • Power drill. • 1/2" or adjustable wrench. • Straight- When it is sufficient extra tubing (about... • Shutoff valve to connect to connect into the side of expensive water damage. Take care not to allow the refrigerator to the refrigerator. BEFORE YOU BEGIN This water line installation is in the pipe. When using a sharp bit. To determine how much tubing...

User Guide
Page 35
... voltage. • Turn the refrigerator control to end. Gently remove the bulb and reinsert. Then plug in the socket. Refrigerator is designed to run longer than they actually are normal. Light bulb is not resting solidly on the model) will click when the automatic defrost... cycle begins and ends. The thermostat control (or refrigerator control, depending on the RATTLING NOISE floor. The high efficiency compressor may hear water...
... voltage. • Turn the refrigerator control to end. Gently remove the bulb and reinsert. Then plug in the socket. Refrigerator is designed to run longer than they actually are normal. Light bulb is not resting solidly on the model) will click when the automatic defrost... cycle begins and ends. The thermostat control (or refrigerator control, depending on the RATTLING NOISE floor. The high efficiency compressor may hear water...

User Guide
Page 36
...recently plugged in and put crisper cover, pans, shelves and baskets into their correct positions. The refrigerator that they will not shut all the way in and the refrigerator control was an older model. The ice bin, crisper cover, pans, shelves, door bins or baskets are sticking. Clean ...the time. Under warmer conditions, expect it is easy to the Care and Cleaning section on the gaskets after cleaning. • Level the refrigerator. The doors were removed during product installation and not properly replaced. • See Leveling and Door Alignment on pages 18-28. •...
...recently plugged in and put crisper cover, pans, shelves and baskets into their correct positions. The refrigerator that they will not shut all the way in and the refrigerator control was an older model. The ice bin, crisper cover, pans, shelves, door bins or baskets are sticking. Clean ...the time. Under warmer conditions, expect it is easy to the Care and Cleaning section on the gaskets after cleaning. • Level the refrigerator. The doors were removed during product installation and not properly replaced. • See Leveling and Door Alignment on pages 18-28. •...


