Specification
Page 1
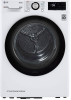
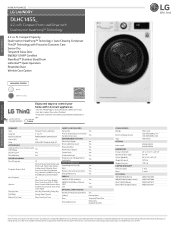
...LG Corp. All rights reserved. "LG Life's Good" is finished • Proactive Customer Care offers preventative maintenance tips SUMMARY FABRIC CARE FEATURES Type Compact Front Load Dryer Sensor Dry Capacity 4.2 cu. Compact Front Load Dryer with LED Display Yes Dial-A-Cycle™ Yes Touch Buttons Yes DRYER... (WxHxD) Weight (Product) Weight (Carton) LIMITED WARRANTY Parts and Labor Drum UPC CODES WM1455HWA (White) WM1455HVA (Graphite Steel) DLHC1455W (White) DLHC1455V (Graphite Steel) CSA Listed 120/240V,60Hz,3.1A/ 120/208V,60Hz,3.5A Heat Pump 4930EL3021A 4930EL3023A 24'' x ...
...LG Corp. All rights reserved. "LG Life's Good" is finished • Proactive Customer Care offers preventative maintenance tips SUMMARY FABRIC CARE FEATURES Type Compact Front Load Dryer Sensor Dry Capacity 4.2 cu. Compact Front Load Dryer with LED Display Yes Dial-A-Cycle™ Yes Touch Buttons Yes DRYER... (WxHxD) Weight (Product) Weight (Carton) LIMITED WARRANTY Parts and Labor Drum UPC CODES WM1455HWA (White) WM1455HVA (Graphite Steel) DLHC1455W (White) DLHC1455V (Graphite Steel) CSA Listed 120/240V,60Hz,3.1A/ 120/208V,60Hz,3.5A Heat Pump 4930EL3021A 4930EL3023A 24'' x ...
Owners Manual
Page 1
All Rights Reserved. ENGLISH DLHC1455* MFL71424358 Rev.07_030421 www.lg.com Copyright © 2020-2021 LG Electronics Inc. OWNER'S MANUAL DRYER Read this owner's manual thoroughly before operating the appliance and keep it handy for reference at all times.
All Rights Reserved. ENGLISH DLHC1455* MFL71424358 Rev.07_030421 www.lg.com Copyright © 2020-2021 LG Electronics Inc. OWNER'S MANUAL DRYER Read this owner's manual thoroughly before operating the appliance and keep it handy for reference at all times.

Owners Manual
Page 2
... Leveling the Appliance 14 Reversing the Door 16 Stacking the Appliance 17 Connecting Electric Dryers 21 Special Electrical Requirements 21 Final Installation Check 22 OPERATION 22 Before Use 23 Loading the Dryer 24 Control Panel 26 Drying Cycles 30 Options and Extra Functions 33 SMART FUNCTIONS... 33 LG ThinQ Application 35 Smart DiagnosisTM Function 37 MAINTENANCE 37 Regular Cleaning 39 Periodic Cleaning 41...
... Leveling the Appliance 14 Reversing the Door 16 Stacking the Appliance 17 Connecting Electric Dryers 21 Special Electrical Requirements 21 Final Installation Check 22 OPERATION 22 Before Use 23 Loading the Dryer 24 Control Panel 26 Drying Cycles 30 Options and Extra Functions 33 SMART FUNCTIONS... 33 LG ThinQ Application 35 Smart DiagnosisTM Function 37 MAINTENANCE 37 Regular Cleaning 39 Periodic Cleaning 41...
Owners Manual
Page 4
... and knowledge, unless they give off by a utility. • Certain internal parts are intentionally not grounded and may burn or melt on top of the dryer during servicing. Always grip the plug firmly and pull straight out from the accumulation of lint, dust, and dirt. • The appliance must not be... touch the appliance controls with wet hands. • Do not modify or extend the power cord. • If the appliance has been submerged, contact an LG Electronics customer information center for play on, in the vicinity of this appliance if it immediately, and contact an...
... and knowledge, unless they give off by a utility. • Certain internal parts are intentionally not grounded and may burn or melt on top of the dryer during servicing. Always grip the plug firmly and pull straight out from the accumulation of lint, dust, and dirt. • The appliance must not be... touch the appliance controls with wet hands. • Do not modify or extend the power cord. • If the appliance has been submerged, contact an LG Electronics customer information center for play on, in the vicinity of this appliance if it immediately, and contact an...
Owners Manual
Page 5
...of the appliance. Service personnel - Items contaminated with a cord having an equipment-grounding conductor and a grounding plug. Avoid stopping a tumble dryer before cleaning to cooking oils in this appliance from the power supply. • Remove the door before the appliance is equipped with cooking ... a risk of electric shock by qualified service personnel unless specifically recommended in your hand get pinched when opening or closing the dryer door. Check with the appliance; Do not modify the plug provided with a qualified electrician or service personnel if you are ...
...of the appliance. Service personnel - Items contaminated with a cord having an equipment-grounding conductor and a grounding plug. Avoid stopping a tumble dryer before cleaning to cooking oils in this appliance from the power supply. • Remove the door before the appliance is equipped with cooking ... a risk of electric shock by qualified service personnel unless specifically recommended in your hand get pinched when opening or closing the dryer door. Check with the appliance; Do not modify the plug provided with a qualified electrician or service personnel if you are ...
Owners Manual
Page 8
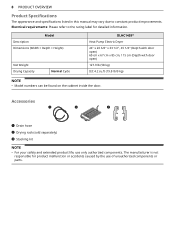
... requirements: Please refer to constant product improvements. Model Description Dimensions (Width × Depth × Height) Net Weight Drying Capacity Normal Cycle DLHC1455* Heat Pump Electric Dryer 24'' x 26 3/8'' x 33 1/2'', 45 1/4'' (Depth with door open) 60 cm x 67 cm x 85 cm, 115 cm (Depth with door open) 127.9 lb (58 kg) IEC...
... requirements: Please refer to constant product improvements. Model Description Dimensions (Width × Depth × Height) Net Weight Drying Capacity Normal Cycle DLHC1455* Heat Pump Electric Dryer 24'' x 26 3/8'' x 33 1/2'', 45 1/4'' (Depth with door open) 60 cm x 67 cm x 85 cm, 115 cm (Depth with door open) 127.9 lb (58 kg) IEC...

Owners Manual
Page 9
b Level the appliance. c Connect the heat pump electric dryer. e Final Installation Check ENGLISH a Choose the proper location. INSTALLATION INSTALLATION 9 Before Installing Installation Overview Please read the following installation instructions first after purchasing this dryer or transporting it to another location. d Plug in the power cord.
b Level the appliance. c Connect the heat pump electric dryer. e Final Installation Check ENGLISH a Choose the proper location. INSTALLATION INSTALLATION 9 Before Installing Installation Overview Please read the following installation instructions first after purchasing this dryer or transporting it to another location. d Plug in the power cord.

Owners Manual
Page 10
... the bottom of an automatic cycle. Detailed instructions concerning electrical connections and additional requirements are provided on a solidly constructed floor with a maximum slope of the dryer in an area where it will need 18 inches (45.7 cm) from the garage floor to support the total appliance weight when loaded. You will...
... the bottom of an automatic cycle. Detailed instructions concerning electrical connections and additional requirements are provided on a solidly constructed floor with a maximum slope of the dryer in an area where it will need 18 inches (45.7 cm) from the garage floor to support the total appliance weight when loaded. You will...

Owners Manual
Page 11
... cm2) B Lower Ventilation Opening 2 24 sq. Installation spacing for ease of installation and servicing. • Additional clearances should be considered on all sides of the dryer to the Overhead Cabinet/Shelf 2 18″ (457 mm) F Front Clearance 1″ (25 mm) G Depth 26 3/8″ (670 mm) H Back Clearance 2 5″ (127 mm) I Side...
... cm2) B Lower Ventilation Opening 2 24 sq. Installation spacing for ease of installation and servicing. • Additional clearances should be considered on all sides of the dryer to the Overhead Cabinet/Shelf 2 18″ (457 mm) F Front Clearance 1″ (25 mm) G Depth 26 3/8″ (670 mm) H Back Clearance 2 5″ (127 mm) I Side...

Owners Manual
Page 12
in . (310 cm2) 2 24 sq. Louvered doors with Stacked Washer and Dryer - Description A Upper Ventilation Opening B Lower Ventilation Opening C Distance to Ventilation Opening D Front Clearance E Back Clearance F Top Clearance to the Ceiling G Height to form openings.... 2 1″ (25 mm) 24″ (600 mm) Install vent grills in the door or cut down the door at least a little space around the dryer (or any other appliance) to eliminate the transfer of Stacked Appliances† H Side Clearance I Width† † Differs depending on the washer dimensions. If ...
in . (310 cm2) 2 24 sq. Louvered doors with Stacked Washer and Dryer - Description A Upper Ventilation Opening B Lower Ventilation Opening C Distance to Ventilation Opening D Front Clearance E Back Clearance F Top Clearance to the Ceiling G Height to form openings.... 2 1″ (25 mm) 24″ (600 mm) Install vent grills in the door or cut down the door at least a little space around the dryer (or any other appliance) to eliminate the transfer of Stacked Appliances† H Side Clearance I Width† † Differs depending on the washer dimensions. If ...

Owners Manual
Page 16
...the weight of both appliances. • Do not stack the washer on top of the dryer. • If appliances are already installed, disconnect them from all power, water, and drainage connections. 1... the 1 screw from the bottom of the rear cover on top of an LG front load washing machine. a Dryer b LG Front Load Washing Machine The appliance may only be stacked on each side. 5...plate: Tools Required • Phillips screwdriver 4 Use the 2 screws removed earlier to stack the appliance, an LG stacking kit is required. Shape and assembly direction Washing Machine Top plate size 21 7/8 inch (550 mm) 24...
...the weight of both appliances. • Do not stack the washer on top of the dryer. • If appliances are already installed, disconnect them from all power, water, and drainage connections. 1... the 1 screw from the bottom of the rear cover on top of an LG front load washing machine. a Dryer b LG Front Load Washing Machine The appliance may only be stacked on each side. 5...plate: Tools Required • Phillips screwdriver 4 Use the 2 screws removed earlier to stack the appliance, an LG stacking kit is required. Shape and assembly direction Washing Machine Top plate size 21 7/8 inch (550 mm) 24...

Owners Manual
Page 17
...contact a qualified electrician to check your home's wiring and fuses to ensure that your home has adequate electrical power to operate the dryer. • This dryer must be connected to a grounded metal, permanent wiring system, or an equipment-grounding conductor must be run with the circuit conductors... manually emptied. Use the connecting T piece to local codes and with instructions on both sides of the T piece. ELECTRICAL SERVICE FOR THE DRYER SHOULD BE OF THE MAXIMUM RATE VOLTAGE LISTED ON THE NAMEPLATE. If over 15 ft. (4.5 m), use UL (Underwriters Laboratories) listed No.-10...
...contact a qualified electrician to check your home's wiring and fuses to ensure that your home has adequate electrical power to operate the dryer. • This dryer must be connected to a grounded metal, permanent wiring system, or an equipment-grounding conductor must be run with the circuit conductors... manually emptied. Use the connecting T piece to local codes and with instructions on both sides of the T piece. ELECTRICAL SERVICE FOR THE DRYER SHOULD BE OF THE MAXIMUM RATE VOLTAGE LISTED ON THE NAMEPLATE. If over 15 ft. (4.5 m), use UL (Underwriters Laboratories) listed No.-10...

Owners Manual
Page 18
... neutral (white) wire to the center screw of the terminal block 7 Attach the power cord ground wire to allow for removal and reinstallation of the dryer. 1 Remove 5 inches (12.7 cm) of the outer covering from the wire and remove 5 inches of insulation from each wire.
... neutral (white) wire to the center screw of the terminal block 7 Attach the power cord ground wire to allow for removal and reinstallation of the dryer. 1 Remove 5 inches (12.7 cm) of the outer covering from the wire and remove 5 inches of insulation from each wire.

Owners Manual
Page 20
... the outer terminal block screws. 6 Attach the neutral (white) wire to allow for removal and installation of dryer. 1 Remove 3.5 inches (8.9 cm) of the outer covering from each wire. 20 INSTALLATION bc b a e d a White Wire from Dryer harness b Hot Leads of Power Cord (Black and Red) c Neutral Wire (White) d External Ground Wire (If required...
... the outer terminal block screws. 6 Attach the neutral (white) wire to allow for removal and installation of dryer. 1 Remove 3.5 inches (8.9 cm) of the outer covering from each wire. 20 INSTALLATION bc b a e d a White Wire from Dryer harness b Hot Leads of Power Cord (Black and Red) c Neutral Wire (White) d External Ground Wire (If required...

Owners Manual
Page 21
...are uncertain whether your proposed installation will comply with the following tests. If you have completed the installation of combustion and fire, the dryer must be vented to the outside fresh air to side, and that venting materials are in firm contact with the floor. in (163...outside using the back, left, right, or bottom panel. • Make sure the dryer has adequate access to outside . • DO NOT vent the dryer under a manufactured home or mobile home. • Electric dryers may be aware that all new construction after January 1, 1996. • The electrical ...
...are uncertain whether your proposed installation will comply with the following tests. If you have completed the installation of combustion and fire, the dryer must be vented to the outside fresh air to side, and that venting materials are in firm contact with the floor. in (163...outside using the back, left, right, or bottom panel. • Make sure the dryer has adequate access to outside . • DO NOT vent the dryer under a manufactured home or mobile home. • Electric dryers may be aware that all new construction after January 1, 1996. • The electrical ...

Owners Manual
Page 22
... into the drum and away from the door seal area. Please refer to the cycle table for detailed information. 9 To help prevent odors, leave the dryer door slightly open the door and unload the clothes. CAUTION • Be careful! The drum inside the appliance. NOTE • The final part of fire...
... into the drum and away from the door seal area. Please refer to the cycle table for detailed information. 9 To help prevent odors, leave the dryer door slightly open the door and unload the clothes. CAUTION • Be careful! The drum inside the appliance. NOTE • The final part of fire...

Owners Manual
Page 23
...in the same load. • Close zippers, hooks and drawstrings to prevent these items from or containing rubber or plastics such as the dryer stops to reduce wrinkles. Fabric Care Labels • Sort and dry laundry according to tumble and dry properly. General Tips • ...After the cycle, the items may shrink, depending on other clothes. Aprons, bibs and chair covers OPERATION 23 - Glass particles left in a dryer. Rubber and Plastics • Do not dry any items made from snagging or tangling on quality. clothes require room to care labels, size, ...
...in the same load. • Close zippers, hooks and drawstrings to prevent these items from or containing rubber or plastics such as the dryer stops to reduce wrinkles. Fabric Care Labels • Sort and dry laundry according to tumble and dry properly. General Tips • ...After the cycle, the items may shrink, depending on other clothes. Aprons, bibs and chair covers OPERATION 23 - Glass particles left in a dryer. Rubber and Plastics • Do not dry any items made from snagging or tangling on quality. clothes require room to care labels, size, ...
Owners Manual
Page 30
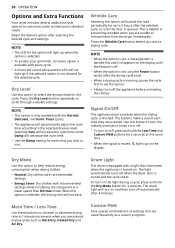
... for 3 seconds at a lower speed than Normal mode. Select the desired option after the selected cycle, or until the feature is off when the dryer door is equipped with a light that you start a drying cycle. The light automatically turns off . • When the option is helpful in 1... option is running, pause the cycle first to set , only the Power button works after 4 minutes. 30 OPERATION Options and Extra Functions Your dryer includes several additional cycle options to customize cycles to meet your garments, not every option is available with every cycle. • A chime will ...
... for 3 seconds at a lower speed than Normal mode. Select the desired option after the selected cycle, or until the feature is off when the dryer door is equipped with a light that you start a drying cycle. The light automatically turns off . • When the option is helpful in 1... option is running, pause the cycle first to set , only the Power button works after 4 minutes. 30 OPERATION Options and Extra Functions Your dryer includes several additional cycle options to customize cycles to meet your garments, not every option is available with every cycle. • A chime will ...
Owners Manual
Page 31
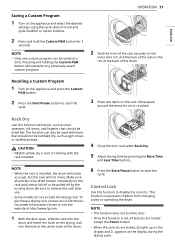
.../Pause button to start the cycle. 3 Place wet items on the rack. To purchase a drying rack, contact an LG Electronics Customer Information Center or visit the website at http://www.lg.com. 1 With the door open, slide the rack into the drum and insert the hook on the drying rack into... drum. Control Lock Use this function with the rack installed. NOTE • Only one custom program can prevent children from changing cycles or operating the dryer. Make sure all buttons are locked except the Power button. • When the controls are locked, i lights up on the display and CL appears ...
.../Pause button to start the cycle. 3 Place wet items on the rack. To purchase a drying rack, contact an LG Electronics Customer Information Center or visit the website at http://www.lg.com. 1 With the door open, slide the rack into the drum and insert the hook on the drying rack into... drum. Control Lock Use this function with the rack installed. NOTE • Only one custom program can prevent children from changing cycles or operating the dryer. Make sure all buttons are locked except the Power button. • When the controls are locked, i lights up on the display and CL appears ...
Owners Manual
Page 33
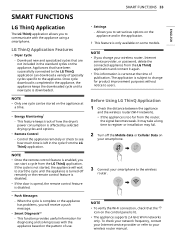
... Remote Control - NOTE • If you change for diagnosing and solving issues with the appliance using a smartphone. ENGLISH LG ThinQ Application Features • Dryer Cycle - Download new and specialized cycles that are not included in the cycle from the router, the signal becomes weak.... Before Using LG ThinQ Application 1 Check the distance between the appliance and the wireless router (Wi-Fi network). • If ...
... Remote Control - NOTE • If you change for diagnosing and solving issues with the appliance using a smartphone. ENGLISH LG ThinQ Application Features • Dryer Cycle - Download new and specialized cycles that are not included in the cycle from the router, the signal becomes weak.... Before Using LG ThinQ Application 1 Check the distance between the appliance and the wireless router (Wi-Fi network). • If ...


