
Owners Manual
Page 3
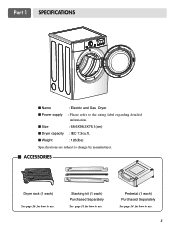
Stacking kit (1 each) Purchased Separately See page 13 for how to use. I Weight : 126(Ibs) Specifications are subject to use . 3 Pedestal (1 each ) See page 26 for how to change by manufacturer. I Size : 68.6X98.3X76.1(cm) I Power supply : Please refer to use . Part 1 SPECIFICATIONS I Name : Electric and Gas Dryer I Dryer capacity : IEC 7.3cu.ft. I ACCESSORIES Dryer rack (1 each ) Purchased Separately See page 14 for how to the rating label regarding detailed information.
Stacking kit (1 each) Purchased Separately See page 13 for how to use. I Weight : 126(Ibs) Specifications are subject to use . 3 Pedestal (1 each ) See page 26 for how to change by manufacturer. I Size : 68.6X98.3X76.1(cm) I Power supply : Please refer to use . Part 1 SPECIFICATIONS I Name : Electric and Gas Dryer I Dryer capacity : IEC 7.3cu.ft. I ACCESSORIES Dryer rack (1 each ) Purchased Separately See page 14 for how to the rating label regarding detailed information.

Owners Manual
Page 13
... fingers between the washer and dryer. Push the front stacking kit back to the stoppers of side stacking kit. 3 Fit the stacking kit side bracket firmly to the washer with a screw on the back of installation makes the stacking procedure too risky for the other side. 5 Place ...on a stable, even and solid floor as picture shows. 7 Screw both sides of the front kit. • Do not use stacking kit with one person. Part 4 ACESSORIES INSTALLATION Stacking Kit Installation Instructions To ensure safe and secure installation, please observe the instructions below. WARNING Do not attempt ...
... fingers between the washer and dryer. Push the front stacking kit back to the stoppers of side stacking kit. 3 Fit the stacking kit side bracket firmly to the washer with a screw on the back of installation makes the stacking procedure too risky for the other side. 5 Place ...on a stable, even and solid floor as picture shows. 7 Screw both sides of the front kit. • Do not use stacking kit with one person. Part 4 ACESSORIES INSTALLATION Stacking Kit Installation Instructions To ensure safe and secure installation, please observe the instructions below. WARNING Do not attempt ...


