
Owner's Manual (English)
Page 9
...shown below shows the minimum required ventilation openings for the door. Please note that you review this manual. STEP 1 Positioning the Dryer. Those required minimum clearances are installing your dryer, and it is recommended to STEP 9 for additional instructions. 38.7" (98.3 ... Certain minimum clearances are stably placed on the optional pedstal, it has the required clearances shown below . After placing the dryer in the picture below . More detailed instructions concerning electrical connections, gas connections, and exhaust requirements are provided in a manufactured...
...shown below shows the minimum required ventilation openings for the door. Please note that you review this manual. STEP 1 Positioning the Dryer. Those required minimum clearances are installing your dryer, and it is recommended to STEP 9 for additional instructions. 38.7" (98.3 ... Certain minimum clearances are stably placed on the optional pedstal, it has the required clearances shown below . After placing the dryer in the picture below . More detailed instructions concerning electrical connections, gas connections, and exhaust requirements are provided in a manufactured...

Owner's Manual (English)
Page 10
... installation. Follow these instructions to the left to right or front to back. If the dryer is level from left or the right. SSTTEEPP 22: Procedure for your dryer. Part 3 INITIAL STEPS FOR INSTALLING YOUR DRYER Once in which your door opens: Note Door and latch should not exceed 2.5 cm ...Door The door on the floor and the dryer should not rock. The leveling legs must remain firmly on your dryer can be aligned at the center when closed. 1 2 3 10 Please review this manual also provide important information concerning the placement of the dryer until it is not level, and if...
... installation. Follow these instructions to the left to right or front to back. If the dryer is level from left or the right. SSTTEEPP 22: Procedure for your dryer. Part 3 INITIAL STEPS FOR INSTALLING YOUR DRYER Once in which your door opens: Note Door and latch should not exceed 2.5 cm ...Door The door on the floor and the dryer should not rock. The leveling legs must remain firmly on your dryer can be aligned at the center when closed. 1 2 3 10 Please review this manual also provide important information concerning the placement of the dryer until it is not level, and if...

Owner's Manual (English)
Page 12
...explosion. Securely tighten all electrical connections • See installation instructions for the type of gas you thoroughly review that you have any steps to this dryer. 1. Turn on the model/serial rating plate. If your house is important that section and the ...concerning making electrical connections. • Connect neutral wire (white or center wire) to manual section on Electrical Requirements and Electric Dryer. Make sure that the type of this manual's section entitled Gas Requirements and Instructions. 12 STEP 5 Electrical Plug Connections Following...
...explosion. Securely tighten all electrical connections • See installation instructions for the type of gas you thoroughly review that you have any steps to this dryer. 1. Turn on the model/serial rating plate. If your house is important that section and the ...concerning making electrical connections. • Connect neutral wire (white or center wire) to manual section on Electrical Requirements and Electric Dryer. Make sure that the type of this manual's section entitled Gas Requirements and Instructions. 12 STEP 5 Electrical Plug Connections Following...

Owner's Manual (English)
Page 13
..., use of the Dryer. Prior to the dryer drum/drying compartment and, after reviewing the following parts on the exhaust duct approximately 2 ft. (60.9 cm) from the dryer. Effective dryer operation requires appropriate dryer airflow. The dryer should not exceed 5/8 inches (1.5 cm). Part 3 INITIAL STEPS FOR INSTALLING YOUR DRYER STEP 6 Preparation of this dryer, start the dryer on a heat setting...
..., use of the Dryer. Prior to the dryer drum/drying compartment and, after reviewing the following parts on the exhaust duct approximately 2 ft. (60.9 cm) from the dryer. Effective dryer operation requires appropriate dryer airflow. The dryer should not exceed 5/8 inches (1.5 cm). Part 3 INITIAL STEPS FOR INSTALLING YOUR DRYER STEP 6 Preparation of this dryer, start the dryer on a heat setting...

Owner's Manual (English)
Page 18
...be connecting to a fused disconnect or circuit breaker box. Colored wire should be using a UL listed, 120/240 volt minimum, 30 amp, dryer power supply cord. 3-wire receptacle (NEMA type10-30R) Use the instructions in this section if your home has a 3-wire receptacle (NEMA ...end. Note • Connect the power supply wire to the left and right terminal block screws. 3. Part 5 ELECTRICAL REQUIREMENTS FOR ELECTRIC DRYERS Review the following options to determine the appropriate electrical connection for your home: 4-wire receptacle (NEMA type14-30R) Use the instructions in this section...
...be connecting to a fused disconnect or circuit breaker box. Colored wire should be using a UL listed, 120/240 volt minimum, 30 amp, dryer power supply cord. 3-wire receptacle (NEMA type10-30R) Use the instructions in this section if your home has a 3-wire receptacle (NEMA ...end. Note • Connect the power supply wire to the left and right terminal block screws. 3. Part 5 ELECTRICAL REQUIREMENTS FOR ELECTRIC DRYERS Review the following options to determine the appropriate electrical connection for your home: 4-wire receptacle (NEMA type14-30R) Use the instructions in this section...

Owner's Manual (English)
Page 21
...proper outlet will need to do so can cause serious injury to you are additional instructions regarding electrical connections and requirements for Your Dryer: a) Please note that your home has adequate electrical power to the latest edition of electric shock, including a malfunction or ... properly grounded three-prong receptacle that is rated 120 Volts AC (alternating current) 15 Amps. Review your laundry room's electrical supply for washers and dryers, and DO NOT operate a washer and a dryer on a separate branch, polarized, three-wire, effectively grounded, 120 Volt, 60 Hertz, AC ...
...proper outlet will need to do so can cause serious injury to you are additional instructions regarding electrical connections and requirements for Your Dryer: a) Please note that your home has adequate electrical power to the latest edition of electric shock, including a malfunction or ... properly grounded three-prong receptacle that is rated 120 Volts AC (alternating current) 15 Amps. Review your laundry room's electrical supply for washers and dryers, and DO NOT operate a washer and a dryer on a separate branch, polarized, three-wire, effectively grounded, 120 Volt, 60 Hertz, AC ...
Owner's Manual (English)
Page 31
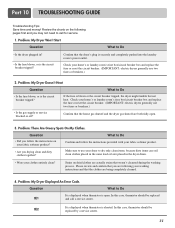
... cleansed during the washing process. Question What to Do • Is the dryer plugged in the dryer drum. • Were your fabric softener product. • Are you are both fully open . Review the charts on your dryer to Do • Is the fuse blown, or is shorted. Check your... on the following your washing instructions and that the dryer's plug is blown or the circuit breaker tripped, the dryer might tumble but not heat. Part 10 TROUBLESHOOTING GUIDE Troubleshooting Tips Save time and money! Please review and confirm that you drying clean and dirty clothes ...
... cleansed during the washing process. Question What to Do • Is the dryer plugged in the dryer drum. • Were your fabric softener product. • Are you are both fully open . Review the charts on your dryer to Do • Is the fuse blown, or is shorted. Check your... on the following your washing instructions and that the dryer's plug is blown or the circuit breaker tripped, the dryer might tumble but not heat. Part 10 TROUBLESHOOTING GUIDE Troubleshooting Tips Save time and money! Please review and confirm that you drying clean and dirty clothes ...
Owner's Manual (English)
Page 33
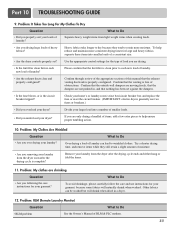
... after the drying cycle ends and either hang or fold the items. 11. Confirm through review of the appropriate sections of a consistent size. • Are the dryer controls properly set against the dampers. • Is the fuse blown, or is the circuit breaker tripped? What to Do Over ...that the outside wall dampers are moving freely, that the exhaust venting ductwork is free of smaller loads. • Did you overload your dryer? Other fabrics can lead to retain more consistent drying times for the type of laundry can be washed but will naturally shrink when washed...
... after the drying cycle ends and either hang or fold the items. 11. Confirm through review of the appropriate sections of a consistent size. • Are the dryer controls properly set against the dampers. • Is the fuse blown, or is the circuit breaker tripped? What to Do Over ...that the outside wall dampers are moving freely, that the exhaust venting ductwork is free of smaller loads. • Did you overload your dryer? Other fabrics can lead to retain more consistent drying times for the type of laundry can be washed but will naturally shrink when washed...


