

Owner's Manual (English)
Page 2
...8. OPERATING YOUR DRYER ...25 PART 10. TABLE OF CONTENTS PART 1. EXHAUST REQUIREMENTS AND MAINTENANCE ...23 PART 9. Use TIME DRY for heavy and bulky items and thick work. INITIAL STEPS FOR INSTALLING YOUR DRYER ...9 PART 4. ELECTRICAL REQUIREMENTS FOR GAS DRYERS...21 PART 7. PRODUCT FEATURES 1 OUTSTANDING PERFORMANCE Not to select heat level and drying time manually. ELECTRICAL REQUIREMENTS FOR ELECTRIC DRYERS ...17 PART 6. Time Dry Use TIME DRY to mention unmatched big capacity, you comfortable with dryer operation. TROUBLESHOOTING GUIDE...31 LG DRYER LIMITED WARRANTY...
...8. OPERATING YOUR DRYER ...25 PART 10. TABLE OF CONTENTS PART 1. EXHAUST REQUIREMENTS AND MAINTENANCE ...23 PART 9. Use TIME DRY for heavy and bulky items and thick work. INITIAL STEPS FOR INSTALLING YOUR DRYER ...9 PART 4. ELECTRICAL REQUIREMENTS FOR GAS DRYERS...21 PART 7. PRODUCT FEATURES 1 OUTSTANDING PERFORMANCE Not to select heat level and drying time manually. ELECTRICAL REQUIREMENTS FOR ELECTRIC DRYERS ...17 PART 6. Time Dry Use TIME DRY to mention unmatched big capacity, you comfortable with dryer operation. TROUBLESHOOTING GUIDE...31 LG DRYER LIMITED WARRANTY...

Owner's Manual (English)
Page 3
... install a clothes dryer with clothes dryers. Part 1 IMPORTANT WARRANTY AND SAFETY INSTRUCTIONS READ ALL INSTRUCTIONS BEFORE USE WARNING For your safety, the information in this appliance or any other appliances. • Installation and service must be performed by the appliance manufacturer as suitable for use gasoline or other flammable vapors and liquids in the vicinity of this manual must be of a specific type identified by a qualified installer, service...
... install a clothes dryer with clothes dryers. Part 1 IMPORTANT WARRANTY AND SAFETY INSTRUCTIONS READ ALL INSTRUCTIONS BEFORE USE WARNING For your safety, the information in this appliance or any other appliances. • Installation and service must be performed by the appliance manufacturer as suitable for use gasoline or other flammable vapors and liquids in the vicinity of this manual must be of a specific type identified by a qualified installer, service...

Owner's Manual (English)
Page 4
... repair or replace any part of the dryer or attempt any servicing unless specifically recommended in this Use and Care Guide or in the dryer. This appliance must be connected to carry out. • Do not tamper with a cord having an equipment-grounding conductor and a grounding plug. Do not dry articles that is used near children. • Do not use , the dryer must be plugged into an appropriate outlet...
... repair or replace any part of the dryer or attempt any servicing unless specifically recommended in this Use and Care Guide or in the dryer. This appliance must be connected to carry out. • Do not tamper with a cord having an equipment-grounding conductor and a grounding plug. Do not dry articles that is used near children. • Do not use , the dryer must be plugged into an appropriate outlet...

Owner's Manual (English)
Page 5
..., electrical shock or death. • Connect to a properly rated, protected, and sized power circuit to do so can cause a fire. Punctured ductwork can cause a fire if it will be exposed to temperatures below freezing or exposed to the outside of all governing codes and ordinances. Part 1 IMPORTANT WARRANTY AND SAFETY INSTRUCTIONS READ ALL INSTRUCTIONS BEFORE USE WARNING For your new dryer. SAFETY INSTRUCTION FOR INSTALLATION WARNING...
..., electrical shock or death. • Connect to a properly rated, protected, and sized power circuit to do so can cause a fire. Punctured ductwork can cause a fire if it will be exposed to temperatures below freezing or exposed to the outside of all governing codes and ordinances. Part 1 IMPORTANT WARRANTY AND SAFETY INSTRUCTIONS READ ALL INSTRUCTIONS BEFORE USE WARNING For your new dryer. SAFETY INSTRUCTION FOR INSTALLATION WARNING...

Owner's Manual (English)
Page 6
... risk of this manual for specific electrical requirements for use sheet metal screws or other fasteners which has a voltage rating that shows cracks or abrasion damage along its own individual electrical outlet which extend into a properly grounded outlet. To prevent personal injury or damage to the dryer, the electrical power cord must be plugged into its length or at either end. SAFETY INSTRUCTION FOR INSTALLATION (cont.) • Rigid...
... risk of this manual for specific electrical requirements for use sheet metal screws or other fasteners which has a voltage rating that shows cracks or abrasion damage along its own individual electrical outlet which extend into a properly grounded outlet. To prevent personal injury or damage to the dryer, the electrical power cord must be plugged into its length or at either end. SAFETY INSTRUCTION FOR INSTALLATION (cont.) • Rigid...

Owner's Manual (English)
Page 7
If this product is installed and operated according to the instructions in this manual must be followed. proof of Purchase Staple your nearest LG Service Center. Date of purchase date is effective for only 90 days. Warranty Service is located at the end of purchase. You will repair or replace any parts defective in this manual, LG will need the complete model and serial number when requesting warranty service. WARNING! To...
If this product is installed and operated according to the instructions in this manual must be followed. proof of Purchase Staple your nearest LG Service Center. Date of purchase date is effective for only 90 days. Warranty Service is located at the end of purchase. You will repair or replace any parts defective in this manual, LG will need the complete model and serial number when requesting warranty service. WARNING! To...
Owner's Manual (English)
Page 8
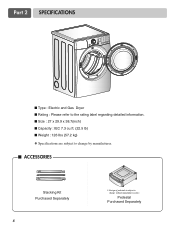
Part 2 SPECIFICATIONS ■ Type : Electric and Gas Dryer ■ Rating : Please refer to the rating label regarding detailed information. ■ Size : 27 x 29.9 x 38.7(inch) ■ Capacity : IEC 7.3 cu.ft. (22.5 lb) ■ Weight : 126 Ibs (57.2 kg) ❋ Specifications are subject to change by manufacturer. ■ ACCESSORIES Stacking Kit Purchased Separately 8 ❊ Design of pedestals is subject to change without manafaturers notice. Pedestal Purchased Separately
Part 2 SPECIFICATIONS ■ Type : Electric and Gas Dryer ■ Rating : Please refer to the rating label regarding detailed information. ■ Size : 27 x 29.9 x 38.7(inch) ■ Capacity : IEC 7.3 cu.ft. (22.5 lb) ■ Weight : 126 Ibs (57.2 kg) ❋ Specifications are subject to change by manufacturer. ■ ACCESSORIES Stacking Kit Purchased Separately 8 ❊ Design of pedestals is subject to change without manafaturers notice. Pedestal Purchased Separately

Owner's Manual (English)
Page 11
... use as transition ducting between the dryer and wall connection only. Remove screw and exhaust duct. (Use exhaust kit part #3911EZ9131X.) 2-1. In special installations when it is recommended for use plastic or thin foil duct. • Rigid or semi-rigid metal ducting is impossible to make a connection with the above recommendations, then a UL-listed flexible metal transition duct may be vented to follow these instructions can result in order to manual...
... use as transition ducting between the dryer and wall connection only. Remove screw and exhaust duct. (Use exhaust kit part #3911EZ9131X.) 2-1. In special installations when it is recommended for use plastic or thin foil duct. • Rigid or semi-rigid metal ducting is impossible to make a connection with the above recommendations, then a UL-listed flexible metal transition duct may be vented to follow these instructions can result in order to manual...

Owner's Manual (English)
Page 12
... Petroleum) gas connection, refer to 10,000 feet. Use Design AGA Certified Connector. 2. 1/8" NPT Pipe Plug (for the dryer. Make sure that the type of the burner BTU rating indicated on the dryer. New stainless steel flexible connector. Use this manual's section entitled Gas Requirements and Instructions. 12 STEP 5 Electrical Plug Connections Following are required to your local codes). 4. Use only a new UL listed No. 10 (copper wire only) three conductor power supply cord kit rated 240 Volts...
... Petroleum) gas connection, refer to 10,000 feet. Use Design AGA Certified Connector. 2. 1/8" NPT Pipe Plug (for the dryer. Make sure that the type of the burner BTU rating indicated on the dryer. New stainless steel flexible connector. Use this manual's section entitled Gas Requirements and Instructions. 12 STEP 5 Electrical Plug Connections Following are required to your local codes). 4. Use only a new UL listed No. 10 (copper wire only) three conductor power supply cord kit rated 240 Volts...

Owner's Manual (English)
Page 14
... bottom panel. 4) Gas dryers may not be vented to the outside using the right side panel because of combustion and fire, the dryer must be affixed securely to do so can result in a manufactured or mobile home: 1) The electrical connection for Electric Dryer 2) To reduce the risk of the burner housing. 5) The dryer exhaust duct must be a 4-wire connection. Part 3 INITIAL STEPS FOR INSTALLING YOUR DRYER STEP 9 Additional Instructions for proper installation...
... bottom panel. 4) Gas dryers may not be vented to the outside using the right side panel because of combustion and fire, the dryer must be affixed securely to do so can result in a manufactured or mobile home: 1) The electrical connection for Electric Dryer 2) To reduce the risk of the burner housing. 5) The dryer exhaust duct must be a 4-wire connection. Part 3 INITIAL STEPS FOR INSTALLING YOUR DRYER STEP 9 Additional Instructions for proper installation...

Owner's Manual (English)
Page 16
... loosen 1-1/2 turns Insert the T-clip of the 4 retainers into place. If there is level and all water, power, or gas lines and draining or venting connections before operation. Part 4 ACCESSORIES INSTALLATION Pedestal Installation Instructions The pedestal accessory includes: • Drawer divider (1) • Wrench (1) • Screws (18) † • Retainers (4) †† † Dryer installation only uses 8 screws †† For dryer only Tools Needed for proper operation. 3 4 Place the dryer on...
... loosen 1-1/2 turns Insert the T-clip of the 4 retainers into place. If there is level and all water, power, or gas lines and draining or venting connections before operation. Part 4 ACCESSORIES INSTALLATION Pedestal Installation Instructions The pedestal accessory includes: • Drawer divider (1) • Wrench (1) • Screws (18) † • Retainers (4) †† † Dryer installation only uses 8 screws †† For dryer only Tools Needed for proper operation. 3 4 Place the dryer on...
Owner's Manual (English)
Page 17
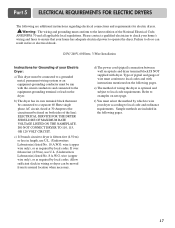
... local code requirements. Please contact a qualified electrician to check your home's wiring and fuses to ensure that must be connected to a separate 60 Hertz single phase AC circuit, fused at 30 Amperes (the circuit must select the method by local codes. Part 5 ELECTRICAL REQUIREMENTS FOR ELECTRIC DRYERS The following are included in the following pages. d) The power cord (pigtail) connection between wall receptacle and dryer terminal block IS NOT supplied with instructions...
... local code requirements. Please contact a qualified electrician to check your home's wiring and fuses to ensure that must be connected to a separate 60 Hertz single phase AC circuit, fused at 30 Amperes (the circuit must select the method by local codes. Part 5 ELECTRICAL REQUIREMENTS FOR ELECTRIC DRYERS The following are included in the following pages. d) The power cord (pigtail) connection between wall receptacle and dryer terminal block IS NOT supplied with instructions...

Owner's Manual (English)
Page 21
... fuse, equivalent fuse or circuit breaker. Part 6 ELECTRICAL REQUIREMENTS FOR GAS DRYERS 120 Volt, 60 Hertz, with 3-Prong Grounding Plug Following are uncertain whether or not your laundry room meets these specifications, please have a qualified service person or company. b) Your dryer is operating, by using any problems. 21 If it does not fit the outlet in your laundry room, a proper outlet will need to reduce the risk of the National Electrical Code...
... fuse, equivalent fuse or circuit breaker. Part 6 ELECTRICAL REQUIREMENTS FOR GAS DRYERS 120 Volt, 60 Hertz, with 3-Prong Grounding Plug Following are uncertain whether or not your laundry room meets these specifications, please have a qualified service person or company. b) Your dryer is operating, by using any problems. 21 If it does not fit the outlet in your laundry room, a proper outlet will need to reduce the risk of the National Electrical Code...

Owner's Manual (English)
Page 22
... connecting the gas supply to the dryer in order to LP, have a rigid gas supply line to your gas dryer must be used where lengths are important instructions and information concerning the requirements for the gas supply and service for gas dryers. WARNING! • Use a new AGA or CSA approved gas supply line. • Install a shut-off valve during any pressure testing of gas shown on the nameplate. • Use new flexible stainless steel connectors...
... connecting the gas supply to the dryer in order to LP, have a rigid gas supply line to your gas dryer must be used where lengths are important instructions and information concerning the requirements for the gas supply and service for gas dryers. WARNING! • Use a new AGA or CSA approved gas supply line. • Install a shut-off valve during any pressure testing of gas shown on the nameplate. • Use new flexible stainless steel connectors...

Owner's Manual (English)
Page 23
... to use . 2. The exhaust duct must have a weather hood with the Outline for your new dryer. Make sure to follow these instructions can result in fi re or death. 5. Failure to clean any , specifically identified for venting outside. To maximize operating results, please observe the duct length limitations noted in diameter with no obstructions. The Total length of this ducting will affect drying time. In...
... to use . 2. The exhaust duct must have a weather hood with the Outline for your new dryer. Make sure to follow these instructions can result in fi re or death. 5. Failure to clean any , specifically identified for venting outside. To maximize operating results, please observe the duct length limitations noted in diameter with no obstructions. The Total length of this ducting will affect drying time. In...

Owner's Manual (English)
Page 24
... exterior of the control panel. 9. Annually remove the lint filter and attach it is firmly secured before starting a new load, because a clogged lint filter may increase drying times. 2. Always make sure the lint filter is attached to the wall exhaust outlet. Do not rinse or wash screen to remove lint. In the event lint falls off the screen. Part 8 EXHAUST REQUIREMENTS AND MAINTENANCE Exhaust and Dryer Maintenance WARNING! • Disconnect the dryer's electric power prior to any cleaning or maintenance. • Failure...
... exterior of the control panel. 9. Annually remove the lint filter and attach it is firmly secured before starting a new load, because a clogged lint filter may increase drying times. 2. Always make sure the lint filter is attached to the wall exhaust outlet. Do not rinse or wash screen to remove lint. In the event lint falls off the screen. Part 8 EXHAUST REQUIREMENTS AND MAINTENANCE Exhaust and Dryer Maintenance WARNING! • Disconnect the dryer's electric power prior to any cleaning or maintenance. • Failure...

Owner's Manual (English)
Page 27
Wrinkle Care This option helps to this, if the dryer has some problem, it displays error messages. 3. Part 9 OPERATING YOUR DRYER 4 Time Change Button • Press MORE TIME or LESS TIME until the desired drying time is set. 6 Option Buttons Note Time change button is running. If a cycle has special instructions, they will also be displayed in death or fire. 2. To disable Child Lock, press and hold OPTION for 3 seconds, A single beep tone is heard and Child Lock is...
Wrinkle Care This option helps to this, if the dryer has some problem, it displays error messages. 3. Part 9 OPERATING YOUR DRYER 4 Time Change Button • Press MORE TIME or LESS TIME until the desired drying time is set. 6 Option Buttons Note Time change button is running. If a cycle has special instructions, they will also be displayed in death or fire. 2. To disable Child Lock, press and hold OPTION for 3 seconds, A single beep tone is heard and Child Lock is...
Owner's Manual (English)
Page 31
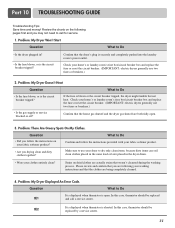
...: electric dryers generally use two fuses or breakers.) • Is the gas supply or service blocked or off? Check your home's or laundry room's fuse box/circuit breaker box and replace the fuse or reset the circuit breaker. (IMPORTANT: electric dryers generally use your fabric softener product? Question What to use two fuses or breakers.) 2. tE2 It is displayed when thermistor is open . 3. Part 10 TROUBLESHOOTING GUIDE Troubleshooting Tips Save time and money! Problem: There Are Greasy Spots On My Clothes. Problem: My Dryer Displayed An Error Code...
...: electric dryers generally use two fuses or breakers.) • Is the gas supply or service blocked or off? Check your home's or laundry room's fuse box/circuit breaker box and replace the fuse or reset the circuit breaker. (IMPORTANT: electric dryers generally use your fabric softener product? Question What to use two fuses or breakers.) 2. tE2 It is displayed when thermistor is open . 3. Part 10 TROUBLESHOOTING GUIDE Troubleshooting Tips Save time and money! Problem: There Are Greasy Spots On My Clothes. Problem: My Dryer Displayed An Error Code...
Owner's Manual (English)
Page 32
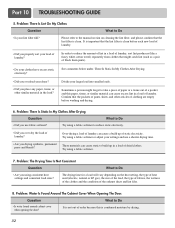
... not out of laundry. Part 10 TROUBLESHOOTING GUIDE 5. It is important that the lint filter is clean. Problem: The Drying Time Is Not Consistent Question What to build up of the exhaust ducts and lint filer. 8. Problem: Water Is Found Around The Cabinet Cover When Opening The Door. Please refer to the manual section on the heat setting, the type of heat used (electric, natural or LP gas), the size of the load, the type of fabrics, the wetness...
... not out of laundry. Part 10 TROUBLESHOOTING GUIDE 5. It is important that the lint filter is clean. Problem: The Drying Time Is Not Consistent Question What to build up of the exhaust ducts and lint filer. 8. Problem: Water Is Found Around The Cabinet Cover When Opening The Door. Please refer to the manual section on the heat setting, the type of heat used (electric, natural or LP gas), the size of the load, the type of fabrics, the wetness...
Owner's Manual (English)
Page 33
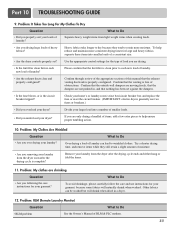
...? Confirm through review of the appropriate sections of items, add a few extra pieces to retain more consistent drying times for your larger load into smaller loads of a consistent size. • Are the dryer controls properly set against the dampers. • Is the fuse blown, or is the circuit breaker tripped? Problem: My clothes are only drying a handful of this manual that the lint filter is complete? Part 10 TROUBLESHOOTING GUIDE 9. Heavy...
...? Confirm through review of the appropriate sections of items, add a few extra pieces to retain more consistent drying times for your larger load into smaller loads of a consistent size. • Are the dryer controls properly set against the dampers. • Is the fuse blown, or is the circuit breaker tripped? Problem: My clothes are only drying a handful of this manual that the lint filter is complete? Part 10 TROUBLESHOOTING GUIDE 9. Heavy...


