
Owners Manual
Page 2
... the Dryer 15 Reversing the Door 16 Installing the Side Vent Kit 17 Stacking the Dryer 18 Venting the Dryer 20 Connecting the Inlet Hose (Steam Models) 21 Connecting Gas Dryers 23 Connecting Electric Dryers 28 Special Electrical Requirements 28 Final Installation Check 29 Installation Test (Duct Check) 32 OPERATION 32 Using the Dryer 33 Check the Lint Filter Before Every Load 33 Sorting Laundry 33 Loading the Dryer 34 Control Panel 37 Cycle Guide 41 Cycle Modifier Buttons 41 Option Buttons 42 Special Functions 43 Steam Functions (Steam Models) 45 SMART FUNCTIONS 45 LG SmartThinQ Application...
... the Dryer 15 Reversing the Door 16 Installing the Side Vent Kit 17 Stacking the Dryer 18 Venting the Dryer 20 Connecting the Inlet Hose (Steam Models) 21 Connecting Gas Dryers 23 Connecting Electric Dryers 28 Special Electrical Requirements 28 Final Installation Check 29 Installation Test (Duct Check) 32 OPERATION 32 Using the Dryer 33 Check the Lint Filter Before Every Load 33 Sorting Laundry 33 Loading the Dryer 34 Control Panel 37 Cycle Guide 41 Cycle Modifier Buttons 41 Option Buttons 42 Special Functions 43 Steam Functions (Steam Models) 45 SMART FUNCTIONS 45 LG SmartThinQ Application...

Owners Manual
Page 3
...; Download the new LG smart phone app to the Customer Information Center. DE S IG N ER TIFIED Protocol P154 Sanitization Performance of a button. PRODUCT FEATURES PRODUCT FEATURES 3 ENGLISH C Easy-to-Use Control Panel Rotate the cycle selector knob to remove the restrictions. If you see the alert: Clean or repair the ducts to select the desired dry cycle. Easy-Access Reversible Door The wide-opening door provides easy access for installation location...
...; Download the new LG smart phone app to the Customer Information Center. DE S IG N ER TIFIED Protocol P154 Sanitization Performance of a button. PRODUCT FEATURES PRODUCT FEATURES 3 ENGLISH C Easy-to-Use Control Panel Rotate the cycle selector knob to remove the restrictions. If you see the alert: Clean or repair the ducts to select the desired dry cycle. Easy-Access Reversible Door The wide-opening door provides easy access for installation location...
Owners Manual
Page 4
... specific type identified by the appliance manufacturer as suitable for use with flexible plastic venting materials. All safety messages will tell you how to follow instructions. WARNING- If flexible metal (foil type) duct is the safety alert symbol. Flexible venting... installer, service agency or your appliance. Immediately call the fire department. ••Installation and service must be easily crushed, and trap lint. Follow the gas supplier's instructions. - This symbol alerts you to the manufacturer's instructions and local codes. ••Clothes dryer installation ...
... specific type identified by the appliance manufacturer as suitable for use with flexible plastic venting materials. All safety messages will tell you how to follow instructions. WARNING- If flexible metal (foil type) duct is the safety alert symbol. Flexible venting... installer, service agency or your appliance. Immediately call the fire department. ••Installation and service must be easily crushed, and trap lint. Follow the gas supplier's instructions. - This symbol alerts you to the manufacturer's instructions and local codes. ••Clothes dryer installation ...

Owners Manual
Page 5
... properly installed as described in this manual. ••Connect to a properly rated, protected, and sized power circuit to avoid electrical overload. ••To reduce the risk of severe injury or death, follow all industry recommended safety procedures including the use of long sleeved gloves and safety glasses. ••Never attempt to operate this appliance if it will obstruct clothes dryer...
... properly installed as described in this manual. ••Connect to a properly rated, protected, and sized power circuit to avoid electrical overload. ••To reduce the risk of severe injury or death, follow all industry recommended safety procedures including the use of long sleeved gloves and safety glasses. ••Never attempt to operate this appliance if it will obstruct clothes dryer...

Owners Manual
Page 6
... external switching device, such as a timer, or connected to prevent backdraft when the dryer is not exhausted outdoors, some fine lint and large amounts of the exhaust system. Do not use a cord that have hinged dampers to a circuit that could affect drying time. ••Ductwork is recommended for their safety. Secure all power cords that shows cracks or abrasion damage along its length or...
... external switching device, such as a timer, or connected to prevent backdraft when the dryer is not exhausted outdoors, some fine lint and large amounts of the exhaust system. Do not use a cord that have hinged dampers to a circuit that could affect drying time. ••Ductwork is recommended for their safety. Secure all power cords that shows cracks or abrasion damage along its length or...

Owners Manual
Page 8
...;•Clean the lint filter before cleaning and attempting any user maintenance. Electrical shock may create an electric shock hazard and/or a fire hazard. if it will reduce the risk of electric shock by yourself. ••Remove any dust or foreign matter from the power plug pins. ••Disconnect this Owner's Manual. Check with the appliance; 8 SAFETY INSTRUCTIONS MAINTENANCE ••Do not repair or replace any part...
...;•Clean the lint filter before cleaning and attempting any user maintenance. Electrical shock may create an electric shock hazard and/or a fire hazard. if it will reduce the risk of electric shock by yourself. ••Remove any dust or foreign matter from the power plug pins. ••Disconnect this Owner's Manual. Check with the appliance; 8 SAFETY INSTRUCTIONS MAINTENANCE ••Do not repair or replace any part...

Owners Manual
Page 10
... door open) Gas : 123.02 lb (55.8kg) - 126.77 lb (57.5kg) Electric : 120.15 lb (54.5kg) - 123.46 lb (56kg) - Check and choose the proper location Level the dryer Vent the dryer Connect the inlet hose (steam models) Connect the Gas dryer Connect the Electric dryer Gas dryer Electric dryer Plug in the power cord Installation test Test run Product Specifications The appearance and specifications listed in this product or transporting it to another location. 10 INSTALLATION INSTALLATION Installation Overview Please read the following installation instructions...
... door open) Gas : 123.02 lb (55.8kg) - 126.77 lb (57.5kg) Electric : 120.15 lb (54.5kg) - 123.46 lb (56kg) - Check and choose the proper location Level the dryer Vent the dryer Connect the inlet hose (steam models) Connect the Gas dryer Connect the Electric dryer Gas dryer Electric dryer Plug in the power cord Installation test Test run Product Specifications The appearance and specifications listed in this product or transporting it to another location. 10 INSTALLATION INSTALLATION Installation Overview Please read the following installation instructions...

Owners Manual
Page 11
... automatic cycle. See Venting the Dryer. ••A grounded electrical outlet located within 2 ft. (61 cm) of either side of the dryer. • Do not operate your dryer. At lower temperatures, the dryer might be required for proper exhaust installation. Contact your dryer! Clothes may not tumble properly, and automatic sensor cycles may not operate correctly if the dryer is not level. • For garage installation, you review this entire manual before installing and operating...
... automatic cycle. See Venting the Dryer. ••A grounded electrical outlet located within 2 ft. (61 cm) of either side of the dryer. • Do not operate your dryer. At lower temperatures, the dryer might be required for proper exhaust installation. Contact your dryer! Clothes may not tumble properly, and automatic sensor cycles may not operate correctly if the dryer is not level. • For garage installation, you review this entire manual before installing and operating...

Owners Manual
Page 16
... (right-side venting is not available on gas models). Secure it in place with duct tape. Bracket Knockout Cover Plate Elbow Your new dryer is not available on gas models). Adapter Duct Rear Exhaust Duct Option 1: Side Venting 2 Press the tabs on the knockout and carefully remove the knockout for the desired vent opening and press it to the base of the dryer with the included screw. An adapter kit, part number...
... (right-side venting is not available on gas models). Secure it in place with duct tape. Bracket Knockout Cover Plate Elbow Your new dryer is not available on gas models). Adapter Duct Rear Exhaust Duct Option 1: Side Venting 2 Press the tabs on the knockout and carefully remove the knockout for the desired vent opening and press it to the base of the dryer with the included screw. An adapter kit, part number...

Owners Manual
Page 21
... connector. • A gas shutoff valve must be installed within at least 6 ft. (1.8 m) of the dryer, in accordance with local codes and regulations. Make sure that is encountered, it replaced with a properly grounded 3-prong wall outlet. grounded outlet protected by a 15-ampere fuse or circuit breaker. • Where a standard 2-prong wall outlet is insoluble in propane (LP) gas on all gas connections. • Connect the dryer to the type of gas shown on the dryer...
... connector. • A gas shutoff valve must be installed within at least 6 ft. (1.8 m) of the dryer, in accordance with local codes and regulations. Make sure that is encountered, it replaced with a properly grounded 3-prong wall outlet. grounded outlet protected by a 15-ampere fuse or circuit breaker. • Where a standard 2-prong wall outlet is insoluble in propane (LP) gas on all gas connections. • Connect the dryer to the type of gas shown on the dryer...

Owners Manual
Page 23
... required by local codes. A 4-wire connection must be installed by a qualified electrician. • Connect the power cord to the terminal block. ELECTRICAL SERVICE FOR THE DRYER SHOULD BE OF THE MAXIMUM RATE VOLTAGE LISTED ON THE NAMEPLATE. ENGLISH Each colored wire should be connected to a 4-hole outlet. • If the plug does not fit the outlet, a proper outlet will need to be fused on both sides of the line). Wire color indicated on manual is prohibited. Connecting Electric Dryers...
... required by local codes. A 4-wire connection must be installed by a qualified electrician. • Connect the power cord to the terminal block. ELECTRICAL SERVICE FOR THE DRYER SHOULD BE OF THE MAXIMUM RATE VOLTAGE LISTED ON THE NAMEPLATE. ENGLISH Each colored wire should be connected to a 4-hole outlet. • If the plug does not fit the outlet, a proper outlet will need to be fused on both sides of the line). Wire color indicated on manual is prohibited. Connecting Electric Dryers...

Owners Manual
Page 28
... contact a service and installation professional for an electric dryer must be a 4-wire connection. Checking Airflow Effective dryer operation requires proper airflow. Testing Dryer Heating GAS MODELS Close the dryer door and press the Power button to the manufactured or mobile home structure, and the exhaust duct must comply with a manometer, placed on . Gas dryers may be vented to the outside using the back, left , right, or bottom panel. ••Gas dryers may not be vented to the outside using the...
... contact a service and installation professional for an electric dryer must be a 4-wire connection. Checking Airflow Effective dryer operation requires proper airflow. Testing Dryer Heating GAS MODELS Close the dryer door and press the Power button to the manufactured or mobile home structure, and the exhaust duct must comply with a manometer, placed on . Gas dryers may be vented to the outside using the back, left , right, or bottom panel. ••Gas dryers may not be vented to the outside using the...

Owners Manual
Page 30
... complete exhaust system and venting requirements. • Your dryer features Flow Sense™, an innovative sensing system that house gas shutoff and the dryer gas shutoff are both fully open. Do not increase the fuse capacity. House fuse is blown, circuit breaker has tripped, or power outage has occurred. Error Code tE1 or tE2 HS PS, PF, or nP gAS Possible Causes Temperature sensor failure. Repair or replace the exhaust system as this manual...
... complete exhaust system and venting requirements. • Your dryer features Flow Sense™, an innovative sensing system that house gas shutoff and the dryer gas shutoff are both fully open. Do not increase the fuse capacity. House fuse is blown, circuit breaker has tripped, or power outage has occurred. Error Code tE1 or tE2 HS PS, PF, or nP gAS Possible Causes Temperature sensor failure. Repair or replace the exhaust system as this manual...

Owners Manual
Page 43
... use Steam Fresh™ with items such as a comforter. Press the More Time or Less Time button to change the display to reduce the static electricity caused by dry fabrics rubbing together. OPERATION 43 The Steam Options The Reduce Static option injects steam late in the drying cycle to reflect the number of items in the load. Do not overload. • When the filter/duct is operating, the drum...
... use Steam Fresh™ with items such as a comforter. Press the More Time or Less Time button to change the display to reduce the static electricity caused by dry fabrics rubbing together. OPERATION 43 The Steam Options The Reduce Static option injects steam late in the drying cycle to reflect the number of items in the load. Do not overload. • When the filter/duct is operating, the drum...
Owners Manual
Page 50
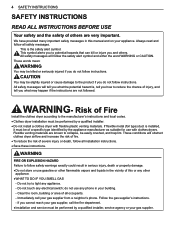
... Steam Fresh™ cycle? A: Proper airflow is excessively long, needs to the point that has *Control Lock on or under it for the number of clothes dryers. Another factor affecting dry time is how the Wrinkle Care feature works. Scan this QR code to adjust the load size setting for 3 seconds. A: This is your home exhaust system. The dryer runs briefly every few minutes? Use the More Time or Less Time buttons to quickly access the 2 Type Dryer...
... Steam Fresh™ cycle? A: Proper airflow is excessively long, needs to the point that has *Control Lock on or under it for the number of clothes dryers. Another factor affecting dry time is how the Wrinkle Care feature works. Scan this QR code to adjust the load size setting for 3 seconds. A: This is your home exhaust system. The dryer runs briefly every few minutes? Use the More Time or Less Time buttons to quickly access the 2 Type Dryer...
Owners Manual
Page 51
... dryer gas shutoff valves are blocked, dirty, or duct run is too long. ENERGY SAVER option selected (on Possible Cause After clearing the restriction, the Flow Sense™ system requires multiple, consecutive cycles to determine that outside wall dampers can fool the sensor because the light items dry faster. ••Check the power supply or the connection of the power cord to dry Exhaust ducts are both fully open . Do not increase fuse capacity...
... dryer gas shutoff valves are blocked, dirty, or duct run is too long. ENERGY SAVER option selected (on Possible Cause After clearing the restriction, the Flow Sense™ system requires multiple, consecutive cycles to determine that outside wall dampers can fool the sensor because the light items dry faster. ••Check the power supply or the connection of the power cord to dry Exhaust ducts are both fully open . Do not increase fuse capacity...

Owners Manual
Page 52
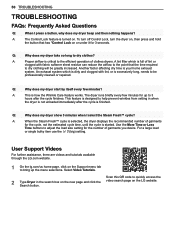
... size. ••Use the appropriate control settings for proper drying. ••Remove the lint from the filter before every load. Dryer controls are not set properly. Even an unbalanced load in the washer can cause poor spinning, resulting in wetter clothes which will vary depending on some extra wet clothes to pause the cycle and clean the filter during the cycle. ••Reset circuit breaker or replace fuse. 52 TROUBLESHOOTING Problem Clothes take too long to dry Drying time is...
... size. ••Use the appropriate control settings for proper drying. ••Remove the lint from the filter before every load. Dryer controls are not set properly. Even an unbalanced load in the washer can cause poor spinning, resulting in wetter clothes which will vary depending on some extra wet clothes to pause the cycle and clean the filter during the cycle. ••Reset circuit breaker or replace fuse. 52 TROUBLESHOOTING Problem Clothes take too long to dry Drying time is...

Owners Manual
Page 53
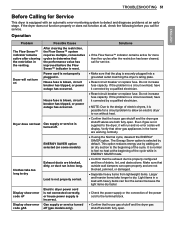
.... Adjust settings and use a shorter drying time, or use SENSOR DRY cycles. ••Divide extra large loads into smaller loads for your washer and detergent. Clothes left in dryer too long after cycle ends. Make sure that clothes are being followed. This feature will tumble the clothes briefly every few minutes for up to a light to the clean clothes in a dryer. Other fabrics can cause a buildup of static electricity. With the lint removed...
.... Adjust settings and use a shorter drying time, or use SENSOR DRY cycles. ••Divide extra large loads into smaller loads for your washer and detergent. Clothes left in dryer too long after cycle ends. Make sure that clothes are being followed. This feature will tumble the clothes briefly every few minutes for up to a light to the clean clothes in a dryer. Other fabrics can cause a buildup of static electricity. With the lint removed...

Owners Manual
Page 57
... to the instructions outlined in -home service to state. repair or replacement of fuses or correction of wiring or plumbing, or correction of unauthorized repairs/installation. ••Failure of the product to perform during power failures and interrupted or inadequate electrical service. ••Damage caused by leaky or broken water pipes, frozen water pipes, restricted drain lines, inadequate or interrupted water supply or...
... to the instructions outlined in -home service to state. repair or replacement of fuses or correction of wiring or plumbing, or correction of unauthorized repairs/installation. ••Failure of the product to perform during power failures and interrupted or inadequate electrical service. ••Damage caused by leaky or broken water pipes, frozen water pipes, restricted drain lines, inadequate or interrupted water supply or...

Owners Manual
Page 58
... product's owner's manual. ••Costs associated with removal of parts not approved or specified by the consumer. Improper repair includes use (e.g. Not heating, long dry time Clean the lint filter. Excessive duct length and/or multiple elbows Not heating, long dry time Improperly connected power cord or electrical outlet issue. Open the gas valve. For further assistance, write: LG Electronics, 201 James Record Road, Huntsville, Alabama 35813 Filter is clogged. Duct is clogged. Door Reversal Instructions for door reversal can be borne by LG. The...
... product's owner's manual. ••Costs associated with removal of parts not approved or specified by the consumer. Improper repair includes use (e.g. Not heating, long dry time Clean the lint filter. Excessive duct length and/or multiple elbows Not heating, long dry time Improperly connected power cord or electrical outlet issue. Open the gas valve. For further assistance, write: LG Electronics, 201 James Record Road, Huntsville, Alabama 35813 Filter is clogged. Duct is clogged. Door Reversal Instructions for door reversal can be borne by LG. The...


