Owner's Manual
Page 2
... Parts and Components 9 INSTALLATION INSTRUCTIONS IMPORTANT: Read all installation instructions completely before installing and operating your purchase and welcome to the LG family. Your new LG Dryer combines the most advanced drying sensor technology with many years of reliable service. Congratulations on your dryer 10 Choose the Proper Location 10 Clearances 10 Installation...
... Parts and Components 9 INSTALLATION INSTRUCTIONS IMPORTANT: Read all installation instructions completely before installing and operating your purchase and welcome to the LG family. Your new LG Dryer combines the most advanced drying sensor technology with many years of reliable service. Congratulations on your dryer 10 Choose the Proper Location 10 Clearances 10 Installation...

Owner's Manual
Page 4
...fabric softeners or products to eliminate static unless recommended by the manufacturer of the fabric softener or product. • Do not use heat to dry articles containing foam rubber or similarly textured rubber-like materials. • Keep area around the exhaust opening and adjacent surrounding areas free from ... • Do not reach into the dryer if the drum or any other part is removed from service or discarded, remove the door to the drying compartment. • The interior of the dryer for foreign objects. • Clean lint screen before using this manual. • Do not place ...
...fabric softeners or products to eliminate static unless recommended by the manufacturer of the fabric softener or product. • Do not use heat to dry articles containing foam rubber or similarly textured rubber-like materials. • Keep area around the exhaust opening and adjacent surrounding areas free from ... • Do not reach into the dryer if the drum or any other part is removed from service or discarded, remove the door to the drying compartment. • The interior of the dryer for foreign objects. • Clean lint screen before using this manual. • Do not place ...

Owner's Manual
Page 6
... above recommendations, a ULlisted flexible metal transition duct may be exhausted to the outside of the dwelling. Failure to clean any area of moisture will affect drying time.
... above recommendations, a ULlisted flexible metal transition duct may be exhausted to the outside of the dwelling. Failure to clean any area of moisture will affect drying time.

Owner's Manual
Page 8
... of a button. 2 EASY-ACCESS REVERSIBLE DOOR Wide-opening door provides easy access for loading and unloading. Door swing can be reversed to select the desired dry cycle. The drum is equipped with a yellow light that reduce exhaust flow from the dryer. Adjust settings and add cycle options with DRUM Light The...
... of a button. 2 EASY-ACCESS REVERSIBLE DOOR Wide-opening door provides easy access for loading and unloading. Door swing can be reversed to select the desired dry cycle. The drum is equipped with a yellow light that reduce exhaust flow from the dryer. Adjust settings and add cycle options with DRUM Light The...

Owner's Manual
Page 9
... two in the back) adjust to be placed in a flat position for drying. 1 2 Power Cord Location (Gas Models) Terminal Block Access Panel (Electric Models) Included Accessories 3 Drying Rack Gas Connection Location (Gas Models) Exhaust Duct Outlet Rear of Dryer 9 The drying rack allows items, such as sweaters, delicates, and gym shoes, to improve...
... two in the back) adjust to be placed in a flat position for drying. 1 2 Power Cord Location (Gas Models) Terminal Block Access Panel (Electric Models) Included Accessories 3 Drying Rack Gas Connection Location (Gas Models) Exhaust Duct Outlet Rear of Dryer 9 The drying rack allows items, such as sweaters, delicates, and gym shoes, to improve...

Owner's Manual
Page 12
... Latch Screws Hinge Screws 1 Open the dryer door. Reinstall the door latch and the 4 screws. LEVELING THE DRYER To ensure that the dryer provides optimal drying performance, it . Raise or lower the leveling feet until dryer is reversed, and reattach the door using the 2 screws previously removed. REVERSING THE DOOR SWING...
... Latch Screws Hinge Screws 1 Open the dryer door. Reinstall the door latch and the 4 screws. LEVELING THE DRYER To ensure that the dryer provides optimal drying performance, it . Raise or lower the leveling feet until dryer is reversed, and reattach the door using the 2 screws previously removed. REVERSING THE DOOR SWING...
Owner's Manual
Page 14
... outside. Failure to follow these instructions can result in fire or death. • Do not allow ductwork to persons when using this ducting will affect drying time. Failure to follow these instructions can result in fire or death. • Gas dryers MUST exhaust to follow these instructions can result in fire...
... outside. Failure to follow these instructions can result in fire or death. • Do not allow ductwork to persons when using this ducting will affect drying time. Failure to follow these instructions can result in fire or death. • Gas dryers MUST exhaust to follow these instructions can result in fire...

Owner's Manual
Page 15
Dia. Routing and Connecting Ductwork Follow the guidelines below to exhaust the dryer correctly will void the dryer's warranty. IMPORTANT: Failure to maximize drying performance and reduce lint buildup and condensation in the ductwork. Length of exhaust duct must point away from the dryer. • Use duct tape on ...
Dia. Routing and Connecting Ductwork Follow the guidelines below to exhaust the dryer correctly will void the dryer's warranty. IMPORTANT: Failure to maximize drying performance and reduce lint buildup and condensation in the ductwork. Length of exhaust duct must point away from the dryer. • Use duct tape on ...

Owner's Manual
Page 24
... during the two tests may not be performed before proceeding. (Gas dryer only) Then perform the duct condition test below. 1 Press and hold the DAMP DRY BEEP and TEMP CONTROL buttons at the same time. If all bars are shown in the ductwork. IMPORTANT: Do NOT interrrupt the test cycle! Correct... duct condition test cycle: NOTE: Dryer heating test must be the same. If no bars are lit, the dryer ductwork has a blockage that needs to dry faster and reduces energy use. The dryer will show lnS in the number display to air flow in the display, the ductwork is in dryer...
... during the two tests may not be performed before proceeding. (Gas dryer only) Then perform the duct condition test below. 1 Press and hold the DAMP DRY BEEP and TEMP CONTROL buttons at the same time. If all bars are shown in the ductwork. IMPORTANT: Do NOT interrrupt the test cycle! Correct... duct condition test cycle: NOTE: Dryer heating test must be the same. If no bars are lit, the dryer ductwork has a blockage that needs to dry faster and reduces energy use. The dryer will show lnS in the number display to air flow in the display, the ductwork is in dryer...

Owner's Manual
Page 25
... into loads that have different care requirements, and some fabrics will increase drying times. Fabric Care Labels Tumble dry Dry Normal Permanent Press/ wrinkle resistant Heat setting Gentle/ delicate Do not tumble dry Do not dry (used with your new dryer. CHECK THE LINT FILTER BEFORE EVERY LOAD... may damage the dryer and articles in fire, explosion, or death. • Never dry clothes that can damage both your dryer and your clothes. clothes require room to tumble to dry properly. • Close zippers, hooks, and drawstrings to prevent these items from snagging ...
... into loads that have different care requirements, and some fabrics will increase drying times. Fabric Care Labels Tumble dry Dry Normal Permanent Press/ wrinkle resistant Heat setting Gentle/ delicate Do not tumble dry Do not dry (used with your new dryer. CHECK THE LINT FILTER BEFORE EVERY LOAD... may damage the dryer and articles in fire, explosion, or death. • Never dry clothes that can damage both your dryer and your clothes. clothes require room to tumble to dry properly. • Close zippers, hooks, and drawstrings to prevent these items from snagging ...

Owner's Manual
Page 26
... remaining, options, and status messages for your new dryer. Please refer to turn the dryer ON. On MANUAL DRY cycles, these buttons with MANUAL DRY and TIME DRY cycles to START the selected cycle. Certain buttons also allow you to activate special functions by pressing and holding the...PAUSE BUTTON Press this button to decrease the cycle time by a minute. If the dryer is running, use this button to adjust the drying time. press LESS TIME to PAUSE the cycle without losing the current settings. For detailed information about the individual options, please see the ...
... remaining, options, and status messages for your new dryer. Please refer to turn the dryer ON. On MANUAL DRY cycles, these buttons with MANUAL DRY and TIME DRY cycles to START the selected cycle. Certain buttons also allow you to activate special functions by pressing and holding the...PAUSE BUTTON Press this button to decrease the cycle time by a minute. If the dryer is running, use this button to adjust the drying time. press LESS TIME to PAUSE the cycle without losing the current settings. For detailed information about the individual options, please see the ...

Owner's Manual
Page 27
... No Heat High Adjustable Off Ultra Low Low 25 Adjustable 20 Adjustable 30 Adjustable 40 Adjustable 50 Adjustable Sensor Dry Cycles Manual Dry Cycles Sensor Dry cycles utilize LG's unique dual sensor system to detect and compare the moisture level in clothes and in the display. High 55... Towels heavy cottons Adjustable Normal Normal Work clothes, corduroys, etc. Type Cycle Fabric Type Dry Level Jeansm Normal Heavy Duty ...
... No Heat High Adjustable Off Ultra Low Low 25 Adjustable 20 Adjustable 30 Adjustable 40 Adjustable 50 Adjustable Sensor Dry Cycles Manual Dry Cycles Sensor Dry cycles utilize LG's unique dual sensor system to detect and compare the moisture level in clothes and in the display. High 55... Towels heavy cottons Adjustable Normal Normal Work clothes, corduroys, etc. Type Cycle Fabric Type Dry Level Jeansm Normal Heavy Duty ...

Owner's Manual
Page 28
...5 2 31 4 1 ESTIMATED TIME REMAINING When the START/PAUSE button is pressed, the display will indicate the estimated time remaining for the selected drying cycle. 2 CYCLE COMPLETION INDICATOR WITH CHECK FILTER REMINDER This portion of the display shows which stage of the... drying cycle is currently underway (CHECK FILTER, DRYING, COOLING, or WRINKLE CARE). 3 Child Lock Indicator When CHILD LOCK is operating. 4 LINT FILTER INDICATOR The dryer automatically detects reduced air flow ...
...5 2 31 4 1 ESTIMATED TIME REMAINING When the START/PAUSE button is pressed, the display will indicate the estimated time remaining for the selected drying cycle. 2 CYCLE COMPLETION INDICATOR WITH CHECK FILTER REMINDER This portion of the display shows which stage of the... drying cycle is currently underway (CHECK FILTER, DRYING, COOLING, or WRINKLE CARE). 3 Child Lock Indicator When CHILD LOCK is operating. 4 LINT FILTER INDICATOR The dryer automatically detects reduced air flow ...

Owner's Manual
Page 29
...To clean, pull the lint filter straight up to 3 hours. The display will show that cycle, such as WRINKLE CARE, ANTI BACTERIAL, or DAMP DRY BEEP, by pressing the button for that option has been selected. The indicator light on the dryer. To prevent wrinkling, remove items from the dryer...clean the lint filter after every cycle. Do not rinse or wash the filter to the desired cycle. NOTE: To protect your garments, not every dry level, temperature, or option is available with every cycle. 4 Select any time, for the desired setting is available with every cycle. 29 To ...
...To clean, pull the lint filter straight up to 3 hours. The display will show that cycle, such as WRINKLE CARE, ANTI BACTERIAL, or DAMP DRY BEEP, by pressing the button for that option has been selected. The indicator light on the dryer. To prevent wrinkling, remove items from the dryer...clean the lint filter after every cycle. Do not rinse or wash the filter to the desired cycle. NOTE: To protect your garments, not every dry level, temperature, or option is available with every cycle. 4 Select any time, for the desired setting is available with every cycle. 29 To ...
Owner's Manual
Page 30
...Selects the level of your garments, not every dryness level, temperature, or option is available with SENSOR DRY cycles. • The dryer will decrease the cycle time. • Use a LESS DRY or DAMP DRY setting for the desired setting is lit. • This option is lit. 30 NOTE: To protect... CONTROL button until the indicator light for the desired setting is only available with every cycle. Selecting VERY DRY or MORE DRY will increase the cycle time, while LESS DRY or DAMP DRY will automatically adjust the cycle time. Use the MORE TIME/ LESS TIME buttons to HIGH. Press the ...
...Selects the level of your garments, not every dryness level, temperature, or option is available with SENSOR DRY cycles. • The dryer will decrease the cycle time. • Use a LESS DRY or DAMP DRY setting for the desired setting is lit. • This option is lit. 30 NOTE: To protect... CONTROL button until the indicator light for the desired setting is only available with every cycle. Selecting VERY DRY or MORE DRY will increase the cycle time, while LESS DRY or DAMP DRY will automatically adjust the cycle time. Use the MORE TIME/ LESS TIME buttons to HIGH. Press the ...

Owner's Manual
Page 31
... to select the desired cycle. 2 Use the cycle settings buttons to adjust the settings for the option you to 3 hours after using the RACK DRY cycle. 31 The dryer will add a high heat setting to meet your individual needs. WRINKLE CARE Selecting this option, the dryer will tumble the... load periodically for 3 seconds. NOTE: Do not use the rack with items that should not be used with a tumble dry cycle. This is approximately 80% dry. This allows you would like to start automatically. NOTE: NEVER use this cycle with the HEAVY DUTY, COTTON/ TOWELS, and NORMAL ...
... to select the desired cycle. 2 Use the cycle settings buttons to adjust the settings for the option you to 3 hours after using the RACK DRY cycle. 31 The dryer will add a high heat setting to meet your individual needs. WRINKLE CARE Selecting this option, the dryer will tumble the... load periodically for 3 seconds. NOTE: Do not use the rack with items that should not be used with a tumble dry cycle. This is approximately 80% dry. This allows you would like to start automatically. NOTE: NEVER use this cycle with the HEAVY DUTY, COTTON/ TOWELS, and NORMAL ...
Owner's Manual
Page 32
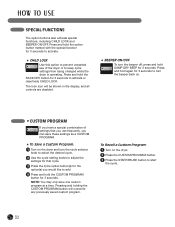
... Program: 1 Turn on the dryer. 2 Press the CUSTOM PROGRAM button. 3 Press the START/PAUSE button to activate or deactivate CHILD LOCK. Press and hold DAMP DRY BEEP for 3 seconds to start the cycle. 32 SPECIAL FUNCTIONS The option buttons also activate special functions, including CHILD LOCK and BEEPER ON/OFF. To... Recall a Custom Program: 1 Turn on the dryer and turn the beeper off, press and hold the RACK DRY button for 3 seconds. The lock icon will overwrite any previously saved custom program.
... Program: 1 Turn on the dryer. 2 Press the CUSTOM PROGRAM button. 3 Press the START/PAUSE button to activate or deactivate CHILD LOCK. Press and hold DAMP DRY BEEP for 3 seconds to start the cycle. 32 SPECIAL FUNCTIONS The option buttons also activate special functions, including CHILD LOCK and BEEPER ON/OFF. To... Recall a Custom Program: 1 Turn on the dryer and turn the beeper off, press and hold the RACK DRY button for 3 seconds. The lock icon will overwrite any previously saved custom program.

Owner's Manual
Page 33
...Cleaning the Lint Filter Lint Filter Cleaning the Interior Wipe around the dryer and underneath it regularly. then wipe dry. If any noticeable reduction in airflow or drying performance occurs, immediately check ductwork for obstructions and blockages. Failure to follow this appliance, follow basic precautions, including... Proper care of electric shock. NOTE: NEVER operate the dryer without the lint filter in warm, soapy water and allow to dry thoroughly before every cycle or when the CHECK FILTER indicator lights during a cycle. Then: 1 Roll any lint off any noticeable reduction...
...Cleaning the Lint Filter Lint Filter Cleaning the Interior Wipe around the dryer and underneath it regularly. then wipe dry. If any noticeable reduction in airflow or drying performance occurs, immediately check ductwork for obstructions and blockages. Failure to follow this appliance, follow basic precautions, including... Proper care of electric shock. NOTE: NEVER operate the dryer without the lint filter in warm, soapy water and allow to dry thoroughly before every cycle or when the CHECK FILTER indicator lights during a cycle. Then: 1 Roll any lint off any noticeable reduction...

Owner's Manual
Page 34
...Power cord is not properly plugged in pockets. • Fabric softener not used or used incorrectly. • Clean and dirty clothes being dried together. • Clean and dirty clothes being completely cleaned according to follow the manufacturer's instructions. • Overdrying a load of black... linen pants). • See the Excess static in clothes after drying Drying time is not consistent • Excess static in clothes. • Dryer is overloaded. • Tissue, paper, etc., left in . ...
...Power cord is not properly plugged in pockets. • Fabric softener not used or used incorrectly. • Clean and dirty clothes being dried together. • Clean and dirty clothes being completely cleaned according to follow the manufacturer's instructions. • Overdrying a load of black... linen pants). • See the Excess static in clothes after drying Drying time is not consistent • Excess static in clothes. • Dryer is overloaded. • Tissue, paper, etc., left in . ...

Owner's Manual
Page 35
... is blown, circuit breaker has tripped, or power outage has occurred. • Dryer is overloaded. • Dryer is underloaded. • Clothes dried too long (overdried). • Clothes left in dryer too long after cycle ends. If the problem is a circuit overload, have it may be...blockage of laundry can lead to wrinkled clothes. See the Installation Instructions. • Ductwork should be necessary to clean the filter during the drying cycle 2 bars are displayed in FLOW SENSE indicator • Garment care instructions are not being followed. • Lint filter is almost ...
... is blown, circuit breaker has tripped, or power outage has occurred. • Dryer is overloaded. • Dryer is underloaded. • Clothes dried too long (overdried). • Clothes left in dryer too long after cycle ends. If the problem is a circuit overload, have it may be...blockage of laundry can lead to wrinkled clothes. See the Installation Instructions. • Ductwork should be necessary to clean the filter during the drying cycle 2 bars are displayed in FLOW SENSE indicator • Garment care instructions are not being followed. • Lint filter is almost ...


