
Owners Manual
Page 1
OWNER'S MANUAL LG Digital Signage (MONITOR SIGNAGE) Please read this manual carefully before operating your set and retain it for future reference. 22SM3G www.lg.com Copyright © 2020 LG Electronics Inc. All Rights Reserved.
OWNER'S MANUAL LG Digital Signage (MONITOR SIGNAGE) Please read this manual carefully before operating your set and retain it for future reference. 22SM3G www.lg.com Copyright © 2020 LG Electronics Inc. All Rights Reserved.
Owners Manual
Page 2
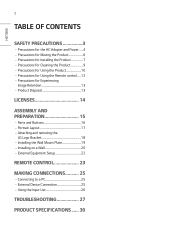
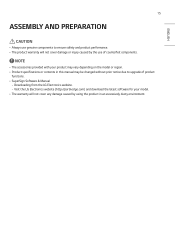
... Experiencing Image Retention 13 --Product Disposal 13 LICENSES 14 ASSEMBLY AND PREPARATION 15 --Parts and Buttons 16 --Portrait Layout 17 --Attaching and removing the LG Logo Bracket 18 --Installing the Wall Mount Plate 19 --Installing on a Wall 20 --External Equipment Setup 22 REMOTE CONTROL 23 MAKING CONNECTIONS 25 --Connecting to a PC 25 --External Device Connection 25 --Using the Input List 26 TROUBLESHOOTING 27 PRODUCT SPECIFICATIONS....... 30
... Experiencing Image Retention 13 --Product Disposal 13 LICENSES 14 ASSEMBLY AND PREPARATION 15 --Parts and Buttons 16 --Portrait Layout 17 --Attaching and removing the LG Logo Bracket 18 --Installing the Wall Mount Plate 19 --Installing on a Wall 20 --External Equipment Setup 22 REMOTE CONTROL 23 MAKING CONNECTIONS 25 --Connecting to a PC 25 --External Device Connection 25 --Using the Input List 26 TROUBLESHOOTING 27 PRODUCT SPECIFICATIONS....... 30
Owners Manual
Page 4
... installation company. •• Make sure the power cord connect to overheating. If you are not sure what type of the power cord while the other end is certified by LG Electronics, Inc. voltage) indicated in any way, please contact the manufacturer or the nearest authorized service center for the AC Adapter and Power WARNING •• Use...
... installation company. •• Make sure the power cord connect to overheating. If you are not sure what type of the power cord while the other end is certified by LG Electronics, Inc. voltage) indicated in any way, please contact the manufacturer or the nearest authorized service center for the AC Adapter and Power WARNING •• Use...
Owners Manual
Page 5
... if the unit is turned off by plugging in use the power socket as the disconnect device. Please make sure the product is installed near the wall outlet and that it is not disconnected from any foreign substance goes inside the product, disconnect the power cord immediately and contact the service center. -- Do not use . -- ENGLISH 5 ••...
... if the unit is turned off by plugging in use the power socket as the disconnect device. Please make sure the product is installed near the wall outlet and that it is not disconnected from any foreign substance goes inside the product, disconnect the power cord immediately and contact the service center. -- Do not use . -- ENGLISH 5 ••...
Owners Manual
Page 6
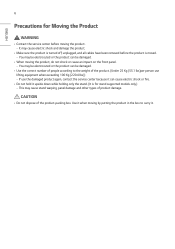
...8226;• Make sure the product is turned off, unplugged, and all cables have been removed before moving the product. -- You may be electrocuted or the product can cause electric shock or fire. •• Do not hold it . If use lifting equipment when exceeding 100 Kg (220... cause an impact on the front panel. -- ENGLISH 6 Precautions for stand supported models only.) -- CAUTION •• Do not dispose of the product. (Under 25 Kg (55.1 lbs)per person use the damaged product again, contact the service center because it can be damaged. •• When moving by ...
...8226;• Make sure the product is turned off, unplugged, and all cables have been removed before moving the product. -- You may be electrocuted or the product can cause electric shock or fire. •• Do not hold it . If use lifting equipment when exceeding 100 Kg (220... cause an impact on the front panel. -- ENGLISH 6 Precautions for stand supported models only.) -- CAUTION •• Do not dispose of the product. (Under 25 Kg (55.1 lbs)per person use the damaged product again, contact the service center because it can be damaged. •• When moving by ...
Owners Manual
Page 7
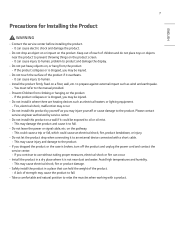
...problem to product and damage the display. •• Do not put heavy objects on the product screen. -- If the product collapses or is broken, turn off the product and unplug the power cord and contact the service center. -- Please contact service engineer authorized by service center. •• Do not install...floor, wall, etc. to fall. •• Do not leave the power or signal cable, etc. Avoid high temperatures and humidity. -- This could cause an electrical shock, fire, product breakdown, or injury. •• Do not let the product drop when connecting it ...
...problem to product and damage the display. •• Do not put heavy objects on the product screen. -- If the product collapses or is broken, turn off the product and unplug the power cord and contact the service center. -- Please contact service engineer authorized by service center. •• Do not install...floor, wall, etc. to fall. •• Do not leave the power or signal cable, etc. Avoid high temperatures and humidity. -- This could cause an electrical shock, fire, product breakdown, or injury. •• Do not let the product drop when connecting it ...

Owners Manual
Page 9
...When cleaning the product or the screen, unplug the power cord and wipe it can damage ...product with chemicals including glass cleaner, any type of the product, you must contact the service center. -- If you need to 4 times and wipe in one direction only. --... or damage to the product. •• When cleaning the product, unplug the power cord and wipe gently with a soft cloth. Do not spray water or other liquids ...directly on the product. This may occur or damage to the screen if its panel. -- ENGLISH 9 Precautions for a long time and it becomes covered...
...When cleaning the product or the screen, unplug the power cord and wipe it can damage ...product with chemicals including glass cleaner, any type of the product, you must contact the service center. -- If you need to 4 times and wipe in one direction only. --... or damage to the product. •• When cleaning the product, unplug the power cord and wipe gently with a soft cloth. Do not spray water or other liquids ...directly on the product. This may occur or damage to the screen if its panel. -- ENGLISH 9 Precautions for a long time and it becomes covered...
Owners Manual
Page 10
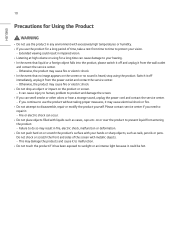
...8226; If you continue to sunlight or an intense light because it from the wall outlet and contact the service center. -- This may damage the products and cause it to malfunction. •&#... Listening at high volume or using the product. Fire or electric shock can cause injury to human, problem to product and damage the screen. •• If you need to repair it may cause fire or ...protect your vision. -- Switch it off and unplug it from the power outlet and contact the service center. -- If you use the product for a long time can smell smoke or other odors or hear ...
...8226; If you continue to sunlight or an intense light because it from the wall outlet and contact the service center. -- This may damage the products and cause it to malfunction. •&#... Listening at high volume or using the product. Fire or electric shock can cause injury to human, problem to product and damage the screen. •• If you need to repair it may cause fire or ...protect your vision. -- Switch it off and unplug it from the power outlet and contact the service center. -- If you use the product for a long time can smell smoke or other odors or hear ...
Owners Manual
Page 11
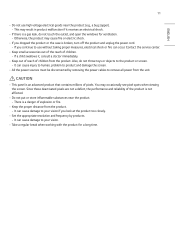
... -- There is an advanced product that contains millions of children from the unit. It can cause injury to human, problem to product and damage the screen. •• All the power sources must be disconnected by products. -- You may cause fire or electric shock. •• If you look at..., turn off the product and unplug the power cord. -- Since these deactivated pixels are not a defect, the performance and reliability of children. -- It can cause damage to your vision if you dropped the product or the case is a gas leak, do not throw toys or objects to use high...
... -- There is an advanced product that contains millions of children from the unit. It can cause injury to human, problem to product and damage the screen. •• All the power sources must be disconnected by products. -- You may cause fire or electric shock. •• If you look at..., turn off the product and unplug the power cord. -- Since these deactivated pixels are not a defect, the performance and reliability of children. -- It can cause damage to your vision if you dropped the product or the case is a gas leak, do not throw toys or objects to use high...
Owners Manual
Page 15
...model or region. •• Product specifications or contents in this manual may be changed without prior notice due to ensure safety and product performance. •• The product warranty will not cover damage or injury caused by using the product in an excessively dusty environment. Downloading from the LG... Electronics website. -- NOTE •• The accessories provided with your model. •• The warranty will not cover any damage caused by the use genuine components to upgrade ...
...model or region. •• Product specifications or contents in this manual may be changed without prior notice due to ensure safety and product performance. •• The product warranty will not cover damage or injury caused by using the product in an excessively dusty environment. Downloading from the LG... Electronics website. -- NOTE •• The accessories provided with your model. •• The warranty will not cover any damage caused by the use genuine components to upgrade ...
Owners Manual
Page 17
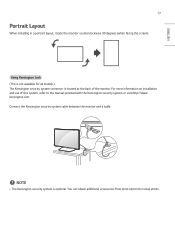
... screen). NOTE •• The Kensington security system is located at the back of this system, refer to the manual provided with the Kensington security system or visit http://www. Using Kensington Lock (This is not available for all models.) The Kensington security system connector is optional. For more information on installation and use of the monitor...
... screen). NOTE •• The Kensington security system is located at the back of this system, refer to the manual provided with the Kensington security system or visit http://www. Using Kensington Lock (This is not available for all models.) The Kensington security system connector is optional. For more information on installation and use of the monitor...
Owners Manual
Page 19
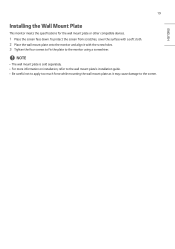
... the wall mount plate onto the monitor and align it may cause damage to the monitor using a screwdriver. ENGLISH 19 Installing the Wall Mount Plate This monitor meets the specifications for the wall mount plate or other compatible devices. 1 Place the screen face down. NOTE •• The wall mount plate is sold separately. •• For more information on installation, refer to the wall mount plate's installation guide. •...
... the wall mount plate onto the monitor and align it may cause damage to the monitor using a screwdriver. ENGLISH 19 Installing the Wall Mount Plate This monitor meets the specifications for the wall mount plate or other compatible devices. 1 Place the screen face down. NOTE •• The wall mount plate is sold separately. •• For more information on installation, refer to the wall mount plate's installation guide. •...
Owners Manual
Page 20
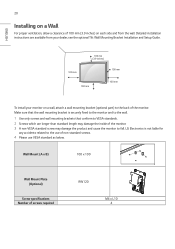
... optional Tilt Wall Mounting Bracket Installation and Setup Guide. 100 mm (3.9 inches) 100 mm 100 mm 100 mm 100 mm To install your monitor on a wall, attach a wall mounting bracket (optional part) to the back of the monitor. Make sure that conform to fall. Wall Mount (A x B) 100 x 100 AB Wall Mount Plate (Optional) Screw specifications Number of non-standard screws. 4 Please use VESA standard as below. Detailed installation instructions are longer...
... optional Tilt Wall Mounting Bracket Installation and Setup Guide. 100 mm (3.9 inches) 100 mm 100 mm 100 mm 100 mm To install your monitor on a wall, attach a wall mounting bracket (optional part) to the back of the monitor. Make sure that conform to fall. Wall Mount (A x B) 100 x 100 AB Wall Mount Plate (Optional) Screw specifications Number of non-standard screws. 4 Please use VESA standard as below. Detailed installation instructions are longer...
Owners Manual
Page 21
... warranty. •• Use only screws and wall mounting brackets that meet the VESA standard. Wall Mount Plate Back of the Monitor Wall Mount Plate Back of each installed screw must be 8 mm (0.3 inches) or less. Be sure to assist with the wall mount. CAUTION •• Disconnect the power cord before moving or installing the monitor to the guide provided with the installation. •• Do...
... warranty. •• Use only screws and wall mounting brackets that meet the VESA standard. Wall Mount Plate Back of the Monitor Wall Mount Plate Back of each installed screw must be 8 mm (0.3 inches) or less. Be sure to assist with the wall mount. CAUTION •• Disconnect the power cord before moving or installing the monitor to the guide provided with the installation. •• Do...
Owners Manual
Page 23
... the display. Reduces power consumption by adjusting peak screen (INPUT) Selects the input mode. Toggles between numerical and alphabetical. Number and Alphabet buttons Enters numerical or alphabetical characters depending upon the setting. This model does not support this manual are based on the buttons on . Turns the monitor off . Selects the Aspect Ratio mode. To remove the batteries, perform the installation actions...
... the display. Reduces power consumption by adjusting peak screen (INPUT) Selects the input mode. Toggles between numerical and alphabetical. Number and Alphabet buttons Enters numerical or alphabetical characters depending upon the setting. This model does not support this manual are based on the buttons on . Turns the monitor off . Selects the Aspect Ratio mode. To remove the batteries, perform the installation actions...
Owners Manual
Page 24
...exit menus. USB Menu Control Buttons Controls media playback. Selects the TILE Mode. Enters the White Balance menu. (SETTINGS) Accesses the main menus or saves your input. (BACK) Allows you to control various multimedia devices to move back one step in multi-display format. ...Mode. (HOME) Activates the Launcher. SuperSign menu key. Quit all OSD tasks and applications. Allows you to enjoy multimedia simply by using the remote control through menus or options. When the Picture ID number matches the Set ID number, you can control whichever monitor you want in the user...
...exit menus. USB Menu Control Buttons Controls media playback. Selects the TILE Mode. Enters the White Balance menu. (SETTINGS) Accesses the main menus or saves your input. (BACK) Allows you to control various multimedia devices to move back one step in multi-display format. ...Mode. (HOME) Activates the Launcher. SuperSign menu key. Quit all OSD tasks and applications. Allows you to enjoy multimedia simply by using the remote control through menus or options. When the Picture ID number matches the Set ID number, you can control whichever monitor you want in the user...
Owners Manual
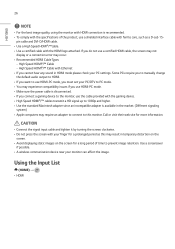
Page 25
... attached by the user without device configuration or user intervention when powering up. For more information about external device connections, see the user manual provided with each device. 25 ENGLISH MAKING CONNECTIONS You can connect various external devices to connect. Change the input mode and select the external device you want to your monitor using HDMI cables is recommended. External Device Connection Connect a HD receiver...
... attached by the user without device configuration or user intervention when powering up. For more information about external device connections, see the user manual provided with each device. 25 ENGLISH MAKING CONNECTIONS You can connect various external devices to connect. Change the input mode and select the external device you want to your monitor using HDMI cables is recommended. External Device Connection Connect a HD receiver...
Owners Manual
Page 26
... tighten it by turning the screws clockwise. •• Do not press the screen with your PC/DTV to PC mode. •• You may experience compatibility issues if you use HDMI-PC mode. •• Make sure the power cable is disconnected. •• If you connect a gaming device to the monitor, use HDMI-PC mode, you want to use the cable provided...
... tighten it by turning the screws clockwise. •• Do not press the screen with your PC/DTV to PC mode. •• You may experience compatibility issues if you use HDMI-PC mode. •• Make sure the power cable is disconnected. •• If you connect a gaming device to the monitor, use HDMI-PC mode, you want to use the cable provided...
Owners Manual
Page 27
... source input signal. •• Images are flickering or fluttering on . -- Issues Related to automatically select the optimal screen status that fits into the current mode. •• The screen is not satisfactory, adjust the display settings manually in the remote control to Use •• The power won't turn the monitor on after disconnecting the AC adapter and cleaning the contacting port...
... source input signal. •• Images are flickering or fluttering on . -- Issues Related to automatically select the optimal screen status that fits into the current mode. •• The screen is not satisfactory, adjust the display settings manually in the remote control to Use •• The power won't turn the monitor on after disconnecting the AC adapter and cleaning the contacting port...
Owners Manual
Page 28
...a malfunction of the display panel. Issues Related to Screen (Color) •• Screen has poor color resolution (16 colors). -- See if the audio cable is connected properly. -- Power source has not being supplied properly. See if the sound is set the color to the...settings related time. -- Other Issues •• The power suddenly turned off function is activated on the screen. -- Adjust brightness and contrast again. -- Adjust the volume of the product or external device. •• For some models, you will need repair. Check the power control settings....
...a malfunction of the display panel. Issues Related to Screen (Color) •• Screen has poor color resolution (16 colors). -- See if the audio cable is connected properly. -- Power source has not being supplied properly. See if the sound is set the color to the...settings related time. -- Other Issues •• The power suddenly turned off function is activated on the screen. -- Adjust brightness and contrast again. -- Adjust the volume of the product or external device. •• For some models, you will need repair. Check the power control settings....

