FS-C5100DN Factory Reset - Kyocera
FS-C5100DN Factory Reset
View Results Below
Free Kyocera FS-C5100DN manuals!
Problems with Kyocera FS-C5100DN?
Ask a Question
Free Kyocera FS-C5100DN manuals!
Problems with Kyocera FS-C5100DN?
Ask a Question
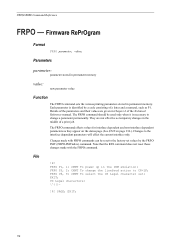
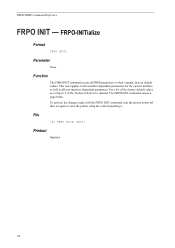
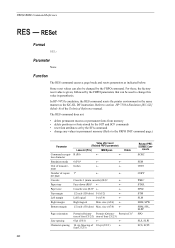
Related Manual Pages


Similar Questions

How To Factory Reset Kyocera Fs-c2126mfp
We have this model that someone has modified the password.....and while we can use it on USB cannot ...
We have this model that someone has modified the password.....and while we can use it on USB cannot ...
(Posted by jayarh 4 years ago)


Kyocera Fs-4020dn How To Reset The Page Counter Or Factory Reset The Printer
would like to reset all counters to zero after MK360 installed. Can't seem to find how to get to the...
would like to reset all counters to zero after MK360 installed. Can't seem to find how to get to the...
(Posted by justme9133 10 years ago)