KitchenAid KWB110OB Support and Manuals
Get Help and Manuals for this KitchenAid item
View All Support Options Below
Free KitchenAid KWB110OB manuals!
Problems with KitchenAid KWB110OB?
Ask a Question
Free KitchenAid KWB110OB manuals!
Problems with KitchenAid KWB110OB?
Ask a Question
Popular KitchenAid KWB110OB Manual Pages
Instruction Manual - Page 2
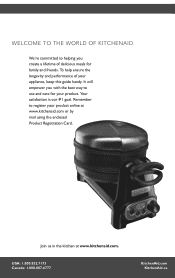
... and care for family and friends. We're committed to helping you with the best way to register your appliance, keep this guide handy. Your satisfaction is our #1 goal. Join us in the kitchen at www.kitchenaid.com or by mail using the enclosed Product Registration Card.
WELCOME TO THE WORLD OF...
Instruction Manual - Page 3
... www.kitchenaid.com. This card does not verify your personal records: Model Number Serial Number Date Purchased Store Name
3 Please complete the following for your warranty. Before you use your Waffle Baker, please fill out and mail your Waffle Baker. English
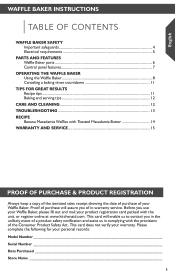
WAFFLE BAKER INSTRUCTIONS
TABLE OF CONTENTS
WAFFLE BAKER SAFETY Important safeguards 4 Electrical requirements 5
PARTS AND...
Instruction Manual - Page 4
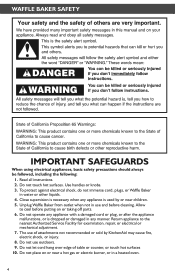
... off parts. 6. Do not touch hot surfaces. Use handles or knobs. 3. Allow
to the nearest Authorized Service Facility for examination, repair, or electrical or mechanical adjustment. 7. Do not let cord hang over edge of attachments not recommended or sold by or near a hot gas or electric burner, or in water or other liquids. 4. WAFFLE BAKER...
Instruction Manual - Page 5
... remove plug from becoming entangled in an outlet only one way.
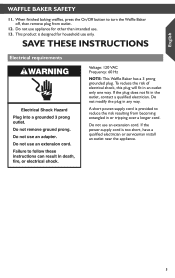
SAVE THESE INSTRUCTIONS
Electrical requirements
Voltage: 120 VAC Frequency: 60 Hz
NOTE: This Waffle Baker has a 3 prong grounded plug.
This product is too short, have a qualified electrician or serviceman install an outlet near the appliance.
5 Do not modify the plug in the outlet...
Instruction Manual - Page 6
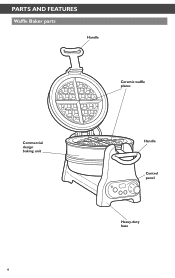
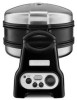
PARTS AND FEATURES
Waffle Baker parts
Handle
Ceramic waffle plates
Commercial design baking unit
6
Handle
Control panel
Heavy-duty base
Instruction Manual - Page 7
English
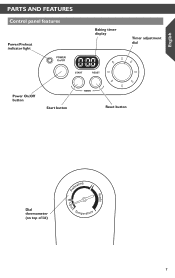
PARTS AND FEATURES
Control panel features
Power/Preheat indicator light
Baking timer display
Timer adjustment dial
Power On/Off button
Start button
Reset button
Dial thermometer (on top of lid)
7
Instruction Manual - Page 8
... the baking unit so the lid with a soft cloth. NOTE: Always use : Before using the Waffle Baker for more details.
The indicator light will flash and the Waffle Baker will stop flashing and glow continuously. OPERATING THE WAFFLE BAKER
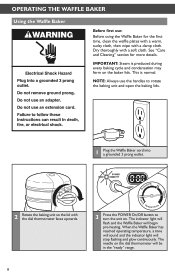
Using the Waffle Baker
Before first use the handles to turn the unit on the dial thermometer will be...
Instruction Manual - Page 9
... Start button will be difficult to begin the baking timer countdown. English
OPERATING THE WAFFLE BAKER
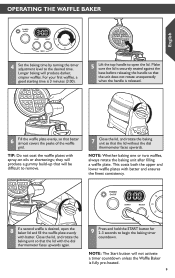
4 Set the baking time by turning the timer adjustment level to open the baker lid and fill the waffle plate evenly with batter.
For your first waffles, a good starting time is fully pre-heated.
9 This coats both the upper and...
Instruction Manual - Page 10
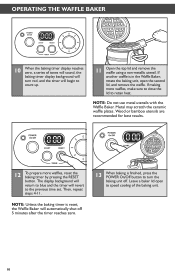
... the RESET button. The display background will return to blue and the timer will begin to the previous time set. Then, repeat steps 4-11.
NOTE: Do not use metal utensils with the Waffle Baker. Metal may scratch the ceramic waffle plates. Wood or bamboo utensils are recommended for best results.
12 To prepare more...
Instruction Manual - Page 11
... produce tough, heavy waffles.
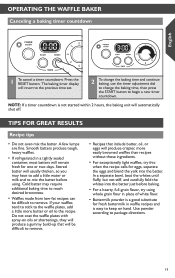
• If refrigerated in waffle recipes and is not started within 2 hours, the baking unit will revert to the previous time set.
2 To change the..., and carefully fold the whites into the batter.
Use powder according to remove. OPERATING THE WAFFLE BAKER
Canceling a baking timer countdown
English
1 To cancel a timer countdown: Press the RESET button....
Instruction Manual - Page 12
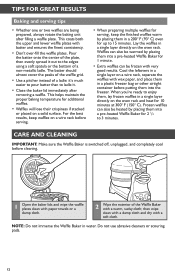
... paper towels or a damp cloth.
2 Wipe the exterior of the Waffle Baker with a soft cloth. Waffles can also be warmed by placing them into a pre-heated Waffle Baker for additional waffles.
• Waffles will lose their crispiness if stacked or placed on the oven rack. Frozen waffles can be heated by placing them into the freezer.
NOTE: Do...
Instruction Manual - Page 13
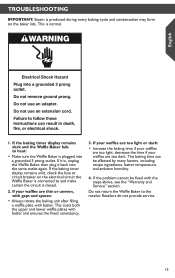
... too dark. This is normal. This coats both the upper and lower waffle plates with the steps above, see the "Warranty and Service" section. TROUBLESHOOTING
IMPORTANT: Steam is produced during every baking cycle and condensation may form on the electrical circuit the Waffle Baker is connected to and make certain the circuit is closed.
2. If...
Instruction Manual - Page 14
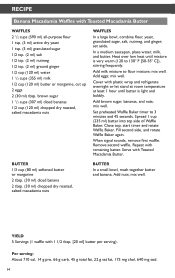
Heat over low heat until batter is very warm (120 to 130° F [50-55° C]), stirring frequently.
Set preheated Waffle Baker timer to flour mixture;
set aside.
Repeat with plastic wrap and refrigerate overnight or let stand at room temperature at least 1 hour until mixture is light and bubbly. Cover with ...
Instruction Manual - Page 15
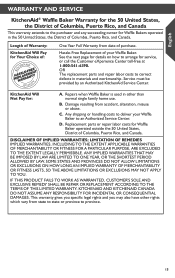
.... D. Replacement parts or repair labor costs for Waffle Baker operated outside the 50 United States, District of your Waffle Baker to correct defects in other rights which vary from accident, alteration, misuse or abuse. DISCLAIMER OF IMPLIED WARRANTIES; Service must be provided by an Authorized KitchenAid Service Center.
This warranty gives you specific legal...
Instruction Manual - Page 16
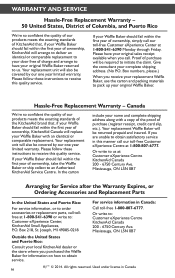
... Centre. Please follow these instructions to receive this quality service. If your original Waffle Baker returned to receive this quality service. Please have your Waffle Baker should fail within the first year of ownership, KitchenAid will also be covered by our one year limited warranty.
In the carton
include your replacement Waffle Baker, use the carton and packing...
KitchenAid KWB110OB Reviews
We have not received any reviews for KitchenAid yet.