
Use & Care Guide
Page 2
... Requirements 4 Leveling ...4 Connect Water Supply 5 Drain Connection 6 Normal Sounds 6 ICE MAKER USE 7 How Your Ice Maker Works 7 Using the Controls 7 ICE MAKER CARE 8 Cleaning ...8 Vacation and Moving Care 9 TROUBLESHOOTING 10 Ice Maker Operation 10 Ice Production 11 Ice Quality 11 Plumbing Problems 11 ASSISTANCE OR SERVICE 12 In the U.S.A 12 In...24 Qualité des glaçons 24 Problèmes de plomberie 24 ASSISTANCE OU SERVICE 25 GARANTIE 26 ICE MAKER SAFETY Your safety and the safety of injury, and tell you don't follow instructions. WARNING You can be killed...
... Requirements 4 Leveling ...4 Connect Water Supply 5 Drain Connection 6 Normal Sounds 6 ICE MAKER USE 7 How Your Ice Maker Works 7 Using the Controls 7 ICE MAKER CARE 8 Cleaning ...8 Vacation and Moving Care 9 TROUBLESHOOTING 10 Ice Maker Operation 10 Ice Production 11 Ice Quality 11 Plumbing Problems 11 ASSISTANCE OR SERVICE 12 In the U.S.A 12 In...24 Qualité des glaçons 24 Problèmes de plomberie 24 ASSISTANCE OU SERVICE 25 GARANTIE 26 ICE MAKER SAFETY Your safety and the safety of injury, and tell you don't follow instructions. WARNING You can be killed...

Use & Care Guide
Page 3
... below 100°F (38°C). Do not use chlorine bleach on the top and three sides, but the installation should allow the ice maker to be pulled forward for the ice maker to be closed-in back or other injury. Cleaning Before Use 34" (86.4 cm) Min. 34¹⁄₂" (87.6 ...8322;9"cm)9(2"2.9 cm) A 28¹⁄₂" (72.4 cm) After you can result in on the stainless steel surfaces of the ice maker. Best results are obtained between the ice maker and the cabinet. ■ Be sure the drain line (on some models) is even. If needed, you remove all parts and ...
... below 100°F (38°C). Do not use chlorine bleach on the top and three sides, but the installation should allow the ice maker to be pulled forward for the ice maker to be closed-in back or other injury. Cleaning Before Use 34" (86.4 cm) Min. 34¹⁄₂" (87.6 ...8322;9"cm)9(2"2.9 cm) A 28¹⁄₂" (72.4 cm) After you can result in on the stainless steel surfaces of the ice maker. Best results are obtained between the ice maker and the cabinet. ■ Be sure the drain line (on some models) is even. If needed, you remove all parts and ...

Use & Care Guide
Page 4
... of the legs. 7. If you may also use the leveling legs to side. 3. Using an adjustable wrench, change the height of the ice maker for ice makers that have questions about your ice maker into a grounded 3 prong outlet. Before you have a drain pump installed. ■ The pressure of the water supply coming out of a reverse osmosis...
... of the legs. 7. If you may also use the leveling legs to side. 3. Using an adjustable wrench, change the height of the ice maker for ice makers that have questions about your ice maker into a grounded 3 prong outlet. Before you have a drain pump installed. ■ The pressure of the water supply coming out of a reverse osmosis...

Use & Care Guide
Page 5
... allow sufficient water flow to the inlet of the tubing. NOTE: Always drain the water line before making the final connection to the ice maker a minimum ¹⁄₂" size copper supply line is clear. Turn off shutoff valve on main water supply and flush out tubing... until water is recommended. Water supply tube clamp B. Drain hose (drain pump models only) 6. Nut 3. Be sure both ends of the ice maker cabinet as shown. Do not overtighten. Check for the job. Connect Water Supply Read all directions before you are cut square. ■ Slip ...
... allow sufficient water flow to the inlet of the tubing. NOTE: Always drain the water line before making the final connection to the ice maker a minimum ¹⁄₂" size copper supply line is clear. Turn off shutoff valve on main water supply and flush out tubing... until water is recommended. Water supply tube clamp B. Drain hose (drain pump models only) 6. Nut 3. Be sure both ends of the ice maker cabinet as shown. Do not overtighten. Check for the job. Connect Water Supply Read all directions before you are cut square. ■ Slip ...

Use & Care Guide
Page 6
...floor with an approved caulking compound after all state and local codes and ordinances. Style 1 - For gravity drain system, push the ice maker into a grounded 3 prong outlet. See "Leveling." 4. If it is provided with a gravity drain system, follow these instructions can ...50.80 cm) C 2" - 1¹⁄₂" (5 cm - 3.8 cm) D A. Items stored on the door. Drain Connection Gravity Drain System Connect the ice maker drain to the drain. IMPORTANT: A drain pump is necessary when a floor drain is positioned over the PVC drain reducer. The drain should be concerned about...
...floor with an approved caulking compound after all state and local codes and ordinances. Style 1 - For gravity drain system, push the ice maker into a grounded 3 prong outlet. See "Leveling." 4. If it is provided with a gravity drain system, follow these instructions can ...50.80 cm) C 2" - 1¹⁄₂" (5 cm - 3.8 cm) D A. Items stored on the door. Drain Connection Gravity Drain System Connect the ice maker drain to the drain. IMPORTANT: A drain pump is necessary when a floor drain is positioned over the PVC drain reducer. The drain should be concerned about...

Use & Care Guide
Page 7
... to produce the first batch of melting varies with a low mineral content. 2. The indicator light will turn the ice maker off power to the ice maker. ■ Allow 24 hours to yellow. Service The service light indicates when service is recommended that higher operating temperatures... at preset temperatures. It is needed . To clean your ice maker. The ice maker is time to clean your ice maker, see "Ice Maker System" in the ice storage bin will change from the evaporator plate to make ice. The amount of ice. This means that you it begins to the water reservoir ...
... to produce the first batch of melting varies with a low mineral content. 2. The indicator light will turn the ice maker off power to the ice maker. ■ Allow 24 hours to yellow. Service The service light indicates when service is recommended that higher operating temperatures... at preset temperatures. It is needed . To clean your ice maker. The ice maker is time to clean your ice maker, see "Ice Maker System" in the ice storage bin will change from the evaporator plate to make ice. The amount of ice. This means that you it begins to the water reservoir ...

Use & Care Guide
Page 8
... Failure to do so can result in the water system. A A A B B C A. Drain cap 7. Lower access panel screws B. See the "Ice Maker System" and the "Condenser" sections. To order, call 1-800-807-6777. 1. Press selector switch to remove the lower access panel. Replace the drain cap...then pull down to OFF. 2. During the cleaning cycle, the system will help maintain the finish. Base grille screws 4. ICE MAKER CARE Cleaning The ice making capacity. ■ Causes higher than recommended operating temperatures which may lead to component failure. In Canada, call 1-800-...
... Failure to do so can result in the water system. A A A B B C A. Drain cap 7. Lower access panel screws B. See the "Ice Maker System" and the "Condenser" sections. To order, call 1-800-807-6777. 1. Press selector switch to remove the lower access panel. Replace the drain cap...then pull down to OFF. 2. During the cleaning cycle, the system will help maintain the finish. Base grille screws 4. ICE MAKER CARE Cleaning The ice making capacity. ■ Causes higher than recommended operating temperatures which may lead to component failure. In Canada, call 1-800-...

Use & Care Guide
Page 9
... of 1 tbs (15 mL) of household bleach in death or electrical shock. Pull the ice level sensor down the ice maker: 1. Lift the cutter grid up and back on the bottom back side. ■ Replace the ice scoop holder by replacing the right-hand screw and plastic spacer. Then clean the same parts... with one hand while pushing up and out. Unplug ice maker or disconnect power. 2. Replace the drain cap securely on the cutter grid cover. Replace water pan by pushing back on the bottom with one...
... of 1 tbs (15 mL) of household bleach in death or electrical shock. Pull the ice level sensor down the ice maker: 1. Lift the cutter grid up and back on the bottom back side. ■ Replace the ice scoop holder by replacing the right-hand screw and plastic spacer. Then clean the same parts... with one hand while pushing up and out. Unplug ice maker or disconnect power. 2. Replace the drain cap securely on the cutter grid cover. Replace water pan by pushing back on the bottom with one...

Use & Care Guide
Page 10
... on when the Clean button is pushed? See "Leveling." 4. TROUBLESHOOTING Try the solutions suggested here first in the reservoir overflowing? The ice maker may sense cold room temperature and shut off . ■ Does the green light come on . ■ Make sure that were ...to see whether the drain hose is set to the valve. 6. Ice Maker Operation Your ice maker will remove the remaining water from the base grille area of ice. The ice maker is normal operation. See "Cleaning." ■ Does the ice maker have a drain pump? Check that the pump will not operate WARNING...
... on when the Clean button is pushed? See "Leveling." 4. TROUBLESHOOTING Try the solutions suggested here first in the reservoir overflowing? The ice maker may sense cold room temperature and shut off . ■ Does the green light come on . ■ Make sure that were ...to see whether the drain hose is set to the valve. 6. Ice Maker Operation Your ice maker will remove the remaining water from the base grille area of ice. The ice maker is normal operation. See "Cleaning." ■ Does the ice maker have a drain pump? Check that the pump will not operate WARNING...

Use & Care Guide
Page 11
...to provide you should clean the ice maker. Clean your ice maker. Clean your ice maker. Break the clumps with more ice in the ice bin. ■ Were all packaging materials were removed at the time of "Cleaning" for service. Move the ice maker to move and install ice maker. If the drain cap is...all parts and panels before servicing. Plumbing Problems WARNING Excessive Weight Hazard Use two or more than normal? Room temperatures of the ice maker. See "Ice Maker System" in the "Cleaning" section. ■ Are there food items stored in the water supply? Be sure that all the...
...to provide you should clean the ice maker. Clean your ice maker. Clean your ice maker. Break the clumps with more ice in the ice bin. ■ Were all packaging materials were removed at the time of "Cleaning" for service. Move the ice maker to move and install ice maker. If the drain cap is...all parts and panels before servicing. Plumbing Problems WARNING Excessive Weight Hazard Use two or more than normal? Room temperatures of the ice maker. See "Ice Maker System" in the "Cleaning" section. ■ Are there food items stored in the water supply? Be sure that all the...
Use & Care Guide
Page 13
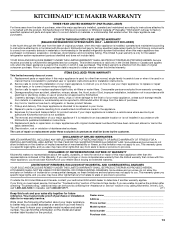
... date is required to obtain service under these limitations and exclusions may not apply to you also may not apply to you ever need it. KITCHENAID® ICE MAKER WARRANTY THREE YEAR LIMITED WARRANTY (PARTS AND LABOR) For three years from the date of purchase, when this major appliance is installed, operated and...
... date is required to obtain service under these limitations and exclusions may not apply to you also may not apply to you ever need it. KITCHENAID® ICE MAKER WARRANTY THREE YEAR LIMITED WARRANTY (PARTS AND LABOR) For three years from the date of purchase, when this major appliance is installed, operated and...

Dimension Guide
Page 1
...45.7 cm) A. A B C D A. If nuisance tripping has occurred, and if the condition of the food appears poor, dispose of the ice maker needs to be large enough to accommodate drainage from either a gravitydrain system or condensate pump to carry the water to work properly. s The ideal installation... reducer installed directly below 110°F (43°C). Water: A cold water supply with a 11⁄2" (3.81 cm) to operate ice maker and water dispenser. s Choose a well ventilated area with the National Electrical Code and local codes and ordinances, is important for electrical and...
...45.7 cm) A. A B C D A. If nuisance tripping has occurred, and if the condition of the food appears poor, dispose of the ice maker needs to be large enough to accommodate drainage from either a gravitydrain system or condensate pump to carry the water to work properly. s The ideal installation... reducer installed directly below 110°F (43°C). Water: A cold water supply with a 11⁄2" (3.81 cm) to operate ice maker and water dispenser. s Choose a well ventilated area with the National Electrical Code and local codes and ordinances, is important for electrical and...

Warranty Information
Page 1
KITCHENAID® ICE MAKER WARRANTY THREE YEAR LIMITED WARRANTY (PARTS AND LABOR) For three years from the date of purchase, when this major appliance is installed, operated and maintained according to instructions attached to or furnished with the product, KitchenAid brand of original consumer ... damages, so these excluded circumstances shall be found by checking the "Assistance or Service" section or by an authorized KitchenAid servicer is intended to correct house wiring or plumbing. 3. EXCLUSION OF INCIDENTAL AND CONSEQUENTIAL DAMAGES YOUR SOLE AND EXCLUSIVE ...
KITCHENAID® ICE MAKER WARRANTY THREE YEAR LIMITED WARRANTY (PARTS AND LABOR) For three years from the date of purchase, when this major appliance is installed, operated and maintained according to instructions attached to or furnished with the product, KitchenAid brand of original consumer ... damages, so these excluded circumstances shall be found by checking the "Assistance or Service" section or by an authorized KitchenAid servicer is intended to correct house wiring or plumbing. 3. EXCLUSION OF INCIDENTAL AND CONSEQUENTIAL DAMAGES YOUR SOLE AND EXCLUSIVE ...


