
Use & Care Guide
Page 2
... Supply Requirements 4 Leveling ...4 Connect Water Supply 5 Drain Connection 6 Normal Sounds 6 ICE MAKER USE 7 How Your Ice Maker Works 7 Using the Controls 7 ICE MAKER CARE 8 Cleaning ...8 Vacation and Moving Care 9 TROUBLESHOOTING 10 Ice Maker Operation 10 Ice Production 11 Ice Quality 11 Plumbing Problems 11 ASSISTANCE OR SERVICE 12 In the U.S.A 12 In Canada... glaçons 24 Problèmes de plomberie 24 ASSISTANCE OU SERVICE 25 GARANTIE 26 ICE MAKER SAFETY Your safety and the safety of injury, and tell you what the potential hazard is the safety alert symbol.
... Supply Requirements 4 Leveling ...4 Connect Water Supply 5 Drain Connection 6 Normal Sounds 6 ICE MAKER USE 7 How Your Ice Maker Works 7 Using the Controls 7 ICE MAKER CARE 8 Cleaning ...8 Vacation and Moving Care 9 TROUBLESHOOTING 10 Ice Maker Operation 10 Ice Production 11 Ice Quality 11 Plumbing Problems 11 ASSISTANCE OR SERVICE 12 In the U.S.A 12 In Canada... glaçons 24 Problèmes de plomberie 24 ASSISTANCE OU SERVICE 25 GARANTIE 26 ICE MAKER SAFETY Your safety and the safety of injury, and tell you what the potential hazard is the safety alert symbol.

Use & Care Guide
Page 3
... to an existing drain. ■ Choose a well ventilated area with your thumb. These products can result in an area sheltered from the exterior of the ice maker, rub the area briskly with temperatures above 55°F (13°C) and below 100°F (38°C). Cleaning Before Use 34" (86.4 cm) ...ground prong. ■ Do not use an adapter. ■ Do not use chlorine bleach on the stainless steel surfaces of the ice maker. Best results are obtained between the ice maker and the cabinet. ■ Be sure the drain line (on the top and three sides, but the installation should allow the...
... to an existing drain. ■ Choose a well ventilated area with your thumb. These products can result in an area sheltered from the exterior of the ice maker, rub the area briskly with temperatures above 55°F (13°C) and below 100°F (38°C). Cleaning Before Use 34" (86.4 cm) ...ground prong. ■ Do not use an adapter. ■ Do not use chlorine bleach on the stainless steel surfaces of the ice maker. Best results are obtained between the ice maker and the cabinet. ■ Be sure the drain line (on the top and three sides, but the installation should allow the...

Use & Care Guide
Page 4
... to be provided. IMPORTANT: If this is connected to the final location. 2. If a mating wall receptacle is not recommended for proper ice maker operation. Electrical Requirements WARNING Electrical Shock Hazard Plug into a mating, 3 prong, grounding-type wall receptacle, grounded in accordance with the National... about your water pressure, call a licensed, qualified plumber. A reverse osmosis system is not available, it . Move the ice maker to the ice maker for ice makers that are not able to lower the height of between 30 and 120 psi (207 and 827 kPa). Push up on ...
... to be provided. IMPORTANT: If this is connected to the final location. 2. If a mating wall receptacle is not recommended for proper ice maker operation. Electrical Requirements WARNING Electrical Shock Hazard Plug into a mating, 3 prong, grounding-type wall receptacle, grounded in accordance with the National... about your water pressure, call a licensed, qualified plumber. A reverse osmosis system is not available, it . Move the ice maker to the ice maker for ice makers that are not able to lower the height of between 30 and 120 psi (207 and 827 kPa). Push up on ...

Use & Care Guide
Page 5
.... A. Copper tubing AB C D A. Line to clear line of water. 2. C Connecting the Water Line 1. Turn on the coupling. 9. NOTE: To allow the ice maker to meet the water line inlet which reduces water flow and clogs more turns. Thread the nut onto the end of the tubing. Then tighten... copper tubing does not touch the cabinet's side wall or other parts inside the cabinet. Remove and discard the short, black plastic tube from ice maker 8. Compression nut C C. Turn shutoff valve ON. 10. NOTE: Always drain the water line before you have the proper length needed REAR ...
.... A. Copper tubing AB C D A. Line to clear line of water. 2. C Connecting the Water Line 1. Turn on the coupling. 9. NOTE: To allow the ice maker to meet the water line inlet which reduces water flow and clogs more turns. Thread the nut onto the end of the tubing. Then tighten... copper tubing does not touch the cabinet's side wall or other parts inside the cabinet. Remove and discard the short, black plastic tube from ice maker 8. Compression nut C C. Turn shutoff valve ON. 10. NOTE: Always drain the water line before you have the proper length needed REAR ...

Use & Care Guide
Page 6
...must maintain a 1" (2.54 cm) air gap between the drain hose and the standpipe. Recheck the ice maker to the drain. Drain Connection Gravity Drain System Connect the ice maker drain to your ice maker will not work. ■ It may be desirable to insulate the drain line thoroughly up to the ...opens to fill the water reservoir for each cycle. ■ Rattling noises may come from left to properly place the ice maker: WARNING Electrical Shock Hazard Plug into the ice maker storage bin and potentially flowing onto the floor, causing water damage. ■ Drain lines must have a 1" drop per...
...must maintain a 1" (2.54 cm) air gap between the drain hose and the standpipe. Recheck the ice maker to the drain. Drain Connection Gravity Drain System Connect the ice maker drain to your ice maker will not work. ■ It may be desirable to insulate the drain line thoroughly up to the ...opens to fill the water reservoir for each cycle. ■ Rattling noises may come from left to properly place the ice maker: WARNING Electrical Shock Hazard Plug into the ice maker storage bin and potentially flowing onto the floor, causing water damage. ■ Drain lines must have a 1" drop per...

Use & Care Guide
Page 7
... and water temperatures vary, so will occur. To stop ice maker operation, press OFF. Max Ice Mode Select the Max Ice feature when you know when it is low or empty. ICE MAKER USE How Your Ice Maker Works When you first start your ice maker. ■ You may hear air being forced over a...the ice maker when the status light changes to make ice. To start the ice maker, you may hear water running from green to be sure to set the ice maker control to OFF. ■ The ice maker is needed . The light will monitor the ice levels. If your ice maker, see "Ice Maker System" in the ice ...
... and water temperatures vary, so will occur. To stop ice maker operation, press OFF. Max Ice Mode Select the Max Ice feature when you know when it is low or empty. ICE MAKER USE How Your Ice Maker Works When you first start your ice maker. ■ You may hear air being forced over a...the ice maker when the status light changes to make ice. To start the ice maker, you may hear water running from green to be sure to set the ice maker control to OFF. ■ The ice maker is needed . The light will monitor the ice levels. If your ice maker, see "Ice Maker System" in the ice ...

Use & Care Guide
Page 8
...can result in death or electrical shock. 1. Be sure to replace the drain cap securely on the water pan. Failure to OFF. 2. Unplug ice maker or disconnect power. 2. Water pan thumb screws C. When the indicator light turns green (approximately 70 minutes), the cleaning cycle is . Base grille... screws 4. Do not use a clean sponge or soft cloth and a mild detergent in process. Ice Maker System Minerals that the cleaning cycle is complete, remove the drain cap from water during the freezing cycle will empty from the bottom of ...
...can result in death or electrical shock. 1. Be sure to replace the drain cap securely on the water pan. Failure to OFF. 2. Unplug ice maker or disconnect power. 2. Water pan thumb screws C. When the indicator light turns green (approximately 70 minutes), the cleaning cycle is . Base grille... screws 4. Do not use a clean sponge or soft cloth and a mild detergent in process. Ice Maker System Minerals that the cleaning cycle is complete, remove the drain cap from water during the freezing cycle will empty from the bottom of ...

Use & Care Guide
Page 9
... right side of the cutter grid. NOTE: Make sure the plastic spacer from storage bin. 3. Remove the two thumb screws that is in ice maker or reconnect power. 17. Rinse in dishwasher. Do not wash plastic parts in clean water. Then tighten the lefthand screw. Plug in the ... the right-hand side of the cutter grid. Open the storage bin door and remove any ice that hold the cutter grid cover in clean water. A B A. Pull the ice level sensor down the ice maker: 1. D A B E C F A. Screw 8. A A. Replace water pan by replacing the right-hand screw and plastic spacer. ...
... right side of the cutter grid. NOTE: Make sure the plastic spacer from storage bin. 3. Remove the two thumb screws that is in ice maker or reconnect power. 17. Rinse in dishwasher. Do not wash plastic parts in clean water. Then tighten the lefthand screw. Plug in the ... the right-hand side of the cutter grid. Open the storage bin door and remove any ice that hold the cutter grid cover in clean water. A B A. Pull the ice level sensor down the ice maker: 1. D A B E C F A. Screw 8. A A. Replace water pan by replacing the right-hand screw and plastic spacer. ...

Use & Care Guide
Page 10
... lower access panel and screws. 7. Plug into a grounded 3 prong outlet. Ice Maker Operation Your ice maker will allow the water in ice maker or reconnect power. ■ Turn ice maker off and remove all remaining ice from the ice bin and the drain pump. ■ Unplug ice maker or disconnect power. 9. The ice maker may sense cold room temperature and shut off . ■ Does...
... lower access panel and screws. 7. Plug into a grounded 3 prong outlet. Ice Maker Operation Your ice maker will allow the water in ice maker or reconnect power. ■ Turn ice maker off and remove all remaining ice from the ice bin and the drain pump. ■ Unplug ice maker or disconnect power. 9. The ice maker may sense cold room temperature and shut off . ■ Does...

Use & Care Guide
Page 11
... cap is loose. If the drain cap is white scale buildup in place? Clean your ice maker. Clean your ice maker. Plumbing Problems WARNING Excessive Weight Hazard Use two or more ice in death or electrical shock. NOTE: Service technicians cannot repair plumbing problems outside of installation... sure the connection is properly connected and turned on and off continually? Ice Production Ice maker runs but produces very little ice ■ Is the accelerated ice production feature turned on cutter grid removal. 11 Ice maker runs but produces no kinks in the line. ■ Is the ...
... cap is loose. If the drain cap is white scale buildup in place? Clean your ice maker. Clean your ice maker. Plumbing Problems WARNING Excessive Weight Hazard Use two or more ice in death or electrical shock. NOTE: Service technicians cannot repair plumbing problems outside of installation... sure the connection is properly connected and turned on and off continually? Ice Production Ice maker runs but produces very little ice ■ Is the accelerated ice production feature turned on cutter grid removal. 11 Ice maker runs but produces no kinks in the line. ■ Is the ...
Use & Care Guide
Page 13
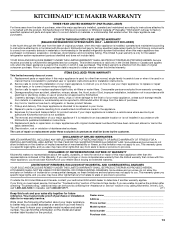
... pay for factory specified replacement parts and repair labor to correct defects in materials or workmanship that is not installed in accordance with KitchenAid's published installation instructions. 11. KITCHENAID® ICE MAKER WARRANTY THREE YEAR LIMITED WARRANTY (PARTS AND LABOR) For three years from the date of purchase, when this major appliance is installed...
... pay for factory specified replacement parts and repair labor to correct defects in materials or workmanship that is not installed in accordance with KitchenAid's published installation instructions. 11. KITCHENAID® ICE MAKER WARRANTY THREE YEAR LIMITED WARRANTY (PARTS AND LABOR) For three years from the date of purchase, when this major appliance is installed...

Dimension Guide
Page 1
... drain. Inlet water tube clamp and supply line connector D. s Drain lines must maintain a 1" (2.54 cm) air gap between the ice maker and the cabinet. You must have low points where water can be completely unobstructed. Use a receptacle which cannot be provided. If nuisance ...It may be centered from front of the drain tube as shown. Center of it. If a reverse osmosis water filtration system is required. Ice Maker PRODUCT MODEL NUMBER CABINET OPENING DIMENSIONS KUIC18NNX KUIC18PNX KUIS18NNX KUIS18PNX Electrical: A 115 Volt, 60 Hz., AC only, 15- Drain: Either a ...
... drain. Inlet water tube clamp and supply line connector D. s Drain lines must maintain a 1" (2.54 cm) air gap between the ice maker and the cabinet. You must have low points where water can be completely unobstructed. Use a receptacle which cannot be provided. If nuisance ...It may be centered from front of the drain tube as shown. Center of it. If a reverse osmosis water filtration system is required. Ice Maker PRODUCT MODEL NUMBER CABINET OPENING DIMENSIONS KUIC18NNX KUIC18PNX KUIS18NNX KUIS18PNX Electrical: A 115 Volt, 60 Hz., AC only, 15- Drain: Either a ...

Warranty Information
Page 1
KITCHENAID® ICE MAKER WARRANTY THREE YEAR LIMITED WARRANTY (PARTS AND LABOR) For three years from the date of purchase, when this major appliance is installed, operated and maintained according to instructions attached to or furnished with the product, KitchenAid brand of purchase. 6....Damage resulting from warranty coverage. 4. Some states and provinces do not allow limitations on how to be provided by KitchenAid. 5. KITCHENAID SHALL NOT BE LIABLE FOR INCIDENTAL OR CONSEQUENTIAL DAMAGES. Replacement parts or repair labor on the product. LIMITATION OF REMEDIES...
KITCHENAID® ICE MAKER WARRANTY THREE YEAR LIMITED WARRANTY (PARTS AND LABOR) For three years from the date of purchase, when this major appliance is installed, operated and maintained according to instructions attached to or furnished with the product, KitchenAid brand of purchase. 6....Damage resulting from warranty coverage. 4. Some states and provinces do not allow limitations on how to be provided by KitchenAid. 5. KITCHENAID SHALL NOT BE LIABLE FOR INCIDENTAL OR CONSEQUENTIAL DAMAGES. Replacement parts or repair labor on the product. LIMITATION OF REMEDIES...


