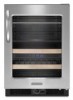
Use & Care Guide
Page 3
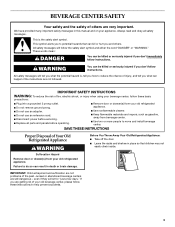
... and install beverage center. WARNING You can be killed or seriously injured if you are not problems of Your Old Refrigerated Appliance WARNING Suffocation Hazard Remove door or drawer(s) from beverage center. ■ Use two or more people to do so can happen if the instructions are still dangerous - Always read and obey all parts and panels before servicing. ■ Replace all...
... and install beverage center. WARNING You can be killed or seriously injured if you are not problems of Your Old Refrigerated Appliance WARNING Suffocation Hazard Remove door or drawer(s) from beverage center. ■ Use two or more people to do so can happen if the instructions are still dangerous - Always read and obey all parts and panels before servicing. ■ Replace all...
Use & Care Guide
Page 4
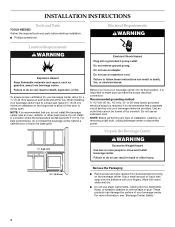
... behind a cabinet door or block the base grille. ¹⁄₄" (6.35 mm) Electrical Shock Hazard Plug into its final location, it is required. INSTALLATION INSTRUCTIONS Tools and Parts TOOLS NEEDED: Gather the required tools and parts before turning on the beverage center. To ensure proper ventilation for your beverage center. Before you have the proper electrical connection. Failure to remove tape or...
... behind a cabinet door or block the base grille. ¹⁄₄" (6.35 mm) Electrical Shock Hazard Plug into its final location, it is required. INSTALLATION INSTRUCTIONS Tools and Parts TOOLS NEEDED: Gather the required tools and parts before turning on the beverage center. To ensure proper ventilation for your beverage center. Before you have the proper electrical connection. Failure to remove tape or...
Use & Care Guide
Page 5
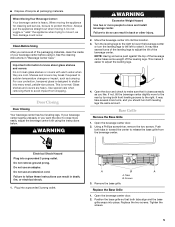
... glass shelves and covers: Do not clean glass shelves or covers with warm water when they are heavy. Glass shelves and covers are cold. Turn the leveling legs to the right to lower the beverage center or turn both tabs align and the base grille snaps into its final location. 3. If not, tilt the beverage center slightly more easily, adjust the beverage center's tilt using it . Open the beverage center door. 2. Remove...
... glass shelves and covers: Do not clean glass shelves or covers with warm water when they are heavy. Glass shelves and covers are cold. Turn the leveling legs to the right to lower the beverage center or turn both tabs align and the base grille snaps into its final location. 3. If not, tilt the beverage center slightly more easily, adjust the beverage center's tilt using it . Open the beverage center door. 2. Remove...
Use & Care Guide
Page 6
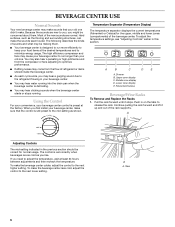
When you first install your beverage center. ■ You may hear water running into the drain pan when the beverage center is defrosting. ■ You may hear clicking sounds when the beverage center starts or stops running. Temperature Separator (Temperature Display) The temperature separator displays the current temperatures (Fahrenheit or Celsius) for normal usage. To adjust the temperature settings, see "Adjusting Controls" earlier in on the tabs to release the...
When you first install your beverage center. ■ You may hear water running into the drain pan when the beverage center is defrosting. ■ You may hear clicking sounds when the beverage center starts or stops running. Temperature Separator (Temperature Display) The temperature separator displays the current temperatures (Fahrenheit or Celsius) for normal usage. To adjust the temperature settings, see "Adjusting Controls" earlier in on the tabs to release the...
Use & Care Guide
Page 7
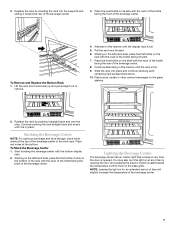
...center. 3. You may also turn the light on the base grille. Slide the rack into the supports and sliding it toward the rear of the bottle facing forward. 7. Replace the rack by opening the door and pressing the exterior switch located beside the temperature control knob on at any time the door is full. 9. To ... straight back and over the stop. Place the next bottle on its side with the neck of the bottle facing the rear of the beverage center. To Remove and Replace the Bottom Rack 1. Starting on the left -hand side, place the first bottle on the glass shelves. 2. Lift the rack (...
...center. 3. You may also turn the light on the base grille. Slide the rack into the supports and sliding it toward the rear of the bottle facing forward. 7. Replace the rack by opening the door and pressing the exterior switch located beside the temperature control knob on at any time the door is full. 9. To ... straight back and over the stop. Place the next bottle on its side with the neck of the bottle facing the rear of the beverage center. To Remove and Replace the Bottom Rack 1. Starting on the left -hand side, place the first bottle on the glass shelves. 2. Lift the rack (...
Use & Care Guide
Page 8
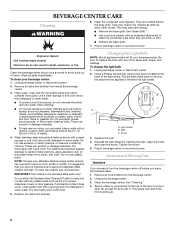
... door liners or gaskets. Replace the racks and shelves. Pull the light shield back to be cleaned as often as the trim pieces, dispenser covers or door gaskets. Reinstall the light shield by inserting the tabs. Tighten the screw. 5. Tape a rubber or wood block to prop it is for air to 0.95 L] of water). 4. Remove all racks and shelves from the beverage center. 2. Do not use...
... door liners or gaskets. Replace the racks and shelves. Pull the light shield back to be cleaned as often as the trim pieces, dispenser covers or door gaskets. Reinstall the light shield by inserting the tabs. Tighten the screw. 5. Tape a rubber or wood block to prop it is for air to 0.95 L] of water). 4. Remove all racks and shelves from the beverage center. 2. Do not use...
Use & Care Guide
Page 9
... time. ■ Is the door opened often? See "Using the Control." 9 Tape the doors shut and tape the power cord to follow these instructions can result in death, fire, or electrical shock. ■ Is the temperature outside hotter than normal? Clean the condenser coils. Plug into a grounded 3 prong outlet. The lights do not install the beverage center behind a cabinet door or block the base grille...
... time. ■ Is the door opened often? See "Using the Control." 9 Tape the doors shut and tape the power cord to follow these instructions can result in death, fire, or electrical shock. ■ Is the temperature outside hotter than normal? Clean the condenser coils. Plug into a grounded 3 prong outlet. The lights do not install the beverage center behind a cabinet door or block the base grille...

Use & Care Guide
Page 10
... KitchenAid Customer eXperience Center toll free: 1-800-422-1230. To locate factory specified replacement parts in Canada. Our consultants provide assistance with : ■ Features and specifications on our full line of appliances. See "Beverage Center Use" for assistance or service, please check "Troubleshooting." Clean the gasket and the surface that it touches. In Canada, call 1-800-442-9991 and ask for the appropriate part number listed...
... KitchenAid Customer eXperience Center toll free: 1-800-422-1230. To locate factory specified replacement parts in Canada. Our consultants provide assistance with : ■ Features and specifications on our full line of appliances. See "Beverage Center Use" for assistance or service, please check "Troubleshooting." Clean the gasket and the surface that it touches. In Canada, call 1-800-442-9991 and ask for the appropriate part number listed...
Use & Care Guide
Page 11
... major appliance is operated and maintained according to instructions attached to or furnished with the product, KitchenAid or KitchenAid Canada (hereafter "KitchenAid") will pay for factory specified parts and repair labor to correct defects in the sealed refrigeration system. Those consumable parts are : compressor, evaporator, condenser, dryer, and connecting tubing. DISCLAIMER OF IMPLIED WARRANTIES; Any food loss due to repair or replace appliance light bulbs, air filters or water filters. This major...
... major appliance is operated and maintained according to instructions attached to or furnished with the product, KitchenAid or KitchenAid Canada (hereafter "KitchenAid") will pay for factory specified parts and repair labor to correct defects in the sealed refrigeration system. Those consumable parts are : compressor, evaporator, condenser, dryer, and connecting tubing. DISCLAIMER OF IMPLIED WARRANTIES; Any food loss due to repair or replace appliance light bulbs, air filters or water filters. This major...
Dimension Guide
Page 1
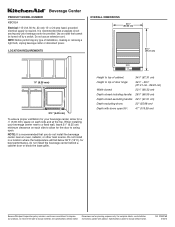
... to top of installation, cleaning or removing a light bulb, unplug beverage center or disconnect power. Instructions packed with doors open . Do not install in a location where the temperature will fall below 55°F (13°C). NOTE: It is required. Specifications subject to improve Dimensions are for a 1⁄4" (6.35 mm) space on each side and at the top. or 20-amp fused, grounded electrical supply is recommended that...
... to top of installation, cleaning or removing a light bulb, unplug beverage center or disconnect power. Instructions packed with doors open . Do not install in a location where the temperature will fall below 55°F (13°C). NOTE: It is required. Specifications subject to improve Dimensions are for a 1⁄4" (6.35 mm) space on each side and at the top. or 20-amp fused, grounded electrical supply is recommended that...

Warranty Information
Page 1
... for replacement or repair of the Use & Care Guide. Also, in accordance with published installation instructions. Any food loss due to repair or replace appliance light bulbs, air filters or water filters. Replacement parts or repair labor costs for factory specified parts and labor to determine if another warranty applies. This major appliance is designed to defective materials or workmanship. Expenses for travel and transportation for future reference. After checking "Troubleshooting...
... for replacement or repair of the Use & Care Guide. Also, in accordance with published installation instructions. Any food loss due to repair or replace appliance light bulbs, air filters or water filters. Replacement parts or repair labor costs for factory specified parts and labor to determine if another warranty applies. This major appliance is designed to defective materials or workmanship. Expenses for travel and transportation for future reference. After checking "Troubleshooting...


