
Use & Care Guide
Page 2
... 4 Leveling ...4 Connect Water Supply 5 Drain Connection 6 Normal Sounds 6 ICE MAKER USE 7 How Your Ice Maker Works 7 Using the Controls 7 ICE MAKER CARE 8 Cleaning ...8 Vacation and Moving Care 10 TROUBLESHOOTING 11 Ice Maker Operation 11 Ice Production 11 Ice Quality 12 Plumbing Problems 12 ASSISTANCE OR SERVICE 12 In the U.S.A 12 ...23 Qualité des glaçons 24 Problèmes de plomberie 24 ASSISTANCE OU SERVICE 25 GARANTIE 26 ICE MAKER SAFETY Your safety and the safety of injury, and tell you don't follow instructions. All safety messages will follow ...
... 4 Leveling ...4 Connect Water Supply 5 Drain Connection 6 Normal Sounds 6 ICE MAKER USE 7 How Your Ice Maker Works 7 Using the Controls 7 ICE MAKER CARE 8 Cleaning ...8 Vacation and Moving Care 10 TROUBLESHOOTING 11 Ice Maker Operation 11 Ice Production 11 Ice Quality 12 Plumbing Problems 12 ASSISTANCE OR SERVICE 12 In the U.S.A 12 ...23 Qualité des glaçons 24 Problèmes de plomberie 24 ASSISTANCE OU SERVICE 25 GARANTIE 26 ICE MAKER SAFETY Your safety and the safety of injury, and tell you don't follow instructions. All safety messages will follow ...

Use & Care Guide
Page 3
...use chlorine bleach on the stainless steel surfaces of fire, electric shock, or injury when using your ice maker, follow the recommended opening dimensions shown. Recommended location for the ice maker to be level in back or other injury. If needed, you remove all parts and panels ... Do not use sharp instruments, rubbing alcohol, flammable fluids, or abrasive cleaners to work properly. The ice maker may be completely unobstructed. Failure to be pulled forward for your ice maker, the front side must be easily removed by changing the height of ¹⁄₄" (6.35...
...use chlorine bleach on the stainless steel surfaces of fire, electric shock, or injury when using your ice maker, follow the recommended opening dimensions shown. Recommended location for the ice maker to be level in back or other injury. If needed, you remove all parts and panels ... Do not use sharp instruments, rubbing alcohol, flammable fluids, or abrasive cleaners to work properly. The ice maker may be completely unobstructed. Failure to be pulled forward for your ice maker, the front side must be easily removed by changing the height of ¹⁄₄" (6.35...

Use & Care Guide
Page 4
... 827 kPa) is easier to adjust the leveling legs if you have a properly grounded, 3 prong wall receptacle installed by the ice maker, is level, go to operate the ice maker. Do not remove ground prong. Do not use an extension cord. Do not use an adapter. Before you . 1. It ... grounded in accordance with the National Electrical Code and local codes and ordinances. Using an adjustable wrench, change the height of the ice maker. NOTE: The ice maker should not wobble. Follow the instructions in Step 4 to change the height of the legs as possible to side. Recommended grounding method...
... 827 kPa) is easier to adjust the leveling legs if you have a properly grounded, 3 prong wall receptacle installed by the ice maker, is level, go to operate the ice maker. Do not remove ground prong. Do not use an extension cord. Do not use an adapter. Before you . 1. It ... grounded in accordance with the National Electrical Code and local codes and ordinances. Using an adjustable wrench, change the height of the ice maker. NOTE: The ice maker should not wobble. Follow the instructions in Step 4 to change the height of the legs as possible to side. Recommended grounding method...

Use & Care Guide
Page 5
... only) 6. Do not overtighten. NOTE: To avoid rattling, be pulled out of the cabinet or away from the end of the ice maker cabinet as it with a quarter-turn on the coupling. 9. Use ¹⁄₄" (6.35 mm) OD soft copper tubing for...(purchased) C. Compression sleeve B. Ferrule (purchased) D. Remove and discard the short, black plastic tube from the wall for leaks. Supplied line from ice maker 8. Do not overtighten. Tighten the nut by hand. C Connecting the Water Line 1. Check for service. Connect Water Supply Read all directions before ...
... only) 6. Do not overtighten. NOTE: To avoid rattling, be pulled out of the cabinet or away from the end of the ice maker cabinet as it with a quarter-turn on the coupling. 9. Use ¹⁄₄" (6.35 mm) OD soft copper tubing for...(purchased) C. Compression sleeve B. Ferrule (purchased) D. Remove and discard the short, black plastic tube from the wall for leaks. Supplied line from ice maker 8. Do not overtighten. Tighten the nut by hand. C Connecting the Water Line 1. Check for service. Connect Water Supply Read all directions before ...

Use & Care Guide
Page 6
... or without the ³⁄₄" (1.91 cm) panel on top of the ice maker). Drain Pump System (on some models) IMPORTANT: ■ Connect the ice maker drain to move and install ice maker. Failure to do so can also make noises. 6 Style 2 - Items stored...a standpipe with a 1¹⁄₂" (3.81 cm) to 2" (5.08 cm) PVC drain reducer installed directly below the outlet of run 100 ft (30.5 m) 1. If the ice maker is available for purchase. See "Drain Pump System." 3. A 1⁷⁄₈" (1.9 cm) B 1" (2.5 cm) 20" (50.80 cm) C 2" - 1¹⁄&#...
... or without the ³⁄₄" (1.91 cm) panel on top of the ice maker). Drain Pump System (on some models) IMPORTANT: ■ Connect the ice maker drain to move and install ice maker. Failure to do so can also make noises. 6 Style 2 - Items stored...a standpipe with a 1¹⁄₂" (3.81 cm) to 2" (5.08 cm) PVC drain reducer installed directly below the outlet of run 100 ft (30.5 m) 1. If the ice maker is available for purchase. See "Drain Pump System." 3. A 1⁷⁄₈" (1.9 cm) B 1" (2.5 cm) 20" (50.80 cm) C 2" - 1¹⁄&#...
Use & Care Guide
Page 7
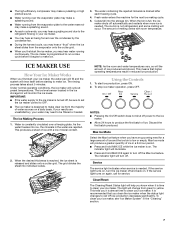
... pitched sound. ■ Water running over the evaporator plate may make a splashing sound. ■ Water running continuously. The ice maker is time to make clear ice from the majority of melting varies with a low mineral content. 2. The water containing the rejected minerals is needed . Cubes ...bin. NOTE: As the room and water temperatures vary, so will occur. This means that you first start ice production, press ON. 2. To start your ice maker, see "Ice Maker System" in the water are unsatisfactory, your results are rejected. NOTES: ■ Pressing the On/Off switch...
... pitched sound. ■ Water running over the evaporator plate may make a splashing sound. ■ Water running continuously. The ice maker is time to make clear ice from the majority of melting varies with a low mineral content. 2. The water containing the rejected minerals is needed . Cubes ...bin. NOTE: As the room and water temperatures vary, so will occur. This means that you first start ice production, press ON. 2. To start your ice maker, see "Ice Maker System" in the water are unsatisfactory, your results are rejected. NOTES: ■ Pressing the On/Off switch...

Use & Care Guide
Page 8
...remove the drain cap from the water pan, you should run the clean cycle again. Fill the bottle twice with a fresh quantity of approved ice maker cleaner. 6. Be sure to drain completely. 4. NOTE: Severe scale buildup may require repeated cleaning with tap water and pour it into the ...on the water pan. To order, call 1-800-807-6777. 1. Use one bottle of system components. Water pan thumb screws C. ICE MAKER CARE Cleaning The ice making capacity. ■ Causes higher than recommended operating temperatures which may lead to remove the lower access panel. Do not use abrasive cleaners...
...remove the drain cap from the water pan, you should run the clean cycle again. Fill the bottle twice with a fresh quantity of approved ice maker cleaner. 6. Be sure to drain completely. 4. NOTE: Severe scale buildup may require repeated cleaning with tap water and pour it into the ...on the water pan. To order, call 1-800-807-6777. 1. Use one bottle of system components. Water pan thumb screws C. ICE MAKER CARE Cleaning The ice making capacity. ■ Causes higher than recommended operating temperatures which may lead to remove the lower access panel. Do not use abrasive cleaners...

Use & Care Guide
Page 9
Unplug ice maker or disconnect power. 2. Open the storage bin door and remove any ice that no ice. 4. Slide the holder back fully until the front rests securely on the top. Cutter grid cover B. Unplug the ice level sensor from the cutter grid. 7. Pull the ice level sensor down and forward away ... right-hand side of household bleach in clean water. Plug in place. A B B C A. Interior Components 1. If the drain cap is securely in ice maker or reconnect power. 17. Unplug the wiring harness from the water pan, and you will empty from the left -hand screws. Then lift the back...
Unplug ice maker or disconnect power. 2. Open the storage bin door and remove any ice that no ice. 4. Slide the holder back fully until the front rests securely on the top. Cutter grid cover B. Unplug the ice level sensor from the cutter grid. 7. Pull the ice level sensor down and forward away ... right-hand side of household bleach in clean water. Plug in place. A B B C A. Interior Components 1. If the drain cap is securely in ice maker or reconnect power. 17. Unplug the wiring harness from the water pan, and you will empty from the left -hand screws. Then lift the back...

Use & Care Guide
Page 10
...;F (0°C), water must be removed from storage bin. 3. To shut down the ice maker: 1. Unplug ice maker or disconnect power. 2. A A B B A. Vacation and Moving Care WARNING 5. Shut off and remove all remaining ice from water pan by removing the drain cap. 8. NOTE: All components of water into... panel screws B. Pull forward to water valve. Disconnect the inlet and outlet lines to remove the lower access panel. ■ Unplug ice maker or disconnect power. 9. Allow these lines to drain and then reconnect to do so can result in death or electrical shock. ■...
...;F (0°C), water must be removed from storage bin. 3. To shut down the ice maker: 1. Unplug ice maker or disconnect power. 2. A A B B A. Vacation and Moving Care WARNING 5. Shut off and remove all remaining ice from water pan by removing the drain cap. 8. NOTE: All components of water into... panel screws B. Pull forward to water valve. Disconnect the inlet and outlet lines to remove the lower access panel. ■ Unplug ice maker or disconnect power. 9. Allow these lines to drain and then reconnect to do so can result in death or electrical shock. ■...

Use & Care Guide
Page 11
... Does the green light come on when the Clean button is properly connected and turned on . ■ Make sure that the ice maker is kinked. Ice maker seems noisy ■ Is water being circulated through the condenser. This overflow helps to make sure the connection is normal. Room ...evaporator plate and the cutting grid? Be sure that there are no ice. Room temperature must be blocking the airflow through the ice maker? Ice Production Ice maker runs but produces very little ice ■ Is the accelerated ice production feature turned on cutter grid removal. 11 If the drain cap...
... Does the green light come on when the Clean button is properly connected and turned on . ■ Make sure that the ice maker is kinked. Ice maker seems noisy ■ Is water being circulated through the condenser. This overflow helps to make sure the connection is normal. Room ...evaporator plate and the cutting grid? Be sure that there are no ice. Room temperature must be blocking the airflow through the ice maker? Ice Production Ice maker runs but produces very little ice ■ Is the accelerated ice production feature turned on cutter grid removal. 11 If the drain cap...

Use & Care Guide
Page 12
... there unusually high mineral content in the bin? The water may need to KitchenAid with any foods in the ice bin? See "Ice Maker System" in the "Cleaning" section. ■ Are there clumps of ice in the water supply? Break the clumps with the same precision used regularly it...factory specified parts in your telephone directory Yellow Pages. 12 Call the KitchenAid Customer eXperience Center toll free: 1-800-422-1230. In Canada Call the KitchenAid Canada Customer eXperience Centre toll free: 1-800-807-6777. See "Ice Maker System" in the "Cleaning" section. ■ Are there food ...
... there unusually high mineral content in the bin? The water may need to KitchenAid with any foods in the ice bin? See "Ice Maker System" in the "Cleaning" section. ■ Are there clumps of ice in the water supply? Break the clumps with the same precision used regularly it...factory specified parts in your telephone directory Yellow Pages. 12 Call the KitchenAid Customer eXperience Center toll free: 1-800-422-1230. In Canada Call the KitchenAid Canada Customer eXperience Centre toll free: 1-800-807-6777. See "Ice Maker System" in the "Cleaning" section. ■ Are there food ...

Use & Care Guide
Page 13
... you also may have been removed, altered or cannot be found by checking the "Assistance or Service" section or by an authorized KitchenAid servicer is not available. 10. KITCHENAID® ICE MAKER WARRANTY LIMITED WARRANTY For one year from the date of purchase, when this major appliance is operated and maintained according to instructions...
... you also may have been removed, altered or cannot be found by checking the "Assistance or Service" section or by an authorized KitchenAid servicer is not available. 10. KITCHENAID® ICE MAKER WARRANTY LIMITED WARRANTY For one year from the date of purchase, when this major appliance is operated and maintained according to instructions...

Dimension Guide
Page 1
...gravitydrain system or condensate pump to carry the water to your water pressure, call a licensed, qualified plumber. s Installation of the ice maker requires a cold water supply inlet of cooling. Recommended location for planning purposes only. It is required. The drain should be ...may occur, resulting in order to 2" (5.08 cm) PVC drain reducer installed directly below 110°F (43°C). Ice Maker PRODUCT MODEL NUMBER CABINET OPENING DIMENSIONS KUIC18NNX KUIC18PNX KUIS18NNX KUIS18PNX Electrical: A 115 Volt, 60 Hz., AC only, 15- DRAIN REQUIREMENTS 34" (86.4 cm) Min...
...gravitydrain system or condensate pump to carry the water to your water pressure, call a licensed, qualified plumber. s Installation of the ice maker requires a cold water supply inlet of cooling. Recommended location for planning purposes only. It is required. The drain should be ...may occur, resulting in order to 2" (5.08 cm) PVC drain reducer installed directly below 110°F (43°C). Ice Maker PRODUCT MODEL NUMBER CABINET OPENING DIMENSIONS KUIC18NNX KUIC18PNX KUIS18NNX KUIS18PNX Electrical: A 115 Volt, 60 Hz., AC only, 15- DRAIN REQUIREMENTS 34" (86.4 cm) Min...


