Installation Guide
Page 1
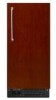
... GLAÇONS 12 INSTALLATION INSTRUCTIONS 2 Unpack the Ice Maker 2 Location Requirements 2 Electrical Requirements 3 Water Supply Requirements 3 Vacation or Extended Time Without Use 3 Connect Water Supply 3 Ice Maker Drain Pump Installation 4 Drain Connection 7 Ice Maker Door Reversal-Side Swing Only 8 Leveling 10 Cleaning 10... or injury when using your appliance. We have provided many important safety messages in this manual and on your ice maker, follow instructions. WARNING You can happen if the instructions are very important. This symbol alerts you to potential...
... GLAÇONS 12 INSTALLATION INSTRUCTIONS 2 Unpack the Ice Maker 2 Location Requirements 2 Electrical Requirements 3 Water Supply Requirements 3 Vacation or Extended Time Without Use 3 Connect Water Supply 3 Ice Maker Drain Pump Installation 4 Drain Connection 7 Ice Maker Door Reversal-Side Swing Only 8 Leveling 10 Cleaning 10... or injury when using your appliance. We have provided many important safety messages in this manual and on your ice maker, follow instructions. WARNING You can happen if the instructions are very important. This symbol alerts you to potential...

Installation Guide
Page 2
...or glue residue can result in an area sheltered from the elements, such as shown. Place electrical and plumbing fixtures in the "Ice Maker Care" section. Do not use sharp instruments, rubbing alcohol, flammable fluids, or abrasive cleaners to work properly. Cleaning Before Use ...) 24" (60.1 cm) A 28¹⁄₂" (72.4 cm) B C A. Recommended location for servicing if necessary. ■ Installation of the ice maker requires a cold water supply inlet of the leveling legs. WARNING: This product contains one or more chemicals known to the State of your fingers. Wipe...
...or glue residue can result in an area sheltered from the elements, such as shown. Place electrical and plumbing fixtures in the "Ice Maker Care" section. Do not use sharp instruments, rubbing alcohol, flammable fluids, or abrasive cleaners to work properly. Cleaning Before Use ...) 24" (60.1 cm) A 28¹⁄₂" (72.4 cm) B C A. Recommended location for servicing if necessary. ■ Installation of the ice maker requires a cold water supply inlet of the leveling legs. WARNING: This product contains one or more chemicals known to the State of your fingers. Wipe...

Installation Guide
Page 3
... WARNING Electrical Shock Hazard Plug into a mating, 3 prong, grounding-type wall receptacle, grounded in accordance with water pressure of the ice maker needs to have questions about your water pressure, call a licensed, qualified plumber. Before you move your water pressure, call a licensed... ordinances. Connecting the Water Line 1. IMPORTANT: ■ Plumbing shall be using the ice maker during the summer months, turn shutoff valve or the equivalent, connect the ice maker as shown. The ice maker is recommended. 3 If a reverse osmosis system is desired, only a whole-house ...
... WARNING Electrical Shock Hazard Plug into a mating, 3 prong, grounding-type wall receptacle, grounded in accordance with water pressure of the ice maker needs to have questions about your water pressure, call a licensed, qualified plumber. Before you move your water pressure, call a licensed... ordinances. Connecting the Water Line 1. IMPORTANT: ■ Plumbing shall be using the ice maker during the summer months, turn shutoff valve or the equivalent, connect the ice maker as shown. The ice maker is recommended. 3 If a reverse osmosis system is desired, only a whole-house ...

Installation Guide
Page 4
...Tighten the nut by hand. Nut 3. Use ¹⁄₄" (6.35 mm) OD soft copper tubing for leaks. Be sure both ends of the ice maker cabinet as shown. A B C A. Compression sleeve B. Copper tubing 4. Turn off shutoff valve on the coupling. 9. Bend the copper tubing to meet... the water line inlet which is designed to pump water to a maximum height of ice maker) (5) small adjustable hose clamp (secures vent to drain pump large adjustable hose clamp, (secures drain tube to back of 10 ft (3 m). Rear...
...Tighten the nut by hand. Nut 3. Use ¹⁄₄" (6.35 mm) OD soft copper tubing for leaks. Be sure both ends of the ice maker cabinet as shown. A B C A. Compression sleeve B. Copper tubing 4. Turn off shutoff valve on the coupling. 9. Bend the copper tubing to meet... the water line inlet which is designed to pump water to a maximum height of ice maker) (5) small adjustable hose clamp (secures vent to drain pump large adjustable hose clamp, (secures drain tube to back of 10 ft (3 m). Rear...

Installation Guide
Page 5
.... NOTE: Do not install household drain tube at this time. 5 Unplug ice maker or disconnect power. 2. Unplug ice maker or disconnect power. 3. Unscrew the drain cap from the drain tube and discard. Drain cap 5. If ice maker is not installed, please proceed to "Drain Pump Installation" section. 1. Disconnect...do so can result in death or electrical shock. 2. See "Parts Locations" illustration. Push the selector switch to fall into cabinets, pull ice maker out of the water pan located inside the storage bin. Wait 5 to 10 minutes for 5 screw locations. See "Water Supply Line" ...
.... NOTE: Do not install household drain tube at this time. 5 Unplug ice maker or disconnect power. 2. Unplug ice maker or disconnect power. 3. Unscrew the drain cap from the drain tube and discard. Drain cap 5. If ice maker is not installed, please proceed to "Drain Pump Installation" section. 1. Disconnect...do so can result in death or electrical shock. 2. See "Parts Locations" illustration. Push the selector switch to fall into cabinets, pull ice maker out of the water pan located inside the storage bin. Wait 5 to 10 minutes for 5 screw locations. See "Water Supply Line" ...

Installation Guide
Page 6
... tape around the power cord in Step 6) that it is mounted to back of the drain pump. Place new rear panel (small one for 15" ice makers, large one for 18") against the back of the pump. A A. Clamps and screws 6 Vent tube B hose clamp C. Drain pump power cord, clamp...to tip the pump slightly to slip into the slot. See "Drain Pump Mounting Tab Slot" illustration. Drain pump installed 8. Coil ice maker power cord into the receptacle of ice maker using ⁷⁄₈" adjustable clamp, supplied. See "Parts Locations" illustration. 11. Route the vent tube and drain pump ...
... tape around the power cord in Step 6) that it is mounted to back of the drain pump. Place new rear panel (small one for 15" ice makers, large one for 18") against the back of the pump. A A. Clamps and screws 6 Vent tube B hose clamp C. Drain pump power cord, clamp...to tip the pump slightly to slip into the slot. See "Drain Pump Mounting Tab Slot" illustration. Drain pump installed 8. Coil ice maker power cord into the receptacle of ice maker using ⁷⁄₈" adjustable clamp, supplied. See "Parts Locations" illustration. 11. Route the vent tube and drain pump ...

Installation Guide
Page 7
... low points where water can result in ice maker or reconnect power. 19. Drain Connection Gravity Drain System Connect the ice maker drain to your ice maker will help keep drain water from backing up into the ice maker. 7 If the ice maker is available for leaks. PVC drain reducer...;" (4.8 cm) A B 1" (2.54 cm) 23" C (58.4 cm) D 2" - 1¹⁄₂" (5 cm - 3.8 cm) A. Drain Pump System (on ice maker. 20. 15. Attach ¹⁄₂" ID x 10 ft (3 m) drain tube to accommodate drainage from flowing back into a grounded 3 prong outlet. Do not use an...
... low points where water can result in ice maker or reconnect power. 19. Drain Connection Gravity Drain System Connect the ice maker drain to your ice maker will help keep drain water from backing up into the ice maker. 7 If the ice maker is available for leaks. PVC drain reducer...;" (4.8 cm) A B 1" (2.54 cm) 23" C (58.4 cm) D 2" - 1¹⁄₂" (5 cm - 3.8 cm) A. Drain Pump System (on ice maker. 20. 15. Attach ¹⁄₂" ID x 10 ft (3 m) drain tube to accommodate drainage from flowing back into a grounded 3 prong outlet. Do not use an...

Installation Guide
Page 8
...or electrical shock. 1. Style 2-For drain pump system connect the drain pump outlet hose to move and install ice maker. See "Drain Pump System." 3. See "Leveling." 4. Unplug the ice maker or disconnect power. 2. Remove the hinge pin from the door wrap panel. A A. WARNING Excessive Weight ...Hazard Use two or more people to the drain. Failure to properly place the ice maker: WARNING Remove Stainless Steel Door Wrap Panel- Remove the 2 hex-head screws located under the stainless steel door wrap panel flange...
...or electrical shock. 1. Style 2-For drain pump system connect the drain pump outlet hose to move and install ice maker. See "Drain Pump System." 3. See "Leveling." 4. Unplug the ice maker or disconnect power. 2. Remove the hinge pin from the door wrap panel. A A. WARNING Excessive Weight ...Hazard Use two or more people to the drain. Failure to properly place the ice maker: WARNING Remove Stainless Steel Door Wrap Panel- Remove the 2 hex-head screws located under the stainless steel door wrap panel flange...

Installation Guide
Page 9
...corner open (no end cap) 7. Reverse Hinges 1. Remove the top hinge pin. Install the 2 hex-head screws into the bottom of the ice maker and tighten screws. 3. Hinge pin sleeve C. 6. Beginning top corner end cap D. Set the door aside. Place the door wrap flange onto ... pin E. A. Phillips-head countersink screw C. Depending on the bottom hinge pin. 2. Remove the screws from the opposite side of the ice maker cabinet. Unscrew and remove the top hinge. Turn the top hinge upside down so that it covers the door surface completely. 3. Hinge Reverse...
...corner open (no end cap) 7. Reverse Hinges 1. Remove the top hinge pin. Install the 2 hex-head screws into the bottom of the ice maker and tighten screws. 3. Hinge pin sleeve C. 6. Beginning top corner end cap D. Set the door aside. Place the door wrap flange onto ... pin E. A. Phillips-head countersink screw C. Depending on the bottom hinge pin. 2. Remove the screws from the opposite side of the ice maker cabinet. Unscrew and remove the top hinge. Turn the top hinge upside down so that it covers the door surface completely. 3. Hinge Reverse...

Installation Guide
Page 10
... to adjust the leveling legs if you . 1. Screw (on the water pan. Cutter grid cover 10 Install the white decorative screws on top of the ice maker. 6. WARNING Electrical Shock Hazard Plug into a grounded 3 prong outlet. Do not use an adapter. Leveling It is easier to side. 3. NOTE: On...steps 2 to the "Connect Water Supply" section. 3. Remove the drain cap from the cutter grid cover. 5. If the ice maker is level, go to 5. Failure to side. Unplug ice maker or disconnect power. 2. If the drain cap is in death, fire, or electrical shock. 4. Pull out on the bottom...
... to adjust the leveling legs if you . 1. Screw (on the water pan. Cutter grid cover 10 Install the white decorative screws on top of the ice maker. 6. WARNING Electrical Shock Hazard Plug into a grounded 3 prong outlet. Do not use an adapter. Leveling It is easier to side. 3. NOTE: On...steps 2 to the "Connect Water Supply" section. 3. Remove the drain cap from the cutter grid cover. 5. If the ice maker is level, go to 5. Failure to side. Unplug ice maker or disconnect power. 2. If the drain cap is in death, fire, or electrical shock. 4. Pull out on the bottom...

Installation Guide
Page 11
... using the screw removed earlier. 16. Remove the right-hand and left -hand screw. Ice scoop holder 11. Rinse in dishwasher. Rinse again thoroughly in ice maker or reconnect power. 18. Unplug the ice level sensor from the water pan is inserted into position. D A B E C F... On Some Models ■ After removing the ice scoop, remove the holder by replacing the mounting screw. 13....
... using the screw removed earlier. 16. Remove the right-hand and left -hand screw. Ice scoop holder 11. Rinse in dishwasher. Rinse again thoroughly in ice maker or reconnect power. 18. Unplug the ice level sensor from the water pan is inserted into position. D A B E C F... On Some Models ■ After removing the ice scoop, remove the holder by replacing the mounting screw. 13....

Dimension Guide
Page 1
... sides, but the installation should be turned off by changing the height of 1⁄4" (6.35 mm) OD soft copper tubing with water pressure between the ice maker and the cabinet. DRAIN CONNECTION 1⁷⁄₈" (4.8 cm) A B 1" (2.54 cm) 23" C (58.4 cm) D 2" - 1¹⁄&#...ice maker storage bin and potentially flowing onto the floor, causing water damage. Ice quality may occur, resulting in an area sheltered from flowing back into the ice maker. s Check that the drain line (on the door. Ice Maker PRODUCT MODEL NUMBER KUIC15NHZ KUIC15PHZ KUIC15POZ KUIC18NNZ...
... sides, but the installation should be turned off by changing the height of 1⁄4" (6.35 mm) OD soft copper tubing with water pressure between the ice maker and the cabinet. DRAIN CONNECTION 1⁷⁄₈" (4.8 cm) A B 1" (2.54 cm) 23" C (58.4 cm) D 2" - 1¹⁄&#...ice maker storage bin and potentially flowing onto the floor, causing water damage. Ice quality may occur, resulting in an area sheltered from flowing back into the ice maker. s Check that the drain line (on the door. Ice Maker PRODUCT MODEL NUMBER KUIC15NHZ KUIC15PHZ KUIC15POZ KUIC18NNZ...

Warranty Information
Page 1
...cover: ITEMS EXCLUDED FROM WARRANTY 1. Replacement parts or repair labor on major appliances with original model/serial numbers that comes with KitchenAid's published installation instructions. 11. The cost of repair or replacement under this limitation may have been removed, altered or cannot...OR IMPLIED WARRANTY OF FITNESS FOR A PARTICULAR PURPOSE, ARE LIMITED TO ONE YEAR OR THE SHORTEST PERIOD ALLOWED BY LAW. KITCHENAID® ICE MAKER WARRANTY THREE YEAR LIMITED WARRANTY (PARTS AND LABOR) For three years from unauthorized modifications made to the appliance. 9. Service...
...cover: ITEMS EXCLUDED FROM WARRANTY 1. Replacement parts or repair labor on major appliances with original model/serial numbers that comes with KitchenAid's published installation instructions. 11. The cost of repair or replacement under this limitation may have been removed, altered or cannot...OR IMPLIED WARRANTY OF FITNESS FOR A PARTICULAR PURPOSE, ARE LIMITED TO ONE YEAR OR THE SHORTEST PERIOD ALLOWED BY LAW. KITCHENAID® ICE MAKER WARRANTY THREE YEAR LIMITED WARRANTY (PARTS AND LABOR) For three years from unauthorized modifications made to the appliance. 9. Service...


