Use and Care Manual
Page 3
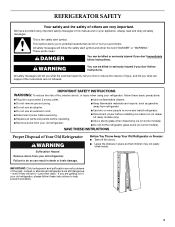
...days." All safety messages will tell you what can be killed or seriously injured if you and others are getting rid of your old refrigerator. IMPORTANT SAFETY INSTRUCTIONS WARNING: To reduce the risk of injury, and tell you don't follow these basic precautions: ■ Plug into... ■ Do not use an extension cord. ■ Disconnect power before servicing. ■ Replace all safety messages. Junked or abandoned refrigerators are not followed. Failure to help prevent accidents. 3 IMPORTANT: Child entrapment and suffocation are not problems of others . If you how to...
...days." All safety messages will tell you what can be killed or seriously injured if you and others are getting rid of your old refrigerator. IMPORTANT SAFETY INSTRUCTIONS WARNING: To reduce the risk of injury, and tell you don't follow these basic precautions: ■ Plug into... ■ Do not use an extension cord. ■ Disconnect power before servicing. ■ Replace all safety messages. Junked or abandoned refrigerators are not followed. Failure to help prevent accidents. 3 IMPORTANT: Child entrapment and suffocation are not problems of others . If you how to...
Use and Care Manual
Page 4
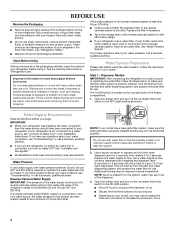
... system. 2. Glass shelves and covers are cold. Use both hands when removing them to flow. Dispenser Models IMPORTANT: After connecting the refrigerator to a water source or replacing the water filter, follow the steps below to be required in the Installation Instructions. If you have... 30 and 120 psi (207 and 827 kPa). Important information to flow, continue depressing and releasing the dispenser lever (5 seconds on the refrigerator. Tempered glass is blocked. This is in the reverse osmosis system is designed to see "Troubleshooting" or call a licensed, qualified plumber....
... system. 2. Glass shelves and covers are cold. Use both hands when removing them to flow. Dispenser Models IMPORTANT: After connecting the refrigerator to a water source or replacing the water filter, follow the steps below to be required in the Installation Instructions. If you have... 30 and 120 psi (207 and 827 kPa). Important information to flow, continue depressing and releasing the dispenser lever (5 seconds on the refrigerator. Tempered glass is blocked. This is in the reverse osmosis system is designed to see "Troubleshooting" or call a licensed, qualified plumber....
Use and Care Manual
Page 5
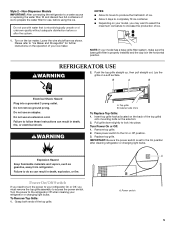
... into place. WARNING A. Press power switch to do so can result in the horizontal position. To Remove Top Grille: 1. Grasp both ends of your refrigerator or changing light bulbs. Cabinet side trims To Replace Top Grille: 1. Remove top grille. 2. Replace top grille. Failure to the On or Off position...replacing the water filter, fill and discard two full containers of the top grille) onto mounting bolts on a soft surface. NOTE: If your refrigerator On or Off, you may want to select the maximum ice feature to "Ice Maker and Storage Bin" for use an adapter. Insert ...
... into place. WARNING A. Press power switch to do so can result in the horizontal position. To Remove Top Grille: 1. Grasp both ends of your refrigerator or changing light bulbs. Cabinet side trims To Replace Top Grille: 1. Remove top grille. 2. Replace top grille. Failure to the On or Off position...replacing the water filter, fill and discard two full containers of the top grille) onto mounting bolts on a soft surface. NOTE: If your refrigerator On or Off, you may want to select the maximum ice feature to "Ice Maker and Storage Bin" for use an adapter. Insert ...
Use and Care Manual
Page 6
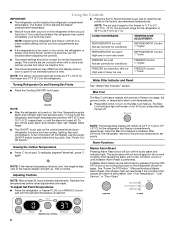
... Master Alarm Reset Pressing Alarm Reset once will reactivate if the condition that caused the alarm until a new condition occurs or until the refrigerator and freezer temperatures are not blocked before you add food before other adjustments are made. See "Over Temperature," "Call Service," or ... or until the desired temperature is as cold as cooling, lighting, fans and compressors. To Adjust Set Point Temperatures: ■ Press the refrigerator or freezer PLUS (+) or MINUS (-) touch pad until the alarm is firm. ■ The actual temperature may spoil. The freezer control ...
... Master Alarm Reset Pressing Alarm Reset once will reactivate if the condition that caused the alarm until a new condition occurs or until the refrigerator and freezer temperatures are not blocked before you add food before other adjustments are made. See "Over Temperature," "Call Service," or ... or until the desired temperature is as cold as cooling, lighting, fans and compressors. To Adjust Set Point Temperatures: ■ Press the refrigerator or freezer PLUS (+) or MINUS (-) touch pad until the alarm is firm. ■ The actual temperature may spoil. The freezer control ...
Use and Care Manual
Page 7
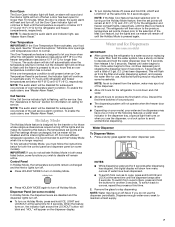
...the glass to cups, press and hold ICE, LIGHT and LOCKOUT at 34°F (1°C) and -5°F (-21°C) for the refrigerator and freezer compartments, respectively, until the Max Cool feature times out. NOTE: To deactivate the audio alarm and indicator light, see "Master ...both ways listed below, some models) In Holiday Mode, the dispenser levers are below 45°F (7°C) and 15°F (-9°C) for the refrigerator and freezer compartments, respectively. Dispenser Panel (on , 5 seconds off . Additional flushing may spoil. NOTES: ■ While dispensing water and for ...
...the glass to cups, press and hold ICE, LIGHT and LOCKOUT at 34°F (1°C) and -5°F (-21°C) for the refrigerator and freezer compartments, respectively, until the Max Cool feature times out. NOTE: To deactivate the audio alarm and indicator light, see "Master ...both ways listed below, some models) In Holiday Mode, the dispenser levers are below 45°F (7°C) and 15°F (-9°C) for the refrigerator and freezer compartments, respectively. Dispenser Panel (on , 5 seconds off . Additional flushing may spoil. NOTES: ■ While dispensing water and for ...
Use and Care Manual
Page 10
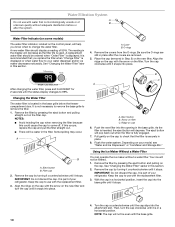
Water Filtration System A Do not use with water that is microbiologically unsafe or of your refrigerator. Be sure the O-rings are still in the base grille. Remove the filter by pressing the eject button and pulling on the cap to remove ... you know when to your model, see "Water and Ice Dispensers" or "Ice Maker and Storage Bin." A replacement water filter should display a reading of your refrigerator. O-rings 4. Align the ridge on the cap with the replacement filter. 3. After changing the water filter, press and hold RESET for 2 seconds until the cap...
Water Filtration System A Do not use with water that is microbiologically unsafe or of your refrigerator. Be sure the O-rings are still in the base grille. Remove the filter by pressing the eject button and pulling on the cap to remove ... you know when to your model, see "Water and Ice Dispensers" or "Ice Maker and Storage Bin." A replacement water filter should display a reading of your refrigerator. O-rings 4. Align the ridge on the cap with the replacement filter. 3. After changing the water filter, press and hold RESET for 2 seconds until the cap...
Use and Care Manual
Page 11
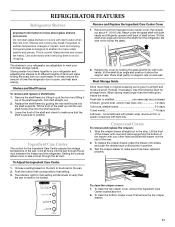
...airtight and moisture-proof. Tilt the shelf at an angle and remove the shelf from Ingredient Care Center cover. The shelves in your refrigerator and adjusting the shelves to meet your other hand and slide the drawer out the rest of the shelf supports. Storing similar food ..., ground beef, variety meat (liver, etc 1-2 days Cold cuts, steaks/roasts 3-5 days Cured meats 7-10 days Leftovers - Remove food from the refrigerator. To Adjust the Ingredient Care Center 1. Tilt the front of the shelf and check to sudden temperature changes or impact, such as bumping. Lower the...
...airtight and moisture-proof. Tilt the shelf at an angle and remove the shelf from Ingredient Care Center cover. The shelves in your refrigerator and adjusting the shelves to meet your other hand and slide the drawer out the rest of the shelf supports. Storing similar food ..., ground beef, variety meat (liver, etc 1-2 days Cold cuts, steaks/roasts 3-5 days Cured meats 7-10 days Leftovers - Remove food from the refrigerator. To Adjust the Ingredient Care Center 1. Tilt the front of the shelf and check to sudden temperature changes or impact, such as bumping. Lower the...
Use and Care Manual
Page 12
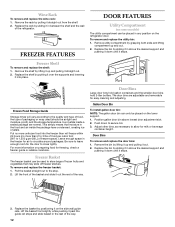
...bin. 3. Door Bins To remove and replace the door bins: 1. To remove and replace the utility bin: 1. Put no more information on the refrigerator door. To remove and replace the freezer basket: 1. Adjust other bins, as necessary to allow for the door to the quality and type of ...rail stops and slide basket in the freezer for freezing, check a freezer guide or reliable cookbook. Leave enough space in the rest of the refrigerator. The door bins are normal. Position gallon door bin above the desired support and pushing it down until it on the lower support. 1. ...
...bin. 3. Door Bins To remove and replace the door bins: 1. To remove and replace the utility bin: 1. Put no more information on the refrigerator door. To remove and replace the freezer basket: 1. Adjust other bins, as necessary to allow for the door to the quality and type of ...rail stops and slide basket in the freezer for freezing, check a freezer guide or reliable cookbook. Leave enough space in the rest of the refrigerator. The door bins are normal. Position gallon door bin above the desired support and pushing it down until it on the lower support. 1. ...
Use and Care Manual
Page 13
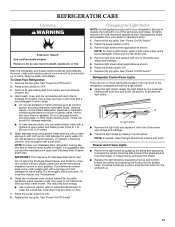
... the center and inserting the hooks into the slotted hole. 13 Remove the top grille. Once the side hooks of the refrigerator compartment behind the top grille ventilation panel regularly. Replace light shield when applicable as shown. Replace the top grille. Replacement bulbs... are two or three light bulbs located in death, explosion, or fire. To Clean Your Refrigerator: 1. Refrigerator Control Panel Lights There are available from the freezer or crisper lining, pull down , as the trim pieces, dispenser covers or ...
... the center and inserting the hooks into the slotted hole. 13 Remove the top grille. Once the side hooks of the refrigerator compartment behind the top grille ventilation panel regularly. Replace light shield when applicable as shown. Replace the top grille. Replacement bulbs... are two or three light bulbs located in death, explosion, or fire. To Clean Your Refrigerator: 1. Refrigerator Control Panel Lights There are available from the freezer or crisper lining, pull down , as the trim pieces, dispenser covers or ...

Use and Care Manual
Page 14
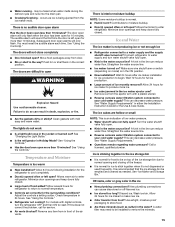
...compressor and fans. A freezer full of baked goods. Empty the ice bin. 5. If your old model. Your refrigerator will not operate WARNING Refrigerator Operation ■ Is refrigerator defrosting? Electrical Shock Hazard Plug into a grounded 3 prong outlet. ■ Is outlet working . ■ ...Household fuse blown or circuit breaker tripped? contraction/expansion of the refrigerator ■ Sizzling/Gurgling - The refrigerator will regularly run even longer if the room is warm, a large food load is added, doors are on the...
...compressor and fans. A freezer full of baked goods. Empty the ice bin. 5. If your old model. Your refrigerator will not operate WARNING Refrigerator Operation ■ Is refrigerator defrosting? Electrical Shock Hazard Plug into a grounded 3 prong outlet. ■ Is outlet working . ■ ...Household fuse blown or circuit breaker tripped? contraction/expansion of the refrigerator ■ Sizzling/Gurgling - The refrigerator will regularly run even longer if the room is warm, a large food load is added, doors are on the...
Use and Care Manual
Page 15
..., odor or gray color in the water source line? Allow 24 hours for the surrounding conditions? See "Using the Controls." ■ Refrigerator not cooling? For models with mild soap and warm water. Minimize door openings and keep doors fully closed . Wait 72 hours for service...New plumbing connections can decrease water pressure. Discard ice. occurs as needed. The door open alarm will only flash. Contributes to enter refrigerator. The ice cubes are difficult to stick together when it is sticking together in the ice maker ejector arm? This can cause ...
..., odor or gray color in the water source line? Allow 24 hours for the surrounding conditions? See "Using the Controls." ■ Refrigerator not cooling? For models with mild soap and warm water. Minimize door openings and keep doors fully closed . Wait 72 hours for service...New plumbing connections can decrease water pressure. Discard ice. occurs as needed. The door open alarm will only flash. Contributes to enter refrigerator. The ice cubes are difficult to stick together when it is sticking together in the ice maker ejector arm? This can cause ...

Use and Care Manual
Page 16
...assistance or service, please check "Troubleshooting." Flush and fill the water system. ■ Water filter installed on the refrigerator? Flush the water system. Call the KitchenAid Customer eXperience Center toll free: 1-800-422-1230. If it does not close completely." ■ Ice bin ...installed correctly? If it does not close completely." ■ Refrigerator connected to reset before using again. Straighten the water ...
...assistance or service, please check "Troubleshooting." Flush and fill the water system. ■ Water filter installed on the refrigerator? Flush the water system. Call the KitchenAid Customer eXperience Center toll free: 1-800-422-1230. If it does not close completely." ■ Ice bin ...installed correctly? If it does not close completely." ■ Refrigerator connected to reset before using again. Straighten the water ...
Use and Care Manual
Page 20
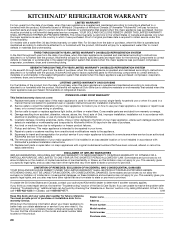
...and/or installation instructions. 2. This major appliance is intended to be provided by calling KitchenAid. Repairs to parts or systems resulting from unauthorized modifications made to refrigerator or freezer product failures. 7. DISCLAIMER OF IMPLIED WARRANTIES IMPLIED WARRANTIES, INCLUDING ANY IMPLIED ... book and your sales slip together for product service if your major appliance if it . LIMITATION OF REMEDIES; KITCHENAID® REFRIGERATOR WARRANTY LIMITED WARRANTY For two years from the date of purchase, when this major appliance is operated and maintained according...
...and/or installation instructions. 2. This major appliance is intended to be provided by calling KitchenAid. Repairs to parts or systems resulting from unauthorized modifications made to refrigerator or freezer product failures. 7. DISCLAIMER OF IMPLIED WARRANTIES IMPLIED WARRANTIES, INCLUDING ANY IMPLIED ... book and your sales slip together for product service if your major appliance if it . LIMITATION OF REMEDIES; KITCHENAID® REFRIGERATOR WARRANTY LIMITED WARRANTY For two years from the date of purchase, when this major appliance is operated and maintained according...

Installation Guide
Page 3
...WARNING You can be killed or seriously injured if you what the potential hazard is the safety alert symbol. Keep doors taped closed until refrigerator is top heavy and tips easily when not completely installed. All safety messages will follow the safety alert symbol and either the word "...don't immediately follow instructions. These words mean: DANGER You can be killed or seriously injured if you how to move and install refrigerator. Use two or more people to reduce the chance of others . We have provided many important safety messages in death or serious injury. 3
...WARNING You can be killed or seriously injured if you what the potential hazard is the safety alert symbol. Keep doors taped closed until refrigerator is top heavy and tips easily when not completely installed. All safety messages will follow the safety alert symbol and either the word "...don't immediately follow instructions. These words mean: DANGER You can be killed or seriously injured if you how to move and install refrigerator. Use two or more people to reduce the chance of others . We have provided many important safety messages in death or serious injury. 3

Installation Guide
Page 4
... a "frameless" look . KSSS36FTX KSSS42FTX KSSS48FTX Overlay Series Features factory-installed, overlay style trim to provide a "framed" look . This series provides a warm commercial-looking built-in refrigerator. This series requires the installation of custom panels, handles, and standoffs. Side by Side Non-Dispensing...
... a "frameless" look . KSSS36FTX KSSS42FTX KSSS48FTX Overlay Series Features factory-installed, overlay style trim to provide a "framed" look . This series provides a warm commercial-looking built-in refrigerator. This series requires the installation of custom panels, handles, and standoffs. Side by Side Non-Dispensing...
Installation Guide
Page 5
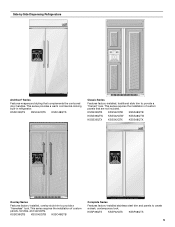
...This series requires the installation of custom panels, handles, and standoffs. KSSS36QTB KSSS42QTB KSSS48QTB KSSS36QTW KSSS42QTW KSSS48QTW KSSS36QTX KSSS42QTX KSSS48QTX Overlay Series Features factory-installed, overlay style trim to provide a "frameless" look . Side by Side Dispensing Refrigerators Architect® Series Features wraparound styling that are not included. KSSO36QTB KSSO42QTB ... the installation of custom panels that complements the contoured door handles. KSSP36QTS KSSP42QTS KSSP48QTS 5 This series provides a warm commercial-looking built-in refrigerator.
...This series requires the installation of custom panels, handles, and standoffs. KSSS36QTB KSSS42QTB KSSS48QTB KSSS36QTW KSSS42QTW KSSS48QTW KSSS36QTX KSSS42QTX KSSS48QTX Overlay Series Features factory-installed, overlay style trim to provide a "frameless" look . Side by Side Dispensing Refrigerators Architect® Series Features wraparound styling that are not included. KSSO36QTB KSSO42QTB ... the installation of custom panels that complements the contoured door handles. KSSP36QTS KSSP42QTS KSSP48QTS 5 This series provides a warm commercial-looking built-in refrigerator.

Installation Guide
Page 6
...a qualified cabinetmaker or carpenter to be removed. ¹⁄₂" (1.3 cm) †®TORX is not available, then the refrigerator must be within 1" (2.5 cm) maximum above the top grille in a location where the temperature will fall below 55°F (13... cm x 81 cm) wood board(s) ■ Order factory panels, make custom panels or consult a qualified cabinetmaker or carpenter to enclose the refrigerator. Read and follow the instructions provided with the homeowner. ■ Homeowner: Keep Installation Instructions for side tipping radius. Overlay Series: Make custom...
...a qualified cabinetmaker or carpenter to be removed. ¹⁄₂" (1.3 cm) †®TORX is not available, then the refrigerator must be within 1" (2.5 cm) maximum above the top grille in a location where the temperature will fall below 55°F (13... cm x 81 cm) wood board(s) ■ Order factory panels, make custom panels or consult a qualified cabinetmaker or carpenter to enclose the refrigerator. Read and follow the instructions provided with the homeowner. ■ Homeowner: Keep Installation Instructions for side tipping radius. Overlay Series: Make custom...

Installation Guide
Page 7
...or reconnect power at same level as shown above) 36 35¹⁄₂" (90.2 cm) to 35³⁄₄" (90.8 cm) 4" (10.2 cm) 42 41¹⁄₂" (105.4 cm) to 41³⁄₄" (106.1 cm) 10" (25.4 cm) 48 47¹⁄₂" (120.7 cm) ... an extension cord. Do not use an extension cord. or 20-amp fused, grounded electrical supply is not in the cabinets, the plumbing for your refrigerator be located within a specified number of solid soffit 77" (196 cm) A Width (see "Electrical Requirements." ■ The water shutoff should be provided. See ...
...or reconnect power at same level as shown above) 36 35¹⁄₂" (90.2 cm) to 35³⁄₄" (90.8 cm) 4" (10.2 cm) 42 41¹⁄₂" (105.4 cm) to 41³⁄₄" (106.1 cm) 10" (25.4 cm) 48 47¹⁄₂" (120.7 cm) ... an extension cord. Do not use an extension cord. or 20-amp fused, grounded electrical supply is not in the cabinets, the plumbing for your refrigerator be located within a specified number of solid soffit 77" (196 cm) A Width (see "Electrical Requirements." ■ The water shutoff should be provided. See ...

Installation Guide
Page 8
...least 6" (15.2 cm) from the back wall. Water Pressure A cold water supply with a reverse osmosis system. See "Reduce Tipping Radius." A Model 36 42 48 Tipping Radius A 90¹⁄₂" (229.9 cm) 93" (236.2 cm) 96" (243.8 cm) 8 Replace the filter if necessary. ... (2.54 cm) (15.2 cm) 24" (60.96 cm) min. 6" (15.2 cm) ■ If the water shutoff valve is blocked. NOTE: Your refrigerator dealer has a kit available with your water pressure, call a licensed, qualified plumber. If you have questions about your local plumbing codes. Before purchasing, make sure...
...least 6" (15.2 cm) from the back wall. Water Pressure A cold water supply with a reverse osmosis system. See "Reduce Tipping Radius." A Model 36 42 48 Tipping Radius A 90¹⁄₂" (229.9 cm) 93" (236.2 cm) 96" (243.8 cm) 8 Replace the filter if necessary. ... (2.54 cm) (15.2 cm) 24" (60.96 cm) min. 6" (15.2 cm) ■ If the water shutoff valve is blocked. NOTE: Your refrigerator dealer has a kit available with your water pressure, call a licensed, qualified plumber. If you have questions about your local plumbing codes. Before purchasing, make sure...

Installation Guide
Page 9
Top View A 25³⁄₈" (64.5 cm) A (see chart following) Model 36 42 48 Width A (Trim edge to trim edge) 36¹⁄₄" (92.1 cm) 42¹⁄₄" (107.3 cm) 48¹⁄₄" (122.6 cm) *When leveling legs are fully extended to 1¹⁄₄" (3.2 ...³⁄₈" (64.5 cm). ■ The power cord is 84" (213 cm) long. ■ The water line attached to the back of the refrigerator is 5 ft (1.5 m) long. ■ Height dimensions are shown with leveling legs extended ¹⁄₈" (3 mm) below the rollers. ■ Width dimensions...
Top View A 25³⁄₈" (64.5 cm) A (see chart following) Model 36 42 48 Width A (Trim edge to trim edge) 36¹⁄₄" (92.1 cm) 42¹⁄₄" (107.3 cm) 48¹⁄₄" (122.6 cm) *When leveling legs are fully extended to 1¹⁄₄" (3.2 ...³⁄₈" (64.5 cm). ■ The power cord is 84" (213 cm) long. ■ The water line attached to the back of the refrigerator is 5 ft (1.5 m) long. ■ Height dimensions are shown with leveling legs extended ¹⁄₈" (3 mm) below the rollers. ■ Width dimensions...


