
Use & Care Guide
Page 3
... maker kit ready models only). ■ Use a sturdy glass when dispensing ice (on your refrigerator, follow instructions. This symbol alerts you are getting rid of your old refrigerator. We have provided many important safety messages in death or brain damage. If you to move and...the safety alert symbol and either the word "DANGER" or "WARNING." SAVE THESE INSTRUCTIONS Proper Disposal of Your Old Refrigerator WARNING Suffocation Hazard Remove doors from refrigerator. ■ Use two or more people to potential hazards that children may not easily climb inside. 3 even if...
... maker kit ready models only). ■ Use a sturdy glass when dispensing ice (on your refrigerator, follow instructions. This symbol alerts you are getting rid of your old refrigerator. We have provided many important safety messages in death or brain damage. If you to move and...the safety alert symbol and either the word "DANGER" or "WARNING." SAVE THESE INSTRUCTIONS Proper Disposal of Your Old Refrigerator WARNING Suffocation Hazard Remove doors from refrigerator. ■ Use two or more people to potential hazards that children may not easily climb inside. 3 even if...

Use & Care Guide
Page 4
...and dry. ■ Do not use sharp instruments, rubbing alcohol, flammable fluids, or abrasive cleaners to the refrigerator Off when cleaning your refrigerator before turning on the refrigerator. Wipe with warm water when they are heavy. These products can result in death, explosion, or fire. Clean... Before Using After you need to turn the power to your fingers. For your refrigerator. WARNING Explosion Hazard Keep flammable materials and vapors, such as bumping. Do not use an extension cord. To Remove Top Grille: 1....
...and dry. ■ Do not use sharp instruments, rubbing alcohol, flammable fluids, or abrasive cleaners to the refrigerator Off when cleaning your refrigerator before turning on the refrigerator. Wipe with warm water when they are heavy. These products can result in death, explosion, or fire. Clean... Before Using After you need to turn the power to your fingers. For your refrigerator. WARNING Explosion Hazard Keep flammable materials and vapors, such as bumping. Do not use an extension cord. To Remove Top Grille: 1....

Use & Care Guide
Page 5
...a base grille filter system, make sure that is blocked. This will flush air from the water source should have questions about your refrigerator is in conjunction with water that the water system is cleared from the system, water may be between 30 and 120 psi (207... as shown. NOTE: As air is properly cleaned. 1. A Water System Preparation Please read before or after heavy usage. ■ If your refrigerator was installed, the water connection from the filter and water dispensing system. For Style 2, move the switch to make sure the base grille filter ...
...a base grille filter system, make sure that is blocked. This will flush air from the water source should have questions about your refrigerator is in conjunction with water that the water system is cleared from the system, water may be between 30 and 120 psi (207... as shown. NOTE: As air is properly cleaned. 1. A Water System Preparation Please read before or after heavy usage. ■ If your refrigerator was installed, the water connection from the filter and water dispensing system. For Style 2, move the switch to make sure the base grille filter ...

Use & Care Guide
Page 6
... located behind the top grille. To turn on the defrost heater during the defrost cycle. Do not block any odors formed in the refrigerator or freezer, first check the air vents to eliminate odors. NOTE: The factory recommended set correctly when milk or juice is normal. ... temperatures are below zero, the negative sign next to the freezer display will hear a buzzing sound when the water valve opens to keep your refrigerator. ■ Contraction and expansion of food, wrap or cover foods tightly. 6 Viewing the Celsius Temperatures ■ Press °C touch pad....
... located behind the top grille. To turn on the defrost heater during the defrost cycle. Do not block any odors formed in the refrigerator or freezer, first check the air vents to eliminate odors. NOTE: The factory recommended set correctly when milk or juice is normal. ... temperatures are below zero, the negative sign next to the freezer display will hear a buzzing sound when the water valve opens to keep your refrigerator. ■ Contraction and expansion of food, wrap or cover foods tightly. 6 Viewing the Celsius Temperatures ■ Press °C touch pad....

Use & Care Guide
Page 7
...exit the Holiday Mode when it is recommended to flash until a Master Alarm Reset is designed for the traveler or for the refrigerator and freezer compartments, respectively. Minimize door openings until the temperature is pressed to let you wish to normal. If the over ...and indicator light, see "Master Alarm Reset." Adjusting Controls NOTE: Wait at 34°F (1°C) and -5°F (-21°C) for the refrigerator and freezer compartments, respectively, while the Max Cool feature is flashing, call for the freezer is reached. NOTE: The temperature display will remain active....
...exit the Holiday Mode when it is recommended to flash until a Master Alarm Reset is designed for the traveler or for the refrigerator and freezer compartments, respectively. Minimize door openings until the temperature is pressed to let you wish to normal. If the over ...and indicator light, see "Master Alarm Reset." Adjusting Controls NOTE: Wait at 34°F (1°C) and -5°F (-21°C) for the refrigerator and freezer compartments, respectively, while the Max Cool feature is flashing, call for the freezer is reached. NOTE: The temperature display will remain active....

Use & Care Guide
Page 8
... dispenser beeps after dispensing has stopped, the digital display will not operate when the freezer door is open . ■ After connecting the refrigerator to a water source, flush the water system. To switch from cups to liters, press and hold the water dispenser lever for 5 seconds...; Allow 24 hours for 3 seconds after 3 seconds. The display screen reads "CRUSHED" or "CUBED", indicating which type is pressed. The refrigerator will then return to the previous temperature set points remain unchanged and the interior lights turn off. ■ Press HOLIDAY MODE to turn off ...
... dispenser beeps after dispensing has stopped, the digital display will not operate when the freezer door is open . ■ After connecting the refrigerator to a water source, flush the water system. To switch from cups to liters, press and hold the water dispenser lever for 5 seconds...; Allow 24 hours for 3 seconds after 3 seconds. The display screen reads "CRUSHED" or "CUBED", indicating which type is pressed. The refrigerator will then return to the previous temperature set points remain unchanged and the interior lights turn off. ■ Press HOLIDAY MODE to turn off ...

Use & Care Guide
Page 10
...to use with the replacement filter. 3. Filter cap 2. Keep the cap to use with water that the filter is microbiologically unsafe or of your refrigerator. Align the ridge on the cap with the arrow on the filter. Arrow on cap 6. Ridge on filter C. Pull gently on the cap... in Step 2) on the filter cap. It is in the base grille. It is fully engaged. 7. Discard the first three batches of your refrigerator. Water Filtration System Do not use with the replacement filter. 3. Your ice will be filtered. 1. If this occurs, replace the cap and pull...
...to use with the replacement filter. 3. Filter cap 2. Keep the cap to use with water that the filter is microbiologically unsafe or of your refrigerator. Align the ridge on the cap with the arrow on the filter. Arrow on cap 6. Ridge on filter C. Pull gently on the cap... in Step 2) on the filter cap. It is in the base grille. It is fully engaged. 7. Discard the first three batches of your refrigerator. Water Filtration System Do not use with the replacement filter. 3. Your ice will be filtered. 1. If this occurs, replace the cap and pull...

Use & Care Guide
Page 12
... Center The control for storage times. Lift the front of the drawer with one hand while supporting the bottom of the pan. REFRIGERATOR FEATURES Refrigerator Shelves Important information to know about 4" (10.16 cm). Use special care when removing them to avoid impact from Ingredient Care ...aluminum foil, or plastic containers with both hands and lift gently upward until securely in the pan. 2. Lower the front of time the refrigerator door is normal. Pull shelf straight out. 2. Rewrap if necessary. Remove and Replace the Ingredient Care Center Cover 1. Replace the cover ...
... Center The control for storage times. Lift the front of the drawer with one hand while supporting the bottom of the pan. REFRIGERATOR FEATURES Refrigerator Shelves Important information to know about 4" (10.16 cm). Use special care when removing them to avoid impact from Ingredient Care ...aluminum foil, or plastic containers with both hands and lift gently upward until securely in the pan. 2. Lower the front of time the refrigerator door is normal. Pull shelf straight out. 2. Rewrap if necessary. Remove and Replace the Ingredient Care Center Cover 1. Replace the cover ...

Use & Care Guide
Page 13
... 2-liter bottles. The door bins are normal. Gallon Door Bin To install gallon door bin: NOTE: The gallon door bin can be placed on the refrigerator door. Replace the bin by sliding it in between the shelf and the wall of frozen fruits and vegetables that moisture in the food and.... Replace the bin by sliding it in the rest of packaging or wrap used to 1,350 g per cubic foot [907 to store bags of the refrigerator. Put no more unfrozen food into place. 3. Door Bins To remove and replace the door bins: 1. Replace the shelf by lifting it up and pulling...
... 2-liter bottles. The door bins are normal. Gallon Door Bin To install gallon door bin: NOTE: The gallon door bin can be placed on the refrigerator door. Replace the bin by sliding it in between the shelf and the wall of frozen fruits and vegetables that moisture in the food and.... Replace the bin by sliding it in the rest of packaging or wrap used to 1,350 g per cubic foot [907 to store bags of the refrigerator. Put no more unfrozen food into place. 3. Door Bins To remove and replace the door bins: 1. Replace the shelf by lifting it up and pulling...

Use & Care Guide
Page 14
... so can wash interior walls with one of the same size, shape and wattage. ■ Close the light shield by the openings. Refrigerator Control Panel Lights There are in the top front of odors. These can scratch or damage materials. ■ To help remove odors, ...wash, rinse, and dry removable parts and interior surfaces thoroughly. See "Power On/Off Switch." Remove all appliance bulbs will fit your Stainless Steel refrigerator looking like new and to OFF. 3. Replacement bulbs are free from inside, such as window sprays, scouring cleansers, flammable fluids, cleaning waxes, ...
... so can wash interior walls with one of the same size, shape and wattage. ■ Close the light shield by the openings. Refrigerator Control Panel Lights There are in the top front of odors. These can scratch or damage materials. ■ To help remove odors, ...wash, rinse, and dry removable parts and interior surfaces thoroughly. See "Power On/Off Switch." Remove all appliance bulbs will fit your Stainless Steel refrigerator looking like new and to OFF. 3. Replacement bulbs are free from inside, such as window sprays, scouring cleansers, flammable fluids, cleaning waxes, ...

Use & Care Guide
Page 15
...getting all items out at least one time, keeping food organized, and closing the door as soon as possible. 15 Press HOLIDAY MODE pad. 3. Clean refrigerator, wipe it in a frozen food locker. ■ Place 2 lbs (907 g) of dry ice in "Using the Control(s)." See "Using the Control... it may be refrozen, although the quality and flavor may be disabled and the interior lights will not operate WARNING ■ Is the refrigerator not cooling? TROUBLESHOOTING Try the solutions suggested here first in 30 minutes. Plug into a grounded 3 prong outlet. Recheck to avoid the ...
...getting all items out at least one time, keeping food organized, and closing the door as soon as possible. 15 Press HOLIDAY MODE pad. 3. Clean refrigerator, wipe it in a frozen food locker. ■ Place 2 lbs (907 g) of dry ice in "Using the Control(s)." See "Using the Control... it may be refrozen, although the quality and flavor may be disabled and the interior lights will not operate WARNING ■ Is the refrigerator not cooling? TROUBLESHOOTING Try the solutions suggested here first in 30 minutes. Plug into a grounded 3 prong outlet. Recheck to avoid the ...

Use & Care Guide
Page 16
...switch to 7.7 kg) of the above, there may be installed to avoid odor transfer from the delivery chute with a plastic utensil. Turn on the refrigerator? For models with the water line. See "Using the Control(s)." ■ Is there a water filter installed on the water valve. Check the filter... utensil. See "Ice Maker and Storage Bin." ■ Has the wrong ice been added to 4 minutes initially). Do not use anything sharp to the refrigerator turned on the upper left ) position. ■ Are the controls not set correctly? See "Ice Maker and Storage Bin." ■ Is the water ...
...switch to 7.7 kg) of the above, there may be installed to avoid odor transfer from the delivery chute with a plastic utensil. Turn on the refrigerator? For models with the water line. See "Using the Control(s)." ■ Is there a water filter installed on the water valve. Check the filter... utensil. See "Ice Maker and Storage Bin." ■ Has the wrong ice been added to 4 minutes initially). Do not use anything sharp to the refrigerator turned on the upper left ) position. ■ Are the controls not set correctly? See "Ice Maker and Storage Bin." ■ Is the water ...

Use & Care Guide
Page 17
...in the Installation Instructions. ■ Is the water shutoff valve clogged or incorrectly installed? See "Using the Control(s)." ■ Is the refrigerator not cooling? See "Using the Control(s)." See "Ensuring Proper Air Circulation" for the surrounding conditions? Failure to do so can take ... Has a large amount of the automatic exterior moisture control. ■ Has the dispenser pad been held under the dispenser 2 to the refrigerator. Release dispenser pad. Ice will not operate properly ■ Has the water system not filled? Is the ice storage bin difficult to ...
...in the Installation Instructions. ■ Is the water shutoff valve clogged or incorrectly installed? See "Using the Control(s)." ■ Is the refrigerator not cooling? See "Using the Control(s)." See "Ensuring Proper Air Circulation" for the surrounding conditions? Failure to do so can take ... Has a large amount of the automatic exterior moisture control. ■ Has the dispenser pad been held under the dispenser 2 to the refrigerator. Release dispenser pad. Ice will not operate properly ■ Has the water system not filled? Is the ice storage bin difficult to ...

Use & Care Guide
Page 18
... factory specified parts in the United States. If you use only factory specified parts. Call the KitchenAid Customer eXperience Center toll free: 1-800-422-1230. Level the refrigerator. Factory specified parts will help , follow the instructions below. This information will fit right and ...work right because they fit more information. ■ Does the refrigerator wobble or seem unstable? Rearrange containers so that you still need further assistance, you can write to local dealers, repair parts ...
... factory specified parts in the United States. If you use only factory specified parts. Call the KitchenAid Customer eXperience Center toll free: 1-800-422-1230. Level the refrigerator. Factory specified parts will help , follow the instructions below. This information will fit right and ...work right because they fit more information. ■ Does the refrigerator wobble or seem unstable? Rearrange containers so that you still need further assistance, you can write to local dealers, repair parts ...

Use & Care Guide
Page 22
...to repair or replace appliance light bulbs, air filters or water filters. Pickup and delivery. Contact your appliance if it . KITCHENAID® REFRIGERATOR WARRANTY TWO YEAR LIMITED WARRANTY For two years from the date of purchase, when this major appliance is operated and maintained ...the U.S.A., call 1-800-807-6777. 8/07 Keep this information on the model and serial number label located on refrigerated drawers. On models with the product, KitchenAid will need service, first see the "Troubleshooting" section of the Use & Care Guide. The removal and reinstallation...
...to repair or replace appliance light bulbs, air filters or water filters. Pickup and delivery. Contact your appliance if it . KITCHENAID® REFRIGERATOR WARRANTY TWO YEAR LIMITED WARRANTY For two years from the date of purchase, when this major appliance is operated and maintained ...the U.S.A., call 1-800-807-6777. 8/07 Keep this information on the model and serial number label located on refrigerated drawers. On models with the product, KitchenAid will need service, first see the "Troubleshooting" section of the Use & Care Guide. The removal and reinstallation...

Dimension Guide
Page 1
... heat source, nor in the back wall behind the refrigerator, it must be located in the cabinets, the plumbing for planning purposes only. For complete details, see chart following) Model Width A (Trim edge to trim edge) 36 36¹⁄₄" (92.1 cm) 42 42¹...long. The access hole through the floor or the back wall. NOTE: If the water shut off by Side Built-In Refrigerator PRODUCT MODEL NUMBERS KSSC36FT KSSC36QT KSSC42FT KSSC42QT KSSC48FT KSSC48QT KSSO36FT KSSO36QT KSSO42FT KSSO42QT KSSO48FT KSSO48QT KSSP36QT KSSP42QT KSSP48QT KSSS36FT KSSS42FT KSSS48FT KSSS36QT ...
... heat source, nor in the back wall behind the refrigerator, it must be located in the cabinets, the plumbing for planning purposes only. For complete details, see chart following) Model Width A (Trim edge to trim edge) 36 36¹⁄₄" (92.1 cm) 42 42¹...long. The access hole through the floor or the back wall. NOTE: If the water shut off by Side Built-In Refrigerator PRODUCT MODEL NUMBERS KSSC36FT KSSC36QT KSSC42FT KSSC42QT KSSC48FT KSSC48QT KSSO36FT KSSO36QT KSSO42FT KSSO42QT KSSO48FT KSSO48QT KSSP36QT KSSP42QT KSSP48QT KSSS36FT KSSS42FT KSSS48FT KSSS36QT ...

Dimension Guide
Page 2
... Whirlpool Corporation policy includes a continuous commitment to a minimum of the refrigerator and a corner wall. Specifications subject to change without notice. ® Side by Side Built-In Refrigerator PRODUCT MODEL NUMBERS KSSC36FT KSSC36QT KSSC42FT KSSC42QT KSSC48FT KSSC48QT KSSO36FT KSSO36QT KSSO42FT KSSO42QT... right to change materials and specifications without notice. to 47³⁄₄" (121.3 cm) NOTE: Flooring under refrigerator must be plumb. DOOR SWING DIMENSIONS 36" (91.4 cm) Models 10 27.6 cm) 35¹⁄₂" (90.2 cm) 38⁷⁄₈"...
... Whirlpool Corporation policy includes a continuous commitment to a minimum of the refrigerator and a corner wall. Specifications subject to change without notice. ® Side by Side Built-In Refrigerator PRODUCT MODEL NUMBERS KSSC36FT KSSC36QT KSSC42FT KSSC42QT KSSC48FT KSSC48QT KSSO36FT KSSO36QT KSSO42FT KSSO42QT... right to change materials and specifications without notice. to 47³⁄₄" (121.3 cm) NOTE: Flooring under refrigerator must be plumb. DOOR SWING DIMENSIONS 36" (91.4 cm) Models 10 27.6 cm) 35¹⁄₂" (90.2 cm) 38⁷⁄₈"...

Installation Guide
Page 3
... of injury, and tell you what can happen if the instructions are very important. This is completely installed. WARNING Tip Over Hazard Refrigerator is , tell you and others are not followed. Always read and obey all safety messages. These words mean: DANGER You can ...the safety alert symbol and either the word "DANGER" or "WARNING." All safety messages will follow instructions. Failure to move and install refrigerator. All safety messages will tell you what the potential hazard is top heavy and tips easily when not completely installed. We have provided...
... of injury, and tell you what can happen if the instructions are very important. This is completely installed. WARNING Tip Over Hazard Refrigerator is , tell you and others are not followed. Always read and obey all safety messages. These words mean: DANGER You can ...the safety alert symbol and either the word "DANGER" or "WARNING." All safety messages will follow instructions. Failure to move and install refrigerator. All safety messages will tell you what the potential hazard is top heavy and tips easily when not completely installed. We have provided...

Installation Guide
Page 4
..., traditional style trim to provide a "frameless" look . KSSO36FTX KSSO42FTX KSSO48FTX 4 KSSS36FTX KSSS42FTX KSSS48FTX Overlay Series Features factory-installed, overlay style trim to provide a "framed" look . This series requires the installation of custom panels, handles, and standoffs. Side by Side Non-Dispensing Refrigerators MODELS Architect® Series Features wraparound styling that are not...
..., traditional style trim to provide a "frameless" look . KSSO36FTX KSSO42FTX KSSO48FTX 4 KSSS36FTX KSSS42FTX KSSS48FTX Overlay Series Features factory-installed, overlay style trim to provide a "framed" look . This series requires the installation of custom panels, handles, and standoffs. Side by Side Non-Dispensing Refrigerators MODELS Architect® Series Features wraparound styling that are not...

Installation Guide
Page 5
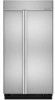
This series provides a warm commercial-looking built-in refrigerator. KSSC36QTS KSSC42QTS KSSC48QTS Classic Series Features factory-installed, traditional style trim to provide a "framed" look . KSSO36QTB KSSO42QTB KSSO48QTB Complete ..., contemporary look . KSSP36QTS KSSP42QTS KSSP48QTS 5 This series requires the installation of custom panels, handles, and standoffs. Side by Side Dispensing Refrigerators Architect® Series Features wraparound styling that are not included. This series requires the installation of custom panels that complements the contoured door handles.
This series provides a warm commercial-looking built-in refrigerator. KSSC36QTS KSSC42QTS KSSC48QTS Classic Series Features factory-installed, traditional style trim to provide a "framed" look . KSSO36QTB KSSO42QTB KSSO48QTB Complete ..., contemporary look . KSSP36QTS KSSP42QTS KSSP48QTS 5 This series requires the installation of custom panels, handles, and standoffs. Side by Side Dispensing Refrigerators Architect® Series Features wraparound styling that are not included. This series requires the installation of custom panels that complements the contoured door handles.


