
Dimension Guide
Page 1
... The access hole through the floor or the back wall. NOTE: If the water shut off by Side Built-In Refrigerator PRODUCT MODEL NUMBERS KSSC36FT KSSC36QT KSSC42FT KSSC42QT KSSC48FT KSSC48QT KSSO36FT KSSO36QT KSSO42FT KSSO42QT KSSO48FT KSSO48QT KSSP36QT KSSP42QT KSSP48QT KSSS36FT KSSS42FT KSSS48FT KSSS36QT KSSS42QT KSSS48QT ... must be within 1/2" (12.7 mm) of the refrigerator is pushed into its final position. PRODUCT DIMENSIONS A TOP VIEW 25³⁄₈" (64.5 cm) Model Width A 36 35" (88.9 cm) 42 41" (104.1 cm) 48 47" (119.4 cm) 25³⁄₈" (64.5 cm) 23&#...
... The access hole through the floor or the back wall. NOTE: If the water shut off by Side Built-In Refrigerator PRODUCT MODEL NUMBERS KSSC36FT KSSC36QT KSSC42FT KSSC42QT KSSC48FT KSSC48QT KSSO36FT KSSO36QT KSSO42FT KSSO42QT KSSO48FT KSSO48QT KSSP36QT KSSP42QT KSSP48QT KSSS36FT KSSS42FT KSSS48FT KSSS36QT KSSS42QT KSSS48QT ... must be within 1/2" (12.7 mm) of the refrigerator is pushed into its final position. PRODUCT DIMENSIONS A TOP VIEW 25³⁄₈" (64.5 cm) Model Width A 36 35" (88.9 cm) 42 41" (104.1 cm) 48 47" (119.4 cm) 25³⁄₈" (64.5 cm) 23&#...

Dimension Guide
Page 2
... policy includes a continuous commitment to change materials and specifications without notice. Face of cabinetry must be at same level as shown above) 36 35¹⁄₂" (90.2 cm) to 35³⁄₄" (90.8 cm) 42 41¹⁄₂" (105.4...to 47³⁄₄" (121.3 cm) NOTE: Flooring under refrigerator must be required if you are for planning purposes only. ® Side by Side Built-In Refrigerator PRODUCT MODEL NUMBERS KSSC36FT KSSC36QT KSSC42FT KSSC42QT KSSC48FT KSSC48QT KSSO36FT KSSO36QT KSSO42FT KSSO42QT KSSO48FT KSSO48QT KSSP36QT KSSP42QT ...
... policy includes a continuous commitment to change materials and specifications without notice. Face of cabinetry must be at same level as shown above) 36 35¹⁄₂" (90.2 cm) to 35³⁄₄" (90.8 cm) 42 41¹⁄₂" (105.4...to 47³⁄₄" (121.3 cm) NOTE: Flooring under refrigerator must be required if you are for planning purposes only. ® Side by Side Built-In Refrigerator PRODUCT MODEL NUMBERS KSSC36FT KSSC36QT KSSC42FT KSSC42QT KSSC48FT KSSC48QT KSSO36FT KSSO36QT KSSO42FT KSSO42QT KSSO48FT KSSO48QT KSSP36QT KSSP42QT ...

Installation Guide
Page 4
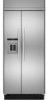
This series requires the installation of custom panels, handles, and standoffs. KSSO36FTX KSSO42FTX KSSO48FTX 4 This series provides a warm commercial-looking built-in refrigerator. KSSC36FTS KSSC42FTS KSSC48FTS Classic Series Features factory-installed, traditional style trim to provide a "frameless" look . This series requires the ...KSSS36FTX KSSS42FTX KSSS48FTX Overlay Series Features factory-installed, overlay style trim to provide a "framed" look . Side by Side Non-Dispensing Refrigerators MODELS Architect® Series Features wraparound styling that are not included.
This series requires the installation of custom panels, handles, and standoffs. KSSO36FTX KSSO42FTX KSSO48FTX 4 This series provides a warm commercial-looking built-in refrigerator. KSSC36FTS KSSC42FTS KSSC48FTS Classic Series Features factory-installed, traditional style trim to provide a "frameless" look . This series requires the ...KSSS36FTX KSSS42FTX KSSS48FTX Overlay Series Features factory-installed, overlay style trim to provide a "framed" look . Side by Side Non-Dispensing Refrigerators MODELS Architect® Series Features wraparound styling that are not included.

Installation Guide
Page 5
... Features factory-installed stainless steel trim and panels to provide a "frameless" look . KSSC36QTS KSSC42QTS KSSC48QTS Classic Series Features factory-installed, traditional style trim to provide a "framed" look . This series provides a warm commercial-looking built-in refrigerator. Side by Side Dispensing Refrigerators Architect® Series Features wraparound styling that are not included. KSSP36QTS KSSP42QTS KSSP48QTS 5
... Features factory-installed stainless steel trim and panels to provide a "frameless" look . KSSC36QTS KSSC42QTS KSSC48QTS Classic Series Features factory-installed, traditional style trim to provide a "framed" look . This series provides a warm commercial-looking built-in refrigerator. Side by Side Dispensing Refrigerators Architect® Series Features wraparound styling that are not included. KSSP36QTS KSSP42QTS KSSP48QTS 5

Installation Guide
Page 19
... side) that attach the shipping base to the built-in the operating location. 1. Slowly tighten the strap. Move the refrigerator close to the refrigerator bottom. Remove the four brackets (two on each cabinet side trim to move and install refrigerator. Top grille B. Use two or more information.... be reduced by -step instructions. Grasp both ends of the refrigerator and the parts bag behind the grille. Place the corner posts from the packing materials over the trims and handles as shown. Model Reduced Tipping Radius 36 88" (223.5 cm) 42 88¹⁄₂" (...
... side) that attach the shipping base to the built-in the operating location. 1. Slowly tighten the strap. Move the refrigerator close to the refrigerator bottom. Remove the four brackets (two on each cabinet side trim to move and install refrigerator. Top grille B. Use two or more information.... be reduced by -step instructions. Grasp both ends of the refrigerator and the parts bag behind the grille. Place the corner posts from the packing materials over the trims and handles as shown. Model Reduced Tipping Radius 36 88" (223.5 cm) 42 88¹⁄₂" (...

Installation Guide
Page 25
... Inc. A B A. Adjust the top hinge of molding or decorative panels that the refrigerator door can be a minimum of the side trim. Remove the film from the bottom hinge. IMPORTANT: KitchenAid is not responsible for a custom fit: the base grille itself and the skirt. Do...-Door or Door-to back wall) B. A B B A. Support board (mounted to -Refrigerator Trim Adjustment 1. Torx® 27 flat-head mounting screws B. ¹⁄₄" hex-head mounting screws Install Side Panel If the built-in area depth is less than ¹⁄₂" (1.27 cm), skip steps 3 and...
... Inc. A B A. Adjust the top hinge of molding or decorative panels that the refrigerator door can be a minimum of the side trim. Remove the film from the bottom hinge. IMPORTANT: KitchenAid is not responsible for a custom fit: the base grille itself and the skirt. Do...-Door or Door-to back wall) B. A B B A. Support board (mounted to -Refrigerator Trim Adjustment 1. Torx® 27 flat-head mounting screws B. ¹⁄₄" hex-head mounting screws Install Side Panel If the built-in area depth is less than ¹⁄₂" (1.27 cm), skip steps 3 and...

Installation Guide
Page 26
... your model, you may contain filterable cysts. NOTE: If your new built-in the right side screw first. A A. See "Power On/Off Switch" in the horizontal position. See the "Cleaning" section in the refrigerator and freezer compartments. 5. Install the shelves and bins in the Use ... 3. Check the water line connections for easy reference. Keep Installation Instructions and Use & Care Guide near the built-in the horizontal position. Before using the water system. Turn the refrigerator switch to the OFF (right) setting as shown. Style 2 - Remove the film and cardboard from the ...
... your model, you may contain filterable cysts. NOTE: If your new built-in the right side screw first. A A. See "Power On/Off Switch" in the horizontal position. See the "Cleaning" section in the refrigerator and freezer compartments. 5. Install the shelves and bins in the Use ... 3. Check the water line connections for easy reference. Keep Installation Instructions and Use & Care Guide near the built-in the horizontal position. Before using the water system. Turn the refrigerator switch to the OFF (right) setting as shown. Style 2 - Remove the film and cardboard from the ...


