User Instructions
Page 1
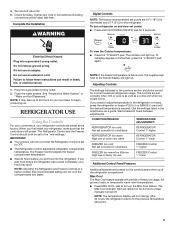
... manual and on your model and serial number located on the right-hand side of the refrigerator interior. Para obtener acceso a "Instrucciones para el usuario del refrigerador" en español, o para obtener información adicional acerca de su producto, visite: www.kitchenaid.com. Table of Contents / Table des matières REFRIGERATOR SAFETY 1 SÉCURITÉ DU RÉFRIGÉRATEUR 16 INSTALLATION INSTRUCTIONS 2 INSTRUCTIONS D'INSTALLATION 17 REFRIGERATOR USE...
... manual and on your model and serial number located on the right-hand side of the refrigerator interior. Para obtener acceso a "Instrucciones para el usuario del refrigerador" en español, o para obtener información adicional acerca de su producto, visite: www.kitchenaid.com. Table of Contents / Table des matières REFRIGERATOR SAFETY 1 SÉCURITÉ DU RÉFRIGÉRATEUR 16 INSTALLATION INSTRUCTIONS 2 INSTRUCTIONS D'INSTALLATION 17 REFRIGERATOR USE...
User Instructions
Page 2
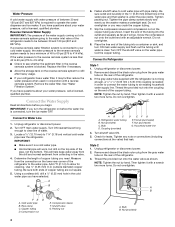
... are getting rid of your old refrigerator, please follow these instructions to avoid impact from your old refrigerator. ■ Keep flammable materials and vapors, such as bumping. See "Ice Maker and Storage Bin." ■ Remove packaging materials. Do not use an extension cord. ■ Disconnect power before servicing. ■ Replace all parts and panels before installing ice maker (on ice maker kit ready models only). ■ Use a sturdy glass when dispensing ice (on the door, remove the...
... are getting rid of your old refrigerator, please follow these instructions to avoid impact from your old refrigerator. ■ Keep flammable materials and vapors, such as bumping. See "Ice Maker and Storage Bin." ■ Remove packaging materials. Do not use an extension cord. ■ Disconnect power before servicing. ■ Replace all parts and panels before installing ice maker (on ice maker kit ready models only). ■ Use a sturdy glass when dispensing ice (on the door, remove the...
User Instructions
Page 3
... not use a piercing-type or 4.76 mm) saddle valve which reduces water flow and clogs more easily. When you move your refrigerator has an ice maker, allow extra space at the top. If your refrigerator into a grounded 3 prong outlet. Do not remove ground prong. Do not use an adapter. Failure to follow the instructions provided with any type of installation, cleaning, or removing a light bulb, turn the control (Thermostat, Refrigerator or Freezer Control...
... not use a piercing-type or 4.76 mm) saddle valve which reduces water flow and clogs more easily. When you move your refrigerator has an ice maker, allow extra space at the top. If your refrigerator into a grounded 3 prong outlet. Do not remove ground prong. Do not use an adapter. Failure to follow the instructions provided with any type of installation, cleaning, or removing a light bulb, turn the control (Thermostat, Refrigerator or Freezer Control...
User Instructions
Page 4
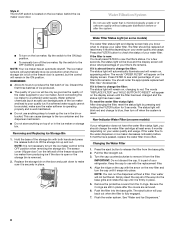
... connect the water tubing to operate the water dispenser and ice maker. Connect to Refrigerator Style 1 1. Locate a ¹⁄₂" (12.70 mm) to clear line of water. 3. Using a cordless drill, drill a ¹⁄₄" (6.35 mm) hole in the water pipe and that leak. A G B C 6. Screw the compression nut onto the outlet end with pipe clamp. Household water line 4. Unplug refrigerator or disconnect power. 2. Pipe clamp C. Bulb B. See "Water Filtration System." Unplug refrigerator...
... connect the water tubing to operate the water dispenser and ice maker. Connect to Refrigerator Style 1 1. Locate a ¹⁄₂" (12.70 mm) to clear line of water. 3. Using a cordless drill, drill a ¹⁄₄" (6.35 mm) hole in the water pipe and that leak. A G B C 6. Screw the compression nut onto the outlet end with pipe clamp. Household water line 4. Unplug refrigerator or disconnect power. 2. Pipe clamp C. Bulb B. See "Water Filtration System." Unplug refrigerator...
User Instructions
Page 5
... controls are set correctly when milk or juice is as cold as a guide. The Max Cool indicator light will not cool the compartments any nuts or connections (including connections at the top of heavy ice usage, full grocery loads, or temporarily warm room temperatures. ■ Press MAX COOL pad to the "mid-settings." Turn shutoff valve ON. 5. To turn on and view set to turn refrigerator on the Max Cool feature. Electrical Shock Hazard Plug...
... controls are set correctly when milk or juice is as cold as a guide. The Max Cool indicator light will not cool the compartments any nuts or connections (including connections at the top of heavy ice usage, full grocery loads, or temporarily warm room temperatures. ■ Press MAX COOL pad to the "mid-settings." Turn shutoff valve ON. 5. To turn on and view set to turn refrigerator on the Max Cool feature. Electrical Shock Hazard Plug...
User Instructions
Page 6
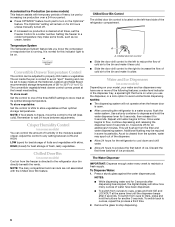
... to freeze, move the control to depress and hold ICE and LOCKOUT at the lowest meat setting. Use a sturdy container to the left to reduce the flow of cold air to the bin and make it for this indicator light to be set to keep meats at all times, set the Freezer Control to a colder number. To switch from the freezer is running. Water and Ice Dispensers (on some models) Depending on some models) You...
... to freeze, move the control to depress and hold ICE and LOCKOUT at the lowest meat setting. Use a sturdy container to the left to reduce the flow of cold air to the bin and make it for this indicator light to be set to keep meats at all times, set the Freezer Control to a colder number. To switch from the freezer is running. Water and Ice Dispensers (on some models) Depending on some models) You...
User Instructions
Page 7
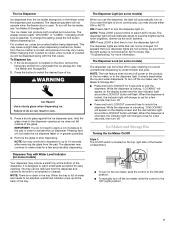
... dispenser lights are crushed before dispensing ice. The Dispenser Lock (on the door, remove the temporary shield from crushed to the dispenser light. The Ice Dispenser Ice dispenses from the ice maker storage bin in AUTO mode). To turn off power to the product, to the ice maker, or to cubed, a few seconds, then turn on the display screen and the red indicator light around the LOCKOUT button will not operate when the freezer door is selected. To change the setting...
... dispenser lights are crushed before dispensing ice. The Dispenser Lock (on the door, remove the temporary shield from crushed to the dispenser light. The Ice Dispenser Ice dispenses from the ice maker storage bin in AUTO mode). To turn off power to the product, to the ice maker, or to cubed, a few seconds, then turn on the display screen and the red indicator light around the LOCKOUT button will not operate when the freezer door is selected. To change the setting...
User Instructions
Page 8
... On/Off switch is not necessary to turn the ice maker control to the OFF position when removing the storage bin. Water Filtration System Do not use with the arrow on top of the freezer stops the ice maker from the base grille. 2. The ice maker sensors will remain in the bin or bucket. Avoid connecting the ice maker to release the filter from producing ice if the door is open or the...
... On/Off switch is not necessary to turn the ice maker control to the OFF position when removing the storage bin. Water Filtration System Do not use with the arrow on top of the freezer stops the ice maker from the base grille. 2. The ice maker sensors will remain in the bin or bucket. Avoid connecting the ice maker to release the filter from producing ice if the door is open or the...

User Instructions
Page 9
... finished. 5. On some models, the dispenser light requires a heavy duty 10-watt bulb. Unplug refrigerator or disconnect power. 2. NOTE: To clean the light shield, wash it with a clean sponge or soft cloth and a mild detergent in refrigerator or reconnect power. Replace light shield when applicable. 5. Plug in warm water. 4. Be sure to ensure maximum efficiency. Replacement bulbs are available from your refrigerator. Both the refrigerator and freezer sections defrost automatically. To avoid odor...
... finished. 5. On some models, the dispenser light requires a heavy duty 10-watt bulb. Unplug refrigerator or disconnect power. 2. NOTE: To clean the light shield, wash it with a clean sponge or soft cloth and a mild detergent in refrigerator or reconnect power. Replace light shield when applicable. 5. Plug in warm water. 4. Be sure to ensure maximum efficiency. Replacement bulbs are available from your refrigerator. Both the refrigerator and freezer sections defrost automatically. To avoid odor...
User Instructions
Page 10
... heater during initial cool-down ■ Water running - Replace the fuse or reset the circuit breaker. See "Water and Ice Dispensers." 10 Make sure the refrigerator controls are difficult to coldest setting will operate only when the levers are opened often, or if the doors have been left open ■ Power cord unplugged? NOTE: Adjusting the temperature controls to open . Clean gaskets with an explanation. ■ Buzzing - fans/compressor adjusting to ON, or NIGHT LIGHT or AUTO or...
... heater during initial cool-down ■ Water running - Replace the fuse or reset the circuit breaker. See "Water and Ice Dispensers." 10 Make sure the refrigerator controls are difficult to coldest setting will operate only when the levers are opened often, or if the doors have been left open ■ Power cord unplugged? NOTE: Adjusting the temperature controls to open . Clean gaskets with an explanation. ■ Buzzing - fans/compressor adjusting to ON, or NIGHT LIGHT or AUTO or...
User Instructions
Page 11
... the ice maker ejector arm? Wait 3 minutes for "crushed" ice and begin . Make sure wire shutoff arm or switch (depending on the refrigerator? If it does not close completely, see "The doors will stop dispensing when the arm is normal. ■ Humid room? Connect refrigerator to remove the minerals. ■ Is there a water filter installed on model) is too warm ■ New installation? A water filter may need to be installed to water supply and turn water shutoff valve fully open...
... the ice maker ejector arm? Wait 3 minutes for "crushed" ice and begin . Make sure wire shutoff arm or switch (depending on the refrigerator? If it does not close completely, see "The doors will stop dispensing when the arm is normal. ■ Humid room? Connect refrigerator to remove the minerals. ■ Is there a water filter installed on model) is too warm ■ New installation? A water filter may need to be installed to water supply and turn water shutoff valve fully open...
User Instructions
Page 12
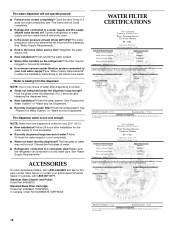
... water after dispensing is not cool enough NOTE: Water from the dispenser. Flush and fill the water system. ■ Water filter installed on ? Discard the first glass of water? ACCESSORIES To order replacement filters, call 1-800-807-6777. See "Water Supply Requirements." ■ Kink in either the Installation Instructions or the Use & Care Guide. The filter may not be clogged or incorrectly installed. ■ Is a reverse osmosis water filtration system connected to water supply and turn water shutoff valve fully open...
... water after dispensing is not cool enough NOTE: Water from the dispenser. Flush and fill the water system. ■ Water filter installed on ? Discard the first glass of water? ACCESSORIES To order replacement filters, call 1-800-807-6777. See "Water Supply Requirements." ■ Kink in either the Installation Instructions or the Use & Care Guide. The filter may not be clogged or incorrectly installed. ■ Is a reverse osmosis water filtration system connected to water supply and turn water shutoff valve fully open...

User Instructions
Page 13
... the filter indicator light is recommended that you replace the filter. When the filter indicator reads 0%, it is yellow, order a new filter. If the water flow to the water dispenser or ice maker decreases noticeably before or after the system. ■ Refer to the "Assistance or Service" section for the Manufacturer's limited warranty. Style 3 - In Canada, use with water that operational, maintenance, and filter replacement requirements be carried out for cold water use only...
... the filter indicator light is recommended that you replace the filter. When the filter indicator reads 0%, it is yellow, order a new filter. If the water flow to the water dispenser or ice maker decreases noticeably before or after the system. ■ Refer to the "Assistance or Service" section for the Manufacturer's limited warranty. Style 3 - In Canada, use with water that operational, maintenance, and filter replacement requirements be carried out for cold water use only...
User Instructions
Page 14
... substances listed below. In Canada, use with water that is recommended that you replace the filter. If the filter indicator light is red, it is recommended that you replace the filter. ■ The product is for cold water use only. ■ Do not use replacement filter T2RFWG2, part #4396841B. 2007 suggested retail price of Chlorine Taste and Odor, Particulate Class II*; Style 3 - If the water flow to the water dispenser or ice maker...
... substances listed below. In Canada, use with water that is recommended that you replace the filter. If the filter indicator light is red, it is recommended that you replace the filter. ■ The product is for cold water use only. ■ Do not use replacement filter T2RFWG2, part #4396841B. 2007 suggested retail price of Chlorine Taste and Odor, Particulate Class II*; Style 3 - If the water flow to the water dispenser or ice maker...
User Instructions
Page 15
... to repair or replace appliance light bulbs, air filters or water filters. 3. This major appliance is designed to correct defects in accordance with the product, KitchenAid will pay for replacement parts to be provided by KitchenAid. 5. The removal and reinstallation of all SLIDE N LOCK™ Door Bins and SLIDE N LOCK™ Can Racks due to correct defects in materials or workmanship in your model number and serial number on...
... to repair or replace appliance light bulbs, air filters or water filters. 3. This major appliance is designed to correct defects in accordance with the product, KitchenAid will pay for replacement parts to be provided by KitchenAid. 5. The removal and reinstallation of all SLIDE N LOCK™ Door Bins and SLIDE N LOCK™ Can Racks due to correct defects in materials or workmanship in your model number and serial number on...

Parts Diagram
Page 2
... 17 489464 Screw 18 940139 Drain Fitting 19 1108438 Extension Tube 20 1108439 Clip, Drain Tube 21 2188735 Cover, Unit 22 Cabinet (Not A Serviceable Part) 23 Hinge Cover 2203408W White 2203408T Biscuit 2203408B Black 2203408AP Apollo Gray 24 549193 Clamp, Service Cord 25 489084 Screw Illus. Part No. No. DESCRIPTION 1 Literature Parts 2318940 Energy Guide 2318586 Owner's Manual 2303925 Service Sheet 2303929 Wiring Sheet 2220407 Modular Icemaker Service Sheet 2308395 Instruction Sheet, Door Removal 2 2174748 Front Roller (2) 3 3400517...
... 17 489464 Screw 18 940139 Drain Fitting 19 1108438 Extension Tube 20 1108439 Clip, Drain Tube 21 2188735 Cover, Unit 22 Cabinet (Not A Serviceable Part) 23 Hinge Cover 2203408W White 2203408T Biscuit 2203408B Black 2203408AP Apollo Gray 24 549193 Clamp, Service Cord 25 489084 Screw Illus. Part No. No. DESCRIPTION 1 Literature Parts 2318940 Energy Guide 2318586 Owner's Manual 2303925 Service Sheet 2303929 Wiring Sheet 2220407 Modular Icemaker Service Sheet 2308395 Instruction Sheet, Door Removal 2 2174748 Front Roller (2) 3 3400517...
Parts Diagram
Page 10
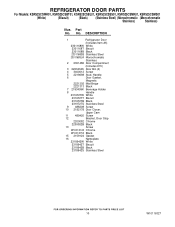
No. REFRIGERATOR DOOR PARTS For Models: KSRS25CSWH01, KSRS25CSBT01, KSRS25CSBL01, KSRS25CSSS01, KSRS25CSMK01, KSRS25CSMS01 (White) (Biscuit) (Black) (Stainless Steel) (Monochromatic (Monochromatic Stainless) Stainless) Illus. Part No. DESCRIPTION 1 Refrigerator Door (Includes Item #6) 2301168W White 2301168T Biscuit 2301168B Black 2301168SB Stainless Steel 2301168SUA Monochromatic Stainless 2 2301486 Door Compartment (Includes #15) 3 2223434K Door Bin (4) 4 3400012 Screw 5 2219698 Stud, Handle 6 Door Gasket, Magnetic 2221302 Mist Beige 2221313 Black 7 2193409K ...
No. REFRIGERATOR DOOR PARTS For Models: KSRS25CSWH01, KSRS25CSBT01, KSRS25CSBL01, KSRS25CSSS01, KSRS25CSMK01, KSRS25CSMS01 (White) (Biscuit) (Black) (Stainless Steel) (Monochromatic (Monochromatic Stainless) Stainless) Illus. Part No. DESCRIPTION 1 Refrigerator Door (Includes Item #6) 2301168W White 2301168T Biscuit 2301168B Black 2301168SB Stainless Steel 2301168SUA Monochromatic Stainless 2 2301486 Door Compartment (Includes #15) 3 2223434K Door Bin (4) 4 3400012 Screw 5 2219698 Stud, Handle 6 Door Gasket, Magnetic 2221302 Mist Beige 2221313 Black 7 2193409K ...

Parts Diagram
Page 12
... Biscuit 2319727B Black 2319727S Stainless Steel 3 2304925K Trivet (3) 4 2219698 Stud, Handle 7 488208 Screw 8 Door Gasket, Magnetic 2221303 Mist Beige 2221314 Black 9 2304895 Safety Barrier 12 2223752 Door Closer, Upper Cam 13 489420 Screw 14 Bracket, Door Stop 2303113 Chrome 2303113B Black 15 Screw W10010140 Chrome W10010150 Black 17 3400012 Screw Following Parts Not Illustrated 2310084 Wire Assembly, Freezer Door 2305405 Tube, Water Dispenser 12 W10116327
... Biscuit 2319727B Black 2319727S Stainless Steel 3 2304925K Trivet (3) 4 2219698 Stud, Handle 7 488208 Screw 8 Door Gasket, Magnetic 2221303 Mist Beige 2221314 Black 9 2304895 Safety Barrier 12 2223752 Door Closer, Upper Cam 13 489420 Screw 14 Bracket, Door Stop 2303113 Chrome 2303113B Black 15 Screw W10010140 Chrome W10010150 Black 17 3400012 Screw Following Parts Not Illustrated 2310084 Wire Assembly, Freezer Door 2305405 Tube, Water Dispenser 12 W10116327

Parts Diagram
Page 14
... Stainless Model Bracket 5 2305262 Motor, Ice Door 6 2305258 Door, Ice 7 2305204 Support, Ice Door 8 4449745 Screw (2) 9 2305447 Clip, Wiring 10 2305236 Spigot 2305307AS For Monochromatic Stainless Model 14 2305343 Lens, Front Cover 17 Pad, Ice 2305306CE For White Model 2305306MN For Biscuit Model 11 2305461 Seperator Assembly 12 2303843 Electronic Cover (2) Control (Core) 2305306GE For Black and Stainless Model 2305306AS For Monochromatic Stainless Model 18 2304140 Cover, Electronic Control 20 2303841 LED Assembly Illus. Part No. No. No. DISPENSER...
... Stainless Model Bracket 5 2305262 Motor, Ice Door 6 2305258 Door, Ice 7 2305204 Support, Ice Door 8 4449745 Screw (2) 9 2305447 Clip, Wiring 10 2305236 Spigot 2305307AS For Monochromatic Stainless Model 14 2305343 Lens, Front Cover 17 Pad, Ice 2305306CE For White Model 2305306MN For Biscuit Model 11 2305461 Seperator Assembly 12 2303843 Electronic Cover (2) Control (Core) 2305306GE For Black and Stainless Model 2305306AS For Monochromatic Stainless Model 18 2304140 Cover, Electronic Control 20 2303841 LED Assembly Illus. Part No. No. No. DISPENSER...
Parts Diagram
Page 18
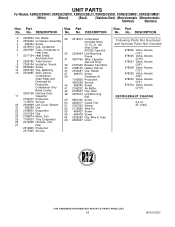
... W10116327 Part No. DESCRIPTION 2 2225834 Fan, Blade 28 2318413 Compressor 3 2304902 Condenser Assembly (Includes Items 4 489464 Screw 17, 27, 31, 39) 5 2216914 Clip, Condenser (Also Order 6 2261599 Tube, Condenser to 876765 Tube Kit) Heat Loop 30 2304904 Unit Mounting 7 2217194 Heat Shield Frame And Drain Pan 31 4387765 Wire, Capacitor 8 2205765 Tube Suction (Service Only) 9 2169104 Insulation, Sound 32 2181929 Bracket, Fan Motor 10...
... W10116327 Part No. DESCRIPTION 2 2225834 Fan, Blade 28 2318413 Compressor 3 2304902 Condenser Assembly (Includes Items 4 489464 Screw 17, 27, 31, 39) 5 2216914 Clip, Condenser (Also Order 6 2261599 Tube, Condenser to 876765 Tube Kit) Heat Loop 30 2304904 Unit Mounting 7 2217194 Heat Shield Frame And Drain Pan 31 4387765 Wire, Capacitor 8 2205765 Tube Suction (Service Only) 9 2169104 Insulation, Sound 32 2181929 Bracket, Fan Motor 10...


