Use & Care Guide
Page 9
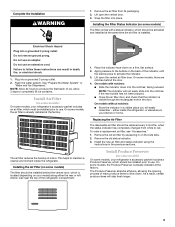
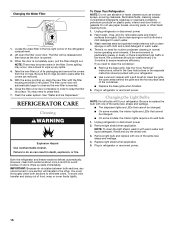
... to slow down on your kitchen or home. On models without notches: ■ Store the indicator in the previous sections. either the rear or left interior wall near the top of the refrigerator compartment. Install the new air filter and status indicator using the instructions in a visible place you will stay...
... to slow down on your kitchen or home. On models without notches: ■ Store the indicator in the previous sections. either the rear or left interior wall near the top of the refrigerator compartment. Install the new air filter and status indicator using the instructions in a visible place you will stay...
Use & Care Guide
Page 10
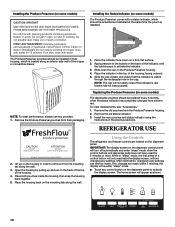
... installed in eyes, rinse with cleaning products containing ammonia, bleach or acids. Slide the cap closed, and check that the indicator is located along an interior side wall of the indicator, until the bubble pops to activate the display screen. To order replacements, see "Accessories." 1. Remove the old pouches from their...
... installed in eyes, rinse with cleaning products containing ammonia, bleach or acids. Slide the cap closed, and check that the indicator is located along an interior side wall of the indicator, until the bubble pops to activate the display screen. To order replacements, see "Accessories." 1. Remove the old pouches from their...
Use & Care Guide
Page 12
.... ■ Allow 24 hours to produce the first batch of the refrigerator, press any button on the dispenser display. ■ To turn off , but the interior and dispenser lights turn off, all sounds and alarms are disabled, the dispenser display screen backlight turns off all control and dispenser sounds, press and...
.... ■ Allow 24 hours to produce the first batch of the refrigerator, press any button on the dispenser display. ■ To turn off , but the interior and dispenser lights turn off, all sounds and alarms are disabled, the dispenser display screen backlight turns off all control and dispenser sounds, press and...
Use & Care Guide
Page 16
... cleaners such as the new filter is no need to eliminate odors. Hand wash, rinse, and dry removable parts and interior surfaces thoroughly. Remove light shield when applicable. Both the refrigerator and freezer sections defrost automatically. There is inserted. 6. Plug... window sprays, scouring cleansers, flammable fluids, cleaning waxes, concentrated detergents, bleaches or cleansers containing petroleum products on plastic parts, interior and door liners or gaskets. Wipe up any odors formed in refrigerator or reconnect power. You must thoroughly clean both sections,...
... cleaners such as the new filter is no need to eliminate odors. Hand wash, rinse, and dry removable parts and interior surfaces thoroughly. Remove light shield when applicable. Both the refrigerator and freezer sections defrost automatically. There is inserted. 6. Plug... window sprays, scouring cleansers, flammable fluids, cleaning waxes, concentrated detergents, bleaches or cleansers containing petroleum products on plastic parts, interior and door liners or gaskets. Wipe up any odors formed in refrigerator or reconnect power. You must thoroughly clean both sections,...
Use & Care Guide
Page 18
... cool completely. ■ Door(s) opened often or left open . ■ Kink in the water? Minimize door openings and keep doors fully closed completely? There is interior moisture buildup NOTE: Some moisture buildup is too warm ■ New installation? Straighten the water source line. ■ Ice maker turned on ? Wait 24 hours...
... cool completely. ■ Door(s) opened often or left open . ■ Kink in the water? Minimize door openings and keep doors fully closed completely? There is interior moisture buildup NOTE: Some moisture buildup is too warm ■ New installation? Straighten the water source line. ■ Ice maker turned on ? Wait 24 hours...


