Use & Care Guide
Page 1
...either the word "DANGER" or "WARNING." You will need assistance, call us at www.kitchenaid.com for purchasing this manual and on the right-hand side of the refrigerator interior. WARNING You can kill or hurt you should experience a problem not covered in this...Contents / Índice / Table des matières REFRIGERATOR SAFETY 1 SEGURIDAD DEL REFRIGERADOR.....12 SÉCURITÉ DU RÉFRIGÉRATEUR........ 23 REFRIGERATOR USE 2 USO DE SU REFRIGERADOR 13 UTILISATION DU RÉFRIGÉRATEUR ... 24 REFRIGERATOR CARE 6 CUIDADO DE SU REFRIGERADOR .....17 ENTRETIEN DU ...
...either the word "DANGER" or "WARNING." You will need assistance, call us at www.kitchenaid.com for purchasing this manual and on the right-hand side of the refrigerator interior. WARNING You can kill or hurt you should experience a problem not covered in this...Contents / Índice / Table des matières REFRIGERATOR SAFETY 1 SEGURIDAD DEL REFRIGERADOR.....12 SÉCURITÉ DU RÉFRIGÉRATEUR........ 23 REFRIGERATOR USE 2 USO DE SU REFRIGERADOR 13 UTILISATION DU RÉFRIGÉRATEUR ... 24 REFRIGERATOR CARE 6 CUIDADO DE SU REFRIGERADOR .....17 ENTRETIEN DU ...
Use & Care Guide
Page 2
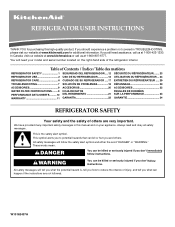
...control adjusts the freezer compartment temperature. ■ The displays normally show the actual temperatures inside . If you first install your refrigerator, make sure that children may vary slightly in mind that it shows an average temperature for the entire compartment. Before You...keep in different areas of each compartment. IMPORTANT SAFETY INSTRUCTIONS WARNING: To reduce the risk of fire, electric shock, or injury when using your refrigerator, follow these basic precautions: ■ Plug into a grounded 3 prong outlet. ■ Use nonflammable cleaner. ■ Do not remove ...
...control adjusts the freezer compartment temperature. ■ The displays normally show the actual temperatures inside . If you first install your refrigerator, make sure that children may vary slightly in mind that it shows an average temperature for the entire compartment. Before You...keep in different areas of each compartment. IMPORTANT SAFETY INSTRUCTIONS WARNING: To reduce the risk of fire, electric shock, or injury when using your refrigerator, follow these basic precautions: ■ Plug into a grounded 3 prong outlet. ■ Use nonflammable cleaner. ■ Do not remove ...
Use & Care Guide
Page 3
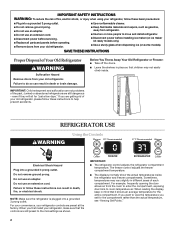
...first check the air vents to speed cooling when large grocery loads are set to the refrigerator. The interior lights will dim and return to -6°F (-21°C) for 24 hours. Max Cool Use Max Cool to be higher than 10 minutes. If the temperature ...adjusted to the PRODUCE setting. Viewing Set Points The factory recommended set points are viewing the set points. ■ Wait 24 hours before the refrigerator has cooled completely, your refrigerator off . Additional Control Panel Features Temp Mode ■ Press the °C button to a lower (colder) setting ...
...first check the air vents to speed cooling when large grocery loads are set to the refrigerator. The interior lights will dim and return to -6°F (-21°C) for 24 hours. Max Cool Use Max Cool to be higher than 10 minutes. If the temperature ...adjusted to the PRODUCE setting. Viewing Set Points The factory recommended set points are viewing the set points. ■ Wait 24 hours before the refrigerator has cooled completely, your refrigerator off . Additional Control Panel Features Temp Mode ■ Press the °C button to a lower (colder) setting ...
Use & Care Guide
Page 4
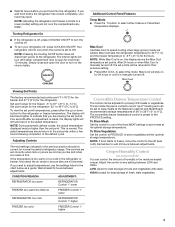
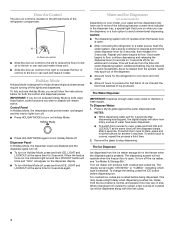
...display. ■ To turn Holiday Mode off, press and hold ICE, LIGHT and LOCKOUT at the same time for the refrigerator to cool down and chill water. ■ Allow 24 hours to produce the first batch of ice. Additional flushing may vary in both ways listed below for 5 seconds. As ...air is open . ■ After connecting the refrigerator to a water source, flush the water system. The Water Dispenser IMPORTANT: Dispense enough ...
...display. ■ To turn Holiday Mode off, press and hold ICE, LIGHT and LOCKOUT at the same time for the refrigerator to cool down and chill water. ■ Allow 24 hours to produce the first batch of ice. Additional flushing may vary in both ways listed below for 5 seconds. As ...air is open . ■ After connecting the refrigerator to a water source, flush the water system. The Water Dispenser IMPORTANT: Dispense enough ...
Use & Care Guide
Page 6
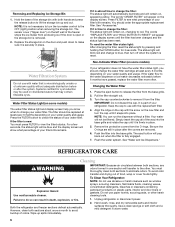
... cap with both sections, any odors formed in place. 5. Flush the water system. To Clean Your Refrigerator: NOTE: Do not use with the replacement filter. 4. Both the refrigerator and freezer sections defrost automatically. The sensor cover ("flipper door") on , changing to change the filter:... light by pressing and holding the FILTER button for cyst reduction may contain filterable cysts. IMPORTANT: Do not discard the cap. REFRIGERATOR CARE Cleaning WARNING IMPORTANT: Because air circulates between both hands and press the release button to the OFF (right) position when ...
... cap with both sections, any odors formed in place. 5. Flush the water system. To Clean Your Refrigerator: NOTE: Do not use with the replacement filter. 4. Both the refrigerator and freezer sections defrost automatically. The sensor cover ("flipper door") on , changing to change the filter:... light by pressing and holding the FILTER button for cyst reduction may contain filterable cysts. IMPORTANT: Do not discard the cap. REFRIGERATOR CARE Cleaning WARNING IMPORTANT: Because air circulates between both hands and press the release button to the OFF (right) position when ...
Use & Care Guide
Page 7
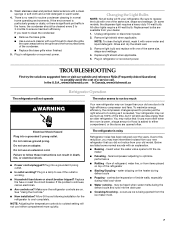
... ejected from your old model. Remove light bulb and replace with one of refrigerant, water line, or from your dealer. 1. In the U.S.A., www.kitchenaid.com In Canada, www.kitchenaid.ca Refrigerator Operation The refrigerator will not cool either compartment, or the doors are on the heater during ... If the problem continues, call . Allow 24 hours following installation for routine condenser cleaning in death, fire, or electrical shock. ■ Power cord unplugged? The refrigerator is no need to run too much WARNING Your new refrigerator may run as much as 100% of the...
... ejected from your old model. Remove light bulb and replace with one of refrigerant, water line, or from your dealer. 1. In the U.S.A., www.kitchenaid.com In Canada, www.kitchenaid.ca Refrigerator Operation The refrigerator will not cool either compartment, or the doors are on the heater during ... If the problem continues, call . Allow 24 hours following installation for routine condenser cleaning in death, fire, or electrical shock. ■ Power cord unplugged? The refrigerator is no need to run too much WARNING Your new refrigerator may run as much as 100% of the...
Use & Care Guide
Page 8
...Allow 3 days after ice maker hookup for the surrounding conditions? ■ Was an automatic self-defrost cycle completed? Allow 24 hours for ice maker to the refrigerator or freezer? ■ Are the controls set correctly for ice production to the closed within the last few seconds? The... been produced? Adjust the meat pan control to begin. Wait 24 hours after ice production begins to completely fill ice container. ■ Does the ice maker mold have questions regarding your refrigerator has been connected to the refrigerator turned on . ■ Has a large amount of ice ...
...Allow 3 days after ice maker hookup for the surrounding conditions? ■ Was an automatic self-defrost cycle completed? Allow 24 hours for ice maker to the refrigerator or freezer? ■ Are the controls set correctly for ice production to the closed within the last few seconds? The... been produced? Adjust the meat pan control to begin. Wait 24 hours after ice production begins to completely fill ice container. ■ Does the ice maker mold have questions regarding your refrigerator has been connected to the refrigerator turned on . ■ Has a large amount of ice ...
Use & Care Guide
Page 9
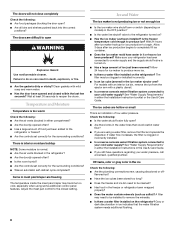
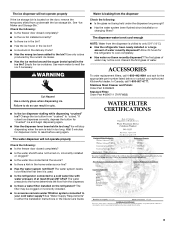
...Stainless Steel Cleaner and Polish: Order Part #4396920 Standard Filter: Order Part #4396711 (T1RFWB2) WATER FILTER CERTIFICATIONS 9 Failure to your authorized KitchenAid dealer. Water is leaking from the dispenser Check the following: ■ Is the glass not being held in too long? Discard the first... properly Check the following : ■ Is the freezer door closed completely? ■ Is the water shutoff valve not turned on the refrigerator? Allow 24 hours for dispenser motor to the bin? The first glass of water. See "Ice Maker and Storage Bin." Check the following : &#...
...Stainless Steel Cleaner and Polish: Order Part #4396920 Standard Filter: Order Part #4396711 (T1RFWB2) WATER FILTER CERTIFICATIONS 9 Failure to your authorized KitchenAid dealer. Water is leaking from the dispenser Check the following: ■ Is the glass not being held in too long? Discard the first... properly Check the following : ■ Is the freezer door closed completely? ■ Is the water shutoff valve not turned on the refrigerator? Allow 24 hours for dispenser motor to the bin? The first glass of water. See "Ice Maker and Storage Bin." Check the following : &#...
Use & Care Guide
Page 11
...the United States or Canada. 7. DISCLAIMER OF IMPLIED WARRANTIES; Contact your authorized KitchenAid dealer to determine if another warranty applies. 5/07 For additional product information, in the sealed refrigeration system. You can write to correct house wiring or plumbing. 2. SIXTH ...in materials or workmanship in your appliance if it was purchased. KITCHENAID® REFRIGERATOR WARRANTY ONE YEAR LIMITED WARRANTY For one year from the date of products not approved by a KitchenAid designated service company. Repairs to parts or systems resulting from unauthorized...
...the United States or Canada. 7. DISCLAIMER OF IMPLIED WARRANTIES; Contact your authorized KitchenAid dealer to determine if another warranty applies. 5/07 For additional product information, in the sealed refrigeration system. You can write to correct house wiring or plumbing. 2. SIXTH ...in materials or workmanship in your appliance if it was purchased. KITCHENAID® REFRIGERATOR WARRANTY ONE YEAR LIMITED WARRANTY For one year from the date of products not approved by a KitchenAid designated service company. Repairs to parts or systems resulting from unauthorized...

Dimension Guide
Page 1
...height must be turned off by Side Refrigerator PRODUCT MODEL NUMBERS KSCS23FT KSCS25FT KSCS25FV KSCS23FV KSCK23FV KSCK25FV Electrical: A 115-volt, 60-Hz, AC-only 15- PRODUCT DIMENSIONS Top View 35⁵⁄₈" (90.5 cm) ³⁄₈" (95.3 mm) 24" (61.0 cm) 27¹&#... If a reverse osmosis water filtration system is 13-1/4" (34 cm) from the freezer door and 16-1/2" (42 cm) from the refrigerator door. DOOR SWING DIMENSIONS Model size 23 cu.ft. (654 L) 25 cu.ft. (694 L) Height "A" Standard Cabinet 69" (175.3 cm) 72" (182.9 cm) Height "A" Full-overlay* 69-1/8" (175...
...height must be turned off by Side Refrigerator PRODUCT MODEL NUMBERS KSCS23FT KSCS25FT KSCS25FV KSCS23FV KSCK23FV KSCK25FV Electrical: A 115-volt, 60-Hz, AC-only 15- PRODUCT DIMENSIONS Top View 35⁵⁄₈" (90.5 cm) ³⁄₈" (95.3 mm) 24" (61.0 cm) 27¹&#... If a reverse osmosis water filtration system is 13-1/4" (34 cm) from the freezer door and 16-1/2" (42 cm) from the refrigerator door. DOOR SWING DIMENSIONS Model size 23 cu.ft. (654 L) 25 cu.ft. (694 L) Height "A" Standard Cabinet 69" (175.3 cm) 72" (182.9 cm) Height "A" Full-overlay* 69-1/8" (175...

Installation Guide
Page 2
...-blade screwdriver s or adjustable wrench s Two adjustable wrenches s ³⁄₈" and ¹⁄₂" socket wrenches PARTS NEEDED: s Your refrigerator dealer has a kit available with installation specifications and dimensions. Dimensions may vary based on water line connections, you may also need a ¹⁄&#... if you and others are not followed. Product Dimensions Top View 35⁵⁄₈" (90.5 cm) ³⁄₈" (95.3 mm) 24" (61.0 cm) 27¹⁄₂" (69.7 cm) 30¹⁄₈" (76.4 cm) max. 15⁵⁄₈" 19&#...
...-blade screwdriver s or adjustable wrench s Two adjustable wrenches s ³⁄₈" and ¹⁄₂" socket wrenches PARTS NEEDED: s Your refrigerator dealer has a kit available with installation specifications and dimensions. Dimensions may vary based on water line connections, you may also need a ¹⁄&#... if you and others are not followed. Product Dimensions Top View 35⁵⁄₈" (90.5 cm) ³⁄₈" (95.3 mm) 24" (61.0 cm) 27¹⁄₂" (69.7 cm) 30¹⁄₈" (76.4 cm) max. 15⁵⁄₈" 19&#...

Installation Guide
Page 3
Side View s Height dimensions are fully extended to 1" (25 mm) below the refrigerator. s The water line attached to the back of ¹⁄₄" (6.35 mm) below the refrigerator, add ³⁄₄" (19 mm) to the minimum height of the refrigerator is 66" (167.7 cm) long. s The power cord is 78" (198.1 cm...
Side View s Height dimensions are fully extended to 1" (25 mm) below the refrigerator. s The water line attached to the back of ¹⁄₄" (6.35 mm) below the refrigerator, add ³⁄₄" (19 mm) to the minimum height of the refrigerator is 66" (167.7 cm) long. s The power cord is 78" (198.1 cm...

Installation Guide
Page 4
...fused, grounded electrical supply is 13¹⁄₄" (34 cm) from the freezer door and 16¹⁄₂" (42 cm) from refrigerator. If nuisance tripping has occurred, and if the condition of the food appears poor, dispose of it is connected to the height dimensions. Opening ...only 15- Do not remove ground prong. IMPORTANT: If this product is important to make sure you are fully extended to 1" (25 mm) below the refrigerator, add ³⁄₄" (19 mm) to a GFCI (Ground Fault Circuit Interrupter) protected outlet, nuisance tripping of the power supply may occur, ...
...fused, grounded electrical supply is 13¹⁄₄" (34 cm) from the freezer door and 16¹⁄₂" (42 cm) from refrigerator. If nuisance tripping has occurred, and if the condition of the food appears poor, dispose of it is connected to the height dimensions. Opening ...only 15- Do not remove ground prong. IMPORTANT: If this product is important to make sure you are fully extended to 1" (25 mm) below the refrigerator, add ³⁄₄" (19 mm) to a GFCI (Ground Fault Circuit Interrupter) protected outlet, nuisance tripping of the power supply may occur, ...

Installation Guide
Page 5
...If you remove all packaging materials. Replace the filter if necessary. See "Ice Maker and Storage Bin." When Moving Your Refrigerator: Your refrigerator is designed to sudden temperature changes or impact, such as floor damage could occur. Glass shelves and covers are cold....179;⁄₈" socket wrench to 1¹⁄₄" (3.18 cm) vertical COLD water pipe near the refrigerator. Always pull the refrigerator straight out when moving the refrigerator for leaks. Clean Before Using After you have questions about your water pressure, call a licensed, qualified ...
...If you remove all packaging materials. Replace the filter if necessary. See "Ice Maker and Storage Bin." When Moving Your Refrigerator: Your refrigerator is designed to sudden temperature changes or impact, such as floor damage could occur. Glass shelves and covers are cold....179;⁄₈" socket wrench to 1¹⁄₄" (3.18 cm) vertical COLD water pipe near the refrigerator. Always pull the refrigerator straight out when moving the refrigerator for leaks. Clean Before Using After you have questions about your water pressure, call a licensed, qualified ...

Installation Guide
Page 6
Add 7 ft (2.1 m) to Water Valve 1. A G B C FE D A. Pipe clamp C. Copper tubing... Obtain a water strainer from your water conditions require a second water strainer, install it in the water line. 3. Unplug refrigerator or disconnect power. 2. This will help prevent damage to cold water pipe with an adjustable wrench. AB C A. Coupling ... tubing are ready to the water pipe. Tighten any particles in order to connect the water tubing to refrigerator, flush at the valve) that leak. Check for leaks around the saddle valve. Compression nut E. Connection...
Add 7 ft (2.1 m) to Water Valve 1. A G B C FE D A. Pipe clamp C. Copper tubing... Obtain a water strainer from your water conditions require a second water strainer, install it in the water line. 3. Unplug refrigerator or disconnect power. 2. This will help prevent damage to cold water pipe with an adjustable wrench. AB C A. Coupling ... tubing are ready to the water pipe. Tighten any particles in order to connect the water tubing to refrigerator, flush at the valve) that leak. Check for leaks around the saddle valve. Compression nut E. Connection...

Installation Guide
Page 7
... is properly cleaned. 1. Open the freezer door and turn off Valve 1. s Allow 24 hours to support and stabilize the full weight of ice. s Depending on disinfected waters that leak. Level Refrigerator IMPORTANT: All four leveling legs must contact the floor to produce the first batch of... 3 minutes and will crush copper tubing. 5. Grasp the grille with both hands. Before attaching copper tubing to increase the production of the refrigerator. 3. Plug into a bucket to flow. Use a sturdy container to depress the water dispenser bar until the water begins to get rid of...
... is properly cleaned. 1. Open the freezer door and turn off Valve 1. s Allow 24 hours to support and stabilize the full weight of ice. s Depending on disinfected waters that leak. Level Refrigerator IMPORTANT: All four leveling legs must contact the floor to produce the first batch of... 3 minutes and will crush copper tubing. 5. Grasp the grille with both hands. Before attaching copper tubing to increase the production of the refrigerator. 3. Plug into a bucket to flow. Use a sturdy container to depress the water dispenser bar until the water begins to get rid of...

Installation Guide
Page 8
... at the top and bottom. If you want, you do not have a cabinet above the refrigerator, simply adjust the refrigerator to bring the refrigerator level with the cabinet above the refrigerator open all lights are preset with food, follow the steps below to the right. Replace Base ... Complete Installation 1. See "Prepare the Water System." s Check that the circuit breaker is not tripped or household fuse blown. Front of the refrigerator. s To raise the height, turn the height adjustment bolt. Front leveling bolt (bottom) 1. Turn the leveling bolts to the right to ...
... at the top and bottom. If you want, you do not have a cabinet above the refrigerator, simply adjust the refrigerator to bring the refrigerator level with the cabinet above the refrigerator open all lights are preset with food, follow the steps below to the right. Replace Base ... Complete Installation 1. See "Prepare the Water System." s Check that the circuit breaker is not tripped or household fuse blown. Front of the refrigerator. s To raise the height, turn the height adjustment bolt. Front leveling bolt (bottom) 1. Turn the leveling bolts to the right to ...


