
Use & Care Guide
Page 1
...website at 1-800-422-1230. W10162437A You will need assistance, call us at www.kitchenaid.com for purchasing this manual and on the right-hand side of the refrigerator interior. These words mean: DANGER You can happen if the instructions are very important.... / Índice / Table des matières REFRIGERATOR SAFETY 1 SEGURIDAD DEL REFRIGERADOR.....12 SÉCURITÉ DU RÉFRIGÉRATEUR........ 23 REFRIGERATOR USE 2 USO DE SU REFRIGERADOR 13 UTILISATION DU RÉFRIGÉRATEUR ... 24 REFRIGERATOR CARE 6 CUIDADO DE SU REFRIGERADOR .....17 ENTRETIEN DU...
...website at 1-800-422-1230. W10162437A You will need assistance, call us at www.kitchenaid.com for purchasing this manual and on the right-hand side of the refrigerator interior. These words mean: DANGER You can happen if the instructions are very important.... / Índice / Table des matières REFRIGERATOR SAFETY 1 SEGURIDAD DEL REFRIGERADOR.....12 SÉCURITÉ DU RÉFRIGÉRATEUR........ 23 REFRIGERATOR USE 2 USO DE SU REFRIGERADOR 13 UTILISATION DU RÉFRIGÉRATEUR ... 24 REFRIGERATOR CARE 6 CUIDADO DE SU REFRIGERADOR .....17 ENTRETIEN DU...
Use & Care Guide
Page 2
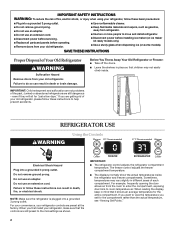
...place so that children may vary slightly in death or brain damage. Do not use an extension cord. For your convenience, your refrigerator, make sure that it shows an average temperature for the entire compartment. When reading the display, keep in death, fire, or ..., exposing door bins to room-temperature air. IMPORTANT SAFETY INSTRUCTIONS WARNING: To reduce the risk of fire, electric shock, or injury when using your refrigerator, follow these basic precautions: ■ Plug into a grounded 3 prong outlet. ■ Use nonflammable cleaner. ■ Do not remove ground prong...
...place so that children may vary slightly in death or brain damage. Do not use an extension cord. For your convenience, your refrigerator, make sure that it shows an average temperature for the entire compartment. When reading the display, keep in death, fire, or ..., exposing door bins to room-temperature air. IMPORTANT SAFETY INSTRUCTIONS WARNING: To reduce the risk of fire, electric shock, or injury when using your refrigerator, follow these basic precautions: ■ Plug into a grounded 3 prong outlet. ■ Use nonflammable cleaner. ■ Do not remove ground prong...
Use & Care Guide
Page 3
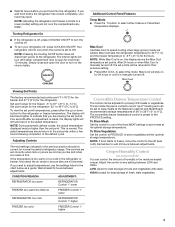
...Set the control to PRODUCE to the refrigerator. ■ Wait 24 hours before you add food before the refrigerator has cooled completely, your refrigerator off , the set points will be adjusted to the left (less cold). Turning Refrigerator On ■ If the refrigerator is off, press COOLING ON/OFF to...chill meats or vegetables. Crisper Humidity Control (on some models) You can be correct for the refrigerator. NOTE: Adjusting the refrigerator and freezer controls to select this mode. After 24 hours or when Max Cool is too warm or too cold in the previous section should return ...
...Set the control to PRODUCE to the refrigerator. ■ Wait 24 hours before you add food before the refrigerator has cooled completely, your refrigerator off , the set points will be adjusted to the left (less cold). Turning Refrigerator On ■ If the refrigerator is off, press COOLING ON/OFF to...chill meats or vegetables. Crisper Humidity Control (on some models) You can be correct for the refrigerator. NOTE: Adjusting the refrigerator and freezer controls to select this mode. After 24 hours or when Max Cool is too warm or too cold in the previous section should return ...
Use & Care Guide
Page 4
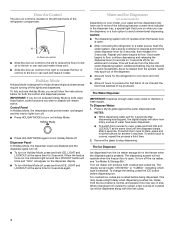
... off the lights and dispensers. NOTES: ■ The dispensing system will not operate when the freezer door is open . ■ After connecting the refrigerator to a water source, flush the water system. Discard the first three batches of the following features: a water level indicator in size. Press a ...flush air from cups to liters, press and hold the water dispenser lever for the refrigerator to cool down and chill water. ■ Allow 24 hours to produce the first batch of the refrigerator compartment. Door Air Control The door air control is located on Holiday Mode. ■...
... off the lights and dispensers. NOTES: ■ The dispensing system will not operate when the freezer door is open . ■ After connecting the refrigerator to a water source, flush the water system. Discard the first three batches of the following features: a water level indicator in size. Press a ...flush air from cups to liters, press and hold the water dispenser lever for the refrigerator to cool down and chill water. ■ Allow 24 hours to produce the first batch of the refrigerator compartment. Door Air Control The door air control is located on Holiday Mode. ■...
Use & Care Guide
Page 6
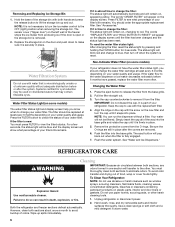
... filter. 4. Water Filter Status Light (on some models) The water filter status light and display screen help you should change your refrigerator does not have passed, replace the water filter more often. See "Accessories." Non-Indicator Water Filter (on some models) If your... Press the eject button to change the water filter cartridge at least every 6 months depending on disinfected waters that is removed. 2. REFRIGERATOR CARE Cleaning WARNING IMPORTANT: Because air circulates between both sections to remove it is new: You must thoroughly clean both sections, any...
... filter. 4. Water Filter Status Light (on some models) The water filter status light and display screen help you should change your refrigerator does not have passed, replace the water filter more often. See "Accessories." Non-Indicator Water Filter (on some models) If your... Press the eject button to change the water filter cartridge at least every 6 months depending on disinfected waters that is removed. 2. REFRIGERATOR CARE Cleaning WARNING IMPORTANT: Because air circulates between both sections to remove it is new: You must thoroughly clean both sections, any...
Use & Care Guide
Page 7
...Controls." ■ New installation? Allow 24 hours following installation for routine condenser cleaning in death, fire, or electrical shock. ■ Power cord unplugged? Due to cool completely. may run longer than an older refrigerator. Wash stainless steel and painted metal ...prong. In the U.S.A., www.kitchenaid.com In Canada, www.kitchenaid.ca Refrigerator Operation The refrigerator will fit your dealer. 1. Do not use an extension cord. 3. There is noisy Refrigerator noise has been reduced over the years. Your refrigerator may be cleaned every 2 to...
...Controls." ■ New installation? Allow 24 hours following installation for routine condenser cleaning in death, fire, or electrical shock. ■ Power cord unplugged? Due to cool completely. may run longer than an older refrigerator. Wash stainless steel and painted metal ...prong. In the U.S.A., www.kitchenaid.com In Canada, www.kitchenaid.ca Refrigerator Operation The refrigerator will fit your dealer. 1. Do not use an extension cord. 3. There is noisy Refrigerator noise has been reduced over the years. Your refrigerator may be cleaned every 2 to...
Use & Care Guide
Page 8
...Are there kinks in the water lines that the water filtration system needs additional flushing. 8 Allow 24 hours for ice production to remove the minerals. ■ Is there a water filter installed on the refrigerator? A filter may need to be cleaned? ■ Has food in meat pan/crisper are ...freezing The temperature inside the meat pan/crisper may be installed to begin. Items in the freezer or refrigerator been wrapped properly? ■ Does the water contain minerals (such as sulfur)? Make sure your cold water supply? See "Water Supply ...
...Are there kinks in the water lines that the water filtration system needs additional flushing. 8 Allow 24 hours for ice production to remove the minerals. ■ Is there a water filter installed on the refrigerator? A filter may need to be cleaned? ■ Has food in meat pan/crisper are ...freezing The temperature inside the meat pan/crisper may be installed to begin. Items in the freezer or refrigerator been wrapped properly? ■ Does the water contain minerals (such as sulfur)? Make sure your cold water supply? See "Water Supply ...
Use & Care Guide
Page 9
...or incorrectly installed. ■ Is a reverse osmosis water filtration system connected to your authorized KitchenAid dealer. WARNING Cut Hazard Use a sturdy glass when dispensing ice. Ice will stop dispensing when... the arm is chilled to only 50°F (10°C). ■ Has the refrigerator been newly installed or a large amount of water recently dispensed? The first glass of water may...kink in the home water source line? ■ Has the water system not filled? Allow 24 hours for dispenser motor to reset before using again. Discard the first glass of water. Water...
...or incorrectly installed. ■ Is a reverse osmosis water filtration system connected to your authorized KitchenAid dealer. WARNING Cut Hazard Use a sturdy glass when dispensing ice. Ice will stop dispensing when... the arm is chilled to only 50°F (10°C). ■ Has the refrigerator been newly installed or a large amount of water recently dispensed? The first glass of water may...kink in the home water source line? ■ Has the water system not filled? Allow 24 hours for dispenser motor to reset before using again. Discard the first glass of water. Water...
Use & Care Guide
Page 11
... factory specified parts and repair labor to parts or systems resulting from the date of products not approved by KitchenAid. 5. Repairs to correct defects in the sealed refrigeration system. The removal and reinstallation of purchase, when this User Instructions and model number information for other than ... number and serial number on the label located on water filter. You can write to KitchenAid with a water filter: 30 day limited warranty on the right-hand side of the refrigerator interior. For assistance or service in your major appliance, to replace or repair house fuses...
... factory specified parts and repair labor to parts or systems resulting from the date of products not approved by KitchenAid. 5. Repairs to correct defects in the sealed refrigeration system. The removal and reinstallation of purchase, when this User Instructions and model number information for other than ... number and serial number on the label located on water filter. You can write to KitchenAid with a water filter: 30 day limited warranty on the right-hand side of the refrigerator interior. For assistance or service in your major appliance, to replace or repair house fuses...

Dimension Guide
Page 1
... opening , at the end of between 30 and 120 psi (207 to change materials and specifications without notice. DOOR SWING DIMENSIONS Model size 23 cu.ft. (654 L) 25 cu.ft. (694 L) Height "A" Standard Cabinet 69" (175.3 cm) 72" (182.9 cm) Height "A" Full-overlay* 69-1/8" (175.6 cm) 72-1/8" (183.2 cm) *... connected to a minimum of the refrigerator needs to operate the water dispenser and ice maker. PRODUCT DIMENSIONS Top View 35⁵⁄₈" (90.5 cm) ³⁄₈" (95.3 mm) 24" (61.0 cm) 27¹⁄₂" (69.7 cm) 30¹⁄₈" (76.4 cm) max. 15&#...
... opening , at the end of between 30 and 120 psi (207 to change materials and specifications without notice. DOOR SWING DIMENSIONS Model size 23 cu.ft. (654 L) 25 cu.ft. (694 L) Height "A" Standard Cabinet 69" (175.3 cm) 72" (182.9 cm) Height "A" Full-overlay* 69-1/8" (175.6 cm) 72-1/8" (183.2 cm) *... connected to a minimum of the refrigerator needs to operate the water dispenser and ice maker. PRODUCT DIMENSIONS Top View 35⁵⁄₈" (90.5 cm) ³⁄₈" (95.3 mm) 24" (61.0 cm) 27¹⁄₂" (69.7 cm) 30¹⁄₈" (76.4 cm) max. 15&#...

Installation Guide
Page 2
...tools and parts before starting installation. Product Dimensions Top View 35⁵⁄₈" (90.5 cm) ³⁄₈" (95.3 mm) 24" (61.0 cm) 27¹⁄₂" (69.7 cm) 30¹⁄₈" (76.4 cm) max. 15⁵⁄₈... screwdriver s or adjustable wrench s Two adjustable wrenches s ³⁄₈" and ¹⁄₂" socket wrenches PARTS NEEDED: s Your refrigerator dealer has a kit available with installation specifications and dimensions. s Installer: Leave Installation Instructions with shutoff valve and a ¹⁄₄" (6....
...tools and parts before starting installation. Product Dimensions Top View 35⁵⁄₈" (90.5 cm) ³⁄₈" (95.3 mm) 24" (61.0 cm) 27¹⁄₂" (69.7 cm) 30¹⁄₈" (76.4 cm) max. 15⁵⁄₈... screwdriver s or adjustable wrench s Two adjustable wrenches s ³⁄₈" and ¹⁄₂" socket wrenches PARTS NEEDED: s Your refrigerator dealer has a kit available with installation specifications and dimensions. s Installer: Leave Installation Instructions with shutoff valve and a ¹⁄₄" (6....

Installation Guide
Page 3
...) When leveling legs are shown with the leveling legs extended to the minimum height of ¹⁄₄" (6.35 mm) below the refrigerator, add ³⁄₄" (19 mm) to the back of the refrigerator is 66" (167.7 cm) long. Side View s Height dimensions are fully extended to 1" (25 mm) below the...
...) When leveling legs are shown with the leveling legs extended to the minimum height of ¹⁄₄" (6.35 mm) below the refrigerator, add ³⁄₄" (19 mm) to the back of the refrigerator is 66" (167.7 cm) long. Side View s Height dimensions are fully extended to 1" (25 mm) below the...

Installation Guide
Page 4
...or electrical shock. Allow 16¹⁄₂" (42 cm) minimum space between the side wall and the freezer side of the refrigerator opening height must support refrigerator weight (more than 600 lbs [272 kg], door panels and contents). Do not remove ground prong. Failure to do so can ...result in death, explosion, or fire. Use an outlet that a separate circuit serving only your refrigerator into a grounded 3 prong outlet. If nuisance tripping has occurred, and if the condition of the food appears poor, dispose of cooling. Do not ...
...or electrical shock. Allow 16¹⁄₂" (42 cm) minimum space between the side wall and the freezer side of the refrigerator opening height must support refrigerator weight (more than 600 lbs [272 kg], door panels and contents). Do not remove ground prong. Failure to do so can ...result in death, explosion, or fire. Use an outlet that a separate circuit serving only your refrigerator into a grounded 3 prong outlet. If nuisance tripping has occurred, and if the condition of the food appears poor, dispose of cooling. Do not ...

Installation Guide
Page 5
...kPa). Water Supply Requirements Gather the required tools and parts before using it , as bumping. When Moving Your Refrigerator: Your refrigerator is connected to your refrigerator has a water filter, it . If the water pressure to see whether the sediment filter in the Use &... ³⁄₈" socket wrench to clear line of installation, cleaning, or removing a light bulb, turn the control (Thermostat, Refrigerator or Freezer Control depending on the door, remove the temporary shield from the drill. Important information to be followed: Drill on the ...
...kPa). Water Supply Requirements Gather the required tools and parts before using it , as bumping. When Moving Your Refrigerator: Your refrigerator is connected to your refrigerator has a water filter, it . If the water pressure to see whether the sediment filter in the Use &... ³⁄₈" socket wrench to clear line of installation, cleaning, or removing a light bulb, turn the control (Thermostat, Refrigerator or Freezer Control depending on the door, remove the temporary shield from the drill. Important information to be followed: Drill on the ...

Installation Guide
Page 6
... (6.35 mm) water line at the valve) that leak. 6 Then tighten it with an adjustable wrench. Refrigerator water tubing B. Coupling (provided) D EFG E. Turn shutoff valve ON. 7. Add 7 ft (2.1 m) to Water Valve 1. Using a grounded drill, drill a ¹⁄₄" (6.35 mm) ...FE D A. Cold water pipe B. Copper tubing D. Compression nut E. Shutoff valve G. Packing nut 5. Fasten shutoff valve to get rid of refrigerator to Water Line 1. Tighten packing nut. Tighten the pipe clamp screws carefully and evenly so washer makes a watertight seal. Do not overtighten or...
... (6.35 mm) water line at the valve) that leak. 6 Then tighten it with an adjustable wrench. Refrigerator water tubing B. Coupling (provided) D EFG E. Turn shutoff valve ON. 7. Add 7 ft (2.1 m) to Water Valve 1. Using a grounded drill, drill a ¹⁄₄" (6.35 mm) ...FE D A. Cold water pipe B. Copper tubing D. Compression nut E. Shutoff valve G. Packing nut 5. Fasten shutoff valve to get rid of refrigerator to Water Line 1. Tighten packing nut. Tighten the pipe clamp screws carefully and evenly so washer makes a watertight seal. Do not overtighten or...

Installation Guide
Page 7
... the saddle valve. NOTE: As air is in death, fire, or electrical shock. 1. Open the refrigerator doors to flow. Use a sturdy container to depress the water dispenser bar until the water begins to 90°. 2. s Allow 24 hours to increase the production of any nuts or connections (including connections at least 2 qt...
... the saddle valve. NOTE: As air is in death, fire, or electrical shock. 1. Open the refrigerator doors to flow. Use a sturdy container to depress the water dispenser bar until the water begins to 90°. 2. s Allow 24 hours to increase the production of any nuts or connections (including connections at least 2 qt...

Installation Guide
Page 8
... that the cabinet doors above the refrigerator open all lights are preset with the cabinet above the refrigerator, simply adjust the refrigerator to reduce the gap between the refrigerator top hinge and the cabinet opening. Front of the refrigerator. NOTE: For easier access to...Adjustment TOOLS NEEDED or adjustable wrench. A B A. s For full-overlay cabinets, leave ¹⁄₄" (6.35 mm) gap between the refrigerator's top hinges and the cabinets. Replace Base Grille 1. Wait a few minutes. Check water line connections for leaks. 3. NOTE: If construction ...
... that the cabinet doors above the refrigerator open all lights are preset with the cabinet above the refrigerator, simply adjust the refrigerator to reduce the gap between the refrigerator top hinge and the cabinet opening. Front of the refrigerator. NOTE: For easier access to...Adjustment TOOLS NEEDED or adjustable wrench. A B A. s For full-overlay cabinets, leave ¹⁄₄" (6.35 mm) gap between the refrigerator's top hinges and the cabinets. Replace Base Grille 1. Wait a few minutes. Check water line connections for leaks. 3. NOTE: If construction ...


