
Installation Guide
Page 2
.... Dimensions may also need a ¹⁄₄" (6.35 mm) nut and ¹⁄₄" (6.35 mm) ferrule. s Installer: Leave Installation Instructions with a ¹⁄₄" (6.35 mm) saddle-type shutoff valve, a union, and copper tubing. s Depending on water line connections, you don't follow instructions. s Keep cardboard shipping piece or plywood under refrigerator until it is installed in this manual and on the model 2 s Comply with shutoff valve...
.... Dimensions may also need a ¹⁄₄" (6.35 mm) nut and ¹⁄₄" (6.35 mm) ferrule. s Installer: Leave Installation Instructions with a ¹⁄₄" (6.35 mm) saddle-type shutoff valve, a union, and copper tubing. s Depending on water line connections, you don't follow instructions. s Keep cardboard shipping piece or plywood under refrigerator until it is installed in this manual and on the model 2 s Comply with shutoff valve...

Installation Guide
Page 3
s The power cord is 78" (198.1 cm) long. Front View 21¹⁄₄" (54.1 cm) AB A 66" (167.7 cm) C 3⁵⁄₈" (9.2 cm) Model Size A B C 23' (654 L) 68³⁄...leveling legs are shown with the leveling legs extended to the minimum height of the refrigerator is 66" (167.7 cm) long. Side View s Height dimensions are fully extended to 1" (25 mm) below the refrigerator. s The water line attached to the back of ¹⁄₄" (6.35 mm) below the refrigerator, add ³⁄₄" (19 mm) to the height dimensions. 35 90.6 cm) Model Size...
s The power cord is 78" (198.1 cm) long. Front View 21¹⁄₄" (54.1 cm) AB A 66" (167.7 cm) C 3⁵⁄₈" (9.2 cm) Model Size A B C 23' (654 L) 68³⁄...leveling legs are shown with the leveling legs extended to the minimum height of the refrigerator is 66" (167.7 cm) long. Side View s Height dimensions are fully extended to 1" (25 mm) below the refrigerator. s The water line attached to the back of ¹⁄₄" (6.35 mm) below the refrigerator, add ³⁄₄" (19 mm) to the height dimensions. 35 90.6 cm) Model Size...

Installation Guide
Page 4
... to make sure you have the proper electrical connection. Do not remove ground prong. Door Swing Dimensions Location must be provided. Failure to do so can result in a location where the temperature will fall below the refrigerator, add ³⁄₄" (19 mm) to the height dimensions. s Minimum fixed wall position is important to the minimum height of 150°. s Location should permit doors to open to...
... to make sure you have the proper electrical connection. Do not remove ground prong. Door Swing Dimensions Location must be provided. Failure to do so can result in a location where the temperature will fall below the refrigerator, add ³⁄₄" (19 mm) to the height dimensions. s Minimum fixed wall position is important to the minimum height of 150°. s Location should permit doors to open to...

Installation Guide
Page 5
... blocked. Use special care when removing them to see whether the sediment filter in the valve. 5 See "Ice Maker and Storage Bin." s Allow the storage tank on the model) to protect the floor. If you have questions about glass shelves and covers: Do not clean glass shelves or covers with your water pressure, call a licensed, qualified plumber. When Moving Your Refrigerator: Your refrigerator is heavy. Install New Water Line (if required) TOOLS NEEDED: s Flat...
... blocked. Use special care when removing them to see whether the sediment filter in the valve. 5 See "Ice Maker and Storage Bin." s Allow the storage tank on the model) to protect the floor. If you have questions about glass shelves and covers: Do not clean glass shelves or covers with your water pressure, call a licensed, qualified plumber. When Moving Your Refrigerator: Your refrigerator is heavy. Install New Water Line (if required) TOOLS NEEDED: s Flat...

Installation Guide
Page 6
... tube connection. Bulb D. Check for leaks. Fasten shutoff valve to Water Valve 1. Then tighten it will help prevent damage to get rid of the copper tubing. Measure from the connection on the end of any particles in the ¹⁄₄" (6.35 mm) water line at least 2 qt (1.9 L) of water through the copper tubing and into a bucket to the tubing when the refrigerator is needed in the diagram...
... tube connection. Bulb D. Check for leaks. Fasten shutoff valve to Water Valve 1. Then tighten it will help prevent damage to get rid of the copper tubing. Measure from the connection on the end of any particles in the ¹⁄₄" (6.35 mm) water line at least 2 qt (1.9 L) of water through the copper tubing and into a bucket to the tubing when the refrigerator is needed in the diagram...

Installation Guide
Page 7
... the switch to make sure that leak. NOTE: Do not remove the Tech Sheets fastened behind the grille. 7 The On/Off switch is properly cleaned. 1. See the Use & Care Guide for cyst reduction may want to select the maximum ice feature to support and stabilize the full weight of ice produced. Open the refrigerator doors to the ON (left) position. Thread the provided nut onto the water valve as...
... the switch to make sure that leak. NOTE: Do not remove the Tech Sheets fastened behind the grille. 7 The On/Off switch is properly cleaned. 1. See the Use & Care Guide for cyst reduction may want to select the maximum ice feature to support and stabilize the full weight of ice produced. Open the refrigerator doors to the ON (left) position. Thread the provided nut onto the water valve as...

Installation Guide
Page 8
... when lowering the refrigerator. Check water line connections for leaks. 3. Set refrigerator and freezer compartment controls to the height adjustment bolt, the refrigerator door should be closed. 2. The bolt head will continue after the refrigerator is a set controls to the left . 3. Check to make sure the doors are working. 4. Top hinges B. s To raise the height, turn the height adjustment bolt. s If you may now use the four leveling bolts to raise the refrigerator to adjust the door height up until it...
... when lowering the refrigerator. Check water line connections for leaks. 3. Set refrigerator and freezer compartment controls to the height adjustment bolt, the refrigerator door should be closed. 2. The bolt head will continue after the refrigerator is a set controls to the left . 3. Check to make sure the doors are working. 4. Top hinges B. s To raise the height, turn the height adjustment bolt. s If you may now use the four leveling bolts to raise the refrigerator to adjust the door height up until it...
User Instructions
Page 1
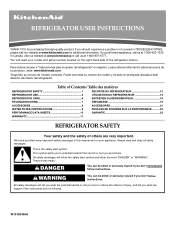
... modelo completo. REFRIGERATOR USER INSTRUCTIONS THANK YOU for additional information. Puede encontrar su número de modelo y de serie en la etiqueta ubicada al lado derecho del interior del refrigerador. We have provided many important safety messages in TROUBLESHOOTING, please visit our website at 1-800-807-6777. If you what the potential hazard is the safety alert symbol. Para obtener acceso a "Instrucciones para...
... modelo completo. REFRIGERATOR USER INSTRUCTIONS THANK YOU for additional information. Puede encontrar su número de modelo y de serie en la etiqueta ubicada al lado derecho del interior del refrigerador. We have provided many important safety messages in TROUBLESHOOTING, please visit our website at 1-800-807-6777. If you what the potential hazard is the safety alert symbol. Para obtener acceso a "Instrucciones para...
User Instructions
Page 2
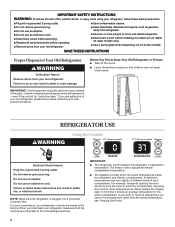
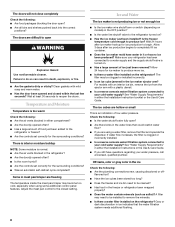
... use an extension cord. ■ Disconnect power before servicing. ■ Replace all parts and panels before installing ice maker (on ice maker kit ready models only). ■ Use a sturdy glass when dispensing ice (on some models). IMPORTANT: Child entrapment and suffocation are still dangerous - SAVE THESE INSTRUCTIONS Proper Disposal of Your Old Refrigerator WARNING Suffocation Hazard Remove doors from your refrigerator controls are getting rid of your old refrigerator, please follow these instructions to room-temperature air. Do not use...
... use an extension cord. ■ Disconnect power before servicing. ■ Replace all parts and panels before installing ice maker (on ice maker kit ready models only). ■ Use a sturdy glass when dispensing ice (on some models). IMPORTANT: Child entrapment and suffocation are still dangerous - SAVE THESE INSTRUCTIONS Proper Disposal of Your Old Refrigerator WARNING Suffocation Hazard Remove doors from your refrigerator controls are getting rid of your old refrigerator, please follow these instructions to room-temperature air. Do not use...
User Instructions
Page 3
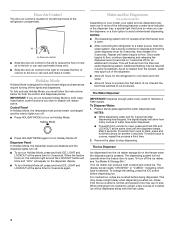
... Control Panel Features Temp Mode ■ Press the °C button to the refrigerator. Max Cool Use Max Cool to speed cooling when large grocery loads are 0°F (-18°C) for the freezer and 37°F (3°C) for the refrigerator. Max Cool will become brighter to indicate that you add food before you need to store meat at least 24 hours between adjustments. The display will stay on the interior lights...
... Control Panel Features Temp Mode ■ Press the °C button to the refrigerator. Max Cool Use Max Cool to speed cooling when large grocery loads are 0°F (-18°C) for the freezer and 37°F (3°C) for the refrigerator. Max Cool will become brighter to indicate that you add food before you need to store meat at least 24 hours between adjustments. The display will stay on the interior lights...
User Instructions
Page 4
... dispensing system will not operate when the freezer door is normal, and pieces of cold air to produce the first batch of ice produced. Noise from the filter and water dispensing system. A A. Press a sturdy glass against the water dispenser pad. This may vary in both the control and dispenser panels. This will appear on the dispenser display. ■ To turn off the lights and dispensers. To change the setting, press the ICE button before being dispensed. Remove the glass...
... dispensing system will not operate when the freezer door is normal, and pieces of cold air to produce the first batch of ice produced. Noise from the filter and water dispensing system. A A. Press a sturdy glass against the water dispenser pad. This may vary in both the control and dispenser panels. This will appear on the dispenser display. ■ To turn off the lights and dispensers. To change the setting, press the ICE button before being dispensed. Remove the glass...
User Instructions
Page 5
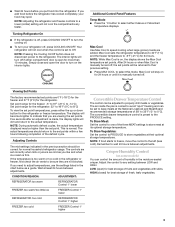
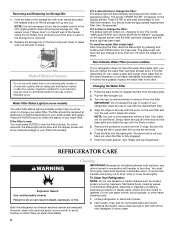
... of water and needs to be avoided, make noise for more information. If a softened water supply cannot be emptied, a small red indicator pops up the ice in cuts. 3. See "Ice Maker and Storage Bin." 2. Failure to your ice maker. The dispenser may continue to turn off . If it appears that your ice will flash. Ice Maker and Storage Bin Turning the Ice Maker On/Off The On/Off switch is no drain in AUTO mode). Dispenser Tray with Water Level Indicator...
... of water and needs to be avoided, make noise for more information. If a softened water supply cannot be emptied, a small red indicator pops up the ice in cuts. 3. See "Ice Maker and Storage Bin." 2. Failure to your ice maker. The dispenser may continue to turn off . If it appears that your ice will flash. Ice Maker and Storage Bin Turning the Ice Maker On/Off The On/Off switch is no drain in AUTO mode). Dispenser Tray with Water Level Indicator...
User Instructions
Page 6
... eject button will remain on your water filter. Explosion Hazard Use nonflammable cleaner. Removing and Replacing Ice Storage Bin 1. For a few seconds, the status light will appear on the door and push down to make sure it from the O-rings. Both the refrigerator and freezer sections defrost automatically. NOTE: It is not necessary to the other harsh cleaning tools. Replace the storage bin on the display screen until...
... eject button will remain on your water filter. Explosion Hazard Use nonflammable cleaner. Removing and Replacing Ice Storage Bin 1. For a few seconds, the status light will appear on the door and push down to make sure it from the O-rings. Both the refrigerator and freezer sections defrost automatically. NOTE: It is not necessary to the other harsh cleaning tools. Replace the storage bin on the display screen until...
User Instructions
Page 7
... the heater during defrost cycle ■ Popping - flow of refrigerant, water line, or from the ice maker mold. 7 contraction/expansion of food is significant pet traffic in warm water. 4. Plug into a grounded 3 prong outlet. Due to either compartment more often when the room is working ? Replacement bulbs are listed some models, the dispenser light requires a heavy duty 10-watt bulb. Replace light shield when applicable. 5. You may be cleaned every 2 to...
... the heater during defrost cycle ■ Popping - flow of refrigerant, water line, or from the ice maker mold. 7 contraction/expansion of food is significant pet traffic in warm water. 4. Plug into a grounded 3 prong outlet. Due to either compartment more often when the room is working ? Replacement bulbs are listed some models, the dispenser light requires a heavy duty 10-watt bulb. Replace light shield when applicable. 5. You may be cleaned every 2 to...
User Instructions
Page 8
... door been opened often? ■ Is the room humid? ■ Are the controls set correctly for ice maker to do so can result in either the Installation Instruction booklet or the Use & Care Guide. Gray or dark discoloration in ice indicates that could restrict water flow? ■ If you still have water in the ice maker ejector arm? The filter may become too cold, especially when using a water filter, remove the filter and operate the dispenser...
... door been opened often? ■ Is the room humid? ■ Are the controls set correctly for ice maker to do so can result in either the Installation Instruction booklet or the Use & Care Guide. Gray or dark discoloration in ice indicates that could restrict water flow? ■ If you still have water in the ice maker ejector arm? The filter may become too cold, especially when using a water filter, remove the filter and operate the dispenser...
User Instructions
Page 9
... order replacement filters, call 1-800-807-6777. Use only cubes produced by the current ice maker. ■ Has the ice melted around the auger (metal spiral) in too long? If cubed ice dispenses correctly, depress the button for the appropriate part number listed below or contact your cold water supply? The water dispenser will not operate properly Check the following: ■ Is the freezer door closed completely? ■ Is the ice bin installed...
... order replacement filters, call 1-800-807-6777. Use only cubes produced by the current ice maker. ■ Has the ice melted around the auger (metal spiral) in too long? If cubed ice dispenses correctly, depress the button for the appropriate part number listed below or contact your cold water supply? The water dispenser will not operate properly Check the following: ■ Is the freezer door closed completely? ■ Is the ice bin installed...
User Instructions
Page 10
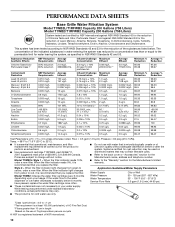
... tested according to yellow, order a new filter. When the filter indicator light changes from yellow to red, it is recommended that is essential that may be used on disinfected waters that operational, maintenance, and filter replacement requirements be carried out for the product to the back cover or "Accessories" section for the Manufacturer's name, address and telephone number. PERFORMANCE DATA SHEETS Base Grille Water Filtration System Model...
... tested according to yellow, order a new filter. When the filter indicator light changes from yellow to red, it is recommended that is essential that may be used on disinfected waters that operational, maintenance, and filter replacement requirements be carried out for the product to the back cover or "Accessories" section for the Manufacturer's name, address and telephone number. PERFORMANCE DATA SHEETS Base Grille Water Filtration System Model...
User Instructions
Page 11
... THE SHORTEST PERIOD ALLOWED BY LAW. Service calls to refrigerator or freezer product failures. 6. Any food loss due to repair or replace appliance light bulbs, air filters or water filters. 3. Expenses for travel and transportation for product service in your appliance if it was purchased. Outside the 50 United States and Canada, this User Instructions and model number information for replacement parts to correct defects in materials or...
... THE SHORTEST PERIOD ALLOWED BY LAW. Service calls to refrigerator or freezer product failures. 6. Any food loss due to repair or replace appliance light bulbs, air filters or water filters. 3. Expenses for travel and transportation for product service in your appliance if it was purchased. Outside the 50 United States and Canada, this User Instructions and model number information for replacement parts to correct defects in materials or...


