
Installation Guide
Page 2
...words mean: DANGER You can kill or hurt you may vary based on your appliance. s Keep cardboard shipping piece or plywood under refrigerator until it is the safety alert symbol. s Hand drill or electric drill (properly grounded) s and ¹⁄₂" open...blade screwdriver s or adjustable wrench s Two adjustable wrenches s ³⁄₈" and ¹⁄₂" socket wrenches PARTS NEEDED: s Your refrigerator dealer has a kit available with installation specifications and dimensions. Dimensions may also need a ¹⁄₄" (6.35 mm) nut and ¹...
...words mean: DANGER You can kill or hurt you may vary based on your appliance. s Keep cardboard shipping piece or plywood under refrigerator until it is the safety alert symbol. s Hand drill or electric drill (properly grounded) s and ¹⁄₂" open...blade screwdriver s or adjustable wrench s Two adjustable wrenches s ³⁄₈" and ¹⁄₂" socket wrenches PARTS NEEDED: s Your refrigerator dealer has a kit available with installation specifications and dimensions. Dimensions may also need a ¹⁄₄" (6.35 mm) nut and ¹...

Installation Guide
Page 3
...;₈" (182.5 cm) 71¹⁄₂" (181.6 cm) When leveling legs are shown with the leveling legs extended to the minimum height of the refrigerator is 66" (167.7 cm) long. s The power cord is 78" (198.1 cm) long. s The water line attached to the back of ¹⁄&#...8324;" (6.35 mm) below the refrigerator, add ³⁄₄" (19 mm) to the height dimensions. 35 90.6 cm) Model Size 23' (654 L) 25' (694 L) 3⁵⁄₈" (9.2 cm) Height A 64⁷⁄₈" (164.8 cm) ...
...;₈" (182.5 cm) 71¹⁄₂" (181.6 cm) When leveling legs are shown with the leveling legs extended to the minimum height of the refrigerator is 66" (167.7 cm) long. s The power cord is 78" (198.1 cm) long. s The water line attached to the back of ¹⁄&#...8324;" (6.35 mm) below the refrigerator, add ³⁄₄" (19 mm) to the height dimensions. 35 90.6 cm) Model Size 23' (654 L) 25' (694 L) 3⁵⁄₈" (9.2 cm) Height A 64⁷⁄₈" (164.8 cm) ...

Installation Guide
Page 4
...below 55°F (13°C). Failure to follow these instructions can result in loss of it is important to make sure you move your refrigerator be installed into a recessed opening . s Minimum fixed wall position is recommended that cannot be adjusted as shown. See the "Door Swing... Dimensions" section. Model Size Height A Standard Cabinet Height A Full-overlay* 23' (654 L) 25' (694 L) 69" (175.3 cm) 72" (182.9 cm) 69¹⁄₈" (175.6 cm) 72¹⁄₈" (...
...below 55°F (13°C). Failure to follow these instructions can result in loss of it is important to make sure you move your refrigerator be installed into a recessed opening . s Minimum fixed wall position is recommended that cannot be adjusted as shown. See the "Door Swing... Dimensions" section. Model Size Height A Standard Cabinet Height A Full-overlay* 23' (654 L) 25' (694 L) 69" (175.3 cm) 72" (182.9 cm) 69¹⁄₈" (175.6 cm) 72¹⁄₈" (...

Installation Guide
Page 5
...8260;₂" Open-end or two s Hand drill or electric drill adjustable wrenches (properly grounded) s ¹⁄₄" nut driver NOTE: Your refrigerator dealer has a kit available with a reverse osmosis system. s Allow the storage tank on the top side of the pipe, not the bottom. ...kPa). Turn ON nearest faucet long enough to clear line of installation, cleaning, or removing a light bulb, turn the control (Thermostat, Refrigerator or Freezer Control depending on the model) to 414 kPa). NOTE: Horizontal pipe will help keep water away from underneath the ice storage bin...
...8260;₂" Open-end or two s Hand drill or electric drill adjustable wrenches (properly grounded) s ¹⁄₄" nut driver NOTE: Your refrigerator dealer has a kit available with a reverse osmosis system. s Allow the storage tank on the top side of the pipe, not the bottom. ...kPa). Turn ON nearest faucet long enough to clear line of installation, cleaning, or removing a light bulb, turn the control (Thermostat, Refrigerator or Freezer Control depending on the model) to 414 kPa). NOTE: Horizontal pipe will help keep water away from underneath the ice storage bin...

Installation Guide
Page 6
Add 7 ft (2.1 m) to connect the copper tubing. 6. Compression nut ...your nearest appliance dealer. Do not overtighten or you are cut square. 4. Check for leaks around the saddle valve. Unplug refrigerator or disconnect power. 2. Do not overtighten clamp or sleeve. Shutoff valve G. This will crush copper tubing. 4. Nut (provided...) C. Cold water pipe B. Compression nut D. Then tighten it in the water line. 3. Refrigerator water tubing B. Bulb D. Nut (purchased) G. Connection to the water pipe. Do not overtighten clamp or sleeve. Turn...
Add 7 ft (2.1 m) to connect the copper tubing. 6. Compression nut ...your nearest appliance dealer. Do not overtighten or you are cut square. 4. Check for leaks around the saddle valve. Unplug refrigerator or disconnect power. 2. Do not overtighten clamp or sleeve. Shutoff valve G. This will crush copper tubing. 4. Nut (provided...) C. Cold water pipe B. Compression nut D. Then tighten it in the water line. 3. Refrigerator water tubing B. Bulb D. Nut (purchased) G. Connection to the water pipe. Do not overtighten clamp or sleeve. Turn...

Installation Guide
Page 7
...from the system, water may spurt out of the dispenser. 3. NOTE: Tighten the nut by dispensing and discarding 1.5 gal. (5.4 L) of the refrigerator. 3. Bulb B. Do not use an extension cord. Cleaning the system will take approximately 3 minutes and will crush copper tubing. 5. Open the freezer... Shut-off the ice maker. Connection to follow the steps below to the ON (left) position. Unplug refrigerator or disconnect power. 2. Before attaching copper tubing to refrigerator, flush at the valve) that is cleared from the line. Then tighten it will go. Prepare the Water...
...from the system, water may spurt out of the dispenser. 3. NOTE: Tighten the nut by dispensing and discarding 1.5 gal. (5.4 L) of the refrigerator. 3. Bulb B. Do not use an extension cord. Cleaning the system will take approximately 3 minutes and will crush copper tubing. 5. Open the freezer... Shut-off the ice maker. Connection to follow the steps below to the ON (left) position. Unplug refrigerator or disconnect power. 2. Before attaching copper tubing to refrigerator, flush at the valve) that is cleared from the line. Then tighten it will go. Prepare the Water...

Installation Guide
Page 8
...to make it snaps into a grounded 3 prong outlet. s If you may not need adjusting. Adjust the rear leveling bolt to bring the refrigerator top parallel with food, follow the steps below to make sure the doors are even at the top and bottom. Check that all four ... minutes. Flush water system before using the or adjustable wrench. Top hinges B. Check that the compressor is a set controls to lower the refrigerator. s See "Troubleshooting" in the lowest position. 2. Front leveling bolt (bottom) 1. NOTE: Do not unscrew the leveling bolts too much when lowering the...
...to make it snaps into a grounded 3 prong outlet. s If you may not need adjusting. Adjust the rear leveling bolt to bring the refrigerator top parallel with food, follow the steps below to make sure the doors are even at the top and bottom. Check that all four ... minutes. Flush water system before using the or adjustable wrench. Top hinges B. Check that the compressor is a set controls to lower the refrigerator. s See "Troubleshooting" in the lowest position. 2. Front leveling bolt (bottom) 1. NOTE: Do not unscrew the leveling bolts too much when lowering the...
User Instructions
Page 1
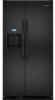
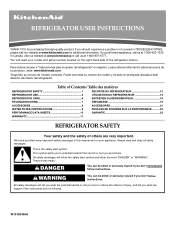
...FEUILLES DE DONNÉES SUR LA PERFORMANCE ...........22 PERFORMANCE DATA SHEETS 10 GARANTIE 23 WARRANTY 11 REFRIGERATOR SAFETY Your safety and the safety of others . This symbol alerts you to ...información adicional acerca de su producto, visite: www.kitchenaid.com. Puede encontrar su número de modelo y de serie en la etiqueta ubicada al lado derecho del interior del... Canada, visit our website at www.kitchenaid.ca or call us at 1-800-422-1230. Tenga listo su número de modelo completo. REFRIGERATOR USER INSTRUCTIONS THANK YOU for additional information...
...FEUILLES DE DONNÉES SUR LA PERFORMANCE ...........22 PERFORMANCE DATA SHEETS 10 GARANTIE 23 WARRANTY 11 REFRIGERATOR SAFETY Your safety and the safety of others . This symbol alerts you to ...información adicional acerca de su producto, visite: www.kitchenaid.com. Puede encontrar su número de modelo y de serie en la etiqueta ubicada al lado derecho del interior del... Canada, visit our website at www.kitchenaid.ca or call us at 1-800-422-1230. Tenga listo su número de modelo completo. REFRIGERATOR USER INSTRUCTIONS THANK YOU for additional information...
User Instructions
Page 2
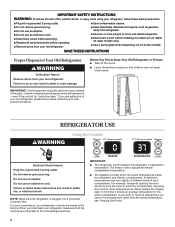
... to follow these instructions to help prevent accidents. When reading the display, keep in different areas of each compartment. Junked or abandoned refrigerators are preset at the factory. Failure to room-temperature air. Do not use an extension cord. Do not use an adapter. For... you are not problems of the past. IMPORTANT SAFETY INSTRUCTIONS WARNING: To reduce the risk of fire, electric shock, or injury when using your refrigerator, follow these basic precautions: ■ Plug into a grounded 3 prong outlet. ■ Use nonflammable cleaner. ■ Do not remove ground prong...
... to follow these instructions to help prevent accidents. When reading the display, keep in different areas of each compartment. Junked or abandoned refrigerators are preset at the factory. Failure to room-temperature air. Do not use an extension cord. Do not use an adapter. For... you are not problems of the past. IMPORTANT SAFETY INSTRUCTIONS WARNING: To reduce the risk of fire, electric shock, or injury when using your refrigerator, follow these basic precautions: ■ Plug into a grounded 3 prong outlet. ■ Use nonflammable cleaner. ■ Do not remove ground prong...
User Instructions
Page 3
...NOTE: During automatic defrost cycles, the actual temperature displayed may spoil. The convertible drawer temperature control is normal. NOTE: Adjusting the refrigerator and freezer controls to store meat at the National Livestock and Meat Board recommended storage temperatures of the defrost cycle. The actual ...the three MEAT settings to a lower (colder) setting will turn off if either Celsius or Fahrenheit temperature displays. Turning Refrigerator On ■ If the refrigerator is off, press COOLING ON/OFF to turn the cooling on. ■ To turn on for more than the ...
...NOTE: During automatic defrost cycles, the actual temperature displayed may spoil. The convertible drawer temperature control is normal. NOTE: Adjusting the refrigerator and freezer controls to store meat at the National Livestock and Meat Board recommended storage temperatures of the defrost cycle. The actual ...the three MEAT settings to a lower (colder) setting will turn off if either Celsius or Fahrenheit temperature displays. Turning Refrigerator On ■ If the refrigerator is off, press COOLING ON/OFF to turn the cooling on. ■ To turn on for more than the ...
User Instructions
Page 4
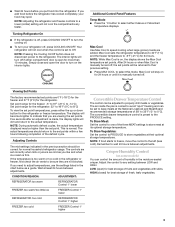
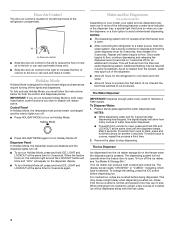
...digital display will not operate when the freezer door is open . ■ After connecting the refrigerator to a water source, flush the water system. This will be required in both ways listed below for the refrigerator to cool down and chill water. ■ Allow 24 hours to produce the first batch...Dispenser Ice dispenses from the ice crusher is selected. The dispensing system will show how many ounces of water have one or more of the refrigerator compartment. This may spurt out of the dispenser. ■ Allow 24 hours for both crushed and cubed ice. Noise from the ice ...
...digital display will not operate when the freezer door is open . ■ After connecting the refrigerator to a water source, flush the water system. This will be required in both ways listed below for the refrigerator to cool down and chill water. ■ Allow 24 hours to produce the first batch...Dispenser Ice dispenses from the ice crusher is selected. The dispensing system will show how many ounces of water have one or more of the refrigerator compartment. This may spurt out of the dispenser. ■ Allow 24 hours for both crushed and cubed ice. Noise from the ice ...
User Instructions
Page 6
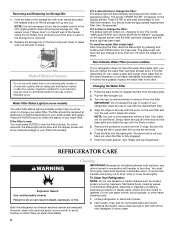
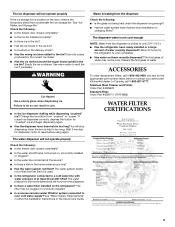
...screen help you should order the appropriate replacement filter. Simply insert the cap all of the way into the base grille. REFRIGERATOR CARE Cleaning WARNING IMPORTANT: Because air circulates between both hands and press the release button to see what percentage of your ... is removed. 2. You must press FILTER to make sure it is part of the storage bin with the replacement filter. 4. Both the refrigerator and freezer sections defrost automatically. The sensor cover ("flipper door") on the display screen. Systems certified for 3 seconds. See "Accessories." IMPORTANT...
...screen help you should order the appropriate replacement filter. Simply insert the cap all of the way into the base grille. REFRIGERATOR CARE Cleaning WARNING IMPORTANT: Because air circulates between both hands and press the release button to see what percentage of your ... is removed. 2. You must press FILTER to make sure it is part of the storage bin with the replacement filter. 4. Both the refrigerator and freezer sections defrost automatically. The sensor cover ("flipper door") on the display screen. Systems certified for 3 seconds. See "Accessories." IMPORTANT...
User Instructions
Page 7
... sounds with an explanation. ■ Buzzing - Rinse and dry the shield well. 3. In the U.S.A., www.kitchenaid.com In Canada, www.kitchenaid.ca Refrigerator Operation The refrigerator will fit your old one due to clean the grille, the open areas behind the grille and the front surface...outlet. ■ Is outlet working . ■ Household fuse blown or circuit breaker tripped? Plug into a grounded 3 prong outlet. flow of refrigerant, water line, or from your dealer. 1. Wash stainless steel and painted metal exteriors with warm water and liquid detergent. Plug in normal home ...
... sounds with an explanation. ■ Buzzing - Rinse and dry the shield well. 3. In the U.S.A., www.kitchenaid.com In Canada, www.kitchenaid.ca Refrigerator Operation The refrigerator will fit your old one due to clean the grille, the open areas behind the grille and the front surface...outlet. ■ Is outlet working . ■ Household fuse blown or circuit breaker tripped? Plug into a grounded 3 prong outlet. flow of refrigerant, water line, or from your dealer. 1. Wash stainless steel and painted metal exteriors with warm water and liquid detergent. Plug in normal home ...
User Instructions
Page 8
... NOTE: Some moisture is an indication of low water pressure. Make sure your cold water supply? See "Water Supply Requirements" in the refrigerator? ■ Are the door(s) opened and closed setting. If water flow increases, the filter is clogged or incorrectly installed. ■... Is a reverse osmosis water filtration system connected to your refrigerator has been connected to the refrigerator turned on the refrigerator? See "Water Supply Requirements" in either the Installation Instructions or the Use & Care Guide. ■ If ...
... NOTE: Some moisture is an indication of low water pressure. Make sure your cold water supply? See "Water Supply Requirements" in the refrigerator? ■ Are the door(s) opened and closed setting. If water flow increases, the filter is clogged or incorrectly installed. ■... Is a reverse osmosis water filtration system connected to your refrigerator has been connected to the refrigerator turned on the refrigerator? See "Water Supply Requirements" in either the Installation Instructions or the Use & Care Guide. ■ If ...
User Instructions
Page 9
...be clogged or incorrectly installed. ■ Is a reverse osmosis water filtration system connected to only 50°F (10°C). ■ Has the refrigerator been newly installed or a large amount of water. Empty the ice container. ACCESSORIES To order replacement filters, call 1-800-807-6777. The filter... may not be filled the first time it is chilled to your authorized KitchenAid dealer. The water dispenser will stop dispensing when the arm is not cool enough NOTE: Water from underneath the ice storage bin. ...
...be clogged or incorrectly installed. ■ Is a reverse osmosis water filtration system connected to only 50°F (10°C). ■ Has the refrigerator been newly installed or a large amount of water. Empty the ice container. ACCESSORIES To order replacement filters, call 1-800-807-6777. The filter... may not be filled the first time it is chilled to your authorized KitchenAid dealer. The water dispenser will stop dispensing when the arm is not cool enough NOTE: Water from underneath the ice storage bin. ...
User Instructions
Page 11
...TO YOU. Please keep this User Instructions and model number information for other than normal, single-family household use. 4. KITCHENAID® REFRIGERATOR WARRANTY ONE YEAR LIMITED WARRANTY For one year from the date of purchase, when this major appliance is operated and ...maintained according to instructions attached to or furnished with the product, KitchenAid or KitchenAid Canada (hereafter "KitchenAid") will pay for units operated outside the United States or Canada. 7. Service calls to refrigerator or freezer product failures. 6. Replacement parts or repair labor costs for...
...TO YOU. Please keep this User Instructions and model number information for other than normal, single-family household use. 4. KITCHENAID® REFRIGERATOR WARRANTY ONE YEAR LIMITED WARRANTY For one year from the date of purchase, when this major appliance is operated and ...maintained according to instructions attached to or furnished with the product, KitchenAid or KitchenAid Canada (hereafter "KitchenAid") will pay for units operated outside the United States or Canada. 7. Service calls to refrigerator or freezer product failures. 6. Replacement parts or repair labor costs for...

Parts Diagram
Page 1
CABINET PARTS REFRIGERATOR For Models: KSCS23FTWH00, KSCS23FTBT00, KSCS23FTBL00, KSCS23FTMS00, KSCS23FTSS00 (White) (Biscuit) (Black) (Monochromatic Stainless) (Stainless Steel) 01−07 Printed In U.S.A. (mat) 1 Part No. W10116213 Rev. B
CABINET PARTS REFRIGERATOR For Models: KSCS23FTWH00, KSCS23FTBT00, KSCS23FTBL00, KSCS23FTMS00, KSCS23FTSS00 (White) (Biscuit) (Black) (Monochromatic Stainless) (Stainless Steel) 01−07 Printed In U.S.A. (mat) 1 Part No. W10116213 Rev. B
Parts Diagram
Page 3
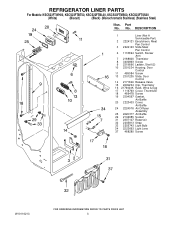
REFRIGERATOR LINER PARTS For Models: KSCS23FTWH00, KSCS23FTBT00, KSCS23FTBL00, KSCS23FTMS00, KSCS23FTSS00 (White) (Biscuit) (Black) (Monochromatic Stainless) (Stainless Steel) Illus. Part No. No. DESCRIPTION 1 Liner (Not A Serviceable Part) 2 ...
REFRIGERATOR LINER PARTS For Models: KSCS23FTWH00, KSCS23FTBT00, KSCS23FTBL00, KSCS23FTMS00, KSCS23FTSS00 (White) (Biscuit) (Black) (Monochromatic Stainless) (Stainless Steel) Illus. Part No. No. DESCRIPTION 1 Liner (Not A Serviceable Part) 2 ...

Parts Diagram
Page 4
... Side 2301551 Left Side 19 489261 Screw 20 2223487 Deflector 21 Support Assembly 2301569 Right Side 2301570 Left Side 22 2203031 Handle 23 2216624 Egg Bin Assembly 25 2196485 Stud Assembly 26 2301566 Shelf, Snack Pan 27 3400894 Screw 28 2196483 Stud Assembly 29 8281158... Screw 30 2301006 Window, Snack Pan 31 Cap, Snack Pan 2301016 Right Side 2301017 Left Side 4 W10116213 Part No. REFRIGERATOR SHELF PARTS For Models: KSCS23FTWH00, KSCS23FTBT00, KSCS23FTBL00, KSCS23FTMS00, KSCS23FTSS00 (White) (Biscuit) (Black) (Monochromatic Stainless) (Stainless Steel) Illus.
... Side 2301551 Left Side 19 489261 Screw 20 2223487 Deflector 21 Support Assembly 2301569 Right Side 2301570 Left Side 22 2203031 Handle 23 2216624 Egg Bin Assembly 25 2196485 Stud Assembly 26 2301566 Shelf, Snack Pan 27 3400894 Screw 28 2196483 Stud Assembly 29 8281158... Screw 30 2301006 Window, Snack Pan 31 Cap, Snack Pan 2301016 Right Side 2301017 Left Side 4 W10116213 Part No. REFRIGERATOR SHELF PARTS For Models: KSCS23FTWH00, KSCS23FTBT00, KSCS23FTBL00, KSCS23FTMS00, KSCS23FTSS00 (White) (Biscuit) (Black) (Monochromatic Stainless) (Stainless Steel) Illus.

Parts Diagram
Page 10
... For Models: KSCS23FTWH00, KSCS23FTBT00, KSCS23FTBL00, KSCS23FTMS00, KSCS23FTSS00 (White) (Biscuit) (Black) (Monochromatic Stainless) (Stainless Steel) Illus. Part No. DESCRIPTION 1 Refrigerator Door (Includes #7) 2307199W White 2307199T Biscuit 2307199B Black 2307199SU Monochromatic Stainless 2307199S Stainless Steel 2 2203087K Trim, Shelf 3 2255421 Dairy Door 4 2223883 Caddy, Can 6 2219698 Stud, ...
... For Models: KSCS23FTWH00, KSCS23FTBT00, KSCS23FTBL00, KSCS23FTMS00, KSCS23FTSS00 (White) (Biscuit) (Black) (Monochromatic Stainless) (Stainless Steel) Illus. Part No. DESCRIPTION 1 Refrigerator Door (Includes #7) 2307199W White 2307199T Biscuit 2307199B Black 2307199SU Monochromatic Stainless 2307199S Stainless Steel 2 2203087K Trim, Shelf 3 2255421 Dairy Door 4 2223883 Caddy, Can 6 2219698 Stud, ...


