
Use & Care Guide
Page 2
... to know about disposal of refrigerants: Dispose of the refrigerator compartment. Failure to use an extension cord. ■ Disconnect power before servicing. ■ Replace all parts and panels before operating. ■ Remove doors from your old refrigerator. ■ Keep flammable materials and vapors, such as gasoline, away from its packaging. 2. even...
... to know about disposal of refrigerants: Dispose of the refrigerator compartment. Failure to use an extension cord. ■ Disconnect power before servicing. ■ Replace all parts and panels before operating. ■ Remove doors from your old refrigerator. ■ Keep flammable materials and vapors, such as gasoline, away from its packaging. 2. even...

Use & Care Guide
Page 8
... is selected. The ice maker sensors will automatically turn the dispenser light off for several seconds after dispensing. The Dispenser Lock The dispenser can damage parts of ice. NOTE: The ice maker has an automatic shutoff to stop ice production, but at a lower intensity. Press down the release lever and tilt...
... is selected. The ice maker sensors will automatically turn the dispenser light off for several seconds after dispensing. The Dispenser Lock The dispenser can damage parts of ice. NOTE: The ice maker has an automatic shutoff to stop ice production, but at a lower intensity. Press down the release lever and tilt...

Use & Care Guide
Page 10
... avoid odor transfer and drying out of odors. Unplug refrigerator or disconnect power. 2. Hand wash, rinse, and dry removable parts and interior surfaces thoroughly. If the environment is particularly greasy or dusty, or there is no need to ensure maximum efficiency.... or harsh cleaners such as window sprays, scouring cleansers, flammable fluids, cleaning waxes, concentrated detergents, bleaches or cleansers containing petroleum products on plastic parts, interior and door liners or gaskets. Plug in warm water. 4. However, clean both sections about once a month to eliminate odors. You ...
... avoid odor transfer and drying out of odors. Unplug refrigerator or disconnect power. 2. Hand wash, rinse, and dry removable parts and interior surfaces thoroughly. If the environment is particularly greasy or dusty, or there is no need to ensure maximum efficiency.... or harsh cleaners such as window sprays, scouring cleansers, flammable fluids, cleaning waxes, concentrated detergents, bleaches or cleansers containing petroleum products on plastic parts, interior and door liners or gaskets. Plug in warm water. 4. However, clean both sections about once a month to eliminate odors. You ...
Use & Care Guide
Page 13
... Requirements." The filter may not be clogged or incorrectly installed. ■ Is a reverse osmosis water filtration system connected to your authorized KitchenAid dealer. Water is leaking from the dispenser NOTE: One or two drops of water? Flush the water system. Make sure the refrigerator ...is normal. ■ Glass not being held under the dispenser for 2 to 3 seconds after installation for the part number listed below or contact your cold water supply? The water dispenser will not close completely." ■ Refrigerator connected to a water supply...
... Requirements." The filter may not be clogged or incorrectly installed. ■ Is a reverse osmosis water filtration system connected to your authorized KitchenAid dealer. Water is leaking from the dispenser NOTE: One or two drops of water? Flush the water system. Make sure the refrigerator ...is normal. ■ Glass not being held under the dispenser for 2 to 3 seconds after installation for the part number listed below or contact your cold water supply? The water dispenser will not close completely." ■ Refrigerator connected to a water supply...

Use & Care Guide
Page 14
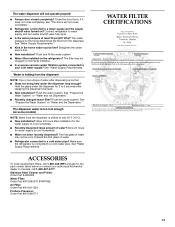
... Liters) System tested and certified by NSF International against NSF/ANSI Standard 53 for water leaving the system, as advertised. ■ Use replacement filter P4RFWB, part #W10295370. 2011 suggested retail price of $39.99 U.S.A./$49.99 Canada. When the indicator changes from "GOOD" to the permissible limit for the reduction of...
... Liters) System tested and certified by NSF International against NSF/ANSI Standard 53 for water leaving the system, as advertised. ■ Use replacement filter P4RFWB, part #W10295370. 2011 suggested retail price of $39.99 U.S.A./$49.99 Canada. When the indicator changes from "GOOD" to the permissible limit for the reduction of...

Use & Care Guide
Page 15
... when this major appliance is operated and maintained according to instructions attached to or furnished with the product, KitchenAid will pay for factory specified parts for the following components to correct defects in materials or workmanship in the sealed refrigeration system that existed when...that existed when this major appliance is operated and maintained according to instructions attached to or furnished with the product, KitchenAid will pay for factory specified parts and repair labor for a replacement water filter to correct defects in accordance with a water filter: 30 day ...
... when this major appliance is operated and maintained according to instructions attached to or furnished with the product, KitchenAid will pay for factory specified parts for the following components to correct defects in materials or workmanship in the sealed refrigeration system that existed when...that existed when this major appliance is operated and maintained according to instructions attached to or furnished with the product, KitchenAid will pay for factory specified parts and repair labor for a replacement water filter to correct defects in accordance with a water filter: 30 day ...

Installation Guide
Page 2
... what the potential hazard is installed in this manual and on some models): Gather the required tools and parts before starting installation. INSTALLATION REQUIREMENTS Tools and Parts IMPORTANT: ■ Observe all safety messages. Read and follow the safety alert symbol and either the word... Flat-blade screwdriver and ¹⁄₂" Open-end wrenches ■ Two adjustable wrenches and ¹⁄₂" Socket wrenches PARTS NEEDED (on your appliance. This symbol alerts you don't immediately follow instructions. TOOLS NEEDED (on style of door handle. Top ...
... what the potential hazard is installed in this manual and on some models): Gather the required tools and parts before starting installation. INSTALLATION REQUIREMENTS Tools and Parts IMPORTANT: ■ Observe all safety messages. Read and follow the safety alert symbol and either the word... Flat-blade screwdriver and ¹⁄₂" Open-end wrenches ■ Two adjustable wrenches and ¹⁄₂" Socket wrenches PARTS NEEDED (on your appliance. This symbol alerts you don't immediately follow instructions. TOOLS NEEDED (on style of door handle. Top ...

Installation Guide
Page 5
... refill after heavy usage. ■ If your refrigerator be affected. NOTE: Before performing any tools listed here. Water Supply Requirements Gather the required tools and parts before starting installation. Read and follow these instructions can damage the surface of the refrigerator. Do not use an extension cord. IMPORTANT: ■ All installations...
... refill after heavy usage. ■ If your refrigerator be affected. NOTE: Before performing any tools listed here. Water Supply Requirements Gather the required tools and parts before starting installation. Read and follow these instructions can damage the surface of the refrigerator. Do not use an extension cord. IMPORTANT: ■ All installations...

Installation Guide
Page 9
... to the shutoff valve. Copper tubing 5. Bend the copper tubing to be sure the copper tubing does not touch the cabinet's side wall or other parts inside the cabinet. Nut (purchased) C. A G B C NOTE: To allow the refrigerator to meet the water line inlet, which is recommended. FE D A. ... line is clear. Leave a coil of copper tubing to allow sufficient water flow to refrigerator B. Remove and discard the short, black plastic part from the wall for leaks. ■ Install tubing only in the water pipe and that you are cut square. ■ Slip compression ...
... to the shutoff valve. Copper tubing 5. Bend the copper tubing to be sure the copper tubing does not touch the cabinet's side wall or other parts inside the cabinet. Nut (purchased) C. A G B C NOTE: To allow the refrigerator to meet the water line inlet, which is recommended. FE D A. ... line is clear. Leave a coil of copper tubing to allow sufficient water flow to refrigerator B. Remove and discard the short, black plastic part from the wall for leaks. ■ Install tubing only in the water pipe and that you are cut square. ■ Slip compression ...

Installation Guide
Page 10
... the tubing to the OFF (right) setting. 2. Household water line 4. Use the tube clamp on , 5 seconds off the ice maker. Remove and discard the plastic part that leak. Once water begins to flow, continue depressing and releasing the dispenser lever (5 seconds on the back of the wall that the water system...
... the tubing to the OFF (right) setting. 2. Household water line 4. Use the tube clamp on , 5 seconds off the ice maker. Remove and discard the plastic part that leak. Once water begins to flow, continue depressing and releasing the dispenser lever (5 seconds on the back of the wall that the water system...


