Owners Manual
Page 3
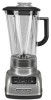
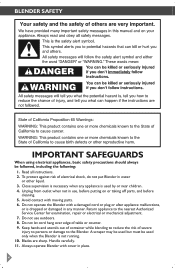
...operate any appliance with reduced physical, sensory, or mental capabilities, or lack of experience and knowledge, unless they do not put Blender in water or other liquid. 3. Keep hands and utensils out of the container while blending to reduce the risk of the appliance...Do not use , before assembling or disassembling parts and before cleaning. PRODUCT SAFETY ENGLISH IMPORTANT SAFEGUARDS When using electrical appliances, basic safety precautions should be supervised to the Blender. Read all instructions. 2. A scraper may be used only when the Blender is not running. 10. Blades are ...
...operate any appliance with reduced physical, sensory, or mental capabilities, or lack of experience and knowledge, unless they do not put Blender in water or other liquid. 3. Keep hands and utensils out of the container while blending to reduce the risk of the appliance...Do not use , before assembling or disassembling parts and before cleaning. PRODUCT SAFETY ENGLISH IMPORTANT SAFEGUARDS When using electrical appliances, basic safety precautions should be supervised to the Blender. Read all instructions. 2. A scraper may be used only when the Blender is not running. 10. Blades are ...
Owners Manual
Page 4
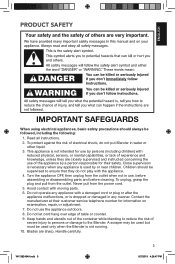
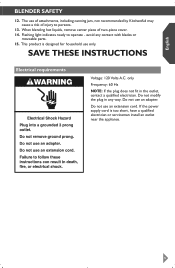
...not recommended by KitchenAid may cause a risk of injury to operate - Flashing light indicates ready to persons. 13. Voltage: 120 V Frequency: 60 Hz Amperage: 6.0 A NOTE: If the plug does not fit in place. 12. Do not use an adapter. As with any blender, the power ...plug in any contact with cover in the outlet, contact a qualified electrician or service technician. PRODUCT SAFETY 11. Always operate Blender with blades or moveable parts. When blending hot liquids, remove center piece of motors. ELECTRICAL REQUIREMENTS WARNING Electrical Shock Hazard Plug into a grounded 3 prong...
...not recommended by KitchenAid may cause a risk of injury to operate - Flashing light indicates ready to persons. 13. Voltage: 120 V Frequency: 60 Hz Amperage: 6.0 A NOTE: If the plug does not fit in place. 12. Do not use an adapter. As with any blender, the power ...plug in any contact with cover in the outlet, contact a qualified electrician or service technician. PRODUCT SAFETY 11. Always operate Blender with blades or moveable parts. When blending hot liquids, remove center piece of motors. ELECTRICAL REQUIREMENTS WARNING Electrical Shock Hazard Plug into a grounded 3 prong...

Owners Manual
Page 5
...Mix Fruit-based drink (thin). . . . . Remove cup and add ingredients at higher speeds with a full pitcher or with hot contents, stop the Blender and then add ingredients. Crush Ice, 5 Liquify Cheesecake 5 Liquify Chopped fruits Pulse, 2 Chop Chopped vegetables . . . . Pulse, 2 Chop Sweet crunch... topping. . . . ENGLISH GETTING STARTED First, clean all parts and accessories (see "Care and Cleaning" section). Crush Ice Finely chopped fresh vegetables Crush Ice Fluffy gelatin for pie/desserts. . . 5 Liquify ...
...Mix Fruit-based drink (thin). . . . . Remove cup and add ingredients at higher speeds with a full pitcher or with hot contents, stop the Blender and then add ingredients. Crush Ice, 5 Liquify Cheesecake 5 Liquify Chopped fruits Pulse, 2 Chop Chopped vegetables . . . . Pulse, 2 Chop Sweet crunch... topping. . . . ENGLISH GETTING STARTED First, clean all parts and accessories (see "Care and Cleaning" section). Crush Ice Finely chopped fresh vegetables Crush Ice Fluffy gelatin for pie/desserts. . . 5 Liquify ...
Owners Manual
Page 9
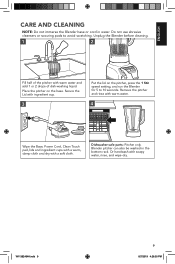
... to 10 seconds. Place the pitcher on the pitcher, press the 1 Stir speed setting, and run the Blender for 5 to avoid scratching. W11382494A.indb 9 9 8/7/2019 4:26:50 PM Dishwasher-safe parts: Pitcher only. Unplug the Blender before cleaning. 1 2 Fill half of the pitcher with a soft cloth. Remove the pitcher and rinse with warm... cloth and dry with warm water and add 1 or 2 drops of dish-washing liquid. Or handwash with ingredient cup. 3 Put the lid on the base. Blender pitcher can also be washed in water. Secure the Lid with soapy water, rinse, and wipe dry.
... to 10 seconds. Place the pitcher on the pitcher, press the 1 Stir speed setting, and run the Blender for 5 to avoid scratching. W11382494A.indb 9 9 8/7/2019 4:26:50 PM Dishwasher-safe parts: Pitcher only. Unplug the Blender before cleaning. 1 2 Fill half of the pitcher with a soft cloth. Remove the pitcher and rinse with warm... cloth and dry with warm water and add 1 or 2 drops of dish-washing liquid. Or handwash with ingredient cup. 3 Put the lid on the base. Blender pitcher can also be washed in water. Secure the Lid with soapy water, rinse, and wipe dry.
Owners Manual
Page 11
... OR FITNESS LASTS, SO THE ABOVE LIMITATIONS OR EXCLUSIONS MAY NOT APPLY TO YOU. Length of Warranty: KitchenAid Will Pay for Blender operated outside the 50 United States, District of purchase. OR The replacement parts and repair labor costs to the purchaser and any succeeding owner for service, or call the Customer eXperience...
... OR FITNESS LASTS, SO THE ABOVE LIMITATIONS OR EXCLUSIONS MAY NOT APPLY TO YOU. Length of Warranty: KitchenAid Will Pay for Blender operated outside the 50 United States, District of purchase. OR The replacement parts and repair labor costs to the purchaser and any succeeding owner for service, or call the Customer eXperience...
Owners Manual
Page 12
... service information, or to order accessories or replacement parts, call our toll-free Customer eXperience Center at 1-800-807-6777. Joseph, MI 49085-0218 Outside the United States and Puerto Rico: Consult your local KitchenAid dealer or the store where you receive your replacement Blender, use the carton and packing materials to pack...
... service information, or to order accessories or replacement parts, call our toll-free Customer eXperience Center at 1-800-807-6777. Joseph, MI 49085-0218 Outside the United States and Puerto Rico: Consult your local KitchenAid dealer or the store where you receive your replacement Blender, use the carton and packing materials to pack...
Owners Manual 1
Page 3
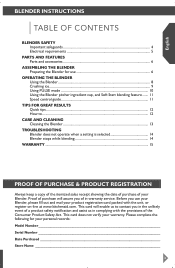
... the date of purchase of your Blender. Please complete the following for your warranty. English BLENDER INSTRUCTIONS Table of Contents blender SAFETY Important safeguards 4 Electrical requirements 5 PARTS AND FEATURES Parts and accessories 6 Assembling the blender Preparing the Blender for use your Blender, please fill out and mail your...10 Using the Blender pitcher ingredient cup, and Soft Start blending feature....... 11 Speed control guide 11 Tips for great results Quick tips...12 How to contact you of in complying with the unit, or register on-line at www.kitchenaid.com. This...
... the date of purchase of your Blender. Please complete the following for your warranty. English BLENDER INSTRUCTIONS Table of Contents blender SAFETY Important safeguards 4 Electrical requirements 5 PARTS AND FEATURES Parts and accessories 6 Assembling the blender Preparing the Blender for use your Blender, please fill out and mail your...10 Using the Blender pitcher ingredient cup, and Soft Start blending feature....... 11 Speed control guide 11 Tips for great results Quick tips...12 How to contact you of in complying with the unit, or register on-line at www.kitchenaid.com. This...
Owners Manual 1
Page 4
... or electrical or mechanical adjustment. 7. Do not use , before putting on or taking off parts, and before cleaning. 5. Always operate Blender with moving parts. 6. Return appliance to the Blender. A scraper may be used but must be followed, including the following: 1. BLender Safety IMPORTANT SAFEGUARDS When using electrical appliances, basic safety precautions should always be used...
... or electrical or mechanical adjustment. 7. Do not use , before putting on or taking off parts, and before cleaning. 5. Always operate Blender with moving parts. 6. Return appliance to the Blender. A scraper may be used but must be followed, including the following: 1. BLender Safety IMPORTANT SAFEGUARDS When using electrical appliances, basic safety precautions should always be used...
Owners Manual 1
Page 5
...serviceman install an outlet near the appliance. 5 Do not use of attachments, including canning jars, not recommended by KitchenAid may cause a risk of two-piece cover. 14. English Blender Safety 12. SAVE THESE INSTRUCTIONS Electrical requirements Voltage: 120 Volts A.C. only Frequency: 60 Hz NOTE: If the ...plug does not fit in any contact with blades or moveable parts. 15. If the power supply cord is designed...
...serviceman install an outlet near the appliance. 5 Do not use of attachments, including canning jars, not recommended by KitchenAid may cause a risk of two-piece cover. 14. English Blender Safety 12. SAVE THESE INSTRUCTIONS Electrical requirements Voltage: 120 Volts A.C. only Frequency: 60 Hz NOTE: If the ...plug does not fit in any contact with blades or moveable parts. 15. If the power supply cord is designed...
Owners Manual 1
Page 6
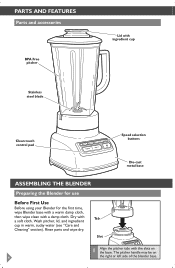
... cloth. The pitcher handle may be on the base. Rinse parts and wipe dry. Parts and Features Parts and accessories BPA Free pitcher Stainless steel blade Lid with ingredient cup Clean touch control pad Speed selection buttons Die-cast metal base Assembling the blender Preparing the Blender for use Before First Use Before using your...
... cloth. The pitcher handle may be on the base. Rinse parts and wipe dry. Parts and Features Parts and accessories BPA Free pitcher Stainless steel blade Lid with ingredient cup Clean touch control pad Speed selection buttons Die-cast metal base Assembling the blender Preparing the Blender for use Before First Use Before using your...
Owners Manual 1
Page 15
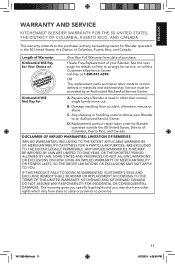
... OR EXCLUSIONS MAY NOT APPLY TO YOU. OR The replacement parts and repair labor costs to correct defects in the 50 United States, the District of Columbia, Puerto Rico, and Canada. C. Length of Warranty: KitchenAid Will Pay for Your Choice of: One Year Full Warranty... may also have other than Not Pay for Blender operated in materials and workmanship. Service must be provided by an Authorized KitchenAid Service Center. Hassle-Free Replacement of your Blender to an Authorized Service Center. English Warranty KitchenAid® Blender Warranty for the 50 United States, the District...
... OR EXCLUSIONS MAY NOT APPLY TO YOU. OR The replacement parts and repair labor costs to correct defects in the 50 United States, the District of Columbia, Puerto Rico, and Canada. C. Length of Warranty: KitchenAid Will Pay for Your Choice of: One Year Full Warranty... may also have other than Not Pay for Blender operated in materials and workmanship. Service must be provided by an Authorized KitchenAid Service Center. Hassle-Free Replacement of your Blender to an Authorized Service Center. English Warranty KitchenAid® Blender Warranty for the 50 United States, the District...

Owners Manual 1
Page 16
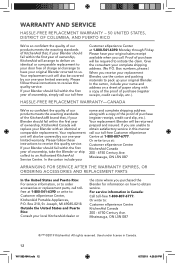
...replacement unit will also be covered by our one year limited warranty. If you purchased the Blender for Service after the Warranty Expires, or Ordering Accessories and Replacement Parts In the United States and Puerto Rico: For service information, or to order accessories or ... Rico We're so confident the quality of our products meets the exacting standards of KitchenAid that , if your complete shipping address. (No P.O. Please have your original Blender returned to your Blender with an identical or comparable replacement. Hassle-Free Replacement Warranty - In the carton include...
...replacement unit will also be covered by our one year limited warranty. If you purchased the Blender for Service after the Warranty Expires, or Ordering Accessories and Replacement Parts In the United States and Puerto Rico: For service information, or to order accessories or ... Rico We're so confident the quality of our products meets the exacting standards of KitchenAid that , if your complete shipping address. (No P.O. Please have your original Blender returned to your Blender with an identical or comparable replacement. Hassle-Free Replacement Warranty - In the carton include...


