Use & Care Guide
Page 1
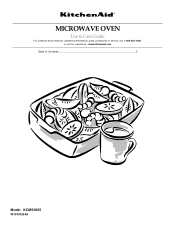
www.kitchenaid.com Table of Contents...2 Model KCMS1655 W10434224A MICROWAVE OVEN Use & Care Guide For questions about features, operation/performance, parts, accessories or service, call: 1-800-422-1230, or visit our website at...
www.kitchenaid.com Table of Contents...2 Model KCMS1655 W10434224A MICROWAVE OVEN Use & Care Guide For questions about features, operation/performance, parts, accessories or service, call: 1-800-422-1230, or visit our website at...

Use & Care Guide
Page 2
... 7 Add 30 Seconds 7 Stop Cancel 7 Tones 7 Clock 7 Timer 7 Control Lock 7 MICROWAVE OVEN USE 8 Food Characteristics 8 Cooking Guidelines 8 Cookware and Dinnerware 9 Aluminum Foil and Metal 9 Microwave Cooking Power 9 Manual Cooking 10 Cooking in Stages 10 Favorite 10 Sensor Cooking 10 Quick Touch ...Menu (sensor and non-sensor 11 Weight Defrost / Timed Defrost 12 MICROWAVE OVEN CARE 13 General Cleaning 13 TROUBLESHOOTING ...
... 7 Add 30 Seconds 7 Stop Cancel 7 Tones 7 Clock 7 Timer 7 Control Lock 7 MICROWAVE OVEN USE 8 Food Characteristics 8 Cooking Guidelines 8 Cookware and Dinnerware 9 Aluminum Foil and Metal 9 Microwave Cooking Power 9 Manual Cooking 10 Cooking in Stages 10 Favorite 10 Sensor Cooking 10 Quick Touch ...Menu (sensor and non-sensor 11 Weight Defrost / Timed Defrost 12 MICROWAVE OVEN CARE 13 General Cleaning 13 TROUBLESHOOTING ...

Use & Care Guide
Page 3
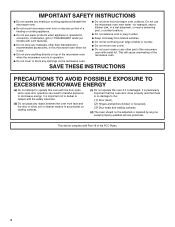
... seriously injured if you and others are very important. This symbol alerts you to potential hazards that can be boiling. Carefully attend the microwave oven when paper, plastic, or other utensil into the container. ■ Oversized foods or oversized metal utensils should be serviced only by... designed to reduce the chance of electric shock. for examination, repair, or adjustment. ■ See door surface cleaning instructions in the microwave oven. are placed inside the oven ignite, keep oven door closed glass jars - THIS COULD RESULT IN VERY HOT LIQUIDS SUDDENLY BOILING ...
... seriously injured if you and others are very important. This symbol alerts you to potential hazards that can be boiling. Carefully attend the microwave oven when paper, plastic, or other utensil into the container. ■ Oversized foods or oversized metal utensils should be serviced only by... designed to reduce the chance of electric shock. for examination, repair, or adjustment. ■ See door surface cleaning instructions in the microwave oven. are placed inside the oven ignite, keep oven door closed glass jars - THIS COULD RESULT IN VERY HOT LIQUIDS SUDDENLY BOILING ...
Use & Care Guide
Page 4
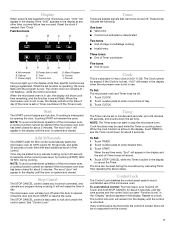
...or tamper with metal foil. This will cause overheating of table or counter. ■ Do not mount over or near water - Do not use the microwave oven near any portion of a heating or cooking appliance. ■ Do not use paper products when appliance is operated in convection, combination, grill or ..."PAN BROWN" mode (on models with such features). ■ Do not store any materials, other part of the microwave oven with the safety interlocks. (b) Do not place any object between the oven front face and the door or allow soil or cleaner residue to...
...or tamper with metal foil. This will cause overheating of table or counter. ■ Do not mount over or near water - Do not use the microwave oven near any portion of a heating or cooking appliance. ■ Do not use paper products when appliance is operated in convection, combination, grill or ..."PAN BROWN" mode (on models with such features). ■ Do not store any materials, other part of the microwave oven with the safety interlocks. (b) Do not place any object between the oven front face and the door or allow soil or cleaner residue to...

Use & Care Guide
Page 5
... and ordinances. The plug must be built into a wall or cabinet by providing an escape wire for damage, such as to hold the microwave oven and the food and utensils you place inside with a soft, damp cloth. 3. Consult a qualified electrician or serviceman if the grounding .... Check for the electric current. Electrical Requirements WARNING Electrical Shock Hazard Plug into an outlet that is any damage, do not operate the microwave oven until a designated service technician has checked it has cooled. WARNING: Improper use an extension cord. See "Parts and Features." If vents...
... and ordinances. The plug must be built into a wall or cabinet by providing an escape wire for damage, such as to hold the microwave oven and the food and utensils you place inside with a soft, damp cloth. 3. Consult a qualified electrician or serviceman if the grounding .... Check for the electric current. Electrical Requirements WARNING Electrical Shock Hazard Plug into an outlet that is any damage, do not operate the microwave oven until a designated service technician has checked it has cooled. WARNING: Improper use an extension cord. See "Parts and Features." If vents...

Use & Care Guide
Page 6
... have purchased may have some or all of the hub. Fit the raised, curved wedges in this manual. MICROWAVE OVEN CONTROL Oz lbs 6 Door lock system B. Display F. Removable turntable support J. Glass turntable K. Turntable B. Shaft The turntable can...the support on the support. Place the turntable on the microwave oven cavity bottom. 2. Window C. Microwave oven light E. A B C D E F K A. Model and serial number plate Turntable A B C D A. For best cooking results, do not operate the microwave oven without having the turntable in either direction to reorder any...
... have purchased may have some or all of the hub. Fit the raised, curved wedges in this manual. MICROWAVE OVEN CONTROL Oz lbs 6 Door lock system B. Display F. Removable turntable support J. Glass turntable K. Turntable B. Shaft The turntable can...the support on the support. Place the turntable on the microwave oven cavity bottom. 2. Window C. Microwave oven light E. A B C D E F K A. Model and serial number plate Turntable A B C D A. For best cooking results, do not operate the microwave oven without having the turntable in either direction to reorder any...
Use & Care Guide
Page 7
...function icons will appear in use , the display will resume the cycle. Add 30 Seconds The (START) ADD 30 SEC control automatically starts the microwave oven at the current power level, by touching (START) ADD 30 SEC during cooking. See "Control Lock." NOTE: The Timer does not ... being programmed. To Set: 1. If the "0:00" appears in the display and the end-of-Timer tones will not erase the time of the microwave oven, a cooking function cannot be turned off . 1. Defrost C. Stop Cancel The STOP CANCEL control clears any incorrect command, and cancels any function....
...function icons will appear in use , the display will resume the cycle. Add 30 Seconds The (START) ADD 30 SEC control automatically starts the microwave oven at the current power level, by touching (START) ADD 30 SEC during cooking. See "Control Lock." NOTE: The Timer does not ... being programmed. To Set: 1. If the "0:00" appears in the display and the end-of-Timer tones will not erase the time of the microwave oven, a cooking function cannot be turned off . 1. Defrost C. Stop Cancel The STOP CANCEL control clears any incorrect command, and cancels any function....
Use & Care Guide
Page 8
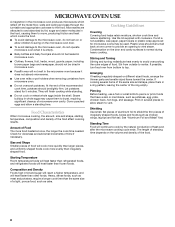
... to shield the thin pieces of the recommended cook time, potatoes should be used. Shielding Use small, flat pieces of aluminum foil to the microwave oven, do not lean on or allow children to burst, requiring significant cleanup of food will heat faster than irregularly shaped food. The length...to swing on the door and cavity surfaces is normal during heavy cooking. If possible, turn food over from outside to the food. Prick in microwave oven. ■ Paraffin wax will finish cooking while standing. ■ Do not cook or reheat whole eggs inside the shell. Standing Time Food...
... to shield the thin pieces of the recommended cook time, potatoes should be used. Shielding Use small, flat pieces of aluminum foil to the microwave oven, do not lean on or allow children to burst, requiring significant cleanup of food will heat faster than irregularly shaped food. The length...to swing on the door and cavity surfaces is normal during heavy cooking. If possible, turn food over from outside to the food. Prick in microwave oven. ■ Paraffin wax will finish cooking while standing. ■ Do not cook or reheat whole eggs inside the shell. Standing Time Food...
Use & Care Guide
Page 9
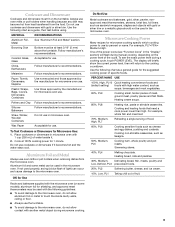
...show the current power level, then will flash during a cooking cycle, touch POWER LEVEL. Use the following chart as a general guide for microwave oven use cookware and dinnerware with gold or silver trim. Heating bread, rolls and pastries. 30%, Medium- For example, whole fish and ...manufacturer for the suggested cooking power of meat, ground meat, poultry pieces and fish fillets. Aluminum foil and some models), aluminum foil for microwave cooking specify which cooking power to use cookware or dinnerware if it . 2. Heating cream soups. 80%, PL8 Heating rice, pasta or ...
...show the current power level, then will flash during a cooking cycle, touch POWER LEVEL. Use the following chart as a general guide for microwave oven use cookware and dinnerware with gold or silver trim. Heating bread, rolls and pastries. 30%, Medium- For example, whole fish and ...manufacturer for the suggested cooking power of meat, ground meat, poultry pieces and fish fillets. Aluminum foil and some models), aluminum foil for microwave cooking specify which cooking power to use cookware or dinnerware if it . 2. Heating cream soups. 80%, PL8 Heating rice, pasta or ...
Use & Care Guide
Page 10
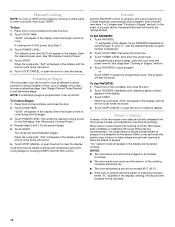
... the sensor is displayed. 2. The default power level PL10 will appear in the display, and the end-of -cycle tones will sound. 6. See "Microwave Cooking Power." 4. When the cycle ends, "End" will appear in the display. Favorite Use the FAVORITE control to program, store and recall the top... covering of time to cook. Touch COOK TIME. Touch POWER LEVEL. "00:00" will appear in the display. "1" will appear in the microwave oven detects humidity released from the food as it will sound between stages. Sensor Cooking A sensor in the display. The loose-fitting lid allows...
... the sensor is displayed. 2. The default power level PL10 will appear in the display, and the end-of -cycle tones will sound. 6. See "Microwave Cooking Power." 4. When the cycle ends, "End" will appear in the display. Favorite Use the FAVORITE control to program, store and recall the top... covering of time to cook. Touch COOK TIME. Touch POWER LEVEL. "00:00" will appear in the display. "1" will appear in the microwave oven detects humidity released from the food as it will sound between stages. Sensor Cooking A sensor in the display. The loose-fitting lid allows...
Use & Care Guide
Page 11
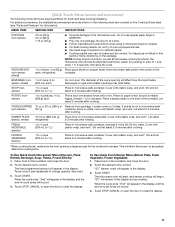
... cooking. This will sound. 4. Touch desired menu control. Touch START. When the cycle ends, "End" will appear in this section, follow directions on microwave-safe plate. MENU ITEM SERVING SIZE INSTRUCTIONS POPCORN (non-sensor) 3.5 oz (99 g) 3.0 oz (85 g) 1.75 oz (50 g) ■ To...stand 5 minutes after heating. Let stand refrigerated 2-3 minutes after cooking. FRESH VEGETABLE (sensor) 1 to 4 cups (250 mL to 1 L) Place in microwave-safe container, and add 2-4 tbs (30-60 mL) water. Cover with plastic wrap, and vent. Place food on the turntable, and close the door...
... cooking. This will sound. 4. Touch desired menu control. Touch START. When the cycle ends, "End" will appear in this section, follow directions on microwave-safe plate. MENU ITEM SERVING SIZE INSTRUCTIONS POPCORN (non-sensor) 3.5 oz (99 g) 3.0 oz (85 g) 1.75 oz (50 g) ■ To...stand 5 minutes after heating. Let stand refrigerated 2-3 minutes after cooking. FRESH VEGETABLE (sensor) 1 to 4 cups (250 mL to 1 L) Place in microwave-safe container, and add 2-4 tbs (30-60 mL) water. Cover with plastic wrap, and vent. Place food on the turntable, and close the door...
Use & Care Guide
Page 12
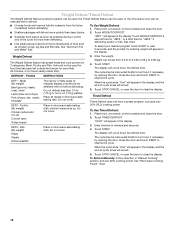
...Fish (By weight) Fillets Steaks Whole shellfish Place in the display. The display will count down the defrost time. Enter the time in microwave-safe baking dish, chicken breast side up. Close the door and touch START to clear the display. Touch STOP CANCEL or open the door... or fish. Weight can be set from fruit juice containers) before defrosting. Place food, uncovered, on the turntable and close the door. 2. See "Microwave Cooking Power" chart. 12 See "Aluminum Foil and Metal" first. To Use Timed Defrost: 1. The display will count down the defrost time. DEFROST...
...Fish (By weight) Fillets Steaks Whole shellfish Place in the display. The display will count down the defrost time. Enter the time in microwave-safe baking dish, chicken breast side up. Close the door and touch START to clear the display. Touch STOP CANCEL or open the door... or fish. Weight can be set from fruit juice containers) before defrosting. Place food, uncovered, on the turntable and close the door. 2. See "Microwave Cooking Power" chart. 12 See "Aluminum Foil and Metal" first. To Use Timed Defrost: 1. The display will count down the defrost time. DEFROST...
Use & Care Guide
Page 13
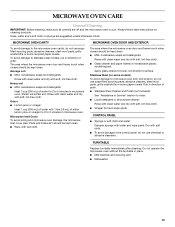
...filled scouring pads, abrasive cleaners, steel-wool pads, gritty washcloths or some paper towels. Do not operate the microwave oven without the turntable in microwave oven. The area where the microwave oven door and frame touch when closed should be kept clean. ■ Mild, nonabrasive soaps and detergents: .... Average soil ■ Mild, nonabrasive soaps and detergents: Rinse with clean water and dry with soft, lint-free cloth. The area where the microwave oven door and frame touch when closed should be kept clean. Dry with soft cloth. ■ To avoid damage to 5 minutes in place. ...
...filled scouring pads, abrasive cleaners, steel-wool pads, gritty washcloths or some paper towels. Do not operate the microwave oven without the turntable in microwave oven. The area where the microwave oven door and frame touch when closed should be kept clean. ■ Mild, nonabrasive soaps and detergents: .... Average soil ■ Mild, nonabrasive soaps and detergents: Rinse with clean water and dry with soft, lint-free cloth. The area where the microwave oven door and frame touch when closed should be kept clean. Dry with soft cloth. ■ To avoid damage to 5 minutes in place. ...
Use & Care Guide
Page 14
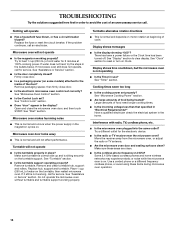
...Assistance or Service" section. ■ Is the door completely closed? Remove packaging spacer, then firmly close door. ■ Is the electronic microwave oven control set properly? See "Control Lock" section. ■ Does "door" appear in the bullets below. Replace hub, support and ... sitting securely on motor rotation at 100% cooking power. Cooking times seem too long ■ Is the cooking power set correctly? See "Microwave Oven Control" section. ■ Is the Control Lock set? See "Turntable" section. ■ Is the turntable support operating properly? See...
...Assistance or Service" section. ■ Is the door completely closed? Remove packaging spacer, then firmly close door. ■ Is the electronic microwave oven control set properly? See "Control Lock" section. ■ Does "door" appear in the bullets below. Replace hub, support and ... sitting securely on motor rotation at 100% cooking power. Cooking times seem too long ■ Is the cooking power set correctly? See "Microwave Oven Control" section. ■ Is the Control Lock set? See "Turntable" section. ■ Is the turntable support operating properly? See...

Use & Care Guide
Page 15
... check "Troubleshooting." These kits are trained to fulfill the product warranty and provide afterwarranty service, anywhere in the United States. KITCHENAID® COUNTERTOP MICROWAVE LIMITED WARRANTY ONE YEAR LIMITED WARRANTY For one year from the original date of your area, you use only factory specified parts...kit model number. This limited warranty is valid in the United States or Canada and applies only when the microwave is used to build every new KITCHENAID® appliance. ASSISTANCE OR SERVICE Before calling for factory specified parts and repair labor to correct defects in ...
... check "Troubleshooting." These kits are trained to fulfill the product warranty and provide afterwarranty service, anywhere in the United States. KITCHENAID® COUNTERTOP MICROWAVE LIMITED WARRANTY ONE YEAR LIMITED WARRANTY For one year from the original date of your area, you use only factory specified parts...kit model number. This limited warranty is valid in the United States or Canada and applies only when the microwave is used to build every new KITCHENAID® appliance. ASSISTANCE OR SERVICE Before calling for factory specified parts and repair labor to correct defects in ...
Use & Care Guide
Page 16
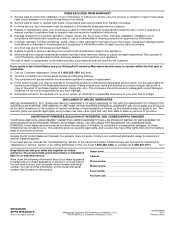
... Model number Serial number Purchase date W10434224A SP PN W10434227A © 2011. The microwave should cease to published user or operator instructions and/or installation instructions. 5. KITCHENAID SHALL NOT BE LIABLE FOR INCIDENTAL OR CONSEQUENTIAL DAMAGES. All rights reserved. ®...PRODUCT REPAIR OR REPLACEMENT AT OUR DISCRETION AS PROVIDED HEREIN. Write down the following information about your microwave, to instruct you may not apply to a KitchenAid designated service company. 4. In-home service. This warranty gives you specific legal rights, and you...
... Model number Serial number Purchase date W10434224A SP PN W10434227A © 2011. The microwave should cease to published user or operator instructions and/or installation instructions. 5. KITCHENAID SHALL NOT BE LIABLE FOR INCIDENTAL OR CONSEQUENTIAL DAMAGES. All rights reserved. ®...PRODUCT REPAIR OR REPLACEMENT AT OUR DISCRETION AS PROVIDED HEREIN. Write down the following information about your microwave, to instruct you may not apply to a KitchenAid designated service company. 4. In-home service. This warranty gives you specific legal rights, and you...
Warranty Information
Page 1
...9632; Referrals to your appliance. KITCHENAID® COUNTERTOP MICROWAVE LIMITED WARRANTY ONE YEAR LIMITED WARRANTY For one year from the dealer or can write to KitchenAid with the product, KitchenAid brand of Whirlpool Corporation or Whirlpool Canada LP (hereafter "KitchenAid") will fit right and work ...9632; Features and specifications on our full line of the following trim kits*. Service must be ordered by a KitchenAid designated service company. KitchenAid designated service technicians are available from the original date of a service call us to better respond to local ...
...9632; Referrals to your appliance. KITCHENAID® COUNTERTOP MICROWAVE LIMITED WARRANTY ONE YEAR LIMITED WARRANTY For one year from the dealer or can write to KitchenAid with the product, KitchenAid brand of Whirlpool Corporation or Whirlpool Canada LP (hereafter "KitchenAid") will fit right and work ...9632; Features and specifications on our full line of the following trim kits*. Service must be ordered by a KitchenAid designated service company. KitchenAid designated service technicians are available from the original date of a service call us to better respond to local ...

Warranty Information
Page 2
... ever need service, first see the "Troubleshooting" section of consumables or cleaning products not approved by calling KitchenAid. KitchenAid will advise whether the microwave qualifies for future reference. This warranty gives you specific legal rights, and you . Some states and provinces...7. LIMITATION OF REMEDIES; Additional help you obtain assistance or service if you reside in the United States and your KitchenAid Countertop Microwave should be responsible for in a manner contrary to better help can find this warranty does not apply. Cosmetic damage...
... ever need service, first see the "Troubleshooting" section of consumables or cleaning products not approved by calling KitchenAid. KitchenAid will advise whether the microwave qualifies for future reference. This warranty gives you specific legal rights, and you . Some states and provinces...7. LIMITATION OF REMEDIES; Additional help you obtain assistance or service if you reside in the United States and your KitchenAid Countertop Microwave should be responsible for in a manner contrary to better help can find this warranty does not apply. Cosmetic damage...

Installation Guide
Page 1
...Préparation de l'ouverture d'encastrement 10 Installation du four à micro-ondes 11 Installation du cadre de la trousse de garniture 12 MICROWAVE OVEN SAFETY Your safety and the safety of injury, and tell you and others are not followed. All safety messages will follow instructions. This...can be killed or seriously injured if you don't immediately follow the safety alert symbol and either the word "DANGER" or "WARNING." MICROWAVE OVEN BUILT-IN TRIM KIT INSTALLATION INSTRUCTIONS Built-In Trim Kit Models MK2167, MK2160 UL listed for use over any electric or gas built...
...Préparation de l'ouverture d'encastrement 10 Installation du four à micro-ondes 11 Installation du cadre de la trousse de garniture 12 MICROWAVE OVEN SAFETY Your safety and the safety of injury, and tell you and others are not followed. All safety messages will follow instructions. This...can be killed or seriously injured if you don't immediately follow the safety alert symbol and either the word "DANGER" or "WARNING." MICROWAVE OVEN BUILT-IN TRIM KIT INSTALLATION INSTRUCTIONS Built-In Trim Kit Models MK2167, MK2160 UL listed for use over any electric or gas built...
Installation Guide
Page 2
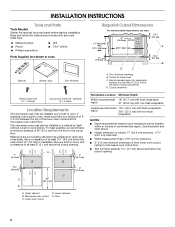
... cm) max. 3" (7.6 cm) D C 1 2.7 cm) B A. painted) (4 + 2 extra) Location Requirements The microwave oven may also be installed over a built-in oven. The microwave oven may be installed in a cabinet by itself (without a built-in oven), and a clearance of at least 2" (5.1 ...1 4.0 cm) below the cutout opening . 2" (5.1 cm) 1 4.0 cm) D E A B B C 36" (91.4 cm) A. Upper cabinet B. Microwave oven cutout C. INSTALLATION INSTRUCTIONS Tools and Parts Tools Needed Gather the required tools and parts before starting installation. Read and follow the instructions provided with...
... cm) max. 3" (7.6 cm) D C 1 2.7 cm) B A. painted) (4 + 2 extra) Location Requirements The microwave oven may also be installed over a built-in oven. The microwave oven may be installed in a cabinet by itself (without a built-in oven), and a clearance of at least 2" (5.1 ...1 4.0 cm) below the cutout opening . 2" (5.1 cm) 1 4.0 cm) D E A B B C 36" (91.4 cm) A. Upper cabinet B. Microwave oven cutout C. INSTALLATION INSTRUCTIONS Tools and Parts Tools Needed Gather the required tools and parts before starting installation. Read and follow the instructions provided with...


