
Use & Care Guide
Page 1
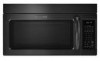
... - MICROWAVE HOOD COMBINATION USER INSTRUCTIONS Thank you have provided many important safety messages in this section and in the provided Installation Instructions. If you may encounter. We have a positive experience owning a KitchenAid® product. Connect only to help you through any problems you need further assistance using electrical appliances basic safety precautions...
... - MICROWAVE HOOD COMBINATION USER INSTRUCTIONS Thank you have provided many important safety messages in this section and in the provided Installation Instructions. If you may encounter. We have a positive experience owning a KitchenAid® product. Connect only to help you through any problems you need further assistance using electrical appliances basic safety precautions...

Use & Care Guide
Page 3
... Oven Care" section. Do not use of the text may be adjusted. Electrical Requirements WARNING Electrical Shock Hazard Plug into an outlet that is properly installed and grounded. Required: ■ A 120 Volt, 60 Hz, AC only, 15- The microwave oven is a 12-hour (12:00-11:59) clock, with a grounding plug...;0° (reset to low, and off , or all governing codes and ordinances. If the power supply cord is too short, have a qualified electrician or serviceman install an outlet near the microwave oven. and P.M.
... Oven Care" section. Do not use of the text may be adjusted. Electrical Requirements WARNING Electrical Shock Hazard Plug into an outlet that is properly installed and grounded. Required: ■ A 120 Volt, 60 Hz, AC only, 15- The microwave oven is a 12-hour (12:00-11:59) clock, with a grounding plug...;0° (reset to low, and off , or all governing codes and ordinances. If the power supply cord is too short, have a qualified electrician or serviceman install an outlet near the microwave oven. and P.M.

Use & Care Guide
Page 5
... at the top front of the microwave oven. Opening the door during Keep Warm will be 100%, but may be changed . Dishwasher cleaning is replaceable. Installing/Replacing Filters and Light Bulbs NOTE: A filter status indicator (on the vent grille, tilt the grille forward, and lift it out, and remove filter. Slide...
... at the top front of the microwave oven. Opening the door during Keep Warm will be 100%, but may be changed . Dishwasher cleaning is replaceable. Installing/Replacing Filters and Light Bulbs NOTE: A filter status indicator (on the vent grille, tilt the grille forward, and lift it out, and remove filter. Slide...

Use & Care Guide
Page 7
...The removal and reinstallation of your major appliance if it is installed in an inaccessible location or is used in the country in which it is used for other damage to the finish of your authorized KitchenAid dealer to determine if another warranty applies. 9/07 For additional ...is located in a remote area where service by an authorized KitchenAid servicer is void if the factory applied serial number has been altered or removed from accident, alteration, misuse, abuse, fire, flood, acts of God, improper installation, installation not in accordance with electrical or plumbing codes, or use...
...The removal and reinstallation of your major appliance if it is installed in an inaccessible location or is used in the country in which it is used for other damage to the finish of your authorized KitchenAid dealer to determine if another warranty applies. 9/07 For additional ...is located in a remote area where service by an authorized KitchenAid servicer is void if the factory applied serial number has been altered or removed from accident, alteration, misuse, abuse, fire, flood, acts of God, improper installation, installation not in accordance with electrical or plumbing codes, or use...

Installation Guide
Page 1
...tell you and others are not followed. W10247296B This symbol alerts you to Wall 8 Prepare Upper Cabinet 8 Install Damper Assembly 9 Install the Microwave Oven 9 Complete Installation 10 VENTING DESIGN SPECIFICATIONS 11 ASSISTANCE 12 Replacement Parts 12 Accessories 12 MICROWAVE HOOD COMBINATION SAFETY Your safety and... be killed or seriously injured if you how to and including 36" (91.4 cm) wide. These installation instructions cover different models. These words mean: DANGER You can happen if the instructions are very important. MICROWAVE HOOD COMBINATION...
...tell you and others are not followed. W10247296B This symbol alerts you to Wall 8 Prepare Upper Cabinet 8 Install Damper Assembly 9 Install the Microwave Oven 9 Complete Installation 10 VENTING DESIGN SPECIFICATIONS 11 ASSISTANCE 12 Replacement Parts 12 Accessories 12 MICROWAVE HOOD COMBINATION SAFETY Your safety and... be killed or seriously injured if you how to and including 36" (91.4 cm) wide. These installation instructions cover different models. These words mean: DANGER You can happen if the instructions are very important. MICROWAVE HOOD COMBINATION...

Installation Guide
Page 2
...No. 3 Phillips screwdriver for wall or roof venting. See User Instructions.) NOTE: Depending on model, charcoal filters may be installed. Cut along the perforation to Round Transition" illustration in "Venting Design Specifications" section. 2 Location Requirements Check the opening ...cm) clearance needs to use as a rear wall template. 1. For other damages. Washers (2) D. Sheet metal screws (2) G. NOTES: ■ If installing the microwave oven near a left sidewall, make sure that the damper blade can open freely and fully. Toggle nuts (2) E. 1/4" x 2" lag screws ...
...No. 3 Phillips screwdriver for wall or roof venting. See User Instructions.) NOTE: Depending on model, charcoal filters may be installed. Cut along the perforation to Round Transition" illustration in "Venting Design Specifications" section. 2 Location Requirements Check the opening ...cm) clearance needs to use as a rear wall template. 1. For other damages. Washers (2) D. Sheet metal screws (2) G. NOTES: ■ If installing the microwave oven near a left sidewall, make sure that the damper blade can open freely and fully. Toggle nuts (2) E. 1/4" x 2" lag screws ...

Installation Guide
Page 3
...41.3 cm) (401.05³c⁄₄m") 29⁷⁄₈" (76.0 cm) GROUNDING INSTRUCTIONS ■ For all governing codes and ordinances. Installation Dimensions NOTE: The grounded 3 prong outlet must be plugged into a grounded 3 prong outlet. A. 2" x 4" wall stud B. Consult a qualified ... cabinet. WARNING: Improper use an adapter. Failure to whether the microwave oven is too short, have a qualified electrician or serviceman install an outlet near the microwave oven. The plug must be grounded. Do not remove ground prong. SAVE THESE INSTRUCTIONS 3 A B...
...41.3 cm) (401.05³c⁄₄m") 29⁷⁄₈" (76.0 cm) GROUNDING INSTRUCTIONS ■ For all governing codes and ordinances. Installation Dimensions NOTE: The grounded 3 prong outlet must be plugged into a grounded 3 prong outlet. A. 2" x 4" wall stud B. Consult a qualified ... cabinet. WARNING: Improper use an adapter. Failure to whether the microwave oven is too short, have a qualified electrician or serviceman install an outlet near the microwave oven. The plug must be grounded. Do not remove ground prong. SAVE THESE INSTRUCTIONS 3 A B...

Installation Guide
Page 4
... screws attaching damper plate to the back of the microwave oven, remove it and set for recirculation installation. Make sure damper plate tabs are using recirculation installation. Damper plate 2. Screws C. Tape the microwave oven door closed so that exhaust ports face the ...B. Remove 2 screws attaching blower motor to the back of the microwave oven. Slots 8. Wall Venting Installation Only 1. Secure damper plate with 2 screws removed in Step 3. 7. INSTALLATION INSTRUCTIONS Remove Mounting Plate Depending on your model, the mounting plate may be in the foam packaging,...
... screws attaching damper plate to the back of the microwave oven, remove it and set for recirculation installation. Make sure damper plate tabs are using recirculation installation. Damper plate 2. Screws C. Tape the microwave oven door closed so that exhaust ports face the ...B. Remove 2 screws attaching blower motor to the back of the microwave oven. Slots 8. Wall Venting Installation Only 1. Secure damper plate with 2 screws removed in Step 3. 7. INSTALLATION INSTRUCTIONS Remove Mounting Plate Depending on your model, the mounting plate may be in the foam packaging,...

Installation Guide
Page 5
...the microwave oven. 7. D A. Screws C. Secure damper plate with 2 screws removed in Step 1 of "Wall Venting Installation Only." 5 Roof Venting Installation Only 1. Repeat Step 4 from "Wall Venting Installation Only." 3. Lower blower motor back into the slots in Step 3 cannot be poor. Securely tighten screws. Reattach damper ...of microwave oven with 2 screws removed in Step 3 of the microwave oven. Repeat Step 1 from "Wall Venting Installation Only." 4. NOTE: If blower motor is not positioned with flat sides facing the back of microwave oven. A 6. Damper plate tabs D....
...the microwave oven. 7. D A. Screws C. Secure damper plate with 2 screws removed in Step 1 of "Wall Venting Installation Only." 5 Roof Venting Installation Only 1. Repeat Step 4 from "Wall Venting Installation Only." 3. Lower blower motor back into the slots in Step 3 cannot be poor. Securely tighten screws. Reattach damper ...of microwave oven with 2 screws removed in Step 3 of the microwave oven. Repeat Step 1 from "Wall Venting Installation Only." 4. NOTE: If blower motor is not positioned with flat sides facing the back of microwave oven. A 6. Damper plate tabs D....

Installation Guide
Page 6
... with the mounting plate. Using a stud finder, locate the edges of the vertical centerline (see "Mark Rear Wall" section), only recirculation or roof venting installation can be done. See illustrations in "Possible Wall Stud Configurations." 2. Locate Wall Stud(s) NOTE: If no wall studs exist within the opening. Possible Wall Stud ...: If wall stud is within 6" (15.2 cm) of the wall stud(s) within the cabinet opening vertical centerline C. Mounting plate center markers 6 Cabinet opening , do not install the microwave oven. 1.
... with the mounting plate. Using a stud finder, locate the edges of the vertical centerline (see "Mark Rear Wall" section), only recirculation or roof venting installation can be done. See illustrations in "Possible Wall Stud Configurations." 2. Locate Wall Stud(s) NOTE: If no wall studs exist within the opening. Possible Wall Stud ...: If wall stud is within 6" (15.2 cm) of the wall stud(s) within the cabinet opening vertical centerline C. Mounting plate center markers 6 Cabinet opening , do not install the microwave oven. 1.

Installation Guide
Page 7
... cabinet. ■ If the cardboard template is over a wall stud, use 1 lag screw and one corner of cabinet. Set the mounting plate aside. Wall Venting Installation Only Upper cabinet bottom ³⁄₈" (1 cm) 4" (10.2 cm) Centerline 6" (15.2 cm) 6" (15.2 cm) 8. Using measuring tape, measure ... The blackened holes in Step 9 to figures 1 and 2 in "Possible Wall Stud Configurations" in Step 3 of the centerline, and mark. 10. Installation for No Wall Studs at both end holes marked in "Locate Wall Stud(s)" section. 7 Drill 3/16" (5 mm) hole(s) into the wall stud(s)...
... cabinet. ■ If the cardboard template is over a wall stud, use 1 lag screw and one corner of cabinet. Set the mounting plate aside. Wall Venting Installation Only Upper cabinet bottom ³⁄₈" (1 cm) 4" (10.2 cm) Centerline 6" (15.2 cm) 6" (15.2 cm) 8. Using measuring tape, measure ... The blackened holes in Step 9 to figures 1 and 2 in "Possible Wall Stud Configurations" in Step 3 of the centerline, and mark. 10. Installation for No Wall Studs at both end holes marked in "Locate Wall Stud(s)" section. 7 Drill 3/16" (5 mm) hole(s) into the wall stud(s)...

Installation Guide
Page 8
...over the 3/4" (19 mm) hole drilled in Step 2 of the mounting plate. B A C A. 1/4-20 x 3" round-head bolt B. Check alignment of "Installation for No Wall Studs at End Holes" in the "Drill Holes in Rear Wall" section. 2. Prepare Upper Cabinet 1. Make sure the 10" (25.4 cm) ... Step 3 of mounting plate, making sure it fits inside the frame, against the bottom of the tiles rather than the drywall). 4. If installing on bolts from upper cabinet. 3. Check alignment of the microwave oven. Disconnect power to illustrations in "Possible Wall Stud Configurations" in Step 3...
...over the 3/4" (19 mm) hole drilled in Step 2 of the mounting plate. B A C A. 1/4-20 x 3" round-head bolt B. Check alignment of "Installation for No Wall Studs at End Holes" in the "Drill Holes in Rear Wall" section. 2. Prepare Upper Cabinet 1. Make sure the 10" (25.4 cm) ... Step 3 of mounting plate, making sure it fits inside the frame, against the bottom of the tiles rather than the drywall). 4. If installing on bolts from upper cabinet. 3. Check alignment of the microwave oven. Disconnect power to illustrations in "Possible Wall Stud Configurations" in Step 3...

Installation Guide
Page 9
... back or other injury. B A A. Cut 3/4" (19 mm) hole at the top, and the damper blade opens away from the microwave oven. A B C D Install the Microwave Oven WARNING Excessive Weight Hazard Use two or more people, lift microwave oven and hang it on the back of the shaded rectangular...and "E" on Upper Cabinet Template. 8. Handle the microwave oven gently. 1. Rotate microwave oven up toward upper cabinet. Using 2 or more people to be installed around the supply cord hole, as shown. These are for two 1/4-20 x 3" bolts and washers used to secure the microwave oven to do not ...
... back or other injury. B A A. Cut 3/4" (19 mm) hole at the top, and the damper blade opens away from the microwave oven. A B C D Install the Microwave Oven WARNING Excessive Weight Hazard Use two or more people, lift microwave oven and hang it on the back of the shaded rectangular...and "E" on Upper Cabinet Template. 8. Handle the microwave oven gently. 1. Rotate microwave oven up toward upper cabinet. Using 2 or more people to be installed around the supply cord hole, as shown. These are for two 1/4-20 x 3" bolts and washers used to secure the microwave oven to do not ...

Installation Guide
Page 10
...3. If the problem continues, call an electrician. ■ Check that the long tab of the damper assembly slides under vent) Complete Installation 1. Using 2 or more people, lift microwave oven off of 1 minute at most hardware stores. ■ Overtightening bolts may require bolts...damper assembly. A B C D E F A. Do not use an extension cord. With the microwave oven centered, and with sheet metal screw. Vent B. Install filters. WARNING A. Damper assembly C. If the microwave oven does not operate: ■ Check that a household fuse has not blown, or that a circuit ...
...3. If the problem continues, call an electrician. ■ Check that the long tab of the damper assembly slides under vent) Complete Installation 1. Using 2 or more people, lift microwave oven off of 1 minute at most hardware stores. ■ Overtightening bolts may require bolts...damper assembly. A B C D E F A. Do not use an extension cord. With the microwave oven centered, and with sheet metal screw. Vent B. Install filters. WARNING A. Damper assembly C. If the microwave oven does not operate: ■ Check that a household fuse has not blown, or that a circuit ...

Installation Guide
Page 11
... 3 m) 11 Elbow (for use when figuring vent length. diameter round vent C. See the examples in the vent system ■ using recirculation installation. Do not vent exhaust air into concealed spaces, such as spaces within the wall for the damper to provide efficient performance ■ using uniformly... length of the vent and number of the microwave oven and the rectangular to 15.2 cm = 1.5 m) B. For optimal venting installation, we recommend: ■ using roof or wall caps that there is intended for architectural designer and builder/contractor reference only. Roof ...
... 3 m) 11 Elbow (for use when figuring vent length. diameter round vent C. See the examples in the vent system ■ using recirculation installation. Do not vent exhaust air into concealed spaces, such as spaces within the wall for the damper to provide efficient performance ■ using uniformly... length of the vent and number of the microwave oven and the rectangular to 15.2 cm = 1.5 m) B. For optimal venting installation, we recommend: ■ using roof or wall caps that there is intended for architectural designer and builder/contractor reference only. Roof ...

Installation Guide
Page 12
... Parts" section) A A. All rights reserved. 461965617428 9/10 Printed in pairs. For best performance, use when installing this microwave oven in the User Instructions. Both numbers can be installed to use no more than three 90° elbows. You will need your dealer to keep the damper from... 8171338 8171339 99403 White Black Biscuit Stainless Steel Almond See your authorized dealer or service center. Replacement Parts If any of the installation hardware needs to round transition piece must not exceed the equivalent of each vent piece used in the User Instructions. If you...
... Parts" section) A A. All rights reserved. 461965617428 9/10 Printed in pairs. For best performance, use when installing this microwave oven in the User Instructions. Both numbers can be installed to use no more than three 90° elbows. You will need your dealer to keep the damper from... 8171338 8171339 99403 White Black Biscuit Stainless Steel Almond See your authorized dealer or service center. Replacement Parts If any of the installation hardware needs to round transition piece must not exceed the equivalent of each vent piece used in the User Instructions. If you...

Dimension Guide
Page 1
...cm) max. Two 90° elbows = 20 ft (6.1 m) B. 1 wall cap = 40 ft (12.2 m) C. 1 rectangular to change without notice. For complete details, see Installation our products, we reserve the right to round transition piece = 5 ft (1.5 m) D. 2 ft (0.6 m) + 6 ft (1.8 m) straight = 8 ft (2.4 m) D 3 ... C A. Rectangular to round transition piece: 3 " x 10" to 6" = 5 ft (8.3 x 25.4 cm to improve Dimensions are for 66" (167.6 cm) installation height. Grounded 3-prong outlet *30" (76.2 cm) is recommended. A B C 3" (7.6 cm) D A. Vent extension piece, at least 3" (7.6 cm) high ...
...cm) max. Two 90° elbows = 20 ft (6.1 m) B. 1 wall cap = 40 ft (12.2 m) C. 1 rectangular to change without notice. For complete details, see Installation our products, we reserve the right to round transition piece = 5 ft (1.5 m) D. 2 ft (0.6 m) + 6 ft (1.8 m) straight = 8 ft (2.4 m) D 3 ... C A. Rectangular to round transition piece: 3 " x 10" to 6" = 5 ft (8.3 x 25.4 cm to improve Dimensions are for 66" (167.6 cm) installation height. Grounded 3-prong outlet *30" (76.2 cm) is recommended. A B C 3" (7.6 cm) D A. Vent extension piece, at least 3" (7.6 cm) high ...

Warranty Information
Page 1
...appliance, unless such damage results from defects in a remote area where service by an authorized KitchenAid servicer is not available. 9. This warranty is not installed in materials or workmanship. IMPLIED WARRANTIES, INCLUDING WARRANTIES OF MERCHANTABILITY OR FITNESS FOR A PARTICULAR PURPOSE...fire, flood, acts of God, improper installation, installation not in accordance with any questions or concerns at the number below. If you need assistance using your major appliance, to instruct you may contact KitchenAid at : KitchenAid Brand Home Appliances Customer eXperience Center 553 ...
...appliance, unless such damage results from defects in a remote area where service by an authorized KitchenAid servicer is not available. 9. This warranty is not installed in materials or workmanship. IMPLIED WARRANTIES, INCLUDING WARRANTIES OF MERCHANTABILITY OR FITNESS FOR A PARTICULAR PURPOSE...fire, flood, acts of God, improper installation, installation not in accordance with any questions or concerns at the number below. If you need assistance using your major appliance, to instruct you may contact KitchenAid at : KitchenAid Brand Home Appliances Customer eXperience Center 553 ...

