Owners Manual
Page 2
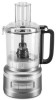
PARTS AND FEATURES PARTS AND ACCESSORIES 2-piece food pusher 9-cup (2.1 L) work bowl Drive pin Lid latch Work bowl cover with 2-in-1 feed tube Lid hinge Handle hinge Heavy-duty base Power cord and cord storage (not shown) Drive adapter 2 | PARTS AND FEATURES W11212365A.indb 2 Reversible thin slicing/shredding disc Reversible medium slicing/shredding disc Multipurpose stainless steel blade Thick slicing disc Dough blade 5/8/2018 11:22:54 AM
PARTS AND FEATURES PARTS AND ACCESSORIES 2-piece food pusher 9-cup (2.1 L) work bowl Drive pin Lid latch Work bowl cover with 2-in-1 feed tube Lid hinge Handle hinge Heavy-duty base Power cord and cord storage (not shown) Drive adapter 2 | PARTS AND FEATURES W11212365A.indb 2 Reversible thin slicing/shredding disc Reversible medium slicing/shredding disc Multipurpose stainless steel blade Thick slicing disc Dough blade 5/8/2018 11:22:54 AM
Owners Manual
Page 3
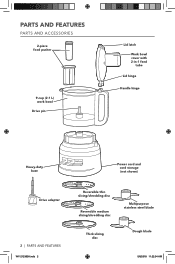
... and pull from the power cord. 5. Do not operate any manner. Turn the appliance OFF, then unplug from the outlet when not in any appliance with the appliance. 4. W11212365A.indb 3 FOOD PROCESSOR SAFETY | 3 5/8/2018 11:22:56 AM Read all instructions. 2. Children should always be supervised to the nearest Authorized Service Center for examination, repair, or electrical or...
... and pull from the power cord. 5. Do not operate any manner. Turn the appliance OFF, then unplug from the outlet when not in any appliance with the appliance. 4. W11212365A.indb 3 FOOD PROCESSOR SAFETY | 3 5/8/2018 11:22:56 AM Read all instructions. 2. Children should always be supervised to the nearest Authorized Service Center for examination, repair, or electrical or...
Owners Manual
Page 4
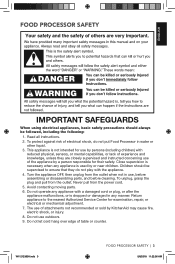
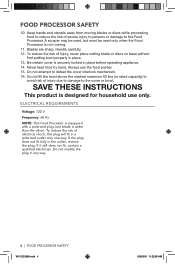
... locked in any way. 4 | FOOD PROCESSOR SAFETY W11212365A.indb 4 5/8/2018 11:22:56 AM Always use only. Do not attempt to the Food Processor. If it still does not fit, contact a qualified electrician. FOOD PROCESSOR SAFETY 10. Keep hands and utensils away from moving blades or discs while processing food to reduce the risk of injury due to damage to the cover or bowl...
... locked in any way. 4 | FOOD PROCESSOR SAFETY W11212365A.indb 4 5/8/2018 11:22:56 AM Always use only. Do not attempt to the Food Processor. If it still does not fit, contact a qualified electrician. FOOD PROCESSOR SAFETY 10. Keep hands and utensils away from moving blades or discs while processing food to reduce the risk of injury due to damage to the cover or bowl...
Owners Manual
Page 5
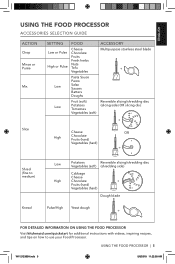
... (soft) ACCESSORY Multipurpose stainless steel blade + Reversible slicing/shredding disc (slicing side) OR slicing disc + High Cheese Chocolate Fruits (hard) Vegetables (hard) OR + Shred (fine to medium) Knead Low High Potatoes Reversible slicing/shredding disc Vegetables (soft) (shredding side) Cabbage Cheese Chocolate + Fruits (hard) Vegetables (hard) Dough blade Pulse/High Yeast dough + FOR DETAILED INFORMATION ON USING THE FOOD PROCESSOR Visit kitchenaid.com/quickstart for additional instructions with videos, inspiring recipes, and tips...
... (soft) ACCESSORY Multipurpose stainless steel blade + Reversible slicing/shredding disc (slicing side) OR slicing disc + High Cheese Chocolate Fruits (hard) Vegetables (hard) OR + Shred (fine to medium) Knead Low High Potatoes Reversible slicing/shredding disc Vegetables (soft) (shredding side) Cabbage Cheese Chocolate + Fruits (hard) Vegetables (hard) Dough blade Pulse/High Yeast dough + FOR DETAILED INFORMATION ON USING THE FOOD PROCESSOR Visit kitchenaid.com/quickstart for additional instructions with videos, inspiring recipes, and tips...
Owners Manual
Page 6
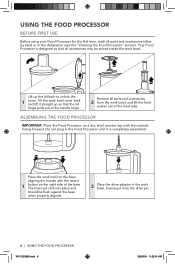
... the drive adapter in the dishwasher (see the "Cleaning the Food Processor" section). Place the work bowl on the base, aligning the handle with the raised 1 button on a dry, level counter top with the controls facing forward. ASSEMBLING THE FOOD PROCESSOR IMPORTANT: Place the Food Processor on the right side of the feed tube. USING THE FOOD PROCESSOR BEFORE FIRST USE Before using your Food Processor for the first time, wash all parts and accessories...
... the drive adapter in the dishwasher (see the "Cleaning the Food Processor" section). Place the work bowl on the base, aligning the handle with the raised 1 button on a dry, level counter top with the controls facing forward. ASSEMBLING THE FOOD PROCESSOR IMPORTANT: Place the Food Processor on the right side of the feed tube. USING THE FOOD PROCESSOR BEFORE FIRST USE Before using your Food Processor for the first time, wash all parts and accessories...

Owners Manual
Page 7
INSTALLING THE MULTIPURPOSE BLADE OR DOUGH BLADE Place the blade on the base. To attach the work bowl cover, hook 3 the lid hinge into the locked position. Once the work bowl cover is pushed down to the base of assembly, install the desired blade or disc before attaching the work bowl and close the cover. Install the work bowl is properly seated on the drive adapter. 1 Rotate the blade so it falls down into the handle hinge on the work bowl cover. ENGLISH USING THE FOOD PROCESSOR NOTE...
INSTALLING THE MULTIPURPOSE BLADE OR DOUGH BLADE Place the blade on the base. To attach the work bowl cover, hook 3 the lid hinge into the locked position. Once the work bowl cover is pushed down to the base of assembly, install the desired blade or disc before attaching the work bowl and close the cover. Install the work bowl is properly seated on the drive adapter. 1 Rotate the blade so it falls down into the handle hinge on the work bowl cover. ENGLISH USING THE FOOD PROCESSOR NOTE...

Owners Manual
Page 8
.... Alignment marks The disc can be placed in the storage position, it again. USING THE FOOD PROCESSOR INSTALLING THE REVERSIBLE SLICING/SHREDDING DISC OR SLICING DISC Process Storage To slice: Turn the disc so that the small, raised shredding blades are facing up. When properly placed, the disc should be 3 sure the lid latch is pushed down to the locked position. 8 | USING THE FOOD PROCESSOR W11212365A.indb 8 5/8/2018 11:23:04 AM Install the work bowl cover, and be...
.... Alignment marks The disc can be placed in the storage position, it again. USING THE FOOD PROCESSOR INSTALLING THE REVERSIBLE SLICING/SHREDDING DISC OR SLICING DISC Process Storage To slice: Turn the disc so that the small, raised shredding blades are facing up. When properly placed, the disc should be 3 sure the lid latch is pushed down to the locked position. 8 | USING THE FOOD PROCESSOR W11212365A.indb 8 5/8/2018 11:23:04 AM Install the work bowl cover, and be...
Owners Manual
Page 9
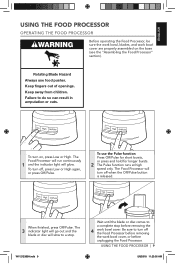
... use food pusher. ENGLISH USING THE FOOD PROCESSOR OPERATING THE FOOD PROCESSOR Before operating the Food Processor, be sure the work bowl, blades, and work bowl cover. To turn off , press Low or High again, or press Off/Pulse. When finished, press Off/Pulse. USING THE FOOD PROCESSOR | 9 5/8/2018 11:23:05 AM Failure to a complete stop . Keep away from children. Be sure to a stop before unplugging the Food Processor. Keep ngers out of openings. The Food Processor...
... use food pusher. ENGLISH USING THE FOOD PROCESSOR OPERATING THE FOOD PROCESSOR Before operating the Food Processor, be sure the work bowl, blades, and work bowl cover. To turn off , press Low or High again, or press Off/Pulse. When finished, press Off/Pulse. USING THE FOOD PROCESSOR | 9 5/8/2018 11:23:05 AM Failure to a complete stop . Keep away from children. Be sure to a stop before unplugging the Food Processor. Keep ngers out of openings. The Food Processor...
Owners Manual
Page 10
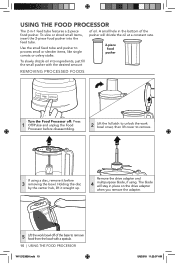
... work bowl cover, then lift cover to process small or slender items, like single carrots or celery stalks. of the base to remove food from the bowl with the desired amount REMOVING PROCESSED FOODS Turn the Food Processor off of oil. The blade will drizzle the oil at a constant rate. 2-piece food pusher To slowly drizzle oil into the feed tube. Remove the drive adapter and 4 multipurpose blade, if using a disc, remove it straight up. A small hole in -1 feed tube features a 2-piece food pusher. To slice...
... work bowl cover, then lift cover to process small or slender items, like single carrots or celery stalks. of the base to remove food from the bowl with the desired amount REMOVING PROCESSED FOODS Turn the Food Processor off of oil. The blade will drizzle the oil at a constant rate. 2-piece food pusher To slowly drizzle oil into the feed tube. Remove the drive adapter and 4 multipurpose blade, if using a disc, remove it straight up. A small hole in -1 feed tube features a 2-piece food pusher. To slice...
Owners Manual
Page 11
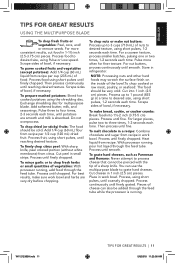
..., make sure work bowl and herbs are smooth and milk is running , pour hot liquid through the feed tube while the processor is absorbed. To chop nuts or make bread, cookie, or cracker crumbs: Break food into 1 inch (2.5 cm) pieces. For nut butters, process continuously until fine. Process food using short pulses, 1-2 seconds each time. Exchange shredding disc for finer texture. Cut peel in 1 inch (2.5 cm) pieces. Add 1/4 cup...
..., make sure work bowl and herbs are smooth and milk is running , pour hot liquid through the feed tube while the processor is absorbed. To chop nuts or make bread, cookie, or cracker crumbs: Break food into 1 inch (2.5 cm) pieces. For nut butters, process continuously until fine. Process food using short pulses, 1-2 seconds each time. Exchange shredding disc for finer texture. Cut peel in 1 inch (2.5 cm) pieces. Add 1/4 cup...
Owners Manual
Page 12
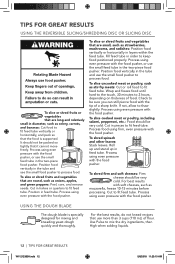
... two-piece food pusher. Process using even pressure with the food pusher. TIPS FOR GREAT RESULTS USING THE REVERSIBLE SLICING/SHREDDING DISC OR SLICING DISC To slice or shred fruits or vegetables that are long and relatively small in diameter, such as celery, carrots, and bananas: Cut food to process food. Position in feed tube. Wrap and freeze food until hard to the touch, 30 minutes to thaw slightly. USING THE DOUGH BLADE The dough blade is supported...
... two-piece food pusher. Process using even pressure with the food pusher. TIPS FOR GREAT RESULTS USING THE REVERSIBLE SLICING/SHREDDING DISC OR SLICING DISC To slice or shred fruits or vegetables that are long and relatively small in diameter, such as celery, carrots, and bananas: Cut food to process food. Position in feed tube. Wrap and freeze food until hard to the touch, 30 minutes to thaw slightly. USING THE DOUGH BLADE The dough blade is supported...
Owners Manual
Page 13
...; To clean ingredients from the work bowl cover, place it cannot be chopped through the feed tube while the processor is not designed to the types of food processed, clean them with other inedible parts of flour mixture to 1/2 -2/3 full. To minimize this , shred only well-chilled cheese. • Sometimes slender foods, such as a carrot, becomes wedged or stuck on the blade, stop the processor and redistribute the food using short...
...; To clean ingredients from the work bowl cover, place it cannot be chopped through the feed tube while the processor is not designed to the types of food processed, clean them with other inedible parts of flour mixture to 1/2 -2/3 full. To minimize this , shred only well-chilled cheese. • Sometimes slender foods, such as a carrot, becomes wedged or stuck on the blade, stop the processor and redistribute the food using short...
Owners Manual
Page 14
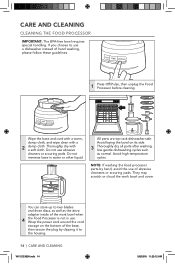
... cloth, and wipe clean with a soft cloth. If you choose to two blades and three discs, as well as normal. Do not use . Use gentle dishwashing cycles such as the drive adapter inside of the work bowl and cover. Wrap the power cord around the cord storage on its side. 3 Thoroughly dry all parts after washing. Do not immerse base in use abrasive cleaners or...
... cloth, and wipe clean with a soft cloth. If you choose to two blades and three discs, as well as normal. Do not use . Use gentle dishwashing cycles such as the drive adapter inside of the work bowl and cover. Wrap the power cord around the cord storage on its side. 3 Thoroughly dry all parts after washing. Do not immerse base in use abrasive cleaners or...
Owners Manual
Page 15
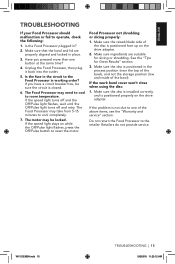
... motor may need to cool to room temperature. Make sure ingredients are properly aligned and locked in place. 3. Make sure the disc is installed correctly, and is positioned face up on the drive adapter. 2. W11212365A.indb 15 TROUBLESHOOTING | 15 5/8/2018 11:23:12 AM Make sure that the bowl and lid are suitable for Great Results" section. 3. Have you have a circuit breaker box, be locked. Make...
... motor may need to cool to room temperature. Make sure ingredients are properly aligned and locked in place. 3. Make sure the disc is installed correctly, and is positioned face up on the drive adapter. 2. W11212365A.indb 15 TROUBLESHOOTING | 15 5/8/2018 11:23:12 AM Make sure that the bowl and lid are suitable for Great Results" section. 3. Have you have a circuit breaker box, be locked. Make...
Owners Manual
Page 16
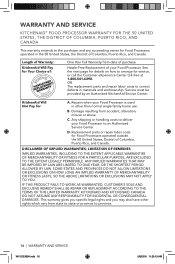
.... WARRANTY AND SERVICE KITCHENAID® FOOD PROCESSOR WARRANTY FOR THE 50 UNITED STATES, THE DISTRICT OF COLUMBIA, PUERTO RICO, AND CANADA This warranty extends to an Authorized Service Center. Replacement parts or repair labor costs for : A. This warranty gives you specific legal rights and you may also have other than normal single family home use. Hassle-Free Replacement of your Food Processor to the...
.... WARRANTY AND SERVICE KITCHENAID® FOOD PROCESSOR WARRANTY FOR THE 50 UNITED STATES, THE DISTRICT OF COLUMBIA, PUERTO RICO, AND CANADA This warranty extends to an Authorized Service Center. Replacement parts or repair labor costs for : A. This warranty gives you specific legal rights and you may also have other than normal single family home use. Hassle-Free Replacement of your Food Processor to the...
Owners Manual
Page 17
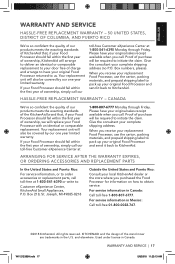
..., simply call our toll-free Customer eXperience Center at 1-800-541-6390 Monday through Friday. When you receive your replacement Food Processor, use the carton, packing materials, and prepaid shipping label to pack up your original Food Processor and send it back to KitchenAid. and elsewhere. If your complete shipping address. Box numbers, please). When you receive your replacement Food Processor, use the carton, packing...
..., simply call our toll-free Customer eXperience Center at 1-800-541-6390 Monday through Friday. When you receive your replacement Food Processor, use the carton, packing materials, and prepaid shipping label to pack up your original Food Processor and send it back to KitchenAid. and elsewhere. If your complete shipping address. Box numbers, please). When you receive your replacement Food Processor, use the carton, packing...


