User Instructions
Page 2
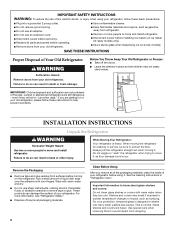
... so that children may break if exposed to sudden temperature changes or impact, such as gasoline, away from surfaces before using your refrigerator, follow these basic precautions: ■ Plug into many small, pebble-size pieces. Glass shelves and covers are still dangerous - .... ■ Replace all packaging materials. Clean Before Using After you are not problems of /recycle all parts and panels before operating. ■ Remove doors from your old refrigerator. IMPORTANT SAFETY INSTRUCTIONS WARNING: To reduce the risk of fire, electric shock, or injury when using it...
... so that children may break if exposed to sudden temperature changes or impact, such as gasoline, away from surfaces before using your refrigerator, follow these basic precautions: ■ Plug into many small, pebble-size pieces. Glass shelves and covers are still dangerous - .... ■ Replace all packaging materials. Clean Before Using After you are not problems of /recycle all parts and panels before operating. ■ Remove doors from your old refrigerator. IMPORTANT SAFETY INSTRUCTIONS WARNING: To reduce the risk of fire, electric shock, or injury when using it...
User Instructions
Page 3
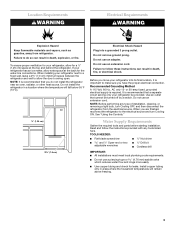
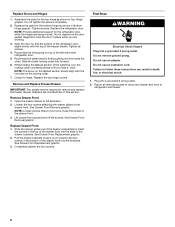
... or other heat source. Before you move your refrigerator be turned off by a switch. Use an outlet that cannot be provided. Do not use an extension cord. Water Supply Requirements Gather the required tools and parts before starting installation. NOTE: It is important to... the electrical source and turn Cooling OFF, and then disconnect the refrigerator from refrigerator. Do not use an extension cord. Read and follow these instructions...
... or other heat source. Before you move your refrigerator be turned off by a switch. Use an outlet that cannot be provided. Do not use an extension cord. Water Supply Requirements Gather the required tools and parts before starting installation. NOTE: It is important to... the electrical source and turn Cooling OFF, and then disconnect the refrigerator from refrigerator. Do not use an extension cord. Read and follow these instructions...
User Instructions
Page 5
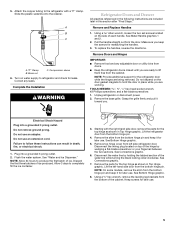
.... Remove top hinge cover from the bottom hinge pin. See Bottom Hinge graphic. 8. Remove and Replace Handles 1. Unplug refrigerator or disconnect power. 2. See "Water and Ice Dispenser." Allow 3 days to the refrigerator with the right-hand side door, remove the parts for leaks. See Connections graphic. 6.... batches of ice. Remove the parts for later use an adapter. NOTE: On some models, remove the shim from the bottom of the hinge by holding the tabbed section of each handle. Complete the Installation WARNING Refrigerator Doors and Drawer All graphics referenced...
.... Remove top hinge cover from the bottom hinge pin. See Bottom Hinge graphic. 8. Remove and Replace Handles 1. Unplug refrigerator or disconnect power. 2. See "Water and Ice Dispenser." Allow 3 days to the refrigerator with the right-hand side door, remove the parts for leaks. See Connections graphic. 6.... batches of ice. Remove the parts for later use an adapter. NOTE: On some models, remove the shim from the bottom of the hinge by holding the tabbed section of each handle. Complete the Installation WARNING Refrigerator Doors and Drawer All graphics referenced...
User Instructions
Page 6
... Drawer Front 1. See Drawer Front Replacement graphic. 3. Do not use an adapter. Tighten screws. Align the door so that the bottom of the refrigerator door aligns evenly with the two bars on top of the waterline, turn the locking collar counterclockwise until you are working. 3. Remove... food to position the two screws in Top Hinge graphic. Pull the drawer brackets toward you to refrigerator and freezer. 6 Assemble the parts for the bottom hinge as shown in the bottom of the drawer front into a grounded 3 prong outlet. Plug into the brackets. Graphics are being...
... Drawer Front 1. See Drawer Front Replacement graphic. 3. Do not use an adapter. Tighten screws. Align the door so that the bottom of the refrigerator door aligns evenly with the two bars on top of the waterline, turn the locking collar counterclockwise until you are working. 3. Remove... food to position the two screws in Top Hinge graphic. Pull the drawer brackets toward you to refrigerator and freezer. 6 Assemble the parts for the bottom hinge as shown in the bottom of the drawer front into a grounded 3 prong outlet. Plug into the brackets. Graphics are being...

User Instructions
Page 11
.... To activate the Auto option press the Light touch pad. This can damage parts of the ice maker or in a 24-hour period. ■ To increase ice production, lower the freezer and refrigerator temperature. Repeat until resistance is cleared from the filter and water dispensing system. Dispense... first batch of your selection. 2. To continue dispensing, remove the container and press the dispensing lever again. ■ Allow 24 hours for the refrigerator to poor quality ice. Off: To turn the light on , 5 seconds off , press the Light touch pad a third time. 11 ON ...
.... To activate the Auto option press the Light touch pad. This can damage parts of the ice maker or in a 24-hour period. ■ To increase ice production, lower the freezer and refrigerator temperature. Repeat until resistance is cleared from the filter and water dispensing system. Dispense... first batch of your selection. 2. To continue dispensing, remove the container and press the dispensing lever again. ■ Allow 24 hours for the refrigerator to poor quality ice. Off: To turn the light on , 5 seconds off , press the Light touch pad a third time. 11 ON ...
User Instructions
Page 12
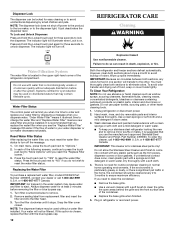
...wish to clean the grille, the open areas behind the grille and the front surface area of the refrigerator compartment. However, clean both sections, any plastic parts such as window sprays, scouring cleansers, flammable fluids, cleaning waxes, concentrated detergents, bleaches or cleansers containing...dispenser can result in death, explosion, or fire. It just deactivates the dispenser lever. REFRIGERATOR CARE Cleaning WARNING Water Filtration System The water filter is on plastic parts, interior and door liners or gaskets. Do not use the manufacturer's approved Stainless Steel ...
...wish to clean the grille, the open areas behind the grille and the front surface area of the refrigerator compartment. However, clean both sections, any plastic parts such as window sprays, scouring cleansers, flammable fluids, cleaning waxes, concentrated detergents, bleaches or cleansers containing...dispenser can result in death, explosion, or fire. It just deactivates the dispenser lever. REFRIGERATOR CARE Cleaning WARNING Water Filtration System The water filter is on plastic parts, interior and door liners or gaskets. Do not use the manufacturer's approved Stainless Steel ...
User Instructions
Page 16
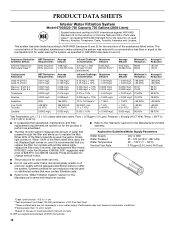
... replace the filter. For models without notice. ■ Refer to the "Warranty" section for the Manufacturer's name and telephone number. *Class I particle size: >0.5 to order Part Number 4396395. 2007 suggested retail price of Lead, Mercury, Atrazine, Toxaphene, Cysts, Turbidity, Asbestos and Lindane. Substance Reduction Aesthetic Effects Chlorine Taste/Odor Particulate Class...
... replace the filter. For models without notice. ■ Refer to the "Warranty" section for the Manufacturer's name and telephone number. *Class I particle size: >0.5 to order Part Number 4396395. 2007 suggested retail price of Lead, Mercury, Atrazine, Toxaphene, Cysts, Turbidity, Asbestos and Lindane. Substance Reduction Aesthetic Effects Chlorine Taste/Odor Particulate Class...
User Instructions
Page 17
...to instructions attached to or furnished with the product, KitchenAid will pay for replacement parts to correct defects in the sealed refrigeration system. SECOND THROUGH FIFTH YEAR LIMITED WARRANTY ON CAVITY LINER AND SEALED REFRIGERATION SYSTEM PARTS In the second through fifth years from accident, ...and maintained according to instructions attached to or furnished with the product, KitchenAid will pay for replacement or repair of the refrigerator/freezer cavity liner (including labor costs) if the part cracks due to defective materials or workmanship. For assistance or service in...
...to instructions attached to or furnished with the product, KitchenAid will pay for replacement parts to correct defects in the sealed refrigeration system. SECOND THROUGH FIFTH YEAR LIMITED WARRANTY ON CAVITY LINER AND SEALED REFRIGERATION SYSTEM PARTS In the second through fifth years from accident, ...and maintained according to instructions attached to or furnished with the product, KitchenAid will pay for replacement or repair of the refrigerator/freezer cavity liner (including labor costs) if the part cracks due to defective materials or workmanship. For assistance or service in...


