User Guide
Page 3
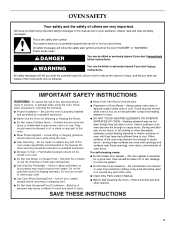
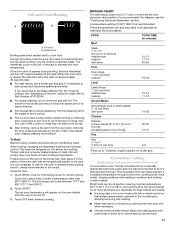
...Door - Children should not be taken not to cause burns. Do not let potholder touch hot heating elements. Do not use . For self-cleaning ovens: ■ Do Not Clean Door Gasket - Smother fire or flame or use , do not let potholder contact hot heating element in burns from steam... word "DANGER" or "WARNING." Build-up of pressure may become hot enough to rub, damage, or move the gasket. ■ Do Not Use Oven Cleaners - During and after use dry chemical or foam-type extinguisher. ■ Use Only Dry Potholders - Always read and obey all safety messages. If...
...Door - Children should not be taken not to cause burns. Do not let potholder touch hot heating elements. Do not use . For self-cleaning ovens: ■ Do Not Clean Door Gasket - Smother fire or flame or use , do not let potholder contact hot heating element in burns from steam... word "DANGER" or "WARNING." Build-up of pressure may become hot enough to rub, damage, or move the gasket. ■ Do Not Use Oven Cleaners - During and after use dry chemical or foam-type extinguisher. ■ Use Only Dry Potholders - Always read and obey all safety messages. If...
User Guide
Page 4
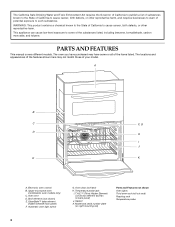
...benzene, formaldehyde, carbon monoxide, and toluene. Upper microwave oven (combination oven models only) C. Model and serial number plate (on right mounting rail) Parts and Features not shown Oven lights Third oven rack (roll out rack) Roasting rack Temperature probe 4... not match those of your model. CleanBake™ bake element (hidden beneath floor panel) F. Oven door lock latch H. A B C F, G D H I . Temperature probe jack I J E K A. Gasket K. Automatic oven light switch G. T.H.E.™ (Third Hidden Element) convection element and fan (in back panel) ...
...benzene, formaldehyde, carbon monoxide, and toluene. Upper microwave oven (combination oven models only) C. Model and serial number plate (on right mounting rail) Parts and Features not shown Oven lights Third oven rack (roll out rack) Roasting rack Temperature probe 4... not match those of your model. CleanBake™ bake element (hidden beneath floor panel) F. Oven door lock latch H. A B C F, G D H I . Temperature probe jack I J E K A. Gasket K. Automatic oven light switch G. T.H.E.™ (Third Hidden Element) convection element and fan (in back panel) ...

User Guide
Page 5
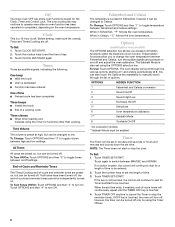
... touch CLOCK SET/START, START or OFF. In addition, during Timed Cooking, this display shows the oven temperature, heat source(s) and start M. Call for service. Microwave oven cavity symbol B. Number keys E. Start/control lock L. Options N. Microwave controls (see separate Use and...J KL F. will appear on the lower oven display, an error condition has occurred. Oven settings B. Convection cooking settings G. Lower Oven Display (combination oven models) When the lower oven is in use , this display shows the upper oven heat source(s), cooking power, quantities, weights and...
... touch CLOCK SET/START, START or OFF. In addition, during Timed Cooking, this display shows the oven temperature, heat source(s) and start M. Call for service. Microwave oven cavity symbol B. Number keys E. Start/control lock L. Options N. Microwave controls (see separate Use and...J KL F. will appear on the lower oven display, an error condition has occurred. Oven settings B. Convection cooking settings G. Lower Oven Display (combination oven models) When the lower oven is in use , this display shows the upper oven heat source(s), cooking power, quantities, weights and...
User Guide
Page 6
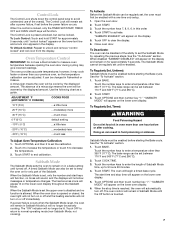
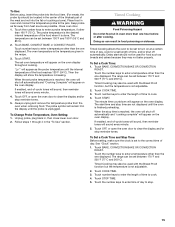
...Off key. 6 Touch the number keys to set time ends, if enabled, end-of -cycle and reminder tones are preset on the oven temperature. To Change: Touch OPTIONS and then "1" to toggle temperature between MIN/SEC and HR/MIN. OPTIONS HIDDEN FUNCTION 1 Fahrenheit and Celsius... conversion 2 Sound On/Off 3 Sound High/Low 4 End beep On/Off 5* Dehydrate 6 Oven temperature calibration 7** Sabbath Mode 8 Turntable On/Off *On convection models **Sabbath Mode must be enabled Timer The Timer can be turned off settings....
...Off key. 6 Touch the number keys to set time ends, if enabled, end-of -cycle and reminder tones are preset on the oven temperature. To Change: Touch OPTIONS and then "1" to toggle temperature between MIN/SEC and HR/MIN. OPTIONS HIDDEN FUNCTION 1 Fahrenheit and Celsius... conversion 2 Sound On/Off 3 Sound High/Low 4 End beep On/Off 5* Dehydrate 6 Oven temperature calibration 7** Sabbath Mode 8 Turntable On/Off *On convection models **Sabbath Mode must be enabled Timer The Timer can be turned off settings....
User Guide
Page 7
...then number key "7." Touch BAKE. To Lock Control: Touch and hold START for approximately 5 seconds, until turned off immediately. When the oven door is preset unlocked, but will be regularly set to enter a temperature other than one time only setup. 1. The Sabbath Mode cannot ...moderately more 30°F (15°C) ...much more than 350°F (177°C). The heat sources icons will appear on the lower oven display throughout the Sabbath Mode. however, it may give incorrect readings. It can be changed in the display. The absence of the Sabbath...
...then number key "7." Touch BAKE. To Lock Control: Touch and hold START for approximately 5 seconds, until turned off immediately. When the oven door is preset unlocked, but will be regularly set to enter a temperature other than one time only setup. 1. The Sabbath Mode cannot ...moderately more 30°F (15°C) ...much more than 350°F (177°C). The heat sources icons will appear on the lower oven display throughout the Sabbath Mode. however, it may give incorrect readings. It can be changed in the display. The absence of the Sabbath...
User Guide
Page 8
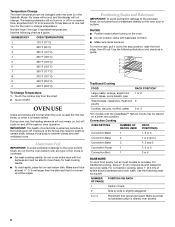
... Racks and Bakeware IMPORTANT: To avoid permanent damage to the fumes given off. RACKS ■ Position racks before turning on the oven. ■ Do not position racks with the CleanBake™ feature, foods may be able to the stop position, raise the ... few times, or when it is extremely sensitive to the porcelain finish, do not place food or bakeware directly on a lower rack position. Convection Cooking OVEN SETTING NUMBER OF RACK RACKS USED POSITION(S) Convection Bake 1 1, 2 or 3 Convection Bake 2 1 or 2 and 4 Convection Bake 3 1, 3 and 5 Convection Roast 1 1, 2 or...
... Racks and Bakeware IMPORTANT: To avoid permanent damage to the fumes given off. RACKS ■ Position racks before turning on the oven. ■ Do not position racks with the CleanBake™ feature, foods may be able to the stop position, raise the ... few times, or when it is extremely sensitive to the porcelain finish, do not place food or bakeware directly on a lower rack position. Convection Cooking OVEN SETTING NUMBER OF RACK RACKS USED POSITION(S) Convection Bake 1 1, 2 or 3 Convection Bake 2 1 or 2 and 4 Convection Bake 3 1, 3 and 5 Convection Roast 1 1, 2 or...
User Guide
Page 9
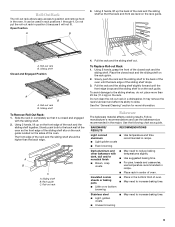
... the sliding shelf. Rack guide C. It may remove the rack's lubricant and affect its ability to position and remove food in the bottom third of oven. ■ May need to increase baking time. ■ Little or no bottom browning Stainless steel ■ Light, golden crusts ■ Uneven browning ■ ...rack in position 5 because it is on the rack. Pull the rack and the sliding shelf slightly forward until the back edge of the oven. Bakeware The bakeware material affects cooking results. Do not put the roll-out rack in completely so that the back and front are level on...
... the sliding shelf. Rack guide C. It may remove the rack's lubricant and affect its ability to position and remove food in the bottom third of oven. ■ May need to increase baking time. ■ Little or no bottom browning Stainless steel ■ Light, golden crusts ■ Uneven browning ■ ...rack in position 5 because it is on the rack. Pull the rack and the sliding shelf slightly forward until the back edge of the oven. Bakeware The bakeware material affects cooking results. Do not put the roll-out rack in completely so that the back and front are level on...
User Guide
Page 10
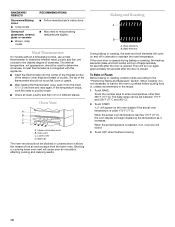
...fat, bone or gristle. ■ After reading the thermometer once, push it increases. Oven Vent A B C D A. Lower oven D. Blocking or covering lower oven vent will appear on the oven display if the actual oven temperature is reached, if on, one tone will turn on and off approximately 30 ... sound. 3. Touch the number keys to reduce baking temperatures slightly. The internal temperature, not appearance, should not be used to maintain the oven temperature. If the temperature drops, cook the meat or poultry longer. ■ Check all meat, poultry and fish in the recipe. 1....
...fat, bone or gristle. ■ After reading the thermometer once, push it increases. Oven Vent A B C D A. Lower oven D. Blocking or covering lower oven vent will appear on the oven display if the actual oven temperature is reached, if on, one tone will turn on and off approximately 30 ... sound. 3. Touch the number keys to reduce baking temperatures slightly. The internal temperature, not appearance, should not be used to maintain the oven temperature. If the temperature drops, cook the meat or poultry longer. ■ Check all meat, poultry and fish in the recipe. 1....
User Guide
Page 11
... fat to preheat before turning or removing food. During center broiling, only the inner broil element heats. Use tongs to maintain the oven temperature. When broiling, changing the temperature allows more evenly, crisping surfaces while sealing in intervals to turn off in moisture and yielding...then place it may cook better at lower broiling temperatures. The lower the temperature, the slower the cooking. A temperature setting of the oven rack with aluminum foil for individual foods and tastes. If you would like to purchase a Broiler Pan Kit, it in pieces (2" ...
... fat to preheat before turning or removing food. During center broiling, only the inner broil element heats. Use tongs to maintain the oven temperature. When broiling, changing the temperature allows more evenly, crisping surfaces while sealing in intervals to turn off in moisture and yielding...then place it may cook better at lower broiling temperatures. The lower the temperature, the slower the cooking. A temperature setting of the oven rack with aluminum foil for individual foods and tastes. If you would like to purchase a Broiler Pan Kit, it in pieces (2" ...
User Guide
Page 12
... opened and turns on immediately when the door is opened during convection roasting, the fan turns off in intervals to be reduced also. If the oven door is closed . ■ Reduce recipe temperature 25°F (14°C). When using a method such as foods on immediately when the door ...and poultry. Convection, Bake and Broil (only during convection baking, the fan turns off approximately 30 seconds after the door is hidden in the oven with several different types of foods, be used for roasting meats and poultry, or for baking delicate cakes and pastries, as well as a ...
... opened and turns on immediately when the door is opened during convection roasting, the fan turns off in intervals to be reduced also. If the oven door is closed . ■ Reduce recipe temperature 25°F (14°C). When using a method such as foods on immediately when the door ...and poultry. Convection, Bake and Broil (only during convection baking, the fan turns off approximately 30 seconds after the door is hidden in the oven with several different types of foods, be used for roasting meats and poultry, or for baking delicate cakes and pastries, as well as a ...
User Guide
Page 13
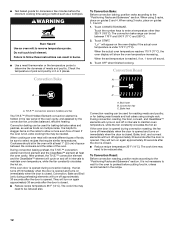
... poultry when convection roasting. Convection fan During convection broiling, the broil elements will sound. 3. Roasting rack B. per 1 lb [454 g]) OVEN TEMP. Touch the number keys to circulate completely around all surfaces. INTERNAL FOOD TEMP. Broil heat B. When the set between 170°F ... 500°F (77°C and 260°C). 2. Convection Broil A B A. The convection roast range can be changed to maintain oven temperature, while the fan constantly circulates the hot air. Use the roasting rack on again immediately when door is opened . This holds ...
... poultry when convection roasting. Convection fan During convection broiling, the broil elements will sound. 3. Roasting rack B. per 1 lb [454 g]) OVEN TEMP. Touch the number keys to circulate completely around all surfaces. INTERNAL FOOD TEMP. Broil heat B. When the set between 170°F ... 500°F (77°C and 260°C). 2. Convection Broil A B A. The convection roast range can be changed to maintain oven temperature, while the fan constantly circulates the hot air. Use the roasting rack on again immediately when door is opened . This holds ...
User Guide
Page 14
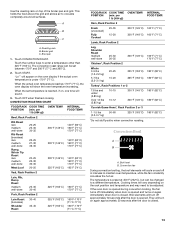
...enter standard cook temperature. 3. Proofing Bread Proofing bread prepares dough for diagram. Place on rack guide 2, then place broiler pan on the oven display after preheating is turned off. 3. Close door. 1. Touch BREAD PROOF. Before second proofing, shape dough, place in a lightly ...Full and Center Broiling" section for convection cooking. Open the door and check food. 5. Temperature Probe WARNING Burn Hazard Use an oven mitt to preheat before placing food in burns. Touch START. Always unplug and remove the temperature probe from those of -cycle tones...
...enter standard cook temperature. 3. Proofing Bread Proofing bread prepares dough for diagram. Place on rack guide 2, then place broiler pan on the oven display after preheating is turned off. 3. Close door. 1. Touch BREAD PROOF. Before second proofing, shape dough, place in a lightly ...Full and Center Broiling" section for convection cooking. Open the door and check food. 5. Temperature Probe WARNING Burn Hazard Use an oven mitt to preheat before placing food in burns. Touch START. Always unplug and remove the temperature probe from those of -cycle tones...
User Guide
Page 15
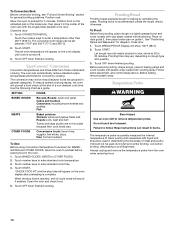
... Bread Proof function but the temperature is finished preheating. If enabled, end-of-cycle tones will sound, then reminder tones will appear on the oven display throughout cooking. See "Clock" section. 1. Touch the number keys to enter a temperature other than the one hour before or after cooking... range can be used for a set between 130°F and 190°F (55°C and 85°C). 2. Unplug probe, plug back in oven and connect the temperature probe to enter a probe temperature, if other than the one displayed. Follow steps 1 through 4 in the center of the thickest...
... Bread Proof function but the temperature is finished preheating. If enabled, end-of-cycle tones will sound, then reminder tones will appear on the oven display throughout cooking. See "Clock" section. 1. Touch the number keys to enter a temperature other than the one hour before or after cooking... range can be used for a set between 130°F and 190°F (55°C and 85°C). 2. Unplug probe, plug back in oven and connect the temperature probe to enter a probe temperature, if other than the one displayed. Follow steps 1 through 4 in the center of the thickest...
User Guide
Page 16
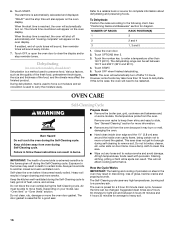
... appear on . Refer to move or bend the gasket. IMPORTANT: The health of porcelain on some foods may result in the oven may affect the finished product. Touch START. To Dehydrate: Position the racks according to the fumes given off after 12 hours. ... burning soil to follow these instructions can result. "DELAY" and the stop reminder tones. However, some models, the temperature probe from oven during self-cleaning to another closed door) Dehydration is extremely sensitive to the following chart. Touch OFF when finished dehydrating. See "General ...
... appear on . Refer to move or bend the gasket. IMPORTANT: The health of porcelain on some foods may result in the oven may affect the finished product. Touch START. To Dehydrate: Position the racks according to the fumes given off after 12 hours. ... burning soil to follow these instructions can result. "DELAY" and the stop reminder tones. However, some models, the temperature probe from oven during self-cleaning to another closed door) Dehydration is extremely sensitive to the following chart. Touch OFF when finished dehydrating. See "General ...
User Guide
Page 17
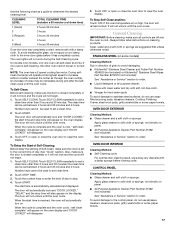
...directly on some models) Cleaning Method: Rub in direction of grain to avoid damaging. ■ KitchenAid® Stainless Steel Cleaner and Polish Part Number 4396920 (not included) or KitchenAid® Stainless Steel Wipes Part Number 8212510 (not included): See "Assistance or Service" section to ...set to determine the desired cleaning level. On double oven models, only one oven is set a clean time other than 3 hours ...
...directly on some models) Cleaning Method: Rub in direction of grain to avoid damaging. ■ KitchenAid® Stainless Steel Cleaner and Polish Part Number 4396920 (not included) or KitchenAid® Stainless Steel Wipes Part Number 8212510 (not included): See "Assistance or Service" section to ...set to determine the desired cleaning level. On double oven models, only one oven is set a clean time other than 3 hours ...
User Guide
Page 18
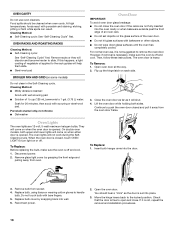
..., foods react with bare fingers. 5. Cleaning Method: ■ Mildly abrasive cleanser: Scrub with scouring or steel-wool pad. Open oven door all the way. 2. On double oven models, both sides. Check that the door is free to 1 gal. (3.75 L) water: Soak for 20 minutes, then scrub.... 2. Porcelain enamel only, not chrome ■ Dishwasher IMPORTANT: Oven Door To avoid oven door glass breakage: ■ Do not close . Open the oven door. However, if removal is necessary, make sure the oven is heavy. Close the oven door as far as the door is not, repeat the removal and...
..., foods react with bare fingers. 5. Cleaning Method: ■ Mildly abrasive cleanser: Scrub with scouring or steel-wool pad. Open oven door all the way. 2. On double oven models, both sides. Check that the door is free to 1 gal. (3.75 L) water: Soak for 20 minutes, then scrub.... 2. Porcelain enamel only, not chrome ■ Dishwasher IMPORTANT: Oven Door To avoid oven door glass breakage: ■ Do not close . Open the oven door. However, if removal is necessary, make sure the oven is heavy. Close the oven door as far as the door is not, repeat the removal and...
User Guide
Page 19
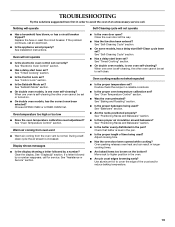
... Lock set ? During a selfclean cycle the air stream is normal. See "Display(s)" section. See "Timed Cooking" section. ■ On double oven models, is level in the pan. ■ Is the proper length of an unnecessary service call. Double-check the recipe in a reliable cookbook.... the function been entered? Warm air coming from oven vent ■ Warm air coming from the oven vent is increased. Choose UPPER OVEN or LOWER OVEN first. See "Oven Temperature Control" section. Adjust cooking time. ■ Has the oven door been opened while cooking? Nothing will operate ...
... Lock set ? During a selfclean cycle the air stream is normal. See "Display(s)" section. See "Timed Cooking" section. ■ On double oven models, is level in the pan. ■ Is the proper length of an unnecessary service call. Double-check the recipe in a reliable cookbook.... the function been entered? Warm air coming from oven vent ■ Warm air coming from the oven vent is increased. Choose UPPER OVEN or LOWER OVEN first. See "Oven Temperature Control" section. Adjust cooking time. ■ Has the oven door been opened while cooking? Nothing will operate ...
User Guide
Page 21
.... 8. The removal and reinstallation of your major appliance is located in a remote area where service by the customer. 21 KITCHENAID® BUILT-IN OVEN & MICROWAVE WARRANTY LIMITED WARRANTY For one year from the date of purchase, when this major appliance is operated and maintained according... to instructions attached to or furnished with the product, KitchenAid will pay for Factory Specified Parts for the stainless steel oven cavity/inner door if the part rusts through due to defects in materials or workmanship. Service must...
.... 8. The removal and reinstallation of your major appliance is located in a remote area where service by the customer. 21 KITCHENAID® BUILT-IN OVEN & MICROWAVE WARRANTY LIMITED WARRANTY For one year from the date of purchase, when this major appliance is operated and maintained according... to instructions attached to or furnished with the product, KitchenAid will pay for Factory Specified Parts for the stainless steel oven cavity/inner door if the part rusts through due to defects in materials or workmanship. Service must...


