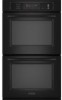
Use and Care Guide
Page 2
... Single Oven Control Panel Double Oven Control Panel Electronic Clock Operation Minute Timer How To Use the Single/Upper Oven How To Use the Lower Oven Baking and Convection Baking Rack Positions Baking Tips Convection Baking & Cooking Tips Pan Placement Bakeware Tips Baking/Convection Baking Chart Baking Problems and Causes Roasting and Convection Roasting Roasting Tips Roasting Chart Convection Roasting Chart Convection Cooking Meat Probe Broiling and Convection Broiling Broiling Tips Broiling Chart Automatic Time Cooking Dehydrating and Defrosting Oven Care and Cleaning Oven Self-Cleaning...
... Single Oven Control Panel Double Oven Control Panel Electronic Clock Operation Minute Timer How To Use the Single/Upper Oven How To Use the Lower Oven Baking and Convection Baking Rack Positions Baking Tips Convection Baking & Cooking Tips Pan Placement Bakeware Tips Baking/Convection Baking Chart Baking Problems and Causes Roasting and Convection Roasting Roasting Tips Roasting Chart Convection Roasting Chart Convection Cooking Meat Probe Broiling and Convection Broiling Broiling Tips Broiling Chart Automatic Time Cooking Dehydrating and Defrosting Oven Care and Cleaning Oven Self-Cleaning...
Use and Care Guide
Page 3
... the oven door to a qualified technician. 10. Use this appliance only in either oven. 6. Keep oven vent ducts unobstructed. 7. Install or locate this oven only for examination, repair or adjustment. 11. They should never be allowed to know this in this oven unless specifically recommended in use as described in case the electrical power to your main electrical switch is not working properly, or if it is in this manual...
... the oven door to a qualified technician. 10. Use this appliance only in either oven. 6. Keep oven vent ducts unobstructed. 7. Install or locate this oven only for examination, repair or adjustment. 11. They should never be allowed to know this in this oven unless specifically recommended in use as described in case the electrical power to your main electrical switch is not working properly, or if it is in this manual...
Use and Care Guide
Page 4
... seal. Use care when opening door. Let hot air or steam escape before removing or replacing food. 5. Never touch an oven light bulb with a damp cleaning cloth unless the power is cool to your oven for warming or heating the room. 2. Never use your oven to rub, damage, or move the gasket. Moist or damp potholders on hot surfaces may be taken not to clean miscellaneous parts.) SAVE THESE INSTRUCTIONS 4 Heating elements may...
... seal. Use care when opening door. Let hot air or steam escape before removing or replacing food. 5. Never touch an oven light bulb with a damp cleaning cloth unless the power is cool to your oven for warming or heating the room. 2. Never use your oven to rub, damage, or move the gasket. Moist or damp potholders on hot surfaces may be taken not to clean miscellaneous parts.) SAVE THESE INSTRUCTIONS 4 Heating elements may...

Use and Care Guide
Page 8
... single/upper and lower ovens. NOTE: The current time of the Display Window, START button, TIME knob and STOP/CANCEL button. To Set The Time of Day: Turn the TIME knob to the left until a total of the STOP/CANCEL button will cancel the Minute Timer and two touches will appear in the Display Window and increase in the Display Window. To use by touching the START button. ELECTRONIC CLOCK OPERATION The electronic clock controls...
... single/upper and lower ovens. NOTE: The current time of the Display Window, START button, TIME knob and STOP/CANCEL button. To Set The Time of Day: Turn the TIME knob to the left until a total of the STOP/CANCEL button will cancel the Minute Timer and two touches will appear in the Display Window and increase in the Display Window. To use by touching the START button. ELECTRONIC CLOCK OPERATION The electronic clock controls...
Use and Care Guide
Page 9
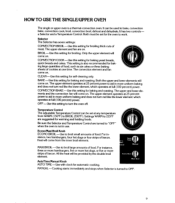
... or three baking sheets of meat. It can be set at full (100 percent) power. The convection element and fan come on . The upper and lower elements and the convection fan will be used to work. CONVECTION BAKE-Use this setting for automatic cooking. 2 hr • tart socal Auto Time Manual Econo Broil I Maxi Broil MANUAL -Cooking starts immediately and stops when Selector is a thermal-convection oven. BAKE-Use this setting for the oven to bake, convection bake, convection cook, broil, convection broil, defrost and dehydrate. It has two controls - Both the...
... or three baking sheets of meat. It can be set at full (100 percent) power. The convection element and fan come on . The upper and lower elements and the convection fan will be used to work. CONVECTION BAKE-Use this setting for automatic cooking. 2 hr • tart socal Auto Time Manual Econo Broil I Maxi Broil MANUAL -Cooking starts immediately and stops when Selector is a thermal-convection oven. BAKE-Use this setting for the oven to bake, convection bake, convection cook, broil, convection broil, defrost and dehydrate. It has two controls - Both the...
Use and Care Guide
Page 10
... baking and roasting. See baking chart, page 13. 3. It has two controls-a Selector and a Temperature Control. OFF -Use this setting to the recommended temperature. TIME BAKE-Use this setting for broiling, baking and roasting. NOTE: A fan may be set point. Arrange the oven racks in the desired positions. 2. Set the Temperature Control to turn red like the lower element, which can be used to work. Preheating the Oven For best results, preheat the oven until the Oven Indicator Light goes out when baking, convection baking and convection cooking...
... baking and roasting. See baking chart, page 13. 3. It has two controls-a Selector and a Temperature Control. OFF -Use this setting to the recommended temperature. TIME BAKE-Use this setting for broiling, baking and roasting. NOTE: A fan may be set point. Arrange the oven racks in the desired positions. 2. Set the Temperature Control to turn red like the lower element, which can be used to work. Preheating the Oven For best results, preheat the oven until the Oven Indicator Light goes out when baking, convection baking and convection cooking...
Use and Care Guide
Page 11
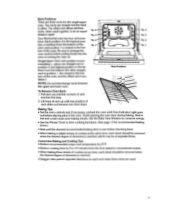
... front stops. Baking Tips • Set the oven controls and, if necessary, preheat the oven until Oven Indicator Light goes out before putting foods into the oven or turning the oven on. Your KitchenAid oven has four rack positions. Single/Upper Oven rack position recommendation -place one time, each sheet should be removed when the desired degree of doneness is reached. • Stagger cake pans in opposite directions on each sheet should be removed when...
... front stops. Baking Tips • Set the oven controls and, if necessary, preheat the oven until Oven Indicator Light goes out before putting foods into the oven or turning the oven on. Your KitchenAid oven has four rack positions. Single/Upper Oven rack position recommendation -place one time, each sheet should be removed when the desired degree of doneness is reached. • Stagger cake pans in opposite directions on each sheet should be removed when...
Use and Care Guide
Page 15
... of air circulating around the food. • A foil "tent" will continue to BAKE or CONVECTION BAKE. Place tent-shaped foil loosely over meat to 10°F lower than the desired doneness. If the temperature drops, return the meat to the oven for more and read again. Insert thermometer into the meat 1/2 inch or more cooking. • Remove roasted meats from the oven. 15 The meat will...
... of air circulating around the food. • A foil "tent" will continue to BAKE or CONVECTION BAKE. Place tent-shaped foil loosely over meat to 10°F lower than the desired doneness. If the temperature drops, return the meat to the oven for more and read again. Insert thermometer into the meat 1/2 inch or more cooking. • Remove roasted meats from the oven. 15 The meat will...
Use and Care Guide
Page 18
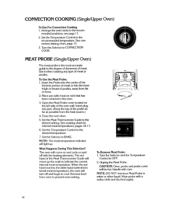
.... 7): 1771 I To Remove Meat Probe: 1. flj MEAT PROBE (Single/Upper Oven) The meat probe is the most accurate guide to cool. Place pan with care. Insert plug into the inner thigh or breast of the oven wall. See roasting chart for internal meat temperatures, pages 16-17. 6. Unplug the Meat Probe. Set the Temperature Control to BAKE. Turn the Selector to the desired temperature. 7. CONVECTION COOKING (Single/Upper Oven) To Use For Convection Cooking 1. See convection baking chart, page 13. 3. Open the Meat Probe cover located on rack that has been...
.... 7): 1771 I To Remove Meat Probe: 1. flj MEAT PROBE (Single/Upper Oven) The meat probe is the most accurate guide to cool. Place pan with care. Insert plug into the inner thigh or breast of the oven wall. See roasting chart for internal meat temperatures, pages 16-17. 6. Unplug the Meat Probe. Set the Temperature Control to BAKE. Turn the Selector to the desired temperature. 7. CONVECTION COOKING (Single/Upper Oven) To Use For Convection Cooking 1. See convection baking chart, page 13. 3. Open the Meat Probe cover located on rack that has been...
Use and Care Guide
Page 19
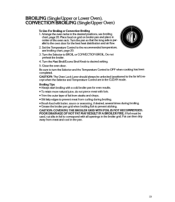
... oven racks in the CLEAN mode. Place food on grid on broiler pan and place in the broiler grid. Turn the Selector to OFF when cooking has been completed. Do not preheat the broiler. 4. Set the Temperature Control to desired setting. 5. Turn the Maxi Broil/Econo Broil Knob to the recommended temperature, see broiling chart, page 20. POOR DRAINAGE OF HOT FAT MAY RESULT IN A BROILER FIRE. BROILING (Single/Upper or Lower Oven), CONVECTION BROILING (Single/Upper Oven...
... oven racks in the CLEAN mode. Place food on grid on broiler pan and place in the broiler grid. Turn the Selector to OFF when cooking has been completed. Do not preheat the broiler. 4. Set the Temperature Control to desired setting. 5. Turn the Maxi Broil/Econo Broil Knob to the recommended temperature, see broiling chart, page 20. POOR DRAINAGE OF HOT FAT MAY RESULT IN A BROILER FIRE. BROILING (Single/Upper or Lower Oven), CONVECTION BROILING (Single/Upper Oven...
Use and Care Guide
Page 21
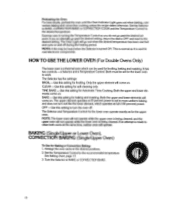
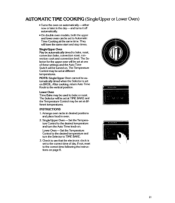
... same start and stop times. Arrange oven racks in desired positions and place food in the day -and turns it off automatically. • On double oven models, both the upper and lower oven can be used to bake or roast. Lower Oven-Set the Temperature Control to TIME BAKE. 3. They I 1 will be set at TIME BAKE and the Temperature Control may be turned on. NOTE: Single/Upper Oven cannot be set on BROIL. Single/Upper Oven -Set the Temperature Control to the desired temperature and turn...
... same start and stop times. Arrange oven racks in desired positions and place food in the day -and turns it off automatically. • On double oven models, both the upper and lower oven can be used to bake or roast. Lower Oven-Set the Temperature Control to TIME BAKE. 3. They I 1 will be set at TIME BAKE and the Temperature Control may be turned on. NOTE: Single/Upper Oven cannot be set on BROIL. Single/Upper Oven -Set the Temperature Control to the desired temperature and turn...
Use and Care Guide
Page 23
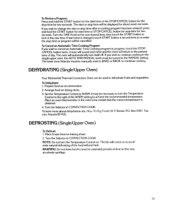
... the food without heat. Turn the Selector to WARM. DEFROSTING (Single/Upper Oven) To Defrost: 1. Set the Temperature Control to CONVECTION COOK. NOTE: Do not turn itself off. To learn more about seven seconds. To Review a Program: Press and hold the START button for start time or STOP/CANCEL button for stop time for extended periods of time as recommended. 2. A tone will sound each time and the clock will automatically turn the Temperature Control on to...
... the food without heat. Turn the Selector to WARM. DEFROSTING (Single/Upper Oven) To Defrost: 1. Set the Temperature Control to CONVECTION COOK. NOTE: Do not turn itself off. To learn more about seven seconds. To Review a Program: Press and hold the START button for start time or STOP/CANCEL button for stop time for extended periods of time as recommended. 2. A tone will sound each time and the clock will automatically turn the Temperature Control on to...
Use and Care Guide
Page 24
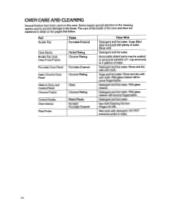
... on this oven. DO NOT immerse probe in Door and Control Panel Chrome Frame Glass Chrome Plating Control Knobs Oven Interior Meat Probe Plated Plastic Pyrolytic Porcelain Enamel Clean With Detergent and hot water. The care of the inside of water. Soap-filled steel wool pad with soft cloth. Soap and hot water. See Self-Cleaning Section (Pages 25-28). Some require special attention to the cleaning agents used on the...
... on this oven. DO NOT immerse probe in Door and Control Panel Chrome Frame Glass Chrome Plating Control Knobs Oven Interior Meat Probe Plated Plastic Pyrolytic Porcelain Enamel Clean With Detergent and hot water. The care of the inside of water. Soap-filled steel wool pad with soft cloth. Soap and hot water. See Self-Cleaning Section (Pages 25-28). Some require special attention to the cleaning agents used on the...
Use and Care Guide
Page 25
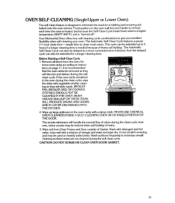
... baked onto the oven interior. A non-scratch scouring pad may be removed as these soils to 4 hours if a longer cleaning time is recommended 4- move oven racks according to eliminate the need for a longer cleaning time. BROILER PAN, BROILER GRID OR COOKING UTENSILS SHOULD NOT BE CLEANED IN THE OVEN. The smoke eliminator will slide easily. Wash with detergent and hot water, rinse well with vegetable oil after clean- OVEN SELF-CLEANING (Single...
... baked onto the oven interior. A non-scratch scouring pad may be removed as these soils to 4 hours if a longer cleaning time is recommended 4- move oven racks according to eliminate the need for a longer cleaning time. BROILER PAN, BROILER GRID OR COOKING UTENSILS SHOULD NOT BE CLEANED IN THE OVEN. The smoke eliminator will slide easily. Wash with detergent and hot water, rinse well with vegetable oil after clean- OVEN SELF-CLEANING (Single...
Use and Care Guide
Page 28
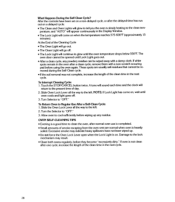
... the STOP/CANCEL button twice. Allow oven to the present time of the clean time in the oven after the delayed time has run out on . At the End of the clean time in the next cycle. Damage to Regular Use After a Self-Clean Cycle: 1. Turn the Selector to "OFF." After the controls have not been wiped up any powdery residue can be removed during the Self-Clean cycle...
... the STOP/CANCEL button twice. Allow oven to the present time of the clean time in the oven after the delayed time has run out on . At the End of the clean time in the next cycle. Damage to Regular Use After a Self-Clean Cycle: 1. Turn the Selector to "OFF." After the controls have not been wiped up any powdery residue can be removed during the Self-Clean cycle...
Use and Care Guide
Page 30
... action. 30 Write to operate, review the following list before calling your problem. Joseph, MI 49085 4. MACAP is the circuit breaker open? • Is the selector set in correct position? • Is Oven Lock Lever in proper position for cooking (left) or cleaning (right)? • Is AUTO TIME/MANUAL knob in turn inform us of the major appliance industry. IF YOU NEED SERVICE OR ASSISTANCE FOLLOW THESE STEPS...
... action. 30 Write to operate, review the following list before calling your problem. Joseph, MI 49085 4. MACAP is the circuit breaker open? • Is the selector set in correct position? • Is Oven Lock Lever in proper position for cooking (left) or cleaning (right)? • Is AUTO TIME/MANUAL knob in turn inform us of the major appliance industry. IF YOU NEED SERVICE OR ASSISTANCE FOLLOW THESE STEPS...
Use and Care Guide
Page 31
... exclusion or limitation of the oven. 2. C. D. Any labor costs during the limited warranty. Joseph, Michigan, USA 49085 31 Service must be repaired in materials or workmanship. Replacement of the electric elements if found to correct defects in the home. E. KITCHENAID, INC. St. KITCHENAID WILL NOT PAY FOR: A. Service calls to use . Instruct you . Replace house fuses or correct house wiring. 4. Correct house plumbing. Damage resulting...
... exclusion or limitation of the oven. 2. C. D. Any labor costs during the limited warranty. Joseph, Michigan, USA 49085 31 Service must be repaired in materials or workmanship. Replacement of the electric elements if found to correct defects in the home. E. KITCHENAID, INC. St. KITCHENAID WILL NOT PAY FOR: A. Service calls to use . Instruct you . Replace house fuses or correct house wiring. 4. Correct house plumbing. Damage resulting...
Installation Instructions
Page 1
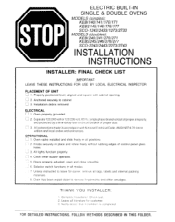
.... J 3. Clock timer buzzer operates. ELECTRIC BUILT-IN SINGLE & DOUBLE OVENS MODELS (singles): KEt31140/141/170/171 KEBS145/146/176/177 SCO-1243/2433/1273/2733 MODELS (doubles): KEB1240/241/270/271 KEBS245/246/276/277 SCO-2243124431227312743 INSTALLATION INSTRUCTIONS INSTALLER: FINAL CHECK LIST LEAVE THESE INSTRUCTIONS IMPORTANT: FOR USE BY LOCAL ELECTRICAL INSPECTOR PLACEMENT OF UNIT @ 1. Doors properly adjusted, open and close smoothly _' 6. Selector switch functions in accordance with cabinet opening. Leave all posrtlons. n 3. ELECTRICAL n 1. All connections...
.... J 3. Clock timer buzzer operates. ELECTRIC BUILT-IN SINGLE & DOUBLE OVENS MODELS (singles): KEt31140/141/170/171 KEBS145/146/176/177 SCO-1243/2433/1273/2733 MODELS (doubles): KEB1240/241/270/271 KEBS245/246/276/277 SCO-2243124431227312743 INSTALLATION INSTRUCTIONS INSTALLER: FINAL CHECK LIST LEAVE THESE INSTRUCTIONS IMPORTANT: FOR USE BY LOCAL ELECTRICAL INSPECTOR PLACEMENT OF UNIT @ 1. Doors properly adjusted, open and close smoothly _' 6. Selector switch functions in accordance with cabinet opening. Leave all posrtlons. n 3. ELECTRICAL n 1. All connections...
Installation Instructions
Page 2
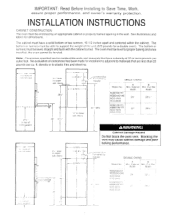
... dimensions. Note: Clearances specified are less than 20 pounds per cubic foot. ft. INSTALLATION INSTRUCTIONS CABINET CONSTRUCTION The oven must be level, straight and flush with the cabinet cutout. The bottom or runners must be leveled. The oven must be enclosed by lns1aller SINGLE OVENS Model No -- ---_- No evaluation of clearances has been made for a double oven). Cabinet Damage Hazard Do Not block the oven vent...
... dimensions. Note: Clearances specified are less than 20 pounds per cubic foot. ft. INSTALLATION INSTRUCTIONS CABINET CONSTRUCTION The oven must be level, straight and flush with the cabinet cutout. The bottom or runners must be leveled. The oven must be enclosed by lns1aller SINGLE OVENS Model No -- ---_- No evaluation of clearances has been made for a double oven). Cabinet Damage Hazard Do Not block the oven vent...
Installation Instructions
Page 5
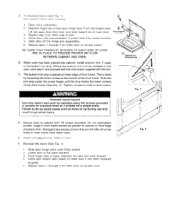
... instructions supplied with a8 screws provided. E Install unwrapped oven racks in front frame have been used , or the bottom trim strip. Depress the tabs and slide forward. 4 Close and reopen door slowly to cabinet with the trim. Slide door off the hinge arm assemblies. 6 Repeat steps 1 through 4 for a single oven). Oven door IS heavy 1 Open door completely. 2. Tighten screws to hold to cabinets using the screws provided (4 screws for a double oven...
... instructions supplied with a8 screws provided. E Install unwrapped oven racks in front frame have been used , or the bottom trim strip. Depress the tabs and slide forward. 4 Close and reopen door slowly to cabinet with the trim. Slide door off the hinge arm assemblies. 6 Repeat steps 1 through 4 for a single oven). Oven door IS heavy 1 Open door completely. 2. Tighten screws to hold to cabinets using the screws provided (4 screws for a double oven...


