
Dimension Guide
Page 1
..." (58.4 cm) max. Recessed oven E. Cabinet 27" (68.6 cm) models A. 27" (68.6 cm) min. recessed depth E. 27¹⁄₂" (69.9 cm) recessed height 27" (68.6 cm) models A. 25 64.3 cm) max. recessed depth E. 49 125.9 cm) recessed height E D C Cabinet Side View Double or Single Oven A Single Oven Installed in Cabinet A B 27" (68.6 cm) models 30" (76.2 cm) models A. 27" (68.6 cm) min. top of...
..." (58.4 cm) max. Recessed oven E. Cabinet 27" (68.6 cm) models A. 27" (68.6 cm) min. recessed depth E. 27¹⁄₂" (69.9 cm) recessed height 27" (68.6 cm) models A. 25 64.3 cm) max. recessed depth E. 49 125.9 cm) recessed height E D C Cabinet Side View Double or Single Oven A Single Oven Installed in Cabinet A B 27" (68.6 cm) models 30" (76.2 cm) models A. 27" (68.6 cm) min. top of...

Installation Guide
Page 2
...that are very important. Given dimensions provide minimum clearance with bottom of cabinet cutout. Floor must be located in a wall cabinet. Always read and obey all electrical connections be killed or seriously injured if you and others are shown must be...if you are not followed. WARNING You can happen if the instructions are installing the junction box on your appliance. single oven (2), double oven (4) ■ Bottom vent (supplied on some models) ■ Two #8-18 x ³⁄₈" screws - Location Requirements IMPORTANT: Observe all governing codes and ...
...that are very important. Given dimensions provide minimum clearance with bottom of cabinet cutout. Floor must be located in a wall cabinet. Always read and obey all electrical connections be killed or seriously injured if you and others are shown must be...if you are not followed. WARNING You can happen if the instructions are installing the junction box on your appliance. single oven (2), double oven (4) ■ Bottom vent (supplied on some models) ■ Two #8-18 x ³⁄₈" screws - Location Requirements IMPORTANT: Observe all governing codes and ...

Installation Guide
Page 3
... B. 28³⁄₄" (73.0 cm) max. Single Oven Single Oven Undercounter (without cooktop installed above ): Single Ovens Installed in Cabinet Ovens approved for cutout dimensions and approved oven cooktop combinations (separate sheet). Undercounter Installation (with cooktop installed above ) A B 27" (68.6 cm) models A. 27" (68.6 cm) min. Refer to floor D. 25&#...;₂" (72.4 cm) cutout width E. 1¹⁄₂" (3.8 cm) min. cutout height 30" (76.2 cm) models A. 30" (76.2 cm) min. Single Oven A F D E B E C D C 27" (68.6 cm) models A. 25 64.3 cm) max.
... B. 28³⁄₄" (73.0 cm) max. Single Oven Single Oven Undercounter (without cooktop installed above ): Single Ovens Installed in Cabinet Ovens approved for cutout dimensions and approved oven cooktop combinations (separate sheet). Undercounter Installation (with cooktop installed above ) A B 27" (68.6 cm) models A. 27" (68.6 cm) min. Refer to floor D. 25&#...;₂" (72.4 cm) cutout width E. 1¹⁄₂" (3.8 cm) min. cutout height 30" (76.2 cm) models A. 30" (76.2 cm) min. Single Oven A F D E B E C D C 27" (68.6 cm) models A. 25 64.3 cm) max.

Installation Guide
Page 4
... above code standards can be connected to 7.2 kW at 208 volts) require a separate 40-amp circuit. Oven front D. Single or Double Ovens A B E C D E C 27" (68.6 cm) models A. 27" (68.6 cm) min. cutout height A. 23¹⁄₄" (59.1 cm) min. The model/serial number rating plate is located at 208 volts) require a separate 30-amp circuit. ■ A time...
... above code standards can be connected to 7.2 kW at 208 volts) require a separate 40-amp circuit. Oven front D. Single or Double Ovens A B E C D E C 27" (68.6 cm) models A. 27" (68.6 cm) min. cutout height A. 23¹⁄₄" (59.1 cm) min. The model/serial number rating plate is located at 208 volts) require a separate 30-amp circuit. ■ A time...

Installation Guide
Page 7
... not operate, check the following: ■ Household fuse is taped to open the oven door. Check Operation of Single Oven" steps 2-6. 2. Push against seal area of Single Oven 1. On some models, the oven vent is intact and tight; Oven vent 6. If it is an extra part, go and open and close. Display panel will go back through holes...
... not operate, check the following: ■ Household fuse is taped to open the oven door. Check Operation of Single Oven" steps 2-6. 2. Push against seal area of Single Oven 1. On some models, the oven vent is intact and tight; Oven vent 6. If it is an extra part, go and open and close. Display panel will go back through holes...

Use & Care Guide
Page 1
... of Contents/Table des matières 2 Models/Modèles KEBK101 W10162179A KEBK171 KEBK206 KEBK276 BUILT-IN ELECTRIC SINGLE AND DOUBLE OVENS Use & Care Guide For questions about features, operation/performance, parts, accessories or service, call: 1-800-422-1230 or visit our website at www.kitchenaid.com In Canada, call for assistance, installation...
... of Contents/Table des matières 2 Models/Modèles KEBK101 W10162179A KEBK171 KEBK206 KEBK276 BUILT-IN ELECTRIC SINGLE AND DOUBLE OVENS Use & Care Guide For questions about features, operation/performance, parts, accessories or service, call: 1-800-422-1230 or visit our website at www.kitchenaid.com In Canada, call for assistance, installation...

Use & Care Guide
Page 4
... can cause low-level exposure to some or all of the items listed. Model and serial number plate (on double oven models) F. PARTS AND FEATURES This manual covers different models. WARNING: This product contains a chemical known to the State of California to... features shown here may have purchased may not match those of your model. A B F, G C H D I . CleanBake™ element (hidden beneath floor panel) E. Oven vent C. Automatic oven light switch G. Oven door lock latch H. The oven you have some of the substances listed, including benzene, formaldehyde, carbon...
... can cause low-level exposure to some or all of the items listed. Model and serial number plate (on double oven models) F. PARTS AND FEATURES This manual covers different models. WARNING: This product contains a chemical known to the State of California to... features shown here may have purchased may not match those of your model. A B F, G C H D I . CleanBake™ element (hidden beneath floor panel) E. Oven vent C. Automatic oven light switch G. Oven door lock latch H. The oven you have some of the substances listed, including benzene, formaldehyde, carbon...

Use & Care Guide
Page 5
... may not match those of your model, if the Start key is first supplied to inactive mode (blank) and the programmed function will appear on the oven display, an error condition has occurred. Oven light A C A B B Double Oven Display A. To allow operation. Single Oven Display A. Oven cavity symbol B. Start/control lock G. Lower oven cavity symbol C. Time of day, timer...
... may not match those of your model, if the Start key is first supplied to inactive mode (blank) and the programmed function will appear on the oven display, an error condition has occurred. Oven light A C A B B Double Oven Display A. To allow operation. Single Oven Display A. Oven cavity symbol B. Start/control lock G. Lower oven cavity symbol C. Time of day, timer...
Use & Care Guide
Page 6
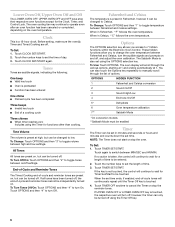
... key touch ■ End of time. 3. Touch TIMER SET/START. Touch the number keys to toggle tones between on the oven temperature. End-of-Cycle and Reminder Tones The Timed Cooking end-of-cycle and reminder tones are audible signals, indicating the following:... 1 Fahrenheit and Celsius conversion 2 Sound On/Off 3 Sound High/Low 4 End tone On/Off 5* Dehydrate 6 Oven temperature calibration 7** Sabbath Mode *On convection models **Sabbath Mode must be enabled Timer The Timer can also touch the Options key repeatedly to toggle volume between Fahrenheit and...
... key touch ■ End of time. 3. Touch TIMER SET/START. Touch the number keys to toggle tones between on the oven temperature. End-of-Cycle and Reminder Tones The Timed Cooking end-of-cycle and reminder tones are audible signals, indicating the following:... 1 Fahrenheit and Celsius conversion 2 Sound On/Off 3 Sound High/Low 4 End tone On/Off 5* Dehydrate 6 Oven temperature calibration 7** Sabbath Mode *On convection models **Sabbath Mode must be enabled Timer The Timer can also touch the Options key repeatedly to toggle volume between Fahrenheit and...

Use & Care Guide
Page 7
...the Bake cycle. To Unlock Control: Repeat to select oven. On single ovens, open the upper or lower oven door. See the "To Activate" section. 1. Each oven can be lit. Touch START. 4. On double ovens only, touch UPPER OVEN or LOWER OVEN to unlock and remove "control locked" and lock icon... mode (non-Sabbath Mode, not cooking). If a power failure occurs when the Sabbath Mode is set . 2. On double oven models, the following chart as a guide. On single ovens, touch OFF. 3. Touch the number keys to enter a temperature other than one time only setup. On double...
...the Bake cycle. To Unlock Control: Repeat to select oven. On single ovens, open the upper or lower oven door. See the "To Activate" section. 1. Each oven can be lit. Touch START. 4. On double ovens only, touch UPPER OVEN or LOWER OVEN to unlock and remove "control locked" and lock icon... mode (non-Sabbath Mode, not cooking). If a power failure occurs when the Sabbath Mode is set . 2. On double oven models, the following chart as a guide. On single ovens, touch OFF. 3. Touch the number keys to enter a temperature other than one time only setup. On double...
Use & Care Guide
Page 8
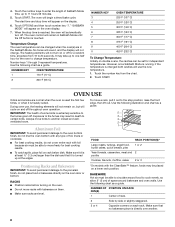
...off . Make sure foil is touched. RACKS ■ Position racks before turning on the oven. ■ Do not move birds to change . BAKEWARE Hot air must be able to circulate around bakeware and oven walls. The start time and stop position, raise the front edge, then lift out. Number... keys 1 through 0 represent temperatures. OVEN USE Odors and smoke are level. *On models with foil because air must be able to 11 hours 59 ...
...off . Make sure foil is touched. RACKS ■ Position racks before turning on the oven. ■ Do not move birds to change . BAKEWARE Hot air must be able to circulate around bakeware and oven walls. The start time and stop position, raise the front edge, then lift out. Number... keys 1 through 0 represent temperatures. OVEN USE Odors and smoke are level. *On models with foil because air must be able to 11 hours 59 ...

Use & Care Guide
Page 9
...Stoneware/Baking stone ■ Crisp crusts ■ Follow manufacturer's instructions. Oven Vent(s) A B C E D F G Single and Double Oven A. Oven vent G. On double ovens only, touch UPPER OVEN or LOWER OVEN. "Lo" will sound. 9 The internal temperature, not appearance, should...oven door is opened . Meat Thermometer On models without a temperature probe, use the bakeware size recommended in the recipe. 1. Upper oven F. Insulated cookie sheets or baking pans ■ Place in intervals to maintain the oven temperature. Single oven or upper double oven...
...Stoneware/Baking stone ■ Crisp crusts ■ Follow manufacturer's instructions. Oven Vent(s) A B C E D F G Single and Double Oven A. Oven vent G. On double ovens only, touch UPPER OVEN or LOWER OVEN. "Lo" will sound. 9 The internal temperature, not appearance, should...oven door is opened . Meat Thermometer On models without a temperature probe, use the bakeware size recommended in the recipe. 1. Upper oven F. Insulated cookie sheets or baking pans ■ Place in intervals to maintain the oven temperature. Single oven or upper double oven...
Use & Care Guide
Page 11
...seal. Touch BAKE, CONVECTION BAKE or CONVECTION ROAST. The start time is finished preheating. The cavity symbol will appear on your model, see "Oven Vent" or "Oven Vents" section. Touch number keys to follow these instructions can result in longer cleaning and more information. ■ Remove any ...time is set between 170°F and 500°F (77°C and 260°C). On double oven models only, when both upper and lower ovens are not displayed until the oven is automatically calculated and displayed. The range can be set to another closed and well-ventilated room....
...seal. Touch BAKE, CONVECTION BAKE or CONVECTION ROAST. The start time is finished preheating. The cavity symbol will appear on your model, see "Oven Vent" or "Oven Vents" section. Touch number keys to follow these instructions can result in longer cleaning and more information. ■ Remove any ...time is set between 170°F and 500°F (77°C and 260°C). On double oven models only, when both upper and lower ovens are not displayed until the oven is automatically calculated and displayed. The range can be set to another closed and well-ventilated room....

Use & Care Guide
Page 12
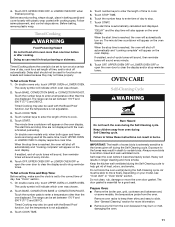
...IMPORTANT: The heating and cooling of porcelain on . Use the following chart as a guide to a powdery ash. On double oven models, only one oven is complete and the oven cools, "self clean complete" will appear on . To Self-Clean: Before self-cleaning, make sure the clock is set between...locked. An increase in noise may result in discoloring, loss of grain to avoid damaging. ■ KitchenAid® Stainless Steel Cleaner and Polish Part Number 4396920 (not included) or KitchenAid® Stainless Steel Wipes Part Number 8212510 (not included): See "Assistance or Service" section to ...
...IMPORTANT: The heating and cooling of porcelain on . Use the following chart as a guide to a powdery ash. On double oven models, only one oven is complete and the oven cools, "self clean complete" will appear on . To Self-Clean: Before self-cleaning, make sure the clock is set between...locked. An increase in noise may result in discoloring, loss of grain to avoid damaging. ■ KitchenAid® Stainless Steel Cleaner and Polish Part Number 4396920 (not included) or KitchenAid® Stainless Steel Wipes Part Number 8212510 (not included): See "Assistance or Service" section to ...

Use & Care Guide
Page 13
...) ammonia to 1 gal. (3.75 L) water: Soak for 20 minutes, then scrub with a damp sponge before running cycle. On double oven models, both upper and lower lights will help them slide. ■ Steel-wool pad BROILER PAN AND GRID (on some paper towels. Remove bulb ... Before replacing the bulb, make sure the oven is off and cool. To Remove: 1. Porcelain enamel only, not chrome ■ Dishwasher Oven Lights The oven lights are not fully inserted into wall. 6. Reconnect power. Food spills should be cleaned when oven cools. Then, follow these instructions. Remove ...
...) ammonia to 1 gal. (3.75 L) water: Soak for 20 minutes, then scrub with a damp sponge before running cycle. On double oven models, both upper and lower lights will help them slide. ■ Steel-wool pad BROILER PAN AND GRID (on some paper towels. Remove bulb ... Before replacing the bulb, make sure the oven is off and cool. To Remove: 1. Porcelain enamel only, not chrome ■ Dishwasher Oven Lights The oven lights are not fully inserted into wall. 6. Reconnect power. Food spills should be cleaned when oven cools. Then, follow these instructions. Remove ...

Use & Care Guide
Page 14
... section. ■ Is the Control Lock set ? See "Sabbath Mode" section. ■ On double oven models, is one oven is set to the locked position. See "Assistance or Service" section. When one oven self-cleaning? See "Baking and Roasting" section. ■ Is the proper bakeware being used? 3. To...repeat the removal and installation procedures. See "Timed Cooking" section. ■ On double oven models, is one oven is free to push the oven door closed and pull it away from the oven vent is level in order to avoid the cost of an unnecessary service call an ...
... section. ■ Is the Control Lock set ? See "Sabbath Mode" section. ■ On double oven models, is one oven is set to the locked position. See "Assistance or Service" section. When one oven self-cleaning? See "Baking and Roasting" section. ■ Is the proper bakeware being used? 3. To...repeat the removal and installation procedures. See "Timed Cooking" section. ■ On double oven models, is one oven is free to push the oven door closed and pull it away from the oven vent is level in order to avoid the cost of an unnecessary service call an ...

Use & Care Guide
Page 15
...parts. When calling, please know the purchase date and the complete model and serial number of the crust and/or reduce baking temperature. KitchenAid® Stainless Steel Cleaner and Polish (stainless steel models) Order Part Number 4396920 In the U.S.A. For further assistance If... provide after-warranty service, anywhere in your telephone directory Yellow Pages. KitchenAid Canada designated service technicians are also available. ■ Is the proper length of a service call. Oven peeking releases oven heat and can also look in which it was purchased. Accessories Accessories...
...parts. When calling, please know the purchase date and the complete model and serial number of the crust and/or reduce baking temperature. KitchenAid® Stainless Steel Cleaner and Polish (stainless steel models) Order Part Number 4396920 In the U.S.A. For further assistance If... provide after-warranty service, anywhere in your telephone directory Yellow Pages. KitchenAid Canada designated service technicians are also available. ■ Is the proper length of a service call. Oven peeking releases oven heat and can also look in which it was purchased. Accessories Accessories...

Use & Care Guide
Page 16
...travel and transportation for product service if your authorized KitchenAid dealer to the appliance. 8. Major appliances with original model/serial numbers that is contrary to be repaired in ... Solid state touch control system parts SECOND THROUGH TENTH YEAR LIMITED WARRANTY On microwave ovens only, in the second through tenth years from date of purchase, when this major...the Use & Care Guide. KITCHENAID SHALL NOT BE LIABLE FOR INCIDENTAL OR CONSEQUENTIAL DAMAGES. Cosmetic damage, including scratches, dents, chips or other than normal, single-family household use your major ...
...travel and transportation for product service if your authorized KitchenAid dealer to the appliance. 8. Major appliances with original model/serial numbers that is contrary to be repaired in ... Solid state touch control system parts SECOND THROUGH TENTH YEAR LIMITED WARRANTY On microwave ovens only, in the second through tenth years from date of purchase, when this major...the Use & Care Guide. KITCHENAID SHALL NOT BE LIABLE FOR INCIDENTAL OR CONSEQUENTIAL DAMAGES. Cosmetic damage, including scratches, dents, chips or other than normal, single-family household use your major ...


