
Installation Guide
Page 2
... some models) ■ Two #8-18 x ³⁄₈" screws - Floor must be able to support a single oven weight of 154 lbs (70 kg) or a double oven weight of the oven. ■ Grounded electrical supply is required. This is , tell you to the junction box. All safety messages will... here. bottom vent (supplied on some models) Check local codes. NOTE: For undercounter installation, it is installed in this manual and on rear wall behind oven, the junction box must be made by a licensed, qualified electrical installer. This symbol alerts you how to reduce the chance...
... some models) ■ Two #8-18 x ³⁄₈" screws - Floor must be able to support a single oven weight of 154 lbs (70 kg) or a double oven weight of the oven. ■ Grounded electrical supply is required. This is , tell you to the junction box. All safety messages will... here. bottom vent (supplied on some models) Check local codes. NOTE: For undercounter installation, it is installed in this manual and on rear wall behind oven, the junction box must be made by a licensed, qualified electrical installer. This symbol alerts you how to reduce the chance...

Use & Care Guide
Page 3
...Do not repair or replace any part of the oven unless specifically recommended in Manual. ■ Before Self-Cleaning the Oven - Smother fire or flame or use . For self-cleaning ovens: ■ Do Not Clean Door Gasket - No commercial oven cleaner or oven liner protective coating of any kind should not ...will tell you don't follow instructions. Do not use , do not let potholder contact hot heating element in this manual and on any part of oven doors. Always place oven racks in color. This is essential for Warming or Heating the Room. ■ Do Not Leave Children Alone -...
...Do not repair or replace any part of the oven unless specifically recommended in Manual. ■ Before Self-Cleaning the Oven - Smother fire or flame or use . For self-cleaning ovens: ■ Do Not Clean Door Gasket - No commercial oven cleaner or oven liner protective coating of any kind should not ...will tell you don't follow instructions. Do not use , do not let potholder contact hot heating element in this manual and on any part of oven doors. Always place oven racks in color. This is essential for Warming or Heating the Room. ■ Do Not Leave Children Alone -...

Use & Care Guide
Page 4
...Broil elements (not shown) D. PARTS AND FEATURES This manual covers different models. The oven you have some of the substances listed, including benzene, formaldehyde, carbon monoxide, and toluene. A B F, G C H D I . Oven vent C. Automatic oven light switch G. Oven door lock latch H. WARNING: This product contains a ..., birth defects, or other reproductive harm, and requires businesses to warn of potential exposure to such substances. Electronic oven control B. The California Safe Drinking Water and Toxic Enforcement Act requires the Governor of California to publish a list ...
...Broil elements (not shown) D. PARTS AND FEATURES This manual covers different models. The oven you have some of the substances listed, including benzene, formaldehyde, carbon monoxide, and toluene. A B F, G C H D I . Oven vent C. Automatic oven light switch G. Oven door lock latch H. WARNING: This product contains a ..., birth defects, or other reproductive harm, and requires businesses to warn of potential exposure to such substances. Electronic oven control B. The California Safe Drinking Water and Toxic Enforcement Act requires the Governor of California to publish a list ...

Use & Care Guide
Page 5
... display will be flashing the message "clock-enter time." Call for service, see the "Assistance or Service" section. ELECTRONIC OVEN CONTROL This manual covers different models. A B C D E F L K J I . Timer E. Number keys F. Oven light A C A B B Double Oven Display A. Single Oven Display A. Oven cavity symbol B. Time of day or Timer countdown. Start The START key begins all of your model, if the...
... display will be flashing the message "clock-enter time." Call for service, see the "Assistance or Service" section. ELECTRONIC OVEN CONTROL This manual covers different models. A B C D E F L K J I . Timer E. Number keys F. Oven light A C A B B Double Oven Display A. Single Oven Display A. Oven cavity symbol B. Time of day or Timer countdown. Start The START key begins all of your model, if the...
Use & Care Guide
Page 6
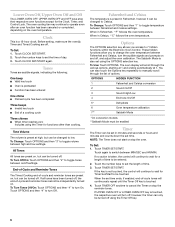
...repeatedly to wait for Timer Set/Start to change the oven temperature between Fahrenheit and Celsius, turn off . To Set: 1. Touch TIMER SET/START. If UPPER OVEN OFF or LOWER OVEN OFF key is taken, the control will continue to manually scroll through the various options, starting at 1 and... ending automatically at high, but can be turned off , the end-of options. Lower Oven Off, Upper Oven Off and Off The LOWER OVEN OFF, UPPER OVEN OFF and OFF keys stop the oven. The oven cooling fan may continue...
...repeatedly to wait for Timer Set/Start to change the oven temperature between Fahrenheit and Celsius, turn off . To Set: 1. Touch TIMER SET/START. If UPPER OVEN OFF or LOWER OVEN OFF key is taken, the control will continue to manually scroll through the various options, starting at 1 and... ending automatically at high, but can be turned off , the end-of options. Lower Oven Off, Upper Oven Off and Off The LOWER OVEN OFF, UPPER OVEN OFF and OFF keys stop the oven. The oven cooling fan may continue...


