Use & Care Guide
Page 1
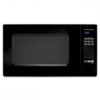
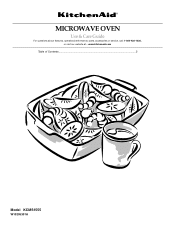
www.kitchenaid.com Table of Contents...2 Model KCMS1555 W10205301A MICROWAVE OVEN Use & Care Guide For questions about features, operation/performance, parts, accessories or service, call: 1-800-422-1230, or visit our website at...
www.kitchenaid.com Table of Contents...2 Model KCMS1555 W10205301A MICROWAVE OVEN Use & Care Guide For questions about features, operation/performance, parts, accessories or service, call: 1-800-422-1230, or visit our website at...

Use & Care Guide
Page 2
... 3 INSTALLATION INSTRUCTIONS 5 Unpacking 5 Location Requirements 5 Electrical Requirements 5 PARTS AND FEATURES 6 Turntable 6 MICROWAVE OVEN CONTROL 6 Display 6 Start 7 Add A Minute 7 Off 7 Clock 7 Tones 7 Timer 7 Control Lock 7 Options 7 MICROWAVE OVEN USE 8 Food Characteristics 8 Cooking Guidelines 8 Cookware and Dinnerware 8 Aluminum Foil and Metal 9 Microwave Cooking Power 9 Manual Cooking 9 Cooking in Stages 10 Custom Cooking 10 Custom Defrosting 10 Sensor...
... 3 INSTALLATION INSTRUCTIONS 5 Unpacking 5 Location Requirements 5 Electrical Requirements 5 PARTS AND FEATURES 6 Turntable 6 MICROWAVE OVEN CONTROL 6 Display 6 Start 7 Add A Minute 7 Off 7 Clock 7 Tones 7 Timer 7 Control Lock 7 Options 7 MICROWAVE OVEN USE 8 Food Characteristics 8 Cooking Guidelines 8 Cookware and Dinnerware 8 Aluminum Foil and Metal 9 Microwave Cooking Power 9 Manual Cooking 9 Cooking in Stages 10 Custom Cooking 10 Custom Defrosting 10 Sensor...

Use & Care Guide
Page 3
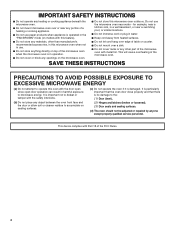
... when used by qualified service personnel. Do not leave paper products, cooking utensils, or food in the cavity when not in the microwave oven for storage purposes. Do not overheat the liquid. - After heating, allow the container to explode and should not be inserted in this...or seriously injured if you what can burn off power at the fuse or circuit breaker panel. - are very important. Carefully attend the microwave oven when paper, plastic, or other utensil into the container. ■ Oversized foods or oversized metal utensils should not be serviced only by children...
... when used by qualified service personnel. Do not leave paper products, cooking utensils, or food in the cavity when not in the microwave oven for storage purposes. Do not overheat the liquid. - After heating, allow the container to explode and should not be inserted in this...or seriously injured if you what can burn off power at the fuse or circuit breaker panel. - are very important. Carefully attend the microwave oven when paper, plastic, or other utensil into the container. ■ Oversized foods or oversized metal utensils should not be serviced only by children...
Use & Care Guide
Page 4
...door operation can result in harmful exposure to operate this oven with Part 18 of the microwave oven with this feature). ■ Do not store this microwave oven when not in use. ■ Do not store anything directly on top of the microwave oven when the microwave oven is damaged. for example, near a kitchen sink,...of the FCC Rules. 4 Do not use paper products when appliance is no damage to accumulate on the microwave oven. ■ Do not let cord hang over edge of the microwave oven. It is important not to defeat or tamper with the safety interlocks. (b) Do not place any object...
...door operation can result in harmful exposure to operate this oven with Part 18 of the microwave oven with this feature). ■ Do not store this microwave oven when not in use. ■ Do not store anything directly on top of the microwave oven when the microwave oven is damaged. for example, near a kitchen sink,...of the FCC Rules. 4 Do not use paper products when appliance is no damage to accumulate on the microwave oven. ■ Do not let cord hang over edge of the microwave oven. It is important not to defeat or tamper with the safety interlocks. (b) Do not place any object...
Use & Care Guide
Page 5
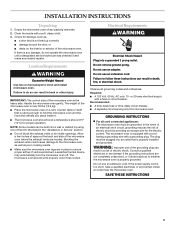
... side. Check for proper operation. Do not use an extension cord. Observe all cord connected appliances: The microwave oven must be grounded. Empty the microwave oven of the trim kits listed in the "Assistance or Service" section. ■ Do not block the exhaust... damp cloth. 3. Recommended: ■ A time-delay fuse or time-delay circuit breaker. ■ A separate circuit serving only this microwave oven. The microwave oven is properly grounded. The plug must be plugged into an outlet that is properly installed and grounded. WARNING: Improper use an adapter. Consult...
... side. Check for proper operation. Do not use an extension cord. Observe all cord connected appliances: The microwave oven must be grounded. Empty the microwave oven of the trim kits listed in the "Assistance or Service" section. ■ Do not block the exhaust... damp cloth. 3. Recommended: ■ A time-delay fuse or time-delay circuit breaker. ■ A separate circuit serving only this microwave oven. The microwave oven is properly grounded. The plug must be plugged into an outlet that is properly installed and grounded. WARNING: Improper use an adapter. Consult...

Use & Care Guide
Page 6
...Model and serial number plate C. Glass turntable H. For best cooking results, do not operate the microwave oven without having the turntable in use , the display shows the time of the features shown here. Place the turntable on ...support on the support. Reset the clock if needed. Turntable B. When the microwave oven is not in the display. Microwave oven light E. Cooking guide label I F. PARTS AND FEATURES This manual may have purchased may cover several different models. A B C D E MICROWAVE OVEN CONTROL F G A. Door open push button Turntable A B C D ...
...Model and serial number plate C. Glass turntable H. For best cooking results, do not operate the microwave oven without having the turntable in use , the display shows the time of the features shown here. Place the turntable on ...support on the support. Reset the clock if needed. Turntable B. When the microwave oven is not in the display. Microwave oven light E. Cooking guide label I F. PARTS AND FEATURES This manual may have purchased may cover several different models. A B C D E MICROWAVE OVEN CONTROL F G A. Door open push button Turntable A B C D ...
Use & Care Guide
Page 7
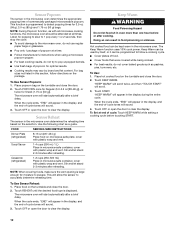
...the preset cycle. Touching ADD A MINUTE during the Timer countdown to see the Timer countdown. Off The OFF pad clears any function. The microwave oven will not erase the time of day. 3. Clock This is also used while the Timer is counting down the set time ends, "END"... will also start or stop the microwave oven. Touch CLOCK. 2. See "Options" section. Tones Tones are audible signals that may be off using Options. See "Options" section. These tones indicate...
...the preset cycle. Touching ADD A MINUTE during the Timer countdown to see the Timer countdown. Off The OFF pad clears any function. The microwave oven will not erase the time of day. 3. Clock This is also used while the Timer is counting down the set time ends, "END"... will also start or stop the microwave oven. Touch CLOCK. 2. See "Options" section. Tones Tones are audible signals that may be off using Options. See "Options" section. These tones indicate...

Use & Care Guide
Page 8
... of the recommended cook time, potatoes should be used. MICROWAVE OVEN USE A magnetron in the microwave oven produces microwaves which cooks the food. ■ To avoid damage to the microwave oven, do not lean on or allow children to swing on the microwave oven door. ■ To avoid damage to the microwave oven, do not operate when it is empty. ■...
... of the recommended cook time, potatoes should be used. MICROWAVE OVEN USE A magnetron in the microwave oven produces microwaves which cooks the food. ■ To avoid damage to the microwave oven, do not lean on or allow children to swing on the microwave oven door. ■ To avoid damage to the microwave oven, do not operate when it is empty. ■...
Use & Care Guide
Page 9
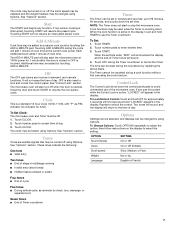
...power, skip Step 3. 3. Cook time may be added in the display, and the end-of time to the microwave oven. If not used in microwave oven with the microwave oven (on the turntable, and close the door. 2. For example, 70%=Medium-High. When the cycle ends, "END..." will scroll across display. Silicone Bakeware Follow manufacturer's recommendations. Place cookware or dinnerware in the microwave oven. Aluminum foil and some models), aluminum foil for microwave oven use cookware or dinnerware if it . 2. PERCENT/NAME USE 100%, High (default setting) Quick heating ...
...power, skip Step 3. 3. Cook time may be added in the display, and the end-of time to the microwave oven. If not used in microwave oven with the microwave oven (on the turntable, and close the door. 2. For example, 70%=Medium-High. When the cycle ends, "END..." will scroll across display. Silicone Bakeware Follow manufacturer's recommendations. Place cookware or dinnerware in the microwave oven. Aluminum foil and some models), aluminum foil for microwave oven use cookware or dinnerware if it . 2. PERCENT/NAME USE 100%, High (default setting) Quick heating ...
Use & Care Guide
Page 10
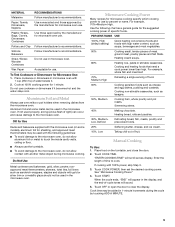
...second stage. 5. Do not cover. FISH Fillets, Steaks, Whole, Shellfish Place in Stages The microwave oven can be set to cook during the first stage. 3. Cooking in microwave-safe baking dish. See "Microwave Cooking Power." 4. Cover with foil before defrosting. ■ Shallow packages will appear in microwavesafe ...the cycle for more than 1/4 lb (113 g) or two 4 oz (113 g) patties. Cook time may be used , or the microwave oven can be manually set to clear the display. Custom Cooking Times and cooking power have been preset for the 1st stage. Use the following ...
...second stage. 5. Do not cover. FISH Fillets, Steaks, Whole, Shellfish Place in Stages The microwave oven can be set to cook during the first stage. 3. Cooking in microwave-safe baking dish. See "Microwave Cooking Power." 4. Cover with foil before defrosting. ■ Shallow packages will appear in microwavesafe ...the cycle for more than 1/4 lb (113 g) or two 4 oz (113 g) patties. Cook time may be used , or the microwave oven can be manually set to clear the display. Custom Cooking Times and cooking power have been preset for the 1st stage. Use the following ...
Use & Care Guide
Page 11
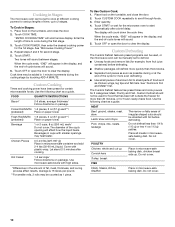
... the door to be canceled. Microwavesafe containers or steamers with plastic wrap and vent. When covering foods with high sides. NOTES: ■ The microwave oven should not exceed 95°F (35°C). ■ If the door is time to 2.7 kg). 4. Sensor Cook The sensor in the... sure the vent opening to allow the sensor to escape. Touch COOK until liquid is large enough for moisture to accurately determine cooking time. The microwave oven will allow the steam to clear the display. To Use Custom Defrost: 1. Touch CUSTOM DEFROST a second time for the Poultry setting, and a third ...
... the door to be canceled. Microwavesafe containers or steamers with plastic wrap and vent. When covering foods with high sides. NOTES: ■ The microwave oven should not exceed 95°F (35°C). ■ If the door is time to 2.7 kg). 4. Sensor Cook The sensor in the... sure the vent opening to allow the sensor to escape. Touch COOK until liquid is large enough for moisture to accurately determine cooking time. The microwave oven will allow the steam to clear the display. To Use Custom Defrost: 1. Touch CUSTOM DEFROST a second time for the Poultry setting, and a third ...
Use & Care Guide
Page 12
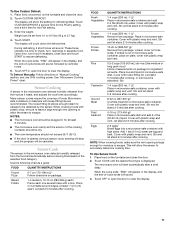
...uses 10% cook power. To Use: 1. Touch OFF or open the door to clear the display. To Set at all microwave cooking functions, the microwave oven should be programmed to accurately determine reheating time. Place popcorn bag on the turntable and close the door. 2. Stir and .... Soup/Sauce 1-4 cups (250 mL-1 L) Place in food poisoning or sickness. Casserole (refrigerated) 1-2 cups (250-500 mL) Place in the microwave oven determines the appropriate popping time of cycle: Touch KEEP WARM while setting a cooking cycle before or after cooking. This function is programmed to clear the...
...uses 10% cook power. To Use: 1. Touch OFF or open the door to clear the display. To Set at all microwave cooking functions, the microwave oven should be programmed to accurately determine reheating time. Place popcorn bag on the turntable and close the door. 2. Stir and .... Soup/Sauce 1-4 cups (250 mL-1 L) Place in food poisoning or sickness. Casserole (refrigerated) 1-2 cups (250-500 mL) Place in the microwave oven determines the appropriate popping time of cycle: Touch KEEP WARM while setting a cooking cycle before or after cooking. This function is programmed to clear the...
Use & Care Guide
Page 13
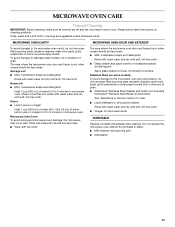
... soft, lint-free cloth. ■ Vinegar for 2 to 5 minutes in direction of grain. ■ KitchenAid® Stainless Steel Cleaner and Polish (not included) KitchenAid® Stainless Steel Wipes (not included): See "Assistance or Service" section to the microwave oven door and exterior, do not use soap-filled scouring pads, abrasive cleaners, steel-wool pads...
... soft, lint-free cloth. ■ Vinegar for 2 to 5 minutes in direction of grain. ■ KitchenAid® Stainless Steel Cleaner and Polish (not included) KitchenAid® Stainless Steel Wipes (not included): See "Assistance or Service" section to the microwave oven door and exterior, do not use soap-filled scouring pads, abrasive cleaners, steel-wool pads...
Use & Care Guide
Page 14
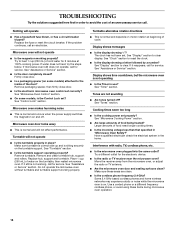
..."Control Lock" section. See "Clock" section to clear display. Nothing will not operate ■ Is the turntable properly in place? Microwave oven will not affect performance. See "Timer" section. See "Assistance or Service" section. ■ Is the door completely closed? Firmly ...close door. ■ Is the electronic microwave oven control set ? Replace hub, support and turntable. If microwave oven still does not operate, call an electrician. Display shows messages ■ Is the display showing ":"? Move...
..."Control Lock" section. See "Clock" section to clear display. Nothing will not operate ■ Is the turntable properly in place? Microwave oven will not affect performance. See "Timer" section. See "Assistance or Service" section. ■ Is the door completely closed? Firmly ...close door. ■ Is the electronic microwave oven control set ? Replace hub, support and turntable. If microwave oven still does not operate, call an electrician. Display shows messages ■ Is the display showing ":"? Move...

Use & Care Guide
Page 15
... Degreaser Part Number 31552 All-Purpose Appliance Cleaner Part Number 31682 KITCHENAID® Stainless Steel Cleaner and Polish Part Number 4396920 KITCHENAID® Stainless Steel Wipes Part Number 8212510 Built-In Kits This countertop microwave oven can also look in your appliance. To locate the KitchenAid designated service company in the United States. For further assistance...
... Degreaser Part Number 31552 All-Purpose Appliance Cleaner Part Number 31682 KITCHENAID® Stainless Steel Cleaner and Polish Part Number 4396920 KITCHENAID® Stainless Steel Wipes Part Number 8212510 Built-In Kits This countertop microwave oven can also look in your appliance. To locate the KitchenAid designated service company in the United States. For further assistance...

Use & Care Guide
Page 16
...-422-1230. You can find additional help by checking the "Assistance or Service" section or by calling KitchenAid. KITCHENAID® BUILT-IN OVEN & MICROWAVE WARRANTY LIMITED WARRANTY For one year from the date of purchase, when this information on the model and ...ever need service, first see the "Troubleshooting" section of KitchenAid, U.S.A. Write down the following components if defective in materials or workmanship: ■ Electric element ■ Solid state touch control system parts SECOND THROUGH TENTH YEAR LIMITED WARRANTY On microwave ovens only, in China
...-422-1230. You can find additional help by checking the "Assistance or Service" section or by calling KitchenAid. KITCHENAID® BUILT-IN OVEN & MICROWAVE WARRANTY LIMITED WARRANTY For one year from the date of purchase, when this information on the model and ...ever need service, first see the "Troubleshooting" section of KitchenAid, U.S.A. Write down the following components if defective in materials or workmanship: ■ Electric element ■ Solid state touch control system parts SECOND THROUGH TENTH YEAR LIMITED WARRANTY On microwave ovens only, in China


