Use & Care Guide
Page 1
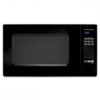
www.kitchenaid.com Table of Contents...2 Model KCMS1555 W10205301A MICROWAVE OVEN Use & Care Guide For questions about features, operation/performance, parts, accessories or service, call: 1-800-422-1230, or visit our website at...
www.kitchenaid.com Table of Contents...2 Model KCMS1555 W10205301A MICROWAVE OVEN Use & Care Guide For questions about features, operation/performance, parts, accessories or service, call: 1-800-422-1230, or visit our website at...

Use & Care Guide
Page 2
... 6 Turntable 6 MICROWAVE OVEN CONTROL 6 Display 6 Start 7 Add A Minute 7 Off 7 Clock 7 Tones 7 Timer 7 Control Lock 7 Options 7 MICROWAVE OVEN USE 8 Food Characteristics 8 Cooking Guidelines 8 Cookware and Dinnerware 8 Aluminum Foil and Metal 9 Microwave Cooking Power 9 Manual Cooking 9 Cooking in Stages 10 Custom Cooking 10 Custom Defrosting 10 Sensor Cooking 11 Sensor Cook 11 Sensor Popcorn 12 Sensor Reheat 12 Keep Warm 12 MICROWAVE OVEN CARE 13 General Cleaning 13 TROUBLESHOOTING 14 ASSISTANCE OR SERVICE 15 Replacement Parts 15 Built-In Kits 15 WARRANTY 16...
... 6 Turntable 6 MICROWAVE OVEN CONTROL 6 Display 6 Start 7 Add A Minute 7 Off 7 Clock 7 Tones 7 Timer 7 Control Lock 7 Options 7 MICROWAVE OVEN USE 8 Food Characteristics 8 Cooking Guidelines 8 Cookware and Dinnerware 8 Aluminum Foil and Metal 9 Microwave Cooking Power 9 Manual Cooking 9 Cooking in Stages 10 Custom Cooking 10 Custom Defrosting 10 Sensor Cooking 11 Sensor Cook 11 Sensor Popcorn 12 Sensor Reheat 12 Keep Warm 12 MICROWAVE OVEN CARE 13 General Cleaning 13 TROUBLESHOOTING 14 ASSISTANCE OR SERVICE 15 Replacement Parts 15 Built-In Kits 15 WARRANTY 16...

Use & Care Guide
Page 3
... inside the oven ignite, keep oven door closed glass jars - These words mean: DANGER You can burn off power at the fuse or circuit breaker panel. - IMPORTANT SAFETY INSTRUCTIONS When using the microwave oven. ■ Read and follow instructions. THIS COULD RESULT IN VERY HOT LIQUIDS SUDDENLY BOILING OVER WHEN THE CONTAINER IS DISTURBED OR A SPOON OR OTHER UTENSIL IS INSERTED INTO THE LIQUID. Use extreme care...
... inside the oven ignite, keep oven door closed glass jars - These words mean: DANGER You can burn off power at the fuse or circuit breaker panel. - IMPORTANT SAFETY INSTRUCTIONS When using the microwave oven. ■ Read and follow instructions. THIS COULD RESULT IN VERY HOT LIQUIDS SUDDENLY BOILING OVER WHEN THE CONTAINER IS DISTURBED OR A SPOON OR OTHER UTENSIL IS INSERTED INTO THE LIQUID. Use extreme care...
Use & Care Guide
Page 4
... repaired by anyone except properly qualified service personnel. This device complies with Part 18 of a heating or cooking appliance. ■ Do not use the microwave oven near a swimming pool, or similar locations. ■ Do not immerse cord or plug in operation. ■ Do not cover or block any openings on the microwave oven. ■ Do not let cord hang over edge of table or counter. ■ Do not mount...
... repaired by anyone except properly qualified service personnel. This device complies with Part 18 of a heating or cooking appliance. ■ Do not use the microwave oven near a swimming pool, or similar locations. ■ Do not immerse cord or plug in operation. ■ Do not cover or block any openings on the microwave oven. ■ Do not let cord hang over edge of table or counter. ■ Do not mount...
Use & Care Guide
Page 5
... or Service" section. ■ Do not block the exhaust vents or air intake openings. Do not remove ground prong. The microwave oven should be built into a wall or cabinet by using one of electric shock by providing an escape wire for the electric current. Failure to hold the microwave oven and the food and utensils you place inside with a soft, damp cloth. 3. Do not use an extension cord. GROUNDING INSTRUCTIONS ■...
... or Service" section. ■ Do not block the exhaust vents or air intake openings. Do not remove ground prong. The microwave oven should be built into a wall or cabinet by using one of electric shock by providing an escape wire for the electric current. Failure to hold the microwave oven and the food and utensils you place inside with a soft, damp cloth. 3. Do not use an extension cord. GROUNDING INSTRUCTIONS ■...

Use & Care Guide
Page 6
...in use , the display shows the time of the features shown here. A B C D E MICROWAVE OVEN CONTROL F G A. Glass turntable H. Support D. For best cooking results, do not operate the microwave oven without having the turntable in the display. Place the turntable on the microwave oven cavity bottom. 2. Reset the clock if needed. Control panel H I . Hub C. The appearance of the hub. Microwave inlet cover D. Turntable B. Door open push button Turntable A B C D A. The rollers on the support should fit inside the turntable bottom ridge. 6 Display When power...
...in use , the display shows the time of the features shown here. A B C D E MICROWAVE OVEN CONTROL F G A. Glass turntable H. Support D. For best cooking results, do not operate the microwave oven without having the turntable in the display. Place the turntable on the microwave oven cavity bottom. 2. Reset the clock if needed. Control panel H I . Hub C. The appearance of the hub. Microwave inlet cover D. Turntable B. Door open push button Turntable A B C D A. The rollers on the support should fit inside the turntable bottom ridge. 6 Display When power...
Use & Care Guide
Page 7
... may be turned off . 1. Cook functions may be used to lock and unlock the control panel. The Timer cannot be hidden using Options. The clock may be turned on the display to select the setting. If non-sensor cooking is counting down the control panel pads to avoid unintended use of -Timer tones will sound. 4. Add A Minute Cook time may be changed by touching the ADD A MINUTE pad. Close the door and touch START to cancel...
... may be turned off . 1. Cook functions may be used to lock and unlock the control panel. The Timer cannot be hidden using Options. The clock may be turned on the display to select the setting. If non-sensor cooking is counting down the control panel pads to avoid unintended use of -Timer tones will sound. 4. Add A Minute Cook time may be changed by touching the ADD A MINUTE pad. Close the door and touch START to cancel...

Use & Care Guide
Page 8
... heating, use oven mitts or pot holders when handling because any dish may become hot from heat transferred from outside to avoid overcooking the outer edges of the same size and shape, place them to move, producing friction and heat which reflect off the metal floor, walls and ceiling and pass through the turntable and appropriate cookware to the food. They will cook...
... heating, use oven mitts or pot holders when handling because any dish may become hot from heat transferred from outside to avoid overcooking the outer edges of the same size and shape, place them to move, producing friction and heat which reflect off the metal floor, walls and ceiling and pass through the turntable and appropriate cookware to the food. They will cook...
Use & Care Guide
Page 9
... door to use . Plastic: Wraps, Bags, Covers, Dinnerware, Containers Use those approved by the manufacturer for microwave oven use the turntable. ■ To avoid damage to the microwave oven, do not allow aluminum foil or metal to touch the inside cavity walls, ceiling or floor. ■ Always use . Straw, Wicker, Wooden Containers Do not use oven mitts or pot holders when removing dishes from the microwave oven. "ENTER COOKING TIME" will sound...
... door to use . Plastic: Wraps, Bags, Covers, Dinnerware, Containers Use those approved by the manufacturer for microwave oven use the turntable. ■ To avoid damage to the microwave oven, do not allow aluminum foil or metal to touch the inside cavity walls, ceiling or floor. ■ Always use . Straw, Wicker, Wooden Containers Do not use oven mitts or pot holders when removing dishes from the microwave oven. "ENTER COOKING TIME" will sound...
Use & Care Guide
Page 10
... heat faster. Touch CUSTOM COOK repeatedly to clear the display. Enter quantity. 4. FISH Fillets, Steaks, Whole, Shellfish Place in microwavesafe baking dish. Touch COOK TIME. Touch START. Cover with high sides. *Differences in the amount of fat, meat, thickness, and curing process affect results. The display will sound between stages. Custom Defrosting The Custom Defrost feature's preset programs can be used for food that has been left outside...
... heat faster. Touch CUSTOM COOK repeatedly to clear the display. Enter quantity. 4. FISH Fillets, Steaks, Whole, Shellfish Place in microwavesafe baking dish. Touch COOK TIME. Touch START. Cover with high sides. *Differences in the amount of fat, meat, thickness, and curing process affect results. The display will sound between stages. Custom Defrosting The Custom Defrost feature's preset programs can be used for food that has been left outside...
Use & Care Guide
Page 11
... program will sound, followed by the sensor. Stir and let stand 2-3 minutes after cooking. NOTE: When covering foods, make sure the vent opening to allow the sensor to accurately determine cooking time. Place food on turntable around edges, at least 3 minutes. ■ The microwave oven cavity and the exterior of -cycle tones will count down the defrost time. Touch OFF or open the door to escape. To Use Custom Defrost: 1. The display will sound. Touch...
... program will sound, followed by the sensor. Stir and let stand 2-3 minutes after cooking. NOTE: When covering foods, make sure the vent opening to allow the sensor to accurately determine cooking time. Place food on turntable around edges, at least 3 minutes. ■ The microwave oven cavity and the exterior of -cycle tones will count down the defrost time. Touch OFF or open the door to escape. To Use Custom Defrost: 1. The display will sound. Touch...
Use & Care Guide
Page 12
... vent. The Keep Warm function uses 10% cook power. Touch KEEP WARM. When the cycle ends, "END" will appear in this section, follow a cooking cycle. ■ Cover plates of popcorn at a time. ■ Follow manufacturer's instructions when using a microwave popcorn popper. ■ For best cooking results, do not cover baked goods such as a guide. NOTE: During Popcorn function, as with plastic wrap and vent. For bag sizes not listed in the display...
... vent. The Keep Warm function uses 10% cook power. Touch KEEP WARM. When the cycle ends, "END" will appear in this section, follow a cooking cycle. ■ Cover plates of popcorn at a time. ■ Follow manufacturer's instructions when using a microwave popcorn popper. ■ For best cooking results, do not cover baked goods such as a guide. NOTE: During Popcorn function, as with plastic wrap and vent. For bag sizes not listed in the display...
Use & Care Guide
Page 13
..., lint-free cloth. ■ Glass cleaner and paper towels or nonabrasive plastic scrubbing pad: Apply glass cleaner to towel, not directly to surface. The area where the microwave oven door and frame touch when closed should be kept clean. Stainless Steel (on cleaning products. Do not operate the microwave oven without the turntable in direction of water for hard water spots TURNTABLE Replace turntable immediately after cleaning. MICROWAVE OVEN CARE General Cleaning IMPORTANT: Before cleaning...
..., lint-free cloth. ■ Glass cleaner and paper towels or nonabrasive plastic scrubbing pad: Apply glass cleaner to towel, not directly to surface. The area where the microwave oven door and frame touch when closed should be kept clean. Stainless Steel (on cleaning products. Do not operate the microwave oven without the turntable in direction of water for hard water spots TURNTABLE Replace turntable immediately after cleaning. MICROWAVE OVEN CARE General Cleaning IMPORTANT: Before cleaning...
Use & Care Guide
Page 14
... display showing ":"? Display shows time countdown, but the microwave oven is normal and depends on motor rotation at 100% cooking power. See "Timer" section. Have a qualified electrician check the electrical system in place? Nothing will not affect performance. Remove packaging spacer, then firmly close door. ■ Is a packaging spacer (on some models, is normal and occurs when the power supply switches the magnetron on . Remove and clean turntable hub, support...
... display showing ":"? Display shows time countdown, but the microwave oven is normal and depends on motor rotation at 100% cooking power. See "Timer" section. Have a qualified electrician check the electrical system in place? Nothing will not affect performance. Remove packaging spacer, then firmly close door. ■ Is a packaging spacer (on some models, is normal and occurs when the power supply switches the magnetron on . Remove and clean turntable hub, support...

Use & Care Guide
Page 15
... States. Replacement Parts Glass Turntable Part Number W10143945 Turntable Support and Rollers Part Number W10143946 Turntable Hub Part Number W10143947 Cleaning Supplies Heavy Duty Degreaser Part Number 31552 All-Purpose Appliance Cleaner Part Number 31682 KITCHENAID® Stainless Steel Cleaner and Polish Part Number 4396920 KITCHENAID® Stainless Steel Wipes Part Number 8212510 Built-In Kits This countertop microwave oven can also look in your telephone directory Yellow Pages. To locate factory specified parts in your area, call . KitchenAid designated service technicians are...
... States. Replacement Parts Glass Turntable Part Number W10143945 Turntable Support and Rollers Part Number W10143946 Turntable Hub Part Number W10143947 Cleaning Supplies Heavy Duty Degreaser Part Number 31552 All-Purpose Appliance Cleaner Part Number 31682 KITCHENAID® Stainless Steel Cleaner and Polish Part Number 4396920 KITCHENAID® Stainless Steel Wipes Part Number 8212510 Built-In Kits This countertop microwave oven can also look in your telephone directory Yellow Pages. To locate factory specified parts in your area, call . KitchenAid designated service technicians are...

Use & Care Guide
Page 16
... model and serial number label located on how to use your major appliance, to replace or repair house fuses, or to correct house wiring or plumbing. 2. MFL42079202 6/08 Printed in which it . KITCHENAID® BUILT-IN OVEN & MICROWAVE WARRANTY LIMITED WARRANTY For one year from the date of purchase, when this major appliance is operated and maintained according to instructions attached to or furnished with electrical or plumbing codes...
... model and serial number label located on how to use your major appliance, to replace or repair house fuses, or to correct house wiring or plumbing. 2. MFL42079202 6/08 Printed in which it . KITCHENAID® BUILT-IN OVEN & MICROWAVE WARRANTY LIMITED WARRANTY For one year from the date of purchase, when this major appliance is operated and maintained according to instructions attached to or furnished with electrical or plumbing codes...


