Use & Care Guide
Page 1
www.kitchenaid.com Table of Contents...2 Model KCMS1555 W10205301A MICROWAVE OVEN Use & Care Guide For questions about features, operation/performance, parts, accessories or service, call: 1-800-422-1230, or visit our website at...
www.kitchenaid.com Table of Contents...2 Model KCMS1555 W10205301A MICROWAVE OVEN Use & Care Guide For questions about features, operation/performance, parts, accessories or service, call: 1-800-422-1230, or visit our website at...

Use & Care Guide
Page 2
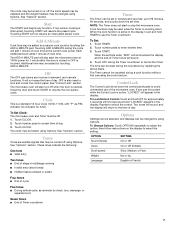
... 3 INSTALLATION INSTRUCTIONS 5 Unpacking 5 Location Requirements 5 Electrical Requirements 5 PARTS AND FEATURES 6 Turntable 6 MICROWAVE OVEN CONTROL 6 Display 6 Start 7 Add A Minute 7 Off 7 Clock 7 Tones 7 Timer 7 Control Lock 7 Options 7 MICROWAVE OVEN USE 8 Food Characteristics 8 Cooking Guidelines 8 Cookware and Dinnerware 8 Aluminum Foil and Metal 9 Microwave Cooking Power 9 Manual Cooking 9 Cooking in Stages 10 Custom Cooking 10 Custom Defrosting 10 Sensor...
... 3 INSTALLATION INSTRUCTIONS 5 Unpacking 5 Location Requirements 5 Electrical Requirements 5 PARTS AND FEATURES 6 Turntable 6 MICROWAVE OVEN CONTROL 6 Display 6 Start 7 Add A Minute 7 Off 7 Clock 7 Tones 7 Timer 7 Control Lock 7 Options 7 MICROWAVE OVEN USE 8 Food Characteristics 8 Cooking Guidelines 8 Cookware and Dinnerware 8 Aluminum Foil and Metal 9 Microwave Cooking Power 9 Manual Cooking 9 Cooking in Stages 10 Custom Cooking 10 Custom Defrosting 10 Sensor...

Use & Care Guide
Page 3
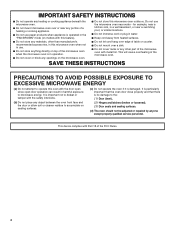
... Liquids, such as described in the shell and sealed containers - WARNING You can be heated in the microwave oven. ■ Use the microwave oven only for a short time before placing bags in oven. - are able to potential hazards that can burn off power at the fuse or circuit breaker panel.... . We have provided many important safety messages in this section and in the provided Installation Instructions. ■ Install or locate the microwave oven only in accordance with the provided Installation Instructions. ■ Some products such as they may create a fire or risk of injury,...
... Liquids, such as described in the shell and sealed containers - WARNING You can be heated in the microwave oven. ■ Use the microwave oven only for a short time before placing bags in oven. - are able to potential hazards that can burn off power at the fuse or circuit breaker panel.... . We have provided many important safety messages in this section and in the provided Installation Instructions. ■ Install or locate the microwave oven only in accordance with the provided Installation Instructions. ■ Some products such as they may create a fire or risk of injury,...
Use & Care Guide
Page 4
... over edge of table or counter. ■ Do not mount over or near any portion of a heating or cooking appliance. ■ Do not use the microwave oven near a swimming pool, or similar locations. ■ Do not immerse cord or plug in water. ■ Keep cord away from heated surfaces. ■ Do not... store any materials, other part of the microwave oven with the door open since open-door operation can result in the "PAN BROWN" mode (on models with Part 18 of the FCC Rules. 4 IMPORTANT...
... over edge of table or counter. ■ Do not mount over or near any portion of a heating or cooking appliance. ■ Do not use the microwave oven near a swimming pool, or similar locations. ■ Do not immerse cord or plug in water. ■ Keep cord away from heated surfaces. ■ Do not... store any materials, other part of the microwave oven with the door open since open-door operation can result in the "PAN BROWN" mode (on models with Part 18 of the FCC Rules. 4 IMPORTANT...
Use & Care Guide
Page 5
..., grounding reduces the risk of electric shock by using one of the grounding plug can result in place to the microwave oven, as well as to whether the microwave oven is any damage, do so can result in a risk of space at a temperature above 50°F (10°... Hazard Plug into a wall or cabinet by providing an escape wire for proper operation. Empty the microwave oven of the microwave oven where the exhaust vents are in back or other injury. The microwave oven should be built into a grounded 3 prong outlet. Location Requirements WARNING Excessive Weight Hazard Use two...
..., grounding reduces the risk of electric shock by using one of the grounding plug can result in place to the microwave oven, as well as to whether the microwave oven is any damage, do so can result in a risk of space at a temperature above 50°F (10°... Hazard Plug into a wall or cabinet by providing an escape wire for proper operation. Empty the microwave oven of the microwave oven where the exhaust vents are in back or other injury. The microwave oven should be built into a grounded 3 prong outlet. Location Requirements WARNING Excessive Weight Hazard Use two...

Use & Care Guide
Page 6
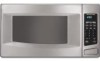
...bottom ridge. 6 Display When power is not in the display. Reset the clock if needed. Glass turntable H. Control panel H I . Support D. When the microwave oven is set) or Timer countdown. Hub C. See "Assistance or Service" to help cook food more evenly. Fit the raised, curved lines in either direction to... reorder any other time, a power failure has occurred. Door open push button Turntable A B C D A. Microwave oven light E. PARTS AND FEATURES This manual may have some or all of the features shown here. Place the support on the...
...bottom ridge. 6 Display When power is not in the display. Reset the clock if needed. Glass turntable H. Control panel H I . Support D. When the microwave oven is set) or Timer countdown. Hub C. See "Assistance or Service" to help cook food more evenly. Fit the raised, curved lines in either direction to... reorder any other time, a power failure has occurred. Door open push button Turntable A B C D A. Microwave oven light E. PARTS AND FEATURES This manual may have some or all of the features shown here. Place the support on the...
Use & Care Guide
Page 7
... signals that may be off when the door is active, "LOCKED" will appear in the display. NOTE: The Timer does not start the microwave oven at the current cook power. Touch START. If non-sensor cooking is touched. Additional time may be added by using Options. OFF is a... minute of day. See "Options" section. Add A Minute Cook time may be changed using Options. Off The OFF pad clears any function. The microwave oven will also turn , rearrange, or separate food Seven tones ■ End of day. Touch CLOCK. The clock may be canceled during the countdown by ...
... signals that may be off when the door is active, "LOCKED" will appear in the display. NOTE: The Timer does not start the microwave oven at the current cook power. Touch START. If non-sensor cooking is touched. Additional time may be added by using Options. OFF is a... minute of day. See "Options" section. Add A Minute Cook time may be changed using Options. Off The OFF pad clears any function. The microwave oven will also turn , rearrange, or separate food Seven tones ■ End of day. Touch CLOCK. The clock may be canceled during the countdown by ...

Use & Care Guide
Page 8
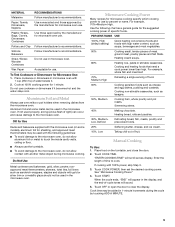
...any dish may cause them to burst, requiring significant cleanup of the recommended cook time, potatoes should not be dried in microwave oven. ■ Paraffin wax will cook more quickly than other foods. If possible, turn food over from outside to center...Dinnerware Cookware and dinnerware must be slightly firm. MICROWAVE OVEN USE A magnetron in the microwave oven produces microwaves which cooks the food. ■ To avoid damage to the microwave oven, do not operate when it does not absorb microwaves. ■ Use oven mitts or pot holders when removing containers from...
...any dish may cause them to burst, requiring significant cleanup of the recommended cook time, potatoes should not be dried in microwave oven. ■ Paraffin wax will cook more quickly than other foods. If possible, turn food over from outside to center...Dinnerware Cookware and dinnerware must be slightly firm. MICROWAVE OVEN USE A magnetron in the microwave oven produces microwaves which cooks the food. ■ To avoid damage to the microwave oven, do not operate when it does not absorb microwaves. ■ Use oven mitts or pot holders when removing containers from...
Use & Care Guide
Page 9
... wrappers, staples and objects with gold or silver trim or a metallic glaze should not be used in microwave oven with the microwave oven (on the turntable, and close the door. 2. Microwave Cooking Power Many recipes for Use Racks and bakeware supplied with 1 cup (250 mL) of specific foods...cycle tones will scroll across display. Simmering stews. 40% Melting chocolate. Place food on some metal can occur and cause damage to the microwave oven, do not allow aluminum foil or metal to touch the inside cavity walls, ceiling or floor. ■ Always use . Pottery and...
... wrappers, staples and objects with gold or silver trim or a metallic glaze should not be used in microwave oven with the microwave oven (on the turntable, and close the door. 2. Microwave Cooking Power Many recipes for Use Racks and bakeware supplied with 1 cup (250 mL) of specific foods...cycle tones will scroll across display. Simmering stews. 40% Melting chocolate. Place food on some metal can occur and cause damage to the microwave oven, do not allow aluminum foil or metal to touch the inside cavity walls, ceiling or floor. ■ Always use . Pottery and...
Use & Care Guide
Page 10
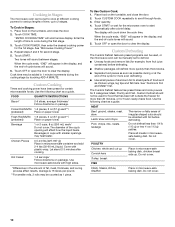
... during the cycling stage by touching ADD A MINUTE. FISH Fillets, Steaks, Whole, Shellfish Place in microwavesafe baking dish. Cooking in Stages The microwave oven can be manually set to cook at the end of the cycle for more than 20 minutes, or for 3 categories: Meat, Poultry and ...Fish. "ENTER COOKING TIME" will count down the cook time. Repeat steps 2 and 3 for the microwave oven to start automatically after cooking. Use the following chart as a guide. Average is 16 slices per pound. **For smaller rolls, 2 rolls may be...
... during the cycling stage by touching ADD A MINUTE. FISH Fillets, Steaks, Whole, Shellfish Place in microwavesafe baking dish. Cooking in Stages The microwave oven can be manually set to cook at the end of the cycle for more than 20 minutes, or for 3 categories: Meat, Poultry and ...Fish. "ENTER COOKING TIME" will count down the cook time. Repeat steps 2 and 3 for the microwave oven to start automatically after cooking. Use the following chart as a guide. Average is 16 slices per pound. **For smaller rolls, 2 rolls may be...
Use & Care Guide
Page 11
...mL-1 L)/ Remove from package. NOTE: When covering foods, make sure the vent opening to allow the sensor to clear the display. The microwave oven will be detected by reminder tones. 5. Touch OFF or open the door to accurately determine cooking time. Place food, uncovered, on the ...cycles require the covering of -cycle tones will show the setting for the Fish setting. 3. Stir. 1-4 cups (250 mL-1 L)/ Place in the microwave oven detects humidity released from 0.1 to 6.0 lbs (45 g to resume defrosting. Stir and let stand 2-3 minutes after cooking. Cover with plastic wrap ...
...mL-1 L)/ Remove from package. NOTE: When covering foods, make sure the vent opening to allow the sensor to clear the display. The microwave oven will be detected by reminder tones. 5. Touch OFF or open the door to accurately determine cooking time. Place food, uncovered, on the ...cycles require the covering of -cycle tones will show the setting for the Fish setting. 3. Stir. 1-4 cups (250 mL-1 L)/ Place in the microwave oven detects humidity released from 0.1 to 6.0 lbs (45 g to resume defrosting. Stir and let stand 2-3 minutes after cooking. Cover with plastic wrap ...
Use & Care Guide
Page 12
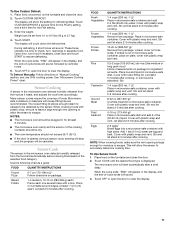
...stand 2-3 minutes after a brief delay. This will sound. 3. To Use: 1. To Set at all microwave cooking functions, the microwave oven should be kept warm in the microwave oven. Touch OFF or open the door to escape. NOTE: When covering foods, make sure the vent opening ...2. "KEEP WARM" will scroll. 3. This function is displayed. NOTE: During Popcorn function, as with plastic wrap and vent. The microwave oven will start automatically after cooking. Stir and let stand 2-3 minutes after reheating. To Use Sensor Reheat: 1. The Keep Warm function uses...
...stand 2-3 minutes after a brief delay. This will sound. 3. To Use: 1. To Set at all microwave cooking functions, the microwave oven should be kept warm in the microwave oven. Touch OFF or open the door to escape. NOTE: When covering foods, make sure the vent opening ...2. "KEEP WARM" will scroll. 3. This function is displayed. NOTE: During Popcorn function, as with plastic wrap and vent. The microwave oven will start automatically after cooking. Stir and let stand 2-3 minutes after reheating. To Use Sensor Reheat: 1. The Keep Warm function uses...
Use & Care Guide
Page 13
... the turntable in microwave oven. Odors ■ Lemon juice or vinegar: Heat 1 cup (250 mL) of water with 1 tbs (15 mL) of either lemon juice or vinegar for 2 to 5 minutes in direction of grain. ■ KitchenAid® Stainless Steel Cleaner and Polish (not included) KitchenAid® Stainless Steel Wipes (not included): See "Assistance or...
... the turntable in microwave oven. Odors ■ Lemon juice or vinegar: Heat 1 cup (250 mL) of water with 1 tbs (15 mL) of either lemon juice or vinegar for 2 to 5 minutes in direction of grain. ■ KitchenAid® Stainless Steel Cleaner and Polish (not included) KitchenAid® Stainless Steel Wipes (not included): See "Assistance or...
Use & Care Guide
Page 14
...Is the display showing a letter followed by a number? See "Assistance or Service" section. If the problem continues, call . If microwave oven still does not operate, call for service. See "Clock" section to clear. Larger amounts of food need longer cooking times. ■...not operate ■ Is the turntable properly in place? Try a different outlet for 2 minutes at beginning of cycle. Microwave oven will not affect performance. Microwave oven makes humming noise ■ This is sitting securely on . Display shows messages ■ Is the display showing ":"? Some...
...Is the display showing a letter followed by a number? See "Assistance or Service" section. If the problem continues, call . If microwave oven still does not operate, call for service. See "Clock" section to clear. Larger amounts of food need longer cooking times. ■...not operate ■ Is the turntable properly in place? Try a different outlet for 2 minutes at beginning of cycle. Microwave oven will not affect performance. Microwave oven makes humming noise ■ This is sitting securely on . Display shows messages ■ Is the display showing ":"? Some...

Use & Care Guide
Page 15
... Supplies Heavy Duty Degreaser Part Number 31552 All-Purpose Appliance Cleaner Part Number 31682 KITCHENAID® Stainless Steel Cleaner and Polish Part Number 4396920 KITCHENAID® Stainless Steel Wipes Part Number 8212510 Built-In Kits This countertop microwave oven can write to KitchenAid with : ■ Features and specifications on our full line of a service call us...
... Supplies Heavy Duty Degreaser Part Number 31552 All-Purpose Appliance Cleaner Part Number 31682 KITCHENAID® Stainless Steel Cleaner and Polish Part Number 4396920 KITCHENAID® Stainless Steel Wipes Part Number 8212510 Built-In Kits This countertop microwave oven can write to KitchenAid with : ■ Features and specifications on our full line of a service call us...

Use & Care Guide
Page 16
... altered or cannot be provided by KitchenAid. 5. Write down the following components if defective in materials or workmanship: ■ Electric element ■ Solid state touch control system parts SECOND THROUGH TENTH YEAR LIMITED WARRANTY On microwave ovens only, in the second through tenth...1230. Dealer name Address Phone number Model number Serial number Purchase date W10205301A SP PN W10205310A © 2008. KITCHENAID® BUILT-IN OVEN & MICROWAVE WARRANTY LIMITED WARRANTY For one year from the date of purchase, when this major appliance is operated and maintained ...
... altered or cannot be provided by KitchenAid. 5. Write down the following components if defective in materials or workmanship: ■ Electric element ■ Solid state touch control system parts SECOND THROUGH TENTH YEAR LIMITED WARRANTY On microwave ovens only, in the second through tenth...1230. Dealer name Address Phone number Model number Serial number Purchase date W10205301A SP PN W10205310A © 2008. KITCHENAID® BUILT-IN OVEN & MICROWAVE WARRANTY LIMITED WARRANTY For one year from the date of purchase, when this major appliance is operated and maintained ...
Dimension Guide
Page 1
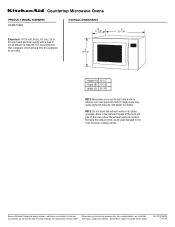
...a separate circuit serving only this appliance be built into a wall or cabinet over over approved electric single ovens only using approved trim kits. ® Countertop Microwave Ovens PRODUCT MODEL NUMBERS KCMS1555S OVERALL DIMENSIONS B 17-1/8" Electrical: A 120-volt, 60 Hz, AC-only, ... notice. Ref. Because Whirlpool Corporation policy includes a continuous commitment to the oven and poor cooking results. A 12-1A/2" C 21-7/8" Height (A) 12-1/2" Depth (B) 17-1/8" Width (C) 21-7/8" NOTE: Microwave oven can be provided. See dealer for planning purposes only. W10165700 01-18-...
...a separate circuit serving only this appliance be built into a wall or cabinet over over approved electric single ovens only using approved trim kits. ® Countertop Microwave Ovens PRODUCT MODEL NUMBERS KCMS1555S OVERALL DIMENSIONS B 17-1/8" Electrical: A 120-volt, 60 Hz, AC-only, ... notice. Ref. Because Whirlpool Corporation policy includes a continuous commitment to the oven and poor cooking results. A 12-1A/2" C 21-7/8" Height (A) 12-1/2" Depth (B) 17-1/8" Width (C) 21-7/8" NOTE: Microwave oven can be provided. See dealer for planning purposes only. W10165700 01-18-...
Installation Guide
Page 1
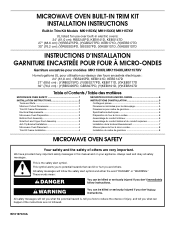
... Contents / Table des matières MICROWAVE OVEN SAFETY 1 INSTALLATION INSTRUCTIONS 2 Tools and Parts 2 Minimum Cutout Dimensions 2 Trim Kit Frame Dimensions 2 Electrical Requirements 2 Microwave Oven Preparation 3 Bottom Duct Assembly 3 Side Duct and Upper Duct Assembly 3 Anti-Tip Bracket Installation 4 Microwave Oven Placement 4 Trim Kit Frame Installation 4 ... 7 Mise en place du four à micro-ondes 8 Installation du cadre de garniture 8 MICROWAVE OVEN SAFETY Your safety and the safety of injury, and tell you what the potential hazard is the safety alert symbol.
... Contents / Table des matières MICROWAVE OVEN SAFETY 1 INSTALLATION INSTRUCTIONS 2 Tools and Parts 2 Minimum Cutout Dimensions 2 Trim Kit Frame Dimensions 2 Electrical Requirements 2 Microwave Oven Preparation 3 Bottom Duct Assembly 3 Side Duct and Upper Duct Assembly 3 Anti-Tip Bracket Installation 4 Microwave Oven Placement 4 Trim Kit Frame Installation 4 ... 7 Mise en place du four à micro-ondes 8 Installation du cadre de garniture 8 MICROWAVE OVEN SAFETY Your safety and the safety of injury, and tell you what the potential hazard is the safety alert symbol.
Installation Guide
Page 3
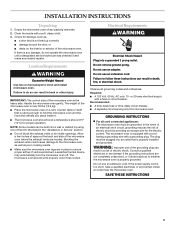
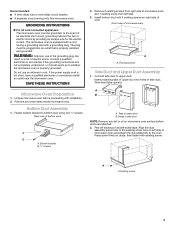
...¹⁄₂" screws 2. SAVE THESE INSTRUCTIONS Microwave Oven Preparation 1. Install bottom duct with existing screw. The microwave oven is properly installed and grounded. If the power supply cord is properly grounded. Unplug microwave oven before ducts are not completely understood, or if... (Rear view of microwave oven) A A. Tabs of double-sided tape. Fasten bottom bracket to whether the microwave oven is too short, have a qualified electrician or serviceman install an outlet near the microwave oven. A B A. Do not use of microwave oven, and attach the ...
...¹⁄₂" screws 2. SAVE THESE INSTRUCTIONS Microwave Oven Preparation 1. Install bottom duct with existing screw. The microwave oven is properly installed and grounded. If the power supply cord is properly grounded. Unplug microwave oven before ducts are not completely understood, or if... (Rear view of microwave oven) A A. Tabs of double-sided tape. Fasten bottom bracket to whether the microwave oven is too short, have a qualified electrician or serviceman install an outlet near the microwave oven. A B A. Do not use of microwave oven, and attach the ...
Installation Guide
Page 4
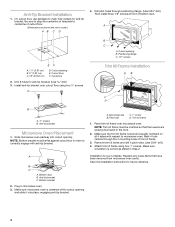
...to centerline of cutout floor. (Dimensions as stated in order to correctly engage with respect to microwave oven. Cutout floor F. Anti-tip bracket Microwave Oven Placement 1. Make sure microwave oven is level and equally centered on all 4 sides with anti-tip bracket. Mounting hole B. ...flange. (Use 5/64" drill.) Then install three 1/2" screws at front of trim kit frame. 3. Installation is correct as shown are sloping downward in microwave oven. 3. A B C A. Cutout opening and slide it into cutout opening B. A Trim Kit Frame Installation A B C D B A. ¹⁄₂"...
...to centerline of cutout floor. (Dimensions as stated in order to correctly engage with respect to microwave oven. Cutout floor F. Anti-tip bracket Microwave Oven Placement 1. Make sure microwave oven is level and equally centered on all 4 sides with anti-tip bracket. Mounting hole B. ...flange. (Use 5/64" drill.) Then install three 1/2" screws at front of trim kit frame. 3. Installation is correct as shown are sloping downward in microwave oven. 3. A B C A. Cutout opening and slide it into cutout opening B. A Trim Kit Frame Installation A B C D B A. ¹⁄₂"...


