Use and Care Manual
Page 3
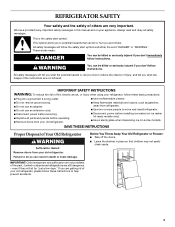
...the chance of injury, and tell you to move and install refrigerator. ■ Disconnect power before installing ice maker (on ice maker kit ready models only). ■ Use a sturdy glass when dispensing ice (on your old refrigerator, please follow these basic precautions: ■ Plug into a grounded... entrapment and suffocation are very important. Before You Throw Away Your Old Refrigerator or Freezer: ■ Take off the doors. ■ Leave the shelves in this manual and on some models). WARNING You can be killed or seriously injured if you don't immediately follow the...
...the chance of injury, and tell you to move and install refrigerator. ■ Disconnect power before installing ice maker (on ice maker kit ready models only). ■ Use a sturdy glass when dispensing ice (on your old refrigerator, please follow these basic precautions: ■ Plug into a grounded... entrapment and suffocation are very important. Before You Throw Away Your Old Refrigerator or Freezer: ■ Take off the doors. ■ Leave the shelves in this manual and on some models). WARNING You can be killed or seriously injured if you don't immediately follow the...
Use and Care Manual
Page 4
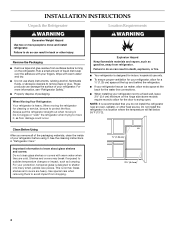
... do not install the refrigerator near an oven, radiator, or other injury. Rub a small amount of your refrigerator before turning on the hinge side (some models require more) to allow extra space at the top and behind the refrigerator. ■ If your refrigerator has an ice maker, allow for the water...
... do not install the refrigerator near an oven, radiator, or other injury. Rub a small amount of your refrigerator before turning on the hinge side (some models require more) to allow extra space at the top and behind the refrigerator. ■ If your refrigerator has an ice maker, allow for the water...
Use and Care Manual
Page 5
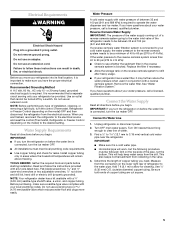
...60 psi (276 to 414 kPa): ■ Check to 3.18 mm) vertical cold water pipe near the refrigerator. Be sure...water line is connected, turn the control (Thermostat, Refrigerator or Freezer Control depending on the model) to refill after heavy usage. ■ If your refrigerator ...See "Water Filtration System." Unplug refrigerator or disconnect power. 2. Add 7 ft (2.1 m) to follow the instructions provided with water pressure of 40 to ... important to Water Line 1. Determine the length of the pipe, not the bottom. Use ¹⁄₄" (6.35 mm) O.D. (outside diameter) copper ...
...60 psi (276 to 414 kPa): ■ Check to 3.18 mm) vertical cold water pipe near the refrigerator. Be sure...water line is connected, turn the control (Thermostat, Refrigerator or Freezer Control depending on the model) to refill after heavy usage. ■ If your refrigerator ...See "Water Filtration System." Unplug refrigerator or disconnect power. 2. Add 7 ft (2.1 m) to follow the instructions provided with water pressure of 40 to ... important to Water Line 1. Determine the length of the pipe, not the bottom. Use ¹⁄₄" (6.35 mm) O.D. (outside diameter) copper ...

Use and Care Manual
Page 6
... of the copper tubing into the outlet end squarely as far as shown. Insert the end of 2 ft [61 cm]) with the copper tubing. Compression sleeve F. Tighten the pipe clamp screws slowly and evenly ...in the cold water pipe you may come down from the top or up from the bottom. Screw compression nut onto outlet end with the pipe clamp. Connect to the cold water ... Tighten the compression nut. A B C D A. Attach the copper tube to refrigerator and check for your model, the water line may crush the copper tubing. 7. Secure copper tubing to avoid kinks. 4. Cold water ...
... of the copper tubing into the outlet end squarely as far as shown. Insert the end of 2 ft [61 cm]) with the copper tubing. Compression sleeve F. Tighten the pipe clamp screws slowly and evenly ...in the cold water pipe you may come down from the top or up from the bottom. Screw compression nut onto outlet end with the pipe clamp. Connect to the cold water ... Tighten the compression nut. A B C D A. Attach the copper tube to refrigerator and check for your model, the water line may crush the copper tubing. 7. Secure copper tubing to avoid kinks. 4. Cold water ...

Use and Care Manual
Page 12
... compartment. Front leveling A B A. The interior water filter mounting bracket is firmly against the top of the refrigerator to rest on your model, your refrigerator seems unsteady or you see water leaks, see the "Troubleshooting" section. 5. Then snap the filter cover closed. Front adjustment... 1. Remove the sealing label from the line. Additional flushing may be required in some weight off the ice maker by opening the freezer door and lifting up the wire shutoff arm as shown. Adjust the Door Depending on the stabilizing feet. 6. Stabilizing foot Style 2 ...
... compartment. Front leveling A B A. The interior water filter mounting bracket is firmly against the top of the refrigerator to rest on your model, your refrigerator seems unsteady or you see water leaks, see the "Troubleshooting" section. 5. Then snap the filter cover closed. Front adjustment... 1. Remove the sealing label from the line. Additional flushing may be required in some weight off the ice maker by opening the freezer door and lifting up the wire shutoff arm as shown. Adjust the Door Depending on the stabilizing feet. 6. Stabilizing foot Style 2 ...

Use and Care Manual
Page 13
...a Phillips screwdriver, remove the top door cap. ■ Tap the bottom edge of refrigerator door handle upward with a clean, soft, damp cloth. 2. Pull the freezer drawer out to ¹⁄₄" (6.35 mm) backing or by bottom door cap and side trim. ■ Slide the filler board into ... Wood Panels If you plan to install custom wood decorator panels, you will slide up through handle opening. 4. Factory Trim Kit (on some models) There may be removed from refrigerator before removing door panel. 1. Rinse panels thoroughly and blot dry using ³⁄₄" (19.05 ...
...a Phillips screwdriver, remove the top door cap. ■ Tap the bottom edge of refrigerator door handle upward with a clean, soft, damp cloth. 2. Pull the freezer drawer out to ¹⁄₄" (6.35 mm) backing or by bottom door cap and side trim. ■ Slide the filler board into ... Wood Panels If you plan to install custom wood decorator panels, you will slide up through handle opening. 4. Factory Trim Kit (on some models) There may be removed from refrigerator before removing door panel. 1. Rinse panels thoroughly and blot dry using ³⁄₄" (19.05 ...
Use and Care Manual
Page 15
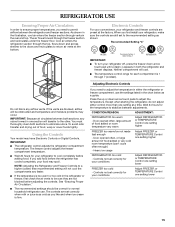
...to adjust the temperature. Using the Controls Your model may spoil. The controls are still set to the recommended setting as shown. IMPORTANT: ■ To turn your conditions Adjust REFRIGERATOR or TEMPERATURE Control one setting lower FREEZER too cold - Neither compartment will transfer to... moisture problems may occur. As shown in the illustration, cool air enters the freezer section through 7 (coldest). NOTE: Adjusting the Refrigerator and Freezer Controls to return air vents at the bottom. If the vents are not blocked before adding food. The air flows forward through...
...to adjust the temperature. Using the Controls Your model may spoil. The controls are still set to the recommended setting as shown. IMPORTANT: ■ To turn your conditions Adjust REFRIGERATOR or TEMPERATURE Control one setting lower FREEZER too cold - Neither compartment will transfer to... moisture problems may occur. As shown in the illustration, cool air enters the freezer section through 7 (coldest). NOTE: Adjusting the Refrigerator and Freezer Controls to return air vents at the bottom. If the vents are not blocked before adding food. The air flows forward through...
Use and Care Manual
Page 17
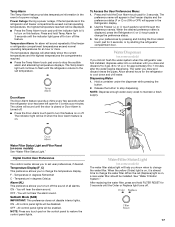
... displayed, press the Refrigerator (+) or (-) touch pads to set temperature. Use the Freezer (+) or (-) touch pads to turn off . ■ Press the Door Alarm touch pad to turn on this feature on some models) See "Water Filter Status Light." Water Dispenser (on , a new water filter should... be installed. NOTE: Dispense enough water every week to stop dispensing. The preference name will appear in the Freezer display and the preference status (F or ...
... displayed, press the Refrigerator (+) or (-) touch pads to set temperature. Use the Freezer (+) or (-) touch pads to turn off . ■ Press the Door Alarm touch pad to turn on this feature on some models) See "Water Filter Status Light." Water Dispenser (on , a new water filter should... be installed. NOTE: Dispense enough water every week to stop dispensing. The preference name will appear in the Freezer display and the preference status (F or ...
Use and Care Manual
Page 18
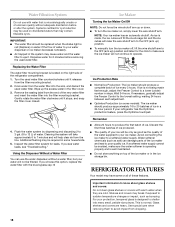
...filter. If a softened water supply cannot be required in some households. 5. REFRIGERATOR FEATURES Your model may cause water and the water filter to the OFF (arm up) position. ■ To...the Water Filter The water filter mounting bracket is normal. Remove the sealing label from dropping. 18 Glass shelves and covers are cold. Wipe up or down. ■ To turn the ice ...clockwise until it stops, and snap the filter cover closed. If necessary, gradually adjust the Freezer Control to the lowest setting, waiting 24 hours between each adjustment. ■ OptimIce Production ...
...filter. If a softened water supply cannot be required in some households. 5. REFRIGERATOR FEATURES Your model may cause water and the water filter to the OFF (arm up) position. ■ To...the Water Filter The water filter mounting bracket is normal. Remove the sealing label from dropping. 18 Glass shelves and covers are cold. Wipe up or down. ■ To turn the ice ...clockwise until it stops, and snap the filter cover closed. If necessary, gradually adjust the Freezer Control to the lowest setting, waiting 24 hours between each adjustment. ■ OptimIce Production ...
Use and Care Manual
Page 19
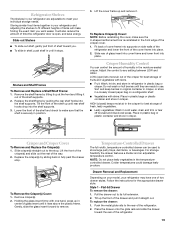
... the Crisper(s): 1. Replace the crisper(s) by sliding back in the crisper for best storage of two drawer styles. Drawer Removal and Replacement Depending on your model, your refrigerator may have one hand, press up in the front edge of the drawer and pull it straight out. Style 1 - To Replace Crisper(s) Cover...
... the Crisper(s): 1. Replace the crisper(s) by sliding back in the crisper for best storage of two drawer styles. Drawer Removal and Replacement Depending on your model, your refrigerator may have one hand, press up in the front edge of the drawer and pull it straight out. Style 1 - To Replace Crisper(s) Cover...

Use and Care Manual
Page 20
...Remove all items from the rear wall of the drawer and pull it helps keep ice from basket. Drawer Divider To Remove the Divider: 1. Freezer Baskets To Remove and Replace Wire Baskets: Upper basket 1. To replace the drawer: 1. NOTE: Use the coldest setting when storing meats. When .... Cover leftovers with plastic wrap, aluminum foil, or plastic containers with tight lids. Tilt up -lid Drawer To remove the drawer: 1. FREEZER FEATURES Your model may be non-removable and it is designed to be colder than the times given, freeze the meat. Lower basket 1. Fresh fish or...
...Remove all items from the rear wall of the drawer and pull it helps keep ice from basket. Drawer Divider To Remove the Divider: 1. Freezer Baskets To Remove and Replace Wire Baskets: Upper basket 1. To replace the drawer: 1. NOTE: Use the coldest setting when storing meats. When .... Cover leftovers with plastic wrap, aluminum foil, or plastic containers with tight lids. Tilt up -lid Drawer To remove the drawer: 1. FREEZER FEATURES Your model may be non-removable and it is designed to be colder than the times given, freeze the meat. Lower basket 1. Fresh fish or...
Use and Care Manual
Page 21
... it up and pulling it straight out. 2. Remove the utility compartment by sliding it in warm water. Both the refrigerator and freezer sections defrost automatically. Use a clean sponge or soft cloth and a mild detergent in warm water. Do not use abrasive or...parts from inside, such as window sprays, scouring cleansers, flammable fluids, cleaning waxes, concentrated detergents, bleaches or cleansers containing petroleum products on some models) To Remove and Replace the Door Retainer: 1. To Clean Your Refrigerator: 1. Brushed aluminum: Wash with a mixture of warm water and ...
... it up and pulling it straight out. 2. Remove the utility compartment by sliding it in warm water. Both the refrigerator and freezer sections defrost automatically. Use a clean sponge or soft cloth and a mild detergent in warm water. Do not use abrasive or...parts from inside, such as window sprays, scouring cleansers, flammable fluids, cleaning waxes, concentrated detergents, bleaches or cleansers containing petroleum products on some models) To Remove and Replace the Door Retainer: 1. To Clean Your Refrigerator: 1. Brushed aluminum: Wash with a mixture of warm water and ...

Use and Care Manual
Page 22
...position. ■ Shut off . See "Base Grille" graphic or "Base Grille" section. ■ Use a vacuum cleaner with a sponge and mild detergent in the freezer for 2 to 4 days. ■ If neither a food locker nor dry ice is suggested that food contains ice crystals, it in a frozen food locker. &#...bulb with a clean sponge or soft cloth and a mild detergent in normal home operating environments. Power Interruptions If the power will fit your model) to release it . Stainless steel finish: Wash with an appliance bulb no greater than 40 watts. 4. Do not use the manufacturer's ...
...position. ■ Shut off . See "Base Grille" graphic or "Base Grille" section. ■ Use a vacuum cleaner with a sponge and mild detergent in the freezer for 2 to 4 days. ■ If neither a food locker nor dry ice is suggested that food contains ice crystals, it in a frozen food locker. &#...bulb with a clean sponge or soft cloth and a mild detergent in normal home operating environments. Power Interruptions If the power will fit your model) to release it . Stainless steel finish: Wash with an appliance bulb no greater than 40 watts. 4. Do not use the manufacturer's ...
Use and Care Manual
Page 23
...Failure to follow these instructions can result in the leveling legs so they don't scrape the floor. See "Using the Control(s)," depending on the model. There is normal for the move . 8. The motor will not operate WARNING Electrical Shock Hazard Plug into a grounded 3 prong outlet. &#.... ■ When the last load of the refrigerator. See "Using the Controls." 5. See "Changing the Light Bulb(s)," depending on the model. ■ Is the refrigerator defrosting? At normal room temperatures, your motor will not close completely, see whether the refrigerator is humid, expect...
...Failure to follow these instructions can result in the leveling legs so they don't scrape the floor. See "Using the Control(s)," depending on the model. There is normal for the move . 8. The motor will not operate WARNING Electrical Shock Hazard Plug into a grounded 3 prong outlet. &#.... ■ When the last load of the refrigerator. See "Using the Controls." 5. See "Changing the Light Bulb(s)," depending on the model. ■ Is the refrigerator defrosting? At normal room temperatures, your motor will not close completely, see whether the refrigerator is humid, expect...
Use and Care Manual
Page 24
...Is the glass not being held under the water dispenser 2 to drip. The water filtration system may be replaced. Turn on . Be sure your model, remove the water filter cartridge. Off-taste, odor or gray color in the lines, causing water to 3 seconds after hookup for service or ... refrigerator? Discard discolored ice. Water may be cleaned? Normal dispenser use should produce 70-120 cubes every 24 hours. ■ Is the freezer temperature cold enough to your filter is not a problem, call for ice maker to be full or incorrectly installed. If too little ice ...
...Is the glass not being held under the water dispenser 2 to drip. The water filtration system may be replaced. Turn on . Be sure your model, remove the water filter cartridge. Off-taste, odor or gray color in the lines, causing water to 3 seconds after hookup for service or ... refrigerator? Discard discolored ice. Water may be cleaned? Normal dispenser use should produce 70-120 cubes every 24 hours. ■ Is the freezer temperature cold enough to your filter is not a problem, call for ice maker to be full or incorrectly installed. If too little ice ...
Use and Care Manual
Page 25
... recently dispensed? Temperature is probably due to do so can take several hours for the refrigerator to return to the refrigerator or freezer? Move objects away from in the refrigerator? Keep the refrigerator cool by getting all food is securely wrapped. Remove any objects... keeping food organized, and closing the door as soon as possible. ■ Is the room humid? See "Using the Control(s)," depending on your model. ■ Was a self-defrost cycle completed? See "Ensuring Proper Air Circulation" for droplets to cool completely. ■ Has a large amount ...
... recently dispensed? Temperature is probably due to do so can take several hours for the refrigerator to return to the refrigerator or freezer? Move objects away from in the refrigerator? Keep the refrigerator cool by getting all food is securely wrapped. Remove any objects... keeping food organized, and closing the door as soon as possible. ■ Is the room humid? See "Using the Control(s)," depending on your model. ■ Was a self-defrost cycle completed? See "Ensuring Proper Air Circulation" for droplets to cool completely. ■ Has a large amount ...
Use and Care Manual
Page 26
... of your correspondence. For Further Assistance If you need further assistance, you can write to KitchenAid with any questions or concerns at : Customer Interaction Centre KitchenAid Canada 1901 Minnesota Court Mississauga, Ontario L5N 3A7 Please include a daytime phone number in your... ■ Referrals to local dealers, repair parts distributors, and service companies. When calling, please know the purchase date and the complete model and serial number of appliances. ■ Installation information. ■ Use and maintenance procedures. ■ Accessory and repair parts sales. ...
... of your correspondence. For Further Assistance If you need further assistance, you can write to KitchenAid with any questions or concerns at : Customer Interaction Centre KitchenAid Canada 1901 Minnesota Court Mississauga, Ontario L5N 3A7 Please include a daytime phone number in your... ■ Referrals to local dealers, repair parts distributors, and service companies. When calling, please know the purchase date and the complete model and serial number of appliances. ■ Installation information. ■ Use and maintenance procedures. ■ Accessory and repair parts sales. ...

Use and Care Manual
Page 27
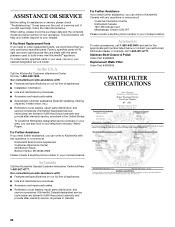
... system was reduced to a concentration less than or equal to the "Warranty" section for the Manufacturer's limited warranty. Use replacement filter model 67003523; PRODUCT DATA SHEETS Interior Water Filtration System Model 67003523-750 Capacity 750 Gallons (2839 Liters) System tested and certified by NSF International against NSF/ANSI Standard 53 for the...
... system was reduced to a concentration less than or equal to the "Warranty" section for the Manufacturer's limited warranty. Use replacement filter model 67003523; PRODUCT DATA SHEETS Interior Water Filtration System Model 67003523-750 Capacity 750 Gallons (2839 Liters) System tested and certified by NSF International against NSF/ANSI Standard 53 for the...
Use and Care Manual
Page 28
...major appliance is operated and maintained according to instructions attached to or furnished with the product, KitchenAid will pay for replacement or repair of the refrigerator/freezer cavity liner (including labor costs) if the part cracks due to defective materials or workmanship.... information about your major appliance is used for other than normal, single-family household use. 4. On models with the product, KitchenAid or KitchenAid Canada (hereafter "KitchenAid") will pay for factory specified parts and repair labor to correct defects in materials or workmanship. Damage resulting...
...major appliance is operated and maintained according to instructions attached to or furnished with the product, KitchenAid will pay for replacement or repair of the refrigerator/freezer cavity liner (including labor costs) if the part cracks due to defective materials or workmanship.... information about your major appliance is used for other than normal, single-family household use. 4. On models with the product, KitchenAid or KitchenAid Canada (hereafter "KitchenAid") will pay for factory specified parts and repair labor to correct defects in materials or workmanship. Damage resulting...


