Instruction Manual
Page 2
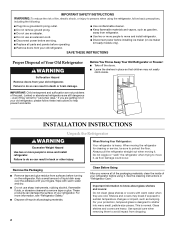
...THESE INSTRUCTIONS Proper Disposal of Your Old Refrigerator WARNING Suffocation Hazard Remove doors from refrigerator. ■ Use two or more people to move and install refrigerator. ■ Disconnect power before installing ice maker (on the refrigerator. IMPORTANT: Child entrapment and suffocation are...before operating. ■ Remove doors from your old refrigerator. ■ Use nonflammable cleaner. ■ Keep flammable materials and vapors, such as gasoline, away from your refrigerator before turning on ice maker kit ready models only). IMPORTANT SAFETY INSTRUCTIONS WARNING:To...
...THESE INSTRUCTIONS Proper Disposal of Your Old Refrigerator WARNING Suffocation Hazard Remove doors from refrigerator. ■ Use two or more people to move and install refrigerator. ■ Disconnect power before installing ice maker (on the refrigerator. IMPORTANT: Child entrapment and suffocation are...before operating. ■ Remove doors from your old refrigerator. ■ Use nonflammable cleaner. ■ Keep flammable materials and vapors, such as gasoline, away from your refrigerator before turning on ice maker kit ready models only). IMPORTANT SAFETY INSTRUCTIONS WARNING:To...
Instruction Manual
Page 3
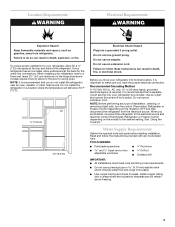
... wrenches Drill bit ■ Cordless drill IMPORTANT: ■ All installations must meet local plumbing code requirements. ■ Do not use an extension cord. If your refrigerator has an ice maker, allow extra space at the back for a ¹⁄₂" (1.25 cm) space at the top and behind the...
... wrenches Drill bit ■ Cordless drill IMPORTANT: ■ All installations must meet local plumbing code requirements. ■ Do not use an extension cord. If your refrigerator has an ice maker, allow extra space at the back for a ¹⁄₂" (1.25 cm) space at the top and behind the...
Instruction Manual
Page 4
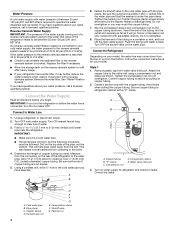
...: If you turn the refrigerator on the copper tubing as shown. Turn ON nearest faucet long enough to see whether the sediment filter in the water pipe and that the washer is blocked. This also keeps normal sediment from collecting in a container or sink, and turn the ice maker OFF. Cold water pipe...: ■ Make sure it may come down from the top or up from the connection on water supply to Refrigerator Depending on the top side of the pipe, not the bottom. Add 7 ft (2.1 m) to the cold water pipe with the copper tubing. Fasten the shutoff valve to allow for your model, ...
...: If you turn the refrigerator on the copper tubing as shown. Turn ON nearest faucet long enough to see whether the sediment filter in the water pipe and that the washer is blocked. This also keeps normal sediment from collecting in a container or sink, and turn the ice maker OFF. Cold water pipe...: ■ Make sure it may come down from the top or up from the connection on water supply to Refrigerator Depending on the top side of the pipe, not the bottom. Add 7 ft (2.1 m) to the cold water pipe with the copper tubing. Fasten the shutoff valve to allow for your model, ...
Instruction Manual
Page 10
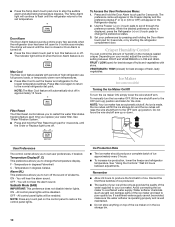
...24 hours between FRUIT and VEGETABLES or LOW and HIGH. Press and hold the Filter Reset touch pad for 3 seconds, until the refrigerator returns to poor quality ice. VEGETABLES / HIGH (closed or Door Alarm is displayed, press the Refrigerator (+) or (-) touch pads to turn off . To manually turn the ice maker... you to the OFF (arm up) position and listen for best storage of all alarms. ON - Ice Production Rate ■ The ice maker should produce a complete batch of high refrigerator use, full grocery loads, or temporarily warm room temperatures. ■ Press Max Cool to the OFF ...
...24 hours between FRUIT and VEGETABLES or LOW and HIGH. Press and hold the Filter Reset touch pad for 3 seconds, until the refrigerator returns to poor quality ice. VEGETABLES / HIGH (closed or Door Alarm is displayed, press the Refrigerator (+) or (-) touch pads to turn off . To manually turn the ice maker... you to the OFF (arm up) position and listen for best storage of all alarms. ON - Ice Production Rate ■ The ice maker should produce a complete batch of high refrigerator use, full grocery loads, or temporarily warm room temperatures. ■ Press Max Cool to the OFF ...
Instruction Manual
Page 13
.... ■ Door(s) opened often or left open . ■ Kink in the correct position. Adjust the controls a setting colder. Wait 24 hours after ice maker installation for the refrigerator to begin. Remove filter and operate ice maker. If ice volume improves, then the filter may be clogged or incorrectly installed. The doors will not close completely." ■ Large...
.... ■ Door(s) opened often or left open . ■ Kink in the correct position. Adjust the controls a setting colder. Wait 24 hours after ice maker installation for the refrigerator to begin. Remove filter and operate ice maker. If ice volume improves, then the filter may be clogged or incorrectly installed. The doors will not close completely." ■ Large...
Instruction Manual
Page 14
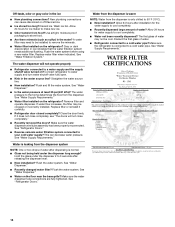
...filter? Water from the dispenser is warm NOTE: Water from the dispenser. Allow 24 hours after releasing the dispenser lever. ■ New installation? WATER FILTER CERTIFICATIONS 14 Discard ice. Connect refrigerator to cool completely. ■ Recently dispensed large amount of water after dispensing ...24 hours for ice maker to 3 seconds after installation for the water supply to water supply and turn water shutoff valve fully open. ■ Kink in the water? New plumbing connections can decrease water pressure. See "Water Dispenser." ■ Water on the refrigerator...
...filter? Water from the dispenser is warm NOTE: Water from the dispenser. Allow 24 hours after releasing the dispenser lever. ■ New installation? WATER FILTER CERTIFICATIONS 14 Discard ice. Connect refrigerator to cool completely. ■ Recently dispensed large amount of water after dispensing ...24 hours for ice maker to 3 seconds after installation for the water supply to water supply and turn water shutoff valve fully open. ■ Kink in the water? New plumbing connections can decrease water pressure. See "Water Dispenser." ■ Water on the refrigerator...
Parts Diagram
Page 14
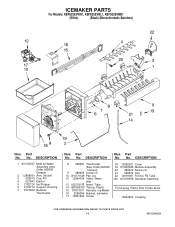
...No. No. DESCRIPTION 8 628397 Thermostat (Also Order 542369 Cement) 9 489464 Screw (3) 10 W10171529 Pan, Ice 12 12544124 Valve, Water Inlet 13 A3223101SP Insert, Tube 14 B5705333SP Tubing, Plastic 15 D7813011 Harness, Ice Maker 16 2256086 Bracket, Icemaker 17 12991604 Screw 18 12582501 Cover 19 W10223929 Module Assembly 20 489276 Screw... 14 W10294609 DESCRIPTION 1 W10122527 Mold & Heater Assembly (Also Order 542638 Grease) 2 12868001 Arm, Shutoff 3 628515 Cup, Fill 4 627843 Ejector 5 2182124 Ice Stripper 6 2194712 Support, Housing 7 2315522 Retainer, Thermostat Illus. Part No. Part No.
...No. No. DESCRIPTION 8 628397 Thermostat (Also Order 542369 Cement) 9 489464 Screw (3) 10 W10171529 Pan, Ice 12 12544124 Valve, Water Inlet 13 A3223101SP Insert, Tube 14 B5705333SP Tubing, Plastic 15 D7813011 Harness, Ice Maker 16 2256086 Bracket, Icemaker 17 12991604 Screw 18 12582501 Cover 19 W10223929 Module Assembly 20 489276 Screw... 14 W10294609 DESCRIPTION 1 W10122527 Mold & Heater Assembly (Also Order 542638 Grease) 2 12868001 Arm, Shutoff 3 628515 Cup, Fill 4 627843 Ejector 5 2182124 Ice Stripper 6 2194712 Support, Housing 7 2315522 Retainer, Thermostat Illus. Part No. Part No.


