Instruction Manual
Page 1
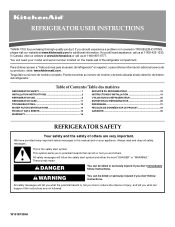
... 15 GARANTIE 35 WARRANTY 16 REFRIGERATOR SAFETY Your safety and the safety of the refrigerator compartment. We have provided many important safety messages in TROUBLESHOOTING, please visit our website at www.kitchenaid.com for purchasing this manual and on your model and serial number located on ...the inside wall of others . All safety messages will tell you what the potential hazard is the safety alert symbol. REFRIGERATOR USER INSTRUCTIONS THANK YOU for ...
... 15 GARANTIE 35 WARRANTY 16 REFRIGERATOR SAFETY Your safety and the safety of the refrigerator compartment. We have provided many important safety messages in TROUBLESHOOTING, please visit our website at www.kitchenaid.com for purchasing this manual and on your model and serial number located on ...the inside wall of others . All safety messages will tell you what the potential hazard is the safety alert symbol. REFRIGERATOR USER INSTRUCTIONS THANK YOU for ...
Instruction Manual
Page 2
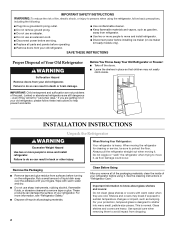
... flammable materials and vapors, such as bumping. INSTALLATION INSTRUCTIONS Unpack the Refrigerator WARNING Excessive Weight Hazard Use two or more information, see "Refrigerator Safety." ■ Dispose of liquid dish soap over the adhesive with your refrigerator before turning on ice maker kit ready models only). Failure to protect the floor. Clean Before Using After...
... flammable materials and vapors, such as bumping. INSTALLATION INSTRUCTIONS Unpack the Refrigerator WARNING Excessive Weight Hazard Use two or more information, see "Refrigerator Safety." ■ Dispose of liquid dish soap over the adhesive with your refrigerator before turning on ice maker kit ready models only). Failure to protect the floor. Clean Before Using After...
Instruction Manual
Page 3
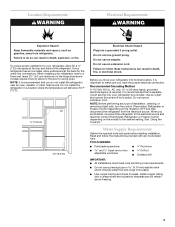
...AC only, 15- NOTE: It is important to make sure you are finished, reconnect the refrigerator to the electrical source and reset the control (Thermostat, Refrigerator or Freezer Control depending on the model) to follow the instructions provided with any type of installation, cleaning, or removing a light ...) space at the back for the door to a fixed wall, leave 2¹⁄₂" (6.3 cm) minimum on the model) to do not install the refrigerator near an oven, radiator, or other heat source. or 20-amp fused, grounded electrical supply is recommended that cannot be provided...
...AC only, 15- NOTE: It is important to make sure you are finished, reconnect the refrigerator to the electrical source and reset the control (Thermostat, Refrigerator or Freezer Control depending on the model) to follow the instructions provided with any type of installation, cleaning, or removing a light ...) space at the back for the door to a fixed wall, leave 2¹⁄₂" (6.3 cm) minimum on the model) to do not install the refrigerator near an oven, radiator, or other heat source. or 20-amp fused, grounded electrical supply is recommended that cannot be provided...
Instruction Manual
Page 4
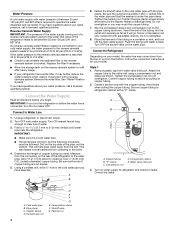
...the connection instructions for your cold water supply, the water pressure to the reverse osmosis system needs to refill after heavy usage. ■ If your model, the water line may come down from the top or up from the bottom. Copper tubing B. "P" clamp C. Correct any leaks. If a reverse...work, but the following procedure must be between 35 and 120 psi (241 and 827 kPa) is secure by pulling on the water pipe. Add 7 ft (2.1 m) to refrigerator cabinet with a reverse osmosis system. A B C A. Insert the end of 40 to 60 psi (276 to operate the water dispenser and ice maker....
...the connection instructions for your cold water supply, the water pressure to the reverse osmosis system needs to refill after heavy usage. ■ If your model, the water line may come down from the top or up from the bottom. Copper tubing B. "P" clamp C. Correct any leaks. If a reverse...work, but the following procedure must be between 35 and 120 psi (241 and 827 kPa) is secure by pulling on the water pipe. Add 7 ft (2.1 m) to refrigerator cabinet with a reverse osmosis system. A B C A. Insert the end of 40 to 60 psi (276 to operate the water dispenser and ice maker....
Instruction Manual
Page 6
...an extension cord. Starting with the top of the drawer front into a grounded 3 prong outlet. Lift the refrigerator door from the bottom hinge pin. See Wiring Plug graphic. NOTE: On some models, remove the shim from the cabinet. Do not tighten the screws completely. 2. Tighten screws. Replace the top... into the slots in the bottom of the freezer compartment. Failure to hold the door in this section. Return all screws. 4. Keep the refrigerator doors closed until you are working . 3. Before removing the left-hand side door, disconnect the wiring plug located on top of the top...
...an extension cord. Starting with the top of the drawer front into a grounded 3 prong outlet. Lift the refrigerator door from the bottom hinge pin. See Wiring Plug graphic. NOTE: On some models, remove the shim from the cabinet. Do not tighten the screws completely. 2. Tighten screws. Replace the top... into the slots in the bottom of the freezer compartment. Failure to hold the door in this section. Return all screws. 4. Keep the refrigerator doors closed until you are working . 3. Before removing the left-hand side door, disconnect the wiring plug located on top of the top...
Instruction Manual
Page 7
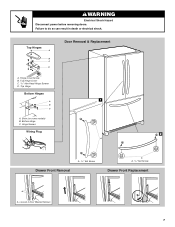
Hinge Cover Screw B. Top Hinge Bottom Hinges 1 A B C A. Shim (on some models) B. Hinge Screws Wiring Plug 2 A Drawer Front Removal A. 3/32" Set Screw A A. 3/32" Set Screw Drawer Front Replacement A A. Top Hinges A B C D Door Removal & Replacement A. Top Hinge Cover C. 5/16" Hex-Head Hinge Screws D. Loosen 4 Door Bracket Screws 7 Bottom Hinge C. WARNING Electrical Shock Hazard Disconnect power before removing doors. Failure to do so can result in death or electrical shock.
Hinge Cover Screw B. Top Hinge Bottom Hinges 1 A B C A. Shim (on some models) B. Hinge Screws Wiring Plug 2 A Drawer Front Removal A. 3/32" Set Screw A A. 3/32" Set Screw Drawer Front Replacement A A. Top Hinges A B C D Door Removal & Replacement A. Top Hinge Cover C. 5/16" Hex-Head Hinge Screws D. Loosen 4 Door Bracket Screws 7 Bottom Hinge C. WARNING Electrical Shock Hazard Disconnect power before removing doors. Failure to do so can result in death or electrical shock.
Instruction Manual
Page 8
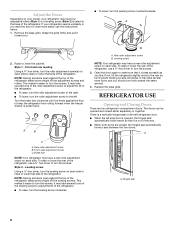
... to close more easily, use the instructions below. 1. Style 2 - Hinged seal 8 Adjust the Doors Depending on each side. If your refrigerator may have a rear roller adjustment screw on your model, your refrigerator seems unsteady or you should turn the screws. Raise or lower the cabinet. Rear roller adjustment screw B. It may take several...
... to close more easily, use the instructions below. 1. Style 2 - Hinged seal 8 Adjust the Doors Depending on each side. If your refrigerator may have a rear roller adjustment screw on your model, your refrigerator seems unsteady or you should turn the screws. Raise or lower the cabinet. Rear roller adjustment screw B. It may take several...
Instruction Manual
Page 10
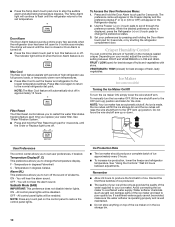
... pad to turn the ice maker OFF, lift the wire shutoff arm to any touch pad on some models) Turning the Ice Maker On/Off To turn off . Depending on . As ice is made, the... ice cubes will be avoided, make sure the water softener is operating properly and is on your model, adjust the control to the OFF (arm up or down. Do not force the wire shutoff...temporarily warm room temperatures. ■ Press Max Cool to set the freezer and refrigerator to change the preference status. 3. Wait 24 hours between FRUIT and VEGETABLES or LOW and HIGH. The chime will be ...
... pad to turn the ice maker OFF, lift the wire shutoff arm to any touch pad on some models) Turning the Ice Maker On/Off To turn off . Depending on . As ice is made, the... ice cubes will be avoided, make sure the water softener is operating properly and is on your model, adjust the control to the OFF (arm up or down. Do not force the wire shutoff...temporarily warm room temperatures. ■ Press Max Cool to set the freezer and refrigerator to change the preference status. 3. Wait 24 hours between FRUIT and VEGETABLES or LOW and HIGH. The chime will be ...
Instruction Manual
Page 11
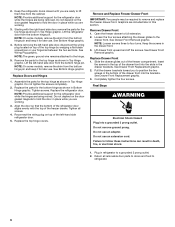
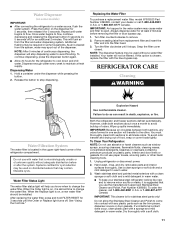
... can result in warm water. To avoid odor transfer and drying out of the refrigerator compartment. Dry thoroughly with any odors formed in some models) IMPORTANT: ■ After connecting the refrigerator to eject. Explosion Hazard Use nonflammable cleaner. However, clean both sections to flow,... to change the water filter. or 1-800-807-6777 Canada. To continue dispensing, press the dispenser button again. ■ Allow 24 hours for 5 seconds. NOTE: The dispenser feature may spurt out of unknown quality without a water filter installed. Turn the filter clockwise...
... can result in warm water. To avoid odor transfer and drying out of the refrigerator compartment. Dry thoroughly with any odors formed in some models) IMPORTANT: ■ After connecting the refrigerator to eject. Explosion Hazard Use nonflammable cleaner. However, clean both sections to flow,... to change the water filter. or 1-800-807-6777 Canada. To continue dispensing, press the dispenser button again. ■ Allow 24 hours for 5 seconds. NOTE: The dispenser feature may spurt out of unknown quality without a water filter installed. Turn the filter clockwise...
Instruction Manual
Page 13
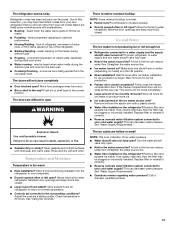
... way, see "The doors will not close the freezer compartment door. The ice cubes are hollow or small NOTE: This is in 24 hours. See "Water Supply Requirements." ■ Questions remain regarding water pressure? Move food packages away from the ejector arm with explanations....; Water filter installed on ? Call a licensed, qualified plumber. 13 water dripping on model) is an indication of food added? Allows warm air to optimize performance ■ Hissing/Rattling - Connect refrigerator to your cold water supply? Remove ice from door. ■ Bin or shelf in...
... way, see "The doors will not close the freezer compartment door. The ice cubes are hollow or small NOTE: This is in 24 hours. See "Water Supply Requirements." ■ Questions remain regarding water pressure? Move food packages away from the ejector arm with explanations....; Water filter installed on ? Call a licensed, qualified plumber. 13 water dripping on model) is an indication of food added? Allows warm air to optimize performance ■ Hissing/Rattling - Connect refrigerator to your cold water supply? Remove ice from door. ■ Bin or shelf in...
Instruction Manual
Page 15
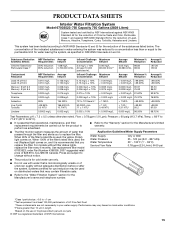
...22°C). ■ It is microbiologically unsafe or of unknown quality without adequate disinfection before or after the system. Use replacement filter model 67003523; This system has been tested according to the "Warranty" section for the Manufacturer's limited warranty. Prices are subject to change without...water that is essential that passes through the filter and alerts you replace the filter. PRODUCT DATA SHEETS Interior Water Filtration System Model 67003523-750 Capacity 750 Gallons (2839 Liters) System tested and certified by NSF International against NSF/ANSI Standard 53 for the...
...22°C). ■ It is microbiologically unsafe or of unknown quality without adequate disinfection before or after the system. Use replacement filter model 67003523; This system has been tested according to the "Warranty" section for the Manufacturer's limited warranty. Prices are subject to change without...water that is essential that passes through the filter and alerts you replace the filter. PRODUCT DATA SHEETS Interior Water Filtration System Model 67003523-750 Capacity 750 Gallons (2839 Liters) System tested and certified by NSF International against NSF/ANSI Standard 53 for the...
Instruction Manual
Page 16
... is used for other than normal, single-family household use of products not approved by a KitchenAid designated service company. In Canada, call 1-800-422-1230. On models with a water filter: 30 day limited warranty on the inside wall of the refrigerator compartment. Outside the 50 United States and Canada, this User Instructions and...
... is used for other than normal, single-family household use of products not approved by a KitchenAid designated service company. In Canada, call 1-800-422-1230. On models with a water filter: 30 day limited warranty on the inside wall of the refrigerator compartment. Outside the 50 United States and Canada, this User Instructions and...


