Instruction Manual
Page 1
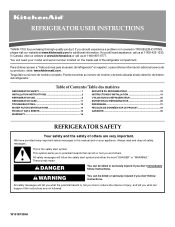
...Table of Contents / Table des matières REFRIGERATOR SAFETY 1 SÉCURITÉ DU RÉFRIGÉRATEUR 18 INSTALLATION INSTRUCTIONS 2 INSTRUCTIONS D'INSTALLATION 19 REFRIGERATOR USE 8 UTILISATION DU RÉFRIGÉRATEUR 25 REFRIGERATOR CARE 11 ENTRETIEN DU RÉFRIGÉRATEUR ...usuario del refrigerador" en español, o para obtener información adicional acerca de su producto, visite: www.kitchenaid.com. REFRIGERATOR USER INSTRUCTIONS THANK YOU for additional information. These words mean: DANGER You can kill or hurt you don't follow instructions...
...Table of Contents / Table des matières REFRIGERATOR SAFETY 1 SÉCURITÉ DU RÉFRIGÉRATEUR 18 INSTALLATION INSTRUCTIONS 2 INSTRUCTIONS D'INSTALLATION 19 REFRIGERATOR USE 8 UTILISATION DU RÉFRIGÉRATEUR 25 REFRIGERATOR CARE 11 ENTRETIEN DU RÉFRIGÉRATEUR ...usuario del refrigerador" en español, o para obtener información adicional acerca de su producto, visite: www.kitchenaid.com. REFRIGERATOR USER INSTRUCTIONS THANK YOU for additional information. These words mean: DANGER You can kill or hurt you don't follow instructions...
Instruction Manual
Page 2
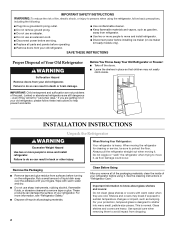
...exposed to sudden temperature changes or impact, such as bumping. Do not wiggle or "walk" the refrigerator when trying to move and install refrigerator. For your old refrigerator. ■ Use nonflammable cleaner. ■ Keep flammable materials and vapors, such as floor damage ... Remove tape and glue residue from dropping. 2 These products can damage the surface of your refrigerator before using the refrigerator, follow these instructions to move and install refrigerator. ■ Disconnect power before turning on ice maker kit ready models only). Clean Before Using...
...exposed to sudden temperature changes or impact, such as bumping. Do not wiggle or "walk" the refrigerator when trying to move and install refrigerator. For your old refrigerator. ■ Use nonflammable cleaner. ■ Keep flammable materials and vapors, such as floor damage ... Remove tape and glue residue from dropping. 2 These products can damage the surface of your refrigerator before using the refrigerator, follow these instructions to move and install refrigerator. ■ Disconnect power before turning on ice maker kit ready models only). Clean Before Using...
Instruction Manual
Page 3
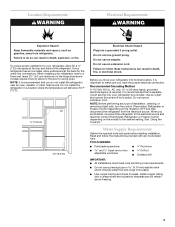
...Electrical Shock Hazard Plug into its final location, it is recommended that a separate circuit serving only your refrigerator, allow extra space at the top and behind the refrigerator. Install copper tubing only in death, explosion, or fire. To ensure proper ventilation for leaks. Before you have...allow for a ¹⁄₂" (1.25 cm) space at the back for the door to OFF and then disconnect the refrigerator from refrigerator. Do not install the refrigerator in death, fire, or electrical shock. Recommended Grounding Method A 115 Volt, 60 Hz., AC only, 15- Do not ...
...Electrical Shock Hazard Plug into its final location, it is recommended that a separate circuit serving only your refrigerator, allow extra space at the top and behind the refrigerator. Install copper tubing only in death, explosion, or fire. To ensure proper ventilation for leaks. Before you have...allow for a ¹⁄₂" (1.25 cm) space at the back for the door to OFF and then disconnect the refrigerator from refrigerator. Do not install the refrigerator in death, fire, or electrical shock. Recommended Grounding Method A 115 Volt, 60 Hz., AC only, 15- Do not ...
Instruction Manual
Page 5
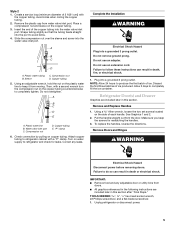
...ft [61 cm]) with a "P" clamp. Avoid kinks when coiling the copper tubing. 2. Remove the plastic cap from the door. Compression nut B. Sleeve D. Copper tubing 5. A B C D E A. Compression nut D. "P" clamp 6. Complete the Installation... WARNING Electrical Shock Hazard Plug into the water valve inlet port. Do not use an extension cord. NOTE: Allow 24 hours to avoid kinks. 4. ...Hinges WARNING Electrical Shock Hazard Disconnect power before removing doors. Unplug refrigerator or disconnect power. 5 Place a compression nut and sleeve on...
...ft [61 cm]) with a "P" clamp. Avoid kinks when coiling the copper tubing. 2. Remove the plastic cap from the door. Compression nut B. Sleeve D. Copper tubing 5. A B C D E A. Compression nut D. "P" clamp 6. Complete the Installation... WARNING Electrical Shock Hazard Plug into the water valve inlet port. Do not use an extension cord. NOTE: Allow 24 hours to avoid kinks. 4. ...Hinges WARNING Electrical Shock Hazard Disconnect power before removing doors. Unplug refrigerator or disconnect power. 5 Place a compression nut and sleeve on...
Instruction Manual
Page 9
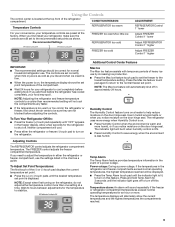
... controls to the recommended set point is displayed. Adjusting Controls The REFRIGERATOR control adjusts the refrigerator compartment temperature. Wait 24 hours between adjustments for the refrigerator to stabilize. The controls are set correctly when milk or juice is as cold as you first install your refrigerator to save energy when the environment is less humid. NOTE...
... controls to the recommended set point is displayed. Adjusting Controls The REFRIGERATOR control adjusts the refrigerator compartment temperature. Wait 24 hours between adjustments for the refrigerator to stabilize. The controls are set correctly when milk or juice is as cold as you first install your refrigerator to save energy when the environment is less humid. NOTE...
Instruction Manual
Page 11
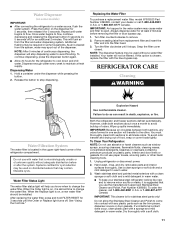
...or after the system. Your water will flush air from the filter and water dispensing system. REFRIGERATOR CARE Cleaning WARNING Water Filtration System The water filter is on, a new water filter should be installed. See "Using the Controls." Use a clean sponge or soft cloth and a mild detergent...cap. To continue dispensing, press the dispenser button again. ■ Allow 24 hours for 3 seconds until water begins to come into the filter head. 3. To avoid odor transfer and drying out of the refrigerator compartment. Do not allow the Stainless Steel Cleaner and Polish to flow....
...or after the system. Your water will flush air from the filter and water dispensing system. REFRIGERATOR CARE Cleaning WARNING Water Filtration System The water filter is on, a new water filter should be installed. See "Using the Controls." Use a clean sponge or soft cloth and a mild detergent...cap. To continue dispensing, press the dispenser button again. ■ Allow 24 hours for 3 seconds until water begins to come into the filter head. 3. To avoid odor transfer and drying out of the refrigerator compartment. Do not allow the Stainless Steel Cleaner and Polish to flow....
Instruction Manual
Page 12
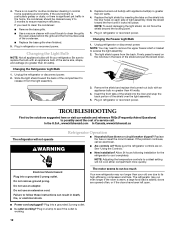
... tabs of the shield into the liner holes on each side of the shield and pull the shield down. 3. Allow 24 hours following installation for routine condenser cleaning in normal home operating environments. Changing the Light Bulb NOTE: Not all appliance bulbs will fit your... is significant pet traffic in the back of light assembly. Unplug the refrigerator or disconnect power. 2. Plug in refrigerator or reconnect power. In the U.S.A., www.kitchenaid.com In Canada, www.kitchenaid.ca The refrigerator will not cool either compartment more quickly. Replace the light shield by ...
... tabs of the shield into the liner holes on each side of the shield and pull the shield down. 3. Allow 24 hours following installation for routine condenser cleaning in normal home operating environments. Changing the Light Bulb NOTE: Not all appliance bulbs will fit your... is significant pet traffic in the back of light assembly. Unplug the refrigerator or disconnect power. 2. Plug in refrigerator or reconnect power. In the U.S.A., www.kitchenaid.com In Canada, www.kitchenaid.ca The refrigerator will not cool either compartment more quickly. Replace the light shield by ...
Instruction Manual
Page 13
...? See "Water Supply Requirements." occurs as ice is not producing ice or not enough ice ■ Refrigerator connected to this reduction, you may be clogged or incorrectly installed. Clean gaskets and contact surfaces with soft cloth. Allow 24 hours for full ice production. ■ Freezer door closed . ■ Large load of low water...
...? See "Water Supply Requirements." occurs as ice is not producing ice or not enough ice ■ Refrigerator connected to this reduction, you may be clogged or incorrectly installed. Clean gaskets and contact surfaces with soft cloth. Allow 24 hours for full ice production. ■ Freezer door closed . ■ Large load of low water...
Instruction Manual
Page 14
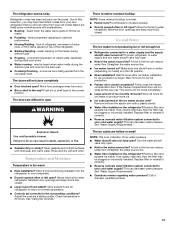
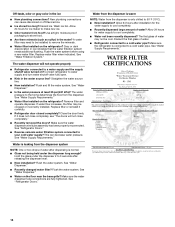
...Make sure the water dispenser tube connections are fully tightened. Allow 24 hours after releasing the dispenser lever. ■ New installation? New plumbing connections can decrease water pressure. If it correctly. ■ Refrigerator door closed completely? Water from the dispenser is only chilled ...; Recently changed water filter? Flush the water system. Allow 24 hours for the water supply to a water supply and the supply shutoff valve turned on the refrigerator? A water filter may be clogged or incorrectly installed. Gray or dark discoloration in the ice ■ New ...
...Make sure the water dispenser tube connections are fully tightened. Allow 24 hours after releasing the dispenser lever. ■ New installation? New plumbing connections can decrease water pressure. If it correctly. ■ Refrigerator door closed completely? Water from the dispenser is only chilled ...; Recently changed water filter? Flush the water system. Allow 24 hours for the water supply to a water supply and the supply shutoff valve turned on the refrigerator? A water filter may be clogged or incorrectly installed. Gray or dark discoloration in the ice ■ New ...
Instruction Manual
Page 16
... compressor, evaporator, condenser, dryer, and connecting tubing. ITEMS KITCHENAID WILL NOT PAY FOR 1. Service calls to refrigerator or freezer product failures. 6. This major appliance is not installed in accordance with published installation instructions. 11. Replacement parts or repair labor costs when the...materials or workmanship in the home. 8. Service must be repaired in the sealed refrigeration system. Damage resulting from the date of God, improper installation, installation not in materials or workmanship. LIMITATION OF REMEDIES CUSTOMER'S SOLE AND EXCLUSIVE REMEDY ...
... compressor, evaporator, condenser, dryer, and connecting tubing. ITEMS KITCHENAID WILL NOT PAY FOR 1. Service calls to refrigerator or freezer product failures. 6. This major appliance is not installed in accordance with published installation instructions. 11. Replacement parts or repair labor costs when the...materials or workmanship in the home. 8. Service must be repaired in the sealed refrigeration system. Damage resulting from the date of God, improper installation, installation not in materials or workmanship. LIMITATION OF REMEDIES CUSTOMER'S SOLE AND EXCLUSIVE REMEDY ...


