User Guide
Page 3
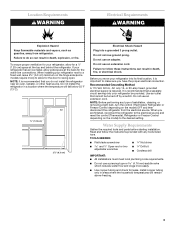
... its final location, it is recommended that you are finished, reconnect the refrigerator to swing open. NOTE: Before performing any tools listed here. If your refrigerator, allow for the water line connections. Do not use an adapter. Read and follow these instructions can...use a piercing-type or 4.76 mm) saddle valve which reduces water flow and clogs more ) to the desired setting. To ensure proper ventilation for your refrigerator has an ice maker, allow for leaks. Location Requirements WARNING Electrical Requirements WARNING Explosion Hazard Keep flammable materials...
... its final location, it is recommended that you are finished, reconnect the refrigerator to swing open. NOTE: Before performing any tools listed here. If your refrigerator, allow for the water line connections. Do not use an adapter. Read and follow these instructions can...use a piercing-type or 4.76 mm) saddle valve which reduces water flow and clogs more ) to the desired setting. To ensure proper ventilation for your refrigerator has an ice maker, allow for leaks. Location Requirements WARNING Electrical Requirements WARNING Explosion Hazard Keep flammable materials...
User Guide
Page 5
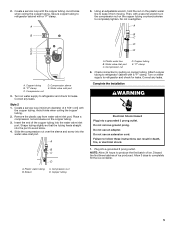
...copper tubing. 3. Place a compression nut and sleeve on water supply to keep it from water valve inlet port. Water valve inlet port C. "P" clamp 6. Check connection by pulling on the plastic water line to refrigerator and check for leaks. Do not use an adapter. Allow 3 days to ...not overtighten. Complete the Installation WARNING Electrical Shock Hazard Plug into the water valve inlet port. Do not remove ground prong. Avoid kinks when coiling the copper tubing. 2. Insert the end of 2 ft [61 cm]) with the copper tubing. Using an adjustable wrench, hold...
...copper tubing. 3. Place a compression nut and sleeve on water supply to keep it from water valve inlet port. Water valve inlet port C. "P" clamp 6. Check connection by pulling on the plastic water line to refrigerator and check for leaks. Do not use an adapter. Allow 3 days to ...not overtighten. Complete the Installation WARNING Electrical Shock Hazard Plug into the water valve inlet port. Do not remove ground prong. Avoid kinks when coiling the copper tubing. 2. Insert the end of 2 ft [61 cm]) with the copper tubing. Using an adjustable wrench, hold...
User Guide
Page 14
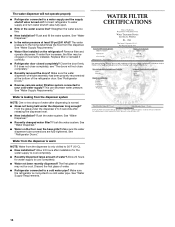
... bottom of the refrigerator door. See "Water Supply Requirements." ■ Water filter installed on the refrigerator? See "Water Supply Requirements." Replace filter or reinstall it does not close completely." ■ Recently removed the doors? Allow 24 hours after installation for water supply to 50°F (10°C). ■ New installation? The water pressure to 3 seconds after dispensing is leaking...
... bottom of the refrigerator door. See "Water Supply Requirements." ■ Water filter installed on the refrigerator? See "Water Supply Requirements." Replace filter or reinstall it does not close completely." ■ Recently removed the doors? Allow 24 hours after installation for water supply to 50°F (10°C). ■ New installation? The water pressure to 3 seconds after dispensing is leaking...


