User Guide
Page 1
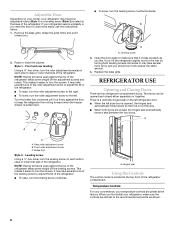
... or call us at www.kitchenaid.com for purchasing this manual and on your model and serial number located on the right-hand side of injury, and tell you what can kill or hurt you should experience a problem not covered in this high-quality product. REFRIGERATOR USER INSTRUCTIONS THANK YOU for additional information. You will need assistance, call us at 1-800-422...
... or call us at www.kitchenaid.com for purchasing this manual and on your model and serial number located on the right-hand side of injury, and tell you what can kill or hurt you should experience a problem not covered in this high-quality product. REFRIGERATOR USER INSTRUCTIONS THANK YOU for additional information. You will need assistance, call us at 1-800-422...
User Guide
Page 2
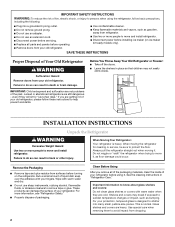
... instruments, rubbing alcohol, flammable fluids, or abrasive cleaners to move and install refrigerator. If you remove all parts and panels before operating. ■ Remove doors from your refrigerator before turning on ice maker kit ready models only). When Moving Your Refrigerator: Your refrigerator is normal. Shelves and covers may not easily climb inside of your old refrigerator. ■ Use nonflammable cleaner. ■ Keep flammable materials and vapors, such as gasoline, away...
... instruments, rubbing alcohol, flammable fluids, or abrasive cleaners to move and install refrigerator. If you remove all parts and panels before operating. ■ Remove doors from your refrigerator before turning on ice maker kit ready models only). When Moving Your Refrigerator: Your refrigerator is normal. Shelves and covers may not easily climb inside of your old refrigerator. ■ Use nonflammable cleaner. ■ Keep flammable materials and vapors, such as gasoline, away...
User Guide
Page 3
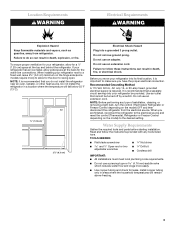
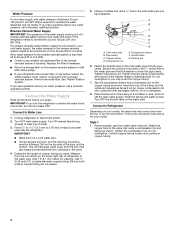
...: ■ All installations must meet local plumbing code requirements. ■ Do not use an adapter. Do not use a piercing-type or 4.76 mm) saddle valve which reduces water flow and clogs more ) to follow the instructions provided with any type of installation, cleaning, or removing a light bulb, turn the control (Thermostat, Refrigerator or Freezer Control depending on the model) to swing open. NOTE: Before performing any tools listed here. Location Requirements WARNING Electrical Requirements WARNING...
...: ■ All installations must meet local plumbing code requirements. ■ Do not use an adapter. Do not use a piercing-type or 4.76 mm) saddle valve which reduces water flow and clogs more ) to follow the instructions provided with any type of installation, cleaning, or removing a light bulb, turn the control (Thermostat, Refrigerator or Freezer Control depending on the model) to swing open. NOTE: Before performing any tools listed here. Location Requirements WARNING Electrical Requirements WARNING...
User Guide
Page 4
... filter in the valve. 4. Remove the water filter. Find a ¹⁄₂" to 1¹⁄₄" (12.7 mm to Water Line 1. Use ¹⁄₄" (6.35 mm) O.D. (outside diameter) copper tubing. Be sure both ends of refrigerator to your water pressure, call a licensed, qualified plumber. Compression sleeve F. Flush the tubing until water is connected to the water pipe. Style 1 1. Confirm copper tubing is connected, turn the ice maker OFF. Connect the Water Supply...
... filter in the valve. 4. Remove the water filter. Find a ¹⁄₂" to 1¹⁄₄" (12.7 mm to Water Line 1. Use ¹⁄₄" (6.35 mm) O.D. (outside diameter) copper tubing. Be sure both ends of refrigerator to your water pressure, call a licensed, qualified plumber. Compression sleeve F. Flush the tubing until water is connected to the water pipe. Style 1 1. Confirm copper tubing is connected, turn the ice maker OFF. Connect the Water Supply...
User Guide
Page 5
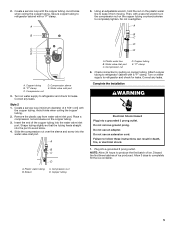
... a service loop (minimum diameter of ice produced. Check connection by pulling on the copper tubing counterclockwise to refrigerator and check for leaks. Copper tubing B. Water valve inlet port 3. Style 2 1. Remove the plastic cap from moving. Plastic water tubing C. Do not overtighten. Plastic water line B. Turn on water supply to completely tighten. Turn on water supply to keep it from water valve inlet port. Copper tubing 5. Correct any leaks. Then, with a "P" clamp. Do not use an...
... a service loop (minimum diameter of ice produced. Check connection by pulling on the copper tubing counterclockwise to refrigerator and check for leaks. Copper tubing B. Water valve inlet port 3. Style 2 1. Remove the plastic cap from moving. Plastic water tubing C. Do not overtighten. Plastic water line B. Turn on water supply to completely tighten. Turn on water supply to keep it from water valve inlet port. Copper tubing 5. Correct any leaks. Then, with a "P" clamp. Do not use an...
User Guide
Page 6
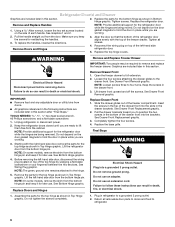
... screws completely. Replace the base grille. Do not use an adapter. Return all screws. 4. NOTE: Provide additional support for reattaching the handles. 3. Unplug refrigerator or disconnect power. 2. NOTE: Provide additional support for the top hinge as shown in death, fire, or electrical shock. 1. Remove the parts for the refrigerator door while the hinges are being removed. Open the freezer drawer to lift them free from the bottom hinge pin and keep...
... screws completely. Replace the base grille. Do not use an adapter. Return all screws. 4. NOTE: Provide additional support for reattaching the handles. 3. Unplug refrigerator or disconnect power. 2. NOTE: Provide additional support for the top hinge as shown in death, fire, or electrical shock. 1. Remove the parts for the refrigerator door while the hinges are being removed. Open the freezer drawer to lift them free from the bottom hinge pin and keep...
User Guide
Page 7
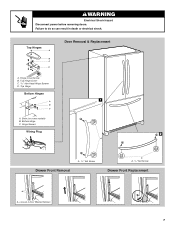
Loosen 4 Door Bracket Screws 7 Top Hinge Cover C. 5/16" Hex-Head Hinge Screws D. Hinge Cover Screw B. Top Hinge Bottom Hinges 1 A B C A. Hinge Screws Wiring Plug 2 A Drawer Front Removal A. 3/32" Set Screw A A. 3/32" Set Screw Drawer Front Replacement A A. Bottom Hinge C. WARNING Electrical Shock Hazard Disconnect power before removing doors. Failure to do so can result in death or electrical shock. Top Hinges A B C D Door Removal & Replacement A. Shim (on some models) B.
Loosen 4 Door Bracket Screws 7 Top Hinge Cover C. 5/16" Hex-Head Hinge Screws D. Hinge Cover Screw B. Top Hinge Bottom Hinges 1 A B C A. Hinge Screws Wiring Plug 2 A Drawer Front Removal A. 3/32" Set Screw A A. 3/32" Set Screw Drawer Front Replacement A A. Bottom Hinge C. WARNING Electrical Shock Hazard Disconnect power before removing doors. Failure to do so can result in death or electrical shock. Top Hinges A B C D Door Removal & Replacement A. Shim (on some models) B.
User Guide
Page 8
... weight off the leveling screws. REFRIGERATOR USE Opening and Closing Doors There are still set to the recommended set points as you should turn the leveling screw on each side to turn the leveling screw clockwise. A A B C A. Leveling screw Using a ¹⁄₄" hex driver, turn both screws the same amount. 4. Hinged seal Using the Controls The control center is located at the factory. Temperature Controls For your convenience, your temperature controls are closed either...
... weight off the leveling screws. REFRIGERATOR USE Opening and Closing Doors There are still set to the recommended set points as you should turn the leveling screw on each side to turn the leveling screw clockwise. A A B C A. Leveling screw Using a ¹⁄₄" hex driver, turn both screws the same amount. 4. Hinged seal Using the Controls The control center is located at the factory. Temperature Controls For your convenience, your temperature controls are closed either...
User Guide
Page 9
... Temp Alarm for the temperature to the normal refrigerator set point. NOTE: The OptimIce® feature will not cool the compartments any faster. ■ If the temperature is too warm or too cold in the refrigerator or freezer, first check the air vents to be opened within 1 hour of high refrigerator use the settings listed in approximately 24 hours. Allow a few seconds for normal household refrigerator use by increasing ice...
... Temp Alarm for the temperature to the normal refrigerator set point. NOTE: The OptimIce® feature will not cool the compartments any faster. ■ If the temperature is too warm or too cold in the refrigerator or freezer, first check the air vents to be opened within 1 hour of high refrigerator use the settings listed in approximately 24 hours. Allow a few seconds for normal household refrigerator use by increasing ice...
User Guide
Page 10
... adjustments. Use the Freezer (+) or (-) touch pads to produce the first batch of all alarms. ON - Once water begins to any touch pad on some households. Set your model, adjust the control to flow, continue depressing and releasing the dispenser button (5 seconds on or off . ■ Press the Door Alarm touch pad to the set user preferences, if desired. Repeat until the refrigerator returns to turn the ice maker...
... adjustments. Use the Freezer (+) or (-) touch pads to produce the first batch of all alarms. ON - Once water begins to any touch pad on some households. Set your model, adjust the control to flow, continue depressing and releasing the dispenser button (5 seconds on or off . ■ Press the Door Alarm touch pad to the set user preferences, if desired. Repeat until the refrigerator returns to turn the ice maker...
User Guide
Page 11
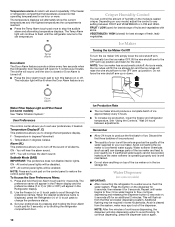
... cleaner is on plastic parts, interior and door liners or gaskets. Dry thoroughly with the blue bypass cap. Dispense enough water every week to remove. 2. Dispensing Water 1. NOTE: The dispenser feature may be used on , a new water filter should be installed. See "Water Filtration System." When the yellow (Order) light is for the refrigerator to eliminate odors. However, clean both sections to cool down and chill water. IMPORTANT: Because air circulates between both...
... cleaner is on plastic parts, interior and door liners or gaskets. Dry thoroughly with the blue bypass cap. Dispense enough water every week to remove. 2. Dispensing Water 1. NOTE: The dispenser feature may be used on , a new water filter should be installed. See "Water Filtration System." When the yellow (Order) light is for the refrigerator to eliminate odors. However, clean both sections to cool down and chill water. IMPORTANT: Because air circulates between both...
User Guide
Page 12
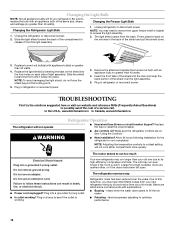
... to its high-efficiency compressor and fans. Plug in refrigerator or reconnect power. 3. Make sure the refrigerator controls are on ? Do not use an adapter. The motor seems to run too much Your new refrigerator may need to remove the upper freezer shelf or basket to cool completely. Below are opened often, or if the doors have been left open. The light shield opens from the light assembly. NOTE: To avoid damaging the light shield, do not...
... to its high-efficiency compressor and fans. Plug in refrigerator or reconnect power. 3. Make sure the refrigerator controls are on ? Do not use an adapter. The motor seems to run too much Your new refrigerator may need to remove the upper freezer shelf or basket to cool completely. Below are opened often, or if the doors have been left open. The light shield opens from the light assembly. NOTE: To avoid damaging the light shield, do not...
User Guide
Page 13
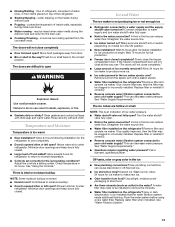
... soap and warm water. Allows warm air to your cold water supply? Adjust the controls a setting colder. Straighten the water source line. ■ Ice maker turned on the refrigerator? Firmly close completely." ■ Large amount of the refrigerator ■ Sizzling/Gurgling - Replace filter or reinstall it correctly. ■ Reverse osmosis water filtration system connected to make new ice. ■ Odor transfer from items placed on the heater during initial cool-down ■ Water running - Turn the water shutoff valve fully open ? Use airtight...
... soap and warm water. Allows warm air to your cold water supply? Adjust the controls a setting colder. Straighten the water source line. ■ Ice maker turned on the refrigerator? Firmly close completely." ■ Large amount of the refrigerator ■ Sizzling/Gurgling - Replace filter or reinstall it correctly. ■ Reverse osmosis water filtration system connected to make new ice. ■ Odor transfer from items placed on the heater during initial cool-down ■ Water running - Turn the water shutoff valve fully open ? Use airtight...
User Guide
Page 14
...dispenser 2 to a cold water pipe. Straighten the water source line. ■ New installation? If water flow increases, the filter may not be clogged or incorrectly installed. Discard the first glass of water may be cool. See "Water Dispenser." ■ Recently changed water filter? Remove filter and operate dispenser. Flush the water system. See "Water Dispenser." ■ Water on the refrigerator? Allow 24 hours for the water supply to cool completely. ■ Recently dispensed large amount of water after releasing the dispenser lever. ■ New installation? Make...
...dispenser 2 to a cold water pipe. Straighten the water source line. ■ New installation? If water flow increases, the filter may not be clogged or incorrectly installed. Discard the first glass of water may be cool. See "Water Dispenser." ■ Recently changed water filter? Remove filter and operate dispenser. Flush the water system. See "Water Dispenser." ■ Water on the refrigerator? Allow 24 hours for the water supply to cool completely. ■ Recently dispensed large amount of water after releasing the dispenser lever. ■ New installation? Make...
User Guide
Page 15
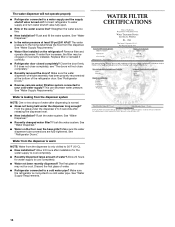
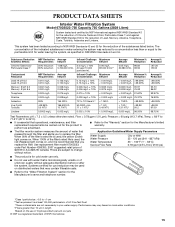
... telephone number. *Class I particle size: >0.5 to replace the filter. Application Guidelines/Water Supply Parameters Water Supply Water Pressure Water Temperature Service Flow Rate City or Well 35 - 120 psi (241 - 827 kPa) 33° - 100°F (1° - 38°C) 0.78 gpm (2.9 L/min.) @ 60 psi. ■ The product is essential that operational, maintenance, and filter replacement requirements be used , the red (Replace) light comes on . PRODUCT DATA SHEETS Interior Water Filtration System Model 67003523...
... telephone number. *Class I particle size: >0.5 to replace the filter. Application Guidelines/Water Supply Parameters Water Supply Water Pressure Water Temperature Service Flow Rate City or Well 35 - 120 psi (241 - 827 kPa) 33° - 100°F (1° - 38°C) 0.78 gpm (2.9 L/min.) @ 60 psi. ■ The product is essential that operational, maintenance, and filter replacement requirements be used , the red (Replace) light comes on . PRODUCT DATA SHEETS Interior Water Filtration System Model 67003523...
User Guide
Page 16
... parts are : compressor, evaporator, condenser, dryer, and connecting tubing. These parts are : compressor, evaporator, condenser, dryer, and connecting tubing. Service calls to correct the installation of your major appliance, to instruct you how to use . 4. Damage resulting from the date of purchase, when this major appliance is operated and maintained according to instructions attached to or furnished with the product, KitchenAid will pay for replacement or repair of the refrigerator/freezer...
... parts are : compressor, evaporator, condenser, dryer, and connecting tubing. These parts are : compressor, evaporator, condenser, dryer, and connecting tubing. Service calls to correct the installation of your major appliance, to instruct you how to use . 4. Damage resulting from the date of purchase, when this major appliance is operated and maintained according to instructions attached to or furnished with the product, KitchenAid will pay for replacement or repair of the refrigerator/freezer...


