
User Manual 2
Page 3
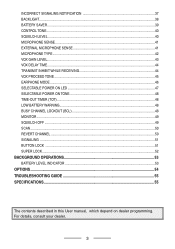
... BACKGROUND OPERATIONS 53 BATTERY LEVEL INDICATOR...53 OPTIONS...54 TROUBLESHOOTING GUIDE 55 SPECIFICATIONS...55 The contents described in this User manual, which depend on dealer programming.
... BACKGROUND OPERATIONS 53 BATTERY LEVEL INDICATOR...53 OPTIONS...54 TROUBLESHOOTING GUIDE 55 SPECIFICATIONS...55 The contents described in this User manual, which depend on dealer programming.

User Manual 2
Page 13
...to transmit the preset Morse code message on your dealer setting. In Channel Menu Mode, the configuration for a function configured for a channel can program the , , Menu, Side, or Remote (KMC-55) buttons each with one of pressing a button to continuously decrease the Channel number. n...; The duration of the functions listed below. n Channel Up Increases the Channel number in steps of 1. n None No function has been programmed. n Channel Menu Enters Channel Menu Mode. Ask your dealer for details on which buttons need to be held down to be changed. PROGRAMMABLE...
...to transmit the preset Morse code message on your dealer setting. In Channel Menu Mode, the configuration for a function configured for a channel can program the , , Menu, Side, or Remote (KMC-55) buttons each with one of pressing a button to continuously decrease the Channel number. n...; The duration of the functions listed below. n Channel Up Increases the Channel number in steps of 1. n None No function has been programmed. n Channel Menu Enters Channel Menu Mode. Ask your dealer for details on which buttons need to be held down to be changed. PROGRAMMABLE...

User Manual 2
Page 16
... decided on the power. {p.47} ADJUST THE VOLUME Set your desired volume level by pressing the button programmed as [Channel Up] or [Channel Down]. • A confirmation tone sounds each time you press the button programmed as a reference in Analog mode, use the Squelch off Function. BASIC OPERATION POWER ON Switch the transceiver...
... decided on the power. {p.47} ADJUST THE VOLUME Set your desired volume level by pressing the button programmed as [Channel Up] or [Channel Down]. • A confirmation tone sounds each time you press the button programmed as a reference in Analog mode, use the Squelch off Function. BASIC OPERATION POWER ON Switch the transceiver...

User Manual 2
Page 19
.... 3 Press the PTT switch to transmit the selected ID. • When a call is calling transceivers D, E, and F. 1 Press and hold the button programmed as [Channel Menu]. GROUP CALLS: For example, transceiver A is received, " " appears on the display, along with the caller's ID number. Transceiver A... transceiver A is appeared. Transceiver A Transceiver A Transceiver E 19 or press the button programmed as [ID List]. • The ID List you called last is calling transceiver E. 1 Press and hold the button programmed as [Channel Up] or [Channel Down] to select an Group ID number (12...
.... 3 Press the PTT switch to transmit the selected ID. • When a call is calling transceivers D, E, and F. 1 Press and hold the button programmed as [Channel Menu]. GROUP CALLS: For example, transceiver A is received, " " appears on the display, along with the caller's ID number. Transceiver A... transceiver A is appeared. Transceiver A Transceiver A Transceiver E 19 or press the button programmed as [ID List]. • The ID List you called last is calling transceiver E. 1 Press and hold the button programmed as [Channel Up] or [Channel Down] to select an Group ID number (12...

User Manual 2
Page 20
... [Channel Menu]. Transceiver A Transceiver B ~ F RECEIVING A SELCALL When a Selcall is finished, Press and hold the button programmed as [Channel Up] or [Channel Down] to select an Broadcast ID number (ALL-15 in this example). • " " (Broadcast Call) represents a group of stations. 3 ... with the caller's ID number. Press the PTT switch and speak into the speaker area to respond to operating mode. 20 or press the button programmed as normal. When the call as [ID List]. • The ID List you called last is calling transceivers B ~ F. 1 Press and hold the Side button ...
... [Channel Menu]. Transceiver A Transceiver B ~ F RECEIVING A SELCALL When a Selcall is finished, Press and hold the button programmed as [Channel Up] or [Channel Down] to select an Broadcast ID number (ALL-15 in this example). • " " (Broadcast Call) represents a group of stations. 3 ... with the caller's ID number. Press the PTT switch and speak into the speaker area to respond to operating mode. 20 or press the button programmed as normal. When the call as [ID List]. • The ID List you called last is calling transceivers B ~ F. 1 Press and hold the Side button ...

User Manual 2
Page 21
...this example group call) represents a group of stations. 3 Press the PTT switch to make calls by calling group parties. Transceiver A 2 Press the button programmed as [ID List]. • The ID List you called last is a general term for the NXDN wireless communication protocol which uses 4 Level FSK. ... own List 21 : Group Send: List 1 : own List 21 : Group To operation the Group Call: 1 Press and hold the button programmed as [Channel Menu], or press the button programmed as [Channel Up] or [Channel Down] to select an group ID number (21-GRP in FleetSync. List 2 : own List 21 :...
...this example group call) represents a group of stations. 3 Press the PTT switch to make calls by calling group parties. Transceiver A 2 Press the button programmed as [ID List]. • The ID List you called last is a general term for the NXDN wireless communication protocol which uses 4 Level FSK. ... own List 21 : Group Send: List 1 : own List 21 : Group To operation the Group Call: 1 Press and hold the button programmed as [Channel Menu], or press the button programmed as [Channel Up] or [Channel Down] to select an group ID number (21-GRP in FleetSync. List 2 : own List 21 :...

User Manual 2
Page 22
List 1 : own List 2 : None List 3 : Individual To operation the Individual Call: 1 Press and hold the button programmed as [Channel Menu], or press the button programmed as [Channel Up] or [Channel Down] to select an individual ID number (03-IND in this example). • " " (individual... call) represents a single station. 3 Press the PTT switch to make calls by calling individual parties. Transceiver A 2 Press the button programmed as [ID List]. • The ID List you called last is received, " " appears on the display, along with the caller's ID number. ...
List 1 : own List 2 : None List 3 : Individual To operation the Individual Call: 1 Press and hold the button programmed as [Channel Menu], or press the button programmed as [Channel Up] or [Channel Down] to select an individual ID number (03-IND in this example). • " " (individual... call) represents a single station. 3 Press the PTT switch to make calls by calling individual parties. Transceiver A 2 Press the button programmed as [ID List]. • The ID List you called last is received, " " appears on the display, along with the caller's ID number. ...

User Manual 2
Page 23
Transceiver A 2 Press the button programmed as [ID List]. • The ID List you called last is received, " " appears on the display, along with the caller's ID number. Transceiver B ~ E 23 Transceiver A 3 ... stations. ALL GROUP CALLS (BROADCAST CALLS) : BROADCAST 15 Group 21 Group 25 15-ALL To operation the ALL Group Call: 1 Press and hold the button programmed as [Channel Menu], or press the button programmed as [Channel Up] or [Channel Down] to transmit the selected ID. • When a call is appeared.
Transceiver A 2 Press the button programmed as [ID List]. • The ID List you called last is received, " " appears on the display, along with the caller's ID number. Transceiver B ~ E 23 Transceiver A 3 ... stations. ALL GROUP CALLS (BROADCAST CALLS) : BROADCAST 15 Group 21 Group 25 15-ALL To operation the ALL Group Call: 1 Press and hold the button programmed as [Channel Menu], or press the button programmed as [Channel Up] or [Channel Down] to transmit the selected ID. • When a call is appeared.

User Manual 2
Page 24
...or configured through the Menu instead of Channel menu mode. 2 Press the button programmed as [Channel Up] or [Channel Down] to select your desired settings. 3 Press the button programmed as [Channel Menu] then press the button programmed as [Channel Up] or [Channel Down] to select your desired value for ... Name Analog Digital Settings Ref. Once you become familiar with the Menu system, you will appreciate the versatility it offers. 1 Press the button programmed as [Channel Menu] to exit the selection. 5 Press the PTT switch or the Side button to exit Channel menu mode. CHANNEL MENU MODE...
...or configured through the Menu instead of Channel menu mode. 2 Press the button programmed as [Channel Up] or [Channel Down] to select your desired settings. 3 Press the button programmed as [Channel Menu] then press the button programmed as [Channel Up] or [Channel Down] to select your desired value for ... Name Analog Digital Settings Ref. Once you become familiar with the Menu system, you will appreciate the versatility it offers. 1 Press the button programmed as [Channel Menu] to exit the selection. 5 Press the PTT switch or the Side button to exit Channel menu mode. CHANNEL MENU MODE...

User Manual 2
Page 25
... ( icon : ) Low Switch transmit power to 1.0 W. ( icon : ) • The icon appears on the display when "ON " is selected. 4 Press the button programmed as [Channel Up] or [Channel Down] to transmit further, in complete privacy. Selecting high power will allow you to the operation mode. 25 Selecting low... The Scrambler (Analog) function is activated. • The PRIVACY icon appears on the appear when Transmission. 4 Press the button programmed as [Channel Up] or [Channel Down] to the operation mode. TRANSMIT POWER You can adjust the transmit power on all channels.
... ( icon : ) Low Switch transmit power to 1.0 W. ( icon : ) • The icon appears on the display when "ON " is selected. 4 Press the button programmed as [Channel Up] or [Channel Down] to transmit further, in complete privacy. Selecting high power will allow you to the operation mode. 25 Selecting low... The Scrambler (Analog) function is activated. • The PRIVACY icon appears on the appear when Transmission. 4 Press the button programmed as [Channel Up] or [Channel Down] to the operation mode. TRANSMIT POWER You can adjust the transmit power on all channels.

User Manual 2
Page 26
...26 Calls cannot be performed. 1 Enter the Setting mode {p.30}. 2 Press the button programmed as [Channel Up] or [Channel Down] to select " ". 3 Press the button programmed as [Channel Menu] then press the button programmed as [Channel Up] or [Channel Down] to select the encryption key code from 1...to 32767. 4 Enter the Channel menu mode {p.16}. 5 Press the button programmed as [Channel Up] or [Channel Down] to select " (Digital) ". 6 Press the button programmed as [Channel Menu] then press the button programmed as [Channel Menu] to confirm the selection, then press the PTT switch ...
...26 Calls cannot be performed. 1 Enter the Setting mode {p.30}. 2 Press the button programmed as [Channel Up] or [Channel Down] to select " ". 3 Press the button programmed as [Channel Menu] then press the button programmed as [Channel Up] or [Channel Down] to select the encryption key code from 1...to 32767. 4 Enter the Channel menu mode {p.16}. 5 Press the button programmed as [Channel Up] or [Channel Down] to select " (Digital) ". 6 Press the button programmed as [Channel Menu] then press the button programmed as [Channel Menu] to confirm the selection, then press the PTT switch ...

User Manual 2
Page 27
...or the Side button to exit to select your desired value. SELCALL ON PTT (Digital NXDN) OFF PTT ID is Digital. 4 Press the button programmed as PTT ID. 27 It can select a Reserved Group and talk. Send the PTT ID at the beginning and end of transmission. ~ List...of transmission) the PTT switch. 1 Enter the Channel menu mode {p.24}. 2 Press the button programmed as [Channel Up] or [Channel Down] to select " ". 3 Press the button programmed as [Channel Menu] then press the button programmed as [Channel Up] or [Channel Down] to the operation mode. Note: ◆ Transceiver's ...
...or the Side button to exit to select your desired value. SELCALL ON PTT (Digital NXDN) OFF PTT ID is Digital. 4 Press the button programmed as PTT ID. 27 It can select a Reserved Group and talk. Send the PTT ID at the beginning and end of transmission. ~ List...of transmission) the PTT switch. 1 Enter the Channel menu mode {p.24}. 2 Press the button programmed as [Channel Up] or [Channel Down] to select " ". 3 Press the button programmed as [Channel Menu] then press the button programmed as [Channel Up] or [Channel Down] to the operation mode. Note: ◆ Transceiver's ...

User Manual 2
Page 28
... function is Analog. 1 Enter the Channel menu mode {p.24}. 2 Press the button programmed as [Channel Up] or [Channel Down] to select " ". 3 Press the button programmed as [Channel Menu] then press the button programmed as [Channel Menu] to confirm the selection, then press the PTT switch or the ... value. ON The Compander function is activated. • The icon appears on the display when "ON " is selected. 4 Press the button programmed as [Channel Up] or [Channel Down] to the operation mode. The function cannot be enabled unless the settings match. 28 COMPANDER The compander ...
... function is Analog. 1 Enter the Channel menu mode {p.24}. 2 Press the button programmed as [Channel Up] or [Channel Down] to select " ". 3 Press the button programmed as [Channel Menu] then press the button programmed as [Channel Menu] to confirm the selection, then press the PTT switch or the ... value. ON The Compander function is activated. • The icon appears on the display when "ON " is selected. 4 Press the button programmed as [Channel Up] or [Channel Down] to the operation mode. The function cannot be enabled unless the settings match. 28 COMPANDER The compander ...

User Manual 2
Page 29
... TIME to set up in front of the transceiver. 3 Enter the Channel menu mode {p.24} 4 Press the button programmed as [Channel Up] or [Channel Down] to select " ". 5 Press the button programmed as [Channel Menu] then press the button programmed as [Channel Up] or [Channel Down] to select " " (VOX function activated) . 6 Press the button...
... TIME to set up in front of the transceiver. 3 Enter the Channel menu mode {p.24} 4 Press the button programmed as [Channel Up] or [Channel Down] to select " ". 5 Press the button programmed as [Channel Menu] then press the button programmed as [Channel Up] or [Channel Down] to select " " (VOX function activated) . 6 Press the button...

User Manual 2
Page 30
... through the Menu instead of physical controls. 1 With the transceiver power OFF, press and hold the button programmed as [Channel Menu] while turning the transceiver power ON. 2 Press the button programmed as [Channel Up] or [Channel Down] to select your desired Setting menu. 3 Press the button... programmed as [Channel Menu] then press the button programmed as [Channel Up] or [Channel Down] to select your desired value. 4 Press the button programmed as [Channel Menu] to exit the selection. 5 Press the PTT switch or ...
... through the Menu instead of physical controls. 1 With the transceiver power OFF, press and hold the button programmed as [Channel Menu] while turning the transceiver power ON. 2 Press the button programmed as [Channel Up] or [Channel Down] to select your desired Setting menu. 3 Press the button... programmed as [Channel Menu] then press the button programmed as [Channel Up] or [Channel Down] to select your desired value. 4 Press the button programmed as [Channel Menu] to exit the selection. 5 Press the PTT switch or ...

User Manual 2
Page 32
... alert tones are using the same channel. 1 Enter the Setting mode {p.30}. 2 Press the button programmed as [Channel Up] or [Channel Down] to select " ". 3 Press the button programmed as [Channel Menu] then press the button programmed as [Channel Up] or [Channel Down] to select your desired value. ~ 0 ~ 9 The ...selected number is set to Profile number. 4 Press the button programmed as [Channel Up] or [Channel Down] to select your desired value. ~ 1 ~ 16 Select from 16 type tones. • Each time you press ...
... alert tones are using the same channel. 1 Enter the Setting mode {p.30}. 2 Press the button programmed as [Channel Up] or [Channel Down] to select " ". 3 Press the button programmed as [Channel Menu] then press the button programmed as [Channel Up] or [Channel Down] to select your desired value. ~ 0 ~ 9 The ...selected number is set to Profile number. 4 Press the button programmed as [Channel Up] or [Channel Down] to select your desired value. ~ 1 ~ 16 Select from 16 type tones. • Each time you press ...

User Manual 2
Page 33
...Home channel] again returns to the original channel. HOME CHANNEL OPERATION 1 Press the button programmed as [Home channel]. 2 A beep sounds and "HOME" appears on the display for 1 second. 3 Pressing the button programmed as Home Channel. If activated you can set the current channel as [Channel Up] ...or [Channel Down] to select your desired channel using Home Channel Select. HOME CHANNEL SELECT Press the button programmed as [Home channel Select] set your own Home Channel by selecting your desired value. HOME CHANNEL SETUP 1 Enter the Channel menu mode ...
...Home channel] again returns to the original channel. HOME CHANNEL OPERATION 1 Press the button programmed as [Home channel]. 2 A beep sounds and "HOME" appears on the display for 1 second. 3 Pressing the button programmed as Home Channel. If activated you can set the current channel as [Channel Up] ...or [Channel Down] to select your desired channel using Home Channel Select. HOME CHANNEL SELECT Press the button programmed as [Home channel Select] set your own Home Channel by selecting your desired value. HOME CHANNEL SETUP 1 Enter the Channel menu mode ...

User Manual 2
Page 34
... is appeared and scanning starts. • When receiving the Second channel, the " " icon flashing and a beep sounds. 5 Press and hold the button programmed as [Channel Up] or [Channel Down] to the second channel and transmits in the setting mode. OFF The Second PTT function is deactivated. ~ 1~16... Select a Second channel. 4 When press the button programmed as [Second PTT], " " icon is light up another channel as [Second PTT]. SECOND CHANNEL Apart from the channel you normally select, you...
... is appeared and scanning starts. • When receiving the Second channel, the " " icon flashing and a beep sounds. 5 Press and hold the button programmed as [Channel Up] or [Channel Down] to the second channel and transmits in the setting mode. OFF The Second PTT function is deactivated. ~ 1~16... Select a Second channel. 4 When press the button programmed as [Second PTT], " " icon is light up another channel as [Second PTT]. SECOND CHANNEL Apart from the channel you normally select, you...

User Manual 2
Page 36
... PTT switch twice quickly, the pressed state will continue even if you press the PTT switch once, the transmission will continue. 4 Press the button programmed as [Channel Menu] to confirm the selection, then press the PTT switch or the Side button to return to the operation mode. 36 PTT HOLD...your desired value. -20 dB(Low level)~ 0 dB(Normal) Adjust in 2 dB steps. It attenuates the volume by the numerical value. 4 Press the button programmed as [Channel Menu] to confirm the selection, then press the PTT switch or the Side button to exit to the operation mode. OFF Press the...
... PTT switch twice quickly, the pressed state will continue even if you press the PTT switch once, the transmission will continue. 4 Press the button programmed as [Channel Menu] to confirm the selection, then press the PTT switch or the Side button to return to the operation mode. 36 PTT HOLD...your desired value. -20 dB(Low level)~ 0 dB(Normal) Adjust in 2 dB steps. It attenuates the volume by the numerical value. 4 Press the button programmed as [Channel Menu] to confirm the selection, then press the PTT switch or the Side button to exit to the operation mode. OFF Press the...

User Manual 2
Page 37
When signaling does not match, the LED blinking purple. 4 Press the button programmed as [Channel Menu] to confirm the selection, then press the PTT switch or the Side button to exit to select your desired value. A beep sounds ... signaling mismatch state by beep sound and LED. 1 Enter the Setting mode {p.30}. 2 Press the button programmed as [Channel Up] or [Channel Down] to select " ". 3 Press the button programmed as [Channel Menu] then press the button programmed as [Channel Up] or [Channel Down] to the operation mode. 37 OFF Not notification even if...
When signaling does not match, the LED blinking purple. 4 Press the button programmed as [Channel Menu] to confirm the selection, then press the PTT switch or the Side button to exit to select your desired value. A beep sounds ... signaling mismatch state by beep sound and LED. 1 Enter the Setting mode {p.30}. 2 Press the button programmed as [Channel Up] or [Channel Down] to select " ". 3 Press the button programmed as [Channel Menu] then press the button programmed as [Channel Up] or [Channel Down] to the operation mode. 37 OFF Not notification even if...
