Operation Manual
Page 1
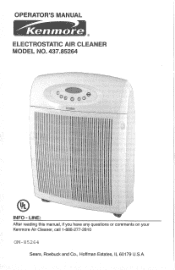
OPERATOR'S MANUAL -i ® INFO - LINE: After reading this manual, if you have any questions or comments on your Kenmore Air Cleaner, call 1-888-277-2810 0M-85264 Sears, Roebuck and Co., Hoffman Estates, IL 60179 U.S.A.
OPERATOR'S MANUAL -i ® INFO - LINE: After reading this manual, if you have any questions or comments on your Kenmore Air Cleaner, call 1-888-277-2810 0M-85264 Sears, Roebuck and Co., Hoffman Estates, IL 60179 U.S.A.
Operation Manual
Page 2
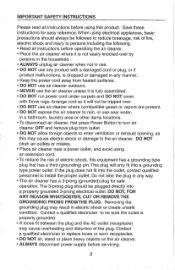
..., basic precautions should be sure the outlet is fully assembled. Removing the grounding plug may cause electric shock or damage to the air cleaner. Save these instructions for safe operation. Arrange cord so it will only fit into a properly grounded 3-prong electrical outlet. o...fit into the outlet, contact qualified personnel to replace loose or worn receptacles. - o ALWAYS disconnect power supply before operating the air cleaner. o ALWAYS unplug air cleaner when not in the household. o DO NOT use any product with throw rugs. o DO NOT run power cord under ...
..., basic precautions should be sure the outlet is fully assembled. Removing the grounding plug may cause electric shock or damage to the air cleaner. Save these instructions for safe operation. Arrange cord so it will only fit into a properly grounded 3-prong electrical outlet. o...fit into the outlet, contact qualified personnel to replace loose or worn receptacles. - o ALWAYS disconnect power supply before operating the air cleaner. o ALWAYS unplug air cleaner when not in the household. o DO NOT use any product with throw rugs. o DO NOT run power cord under ...
Operation Manual
Page 3
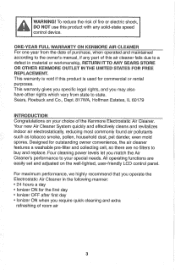
...INTRODUCTION Congratulations on the well-lighted, user-friendly LCD control panel. All operating functions are no filters to your choice of the Kenmore Electrostatic Air Cleaner. This warranty gives you specific legal rights, and you may also have other rights which vary from the date of purchase,... when operated and maintained according to the owner's manual, if any part of room air For maximum performance, we highly recommend that you operate the Electrostatic Air Cleaner in the following manner: o 24 hours a day o Ionizer ON for the first day o Ionizer OFF...
...INTRODUCTION Congratulations on the well-lighted, user-friendly LCD control panel. All operating functions are no filters to your choice of the Kenmore Electrostatic Air Cleaner. This warranty gives you specific legal rights, and you may also have other rights which vary from the date of purchase,... when operated and maintained according to the owner's manual, if any part of room air For maximum performance, we highly recommend that you operate the Electrostatic Air Cleaner in the following manner: o 24 hours a day o Ionizer ON for the first day o Ionizer OFF...
Operation Manual
Page 4
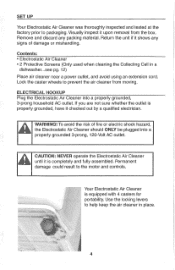
...-Volt AC outlet. CAUTION: NEVER operate the Electrostatic Air Cleaner until it upon removal from moving. Your Electrostatic Air Cleaner is completely and fully assembled. Remove and discard any signs of fire or electric shock hazard, the Electrostatic Air Cleaner should ONLY be plugged into a properly grounded,... portability. Lock the caster wheels to packaging. Return the unit if it checked out by a qualified electrician. Contents: o Electrostatic Air Cleaner o 2 Protective Screens (Only used when cleaning the Collecting Cell in place. 4 If you are not sure whether the ...
...-Volt AC outlet. CAUTION: NEVER operate the Electrostatic Air Cleaner until it upon removal from moving. Your Electrostatic Air Cleaner is completely and fully assembled. Remove and discard any signs of fire or electric shock hazard, the Electrostatic Air Cleaner should ONLY be plugged into a properly grounded,... portability. Lock the caster wheels to packaging. Return the unit if it checked out by a qualified electrician. Contents: o Electrostatic Air Cleaner o 2 Protective Screens (Only used when cleaning the Collecting Cell in place. 4 If you are not sure whether the ...
Operation Manual
Page 5
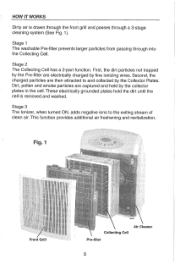
... function. First, the dirt particles not trapped by the Pre-filter are then attracted to the exiting stream of clean air. Fig. 1 Front Grill Collecting Cell Pre-filter Air Cleaner This function provides additional air freshening and revitalization. Second, the charged particles are electrically charged by the collector plates in the cell. These electrically... ions to and collected by the Collector Plates. Dirt, pollen and smoke particles are captured and held by fine ionizing wires. HOW IT WORKS Dirty air is removed and washed.
... function. First, the dirt particles not trapped by the Pre-filter are then attracted to the exiting stream of clean air. Fig. 1 Front Grill Collecting Cell Pre-filter Air Cleaner This function provides additional air freshening and revitalization. Second, the charged particles are electrically charged by the collector plates in the cell. These electrically... ions to and collected by the Collector Plates. Dirt, pollen and smoke particles are captured and held by fine ionizing wires. HOW IT WORKS Dirty air is removed and washed.
Operation Manual
Page 6
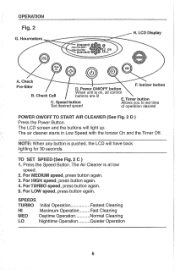
Check Pre=filter D. Check Cell When unit is at low speed. 2. The Air Cleaner is on, all control buttons are lit E. Power ON/OFF button F. The air cleaner starts in Low Speed with the Ionizer On and the Timer Off. TO SET SPEED (See Fig. 2 C ) 1. For HIGH... Daytime Operation Normal Cleaning Nighttime Operation .......... Speed button Set desired speed Allows you to set time of operation desired POWER ON/OFF TO START AIR CLEANER (See Fig. 2 D ) Press the Power Button. Quieter Operation 6 Timer button C. NOTE: When any button is pushed, the LCD...
Check Pre=filter D. Check Cell When unit is at low speed. 2. The Air Cleaner is on, all control buttons are lit E. Power ON/OFF button F. The air cleaner starts in Low Speed with the Ionizer On and the Timer Off. TO SET SPEED (See Fig. 2 C ) 1. For HIGH... Daytime Operation Normal Cleaning Nighttime Operation .......... Speed button Set desired speed Allows you to set time of operation desired POWER ON/OFF TO START AIR CLEANER (See Fig. 2 D ) Press the Power Button. Quieter Operation 6 Timer button C. NOTE: When any button is pushed, the LCD...
Operation Manual
Page 7
... Cell arcing may be caused by hair or large particles of hours you run for 1 hour. Each time you start your Air Cleaner, we recommend that are a result of clean air. For Continuous Running: Push button 9 times. To turn Ionizer ON. If snapping sounds do not eventually stop, TURN UNIT OFF... Ionizer OFF, push button again. The ION icon on control board will run it to 8 pushes = 8 hours. Press timer button once and the air cleaner will light up. Then set it at Turbo speed for a few minutes for CLEANING THE CELL. 7 OPERATION cont. Each time you press the button ...
... Cell arcing may be caused by hair or large particles of hours you run for 1 hour. Each time you start your Air Cleaner, we recommend that are a result of clean air. For Continuous Running: Push button 9 times. To turn Ionizer ON. If snapping sounds do not eventually stop, TURN UNIT OFF... Ionizer OFF, push button again. The ION icon on control board will run it to 8 pushes = 8 hours. Press timer button once and the air cleaner will light up. Then set it at Turbo speed for a few minutes for CLEANING THE CELL. 7 OPERATION cont. Each time you press the button ...
Operation Manual
Page 8
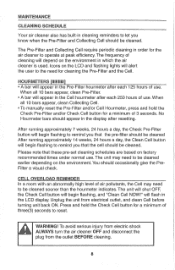
... outlet BEFORE cleaning. 8 Press and hold the Check PreoFilter and/or Check Cell button for the air cleaner to reset. To avoid serious injury from electric shock ALWAYS turn the air cleaner OFF and disconnect the plug from electrical outlet, and clean Cell before turning unit back ON. The...will depend on the environment in the LCD display. WARNING! When all 10 bars appear, clean Collecting Cell. MAINTENANCE CLEANING SCHEDULE Your air cleaner also has built=in cleaning reminders to be cleaned earlier depending on the environment. Icons on the LCD and flashing lights will alert the...
... outlet BEFORE cleaning. 8 Press and hold the Check PreoFilter and/or Check Cell button for the air cleaner to reset. To avoid serious injury from electric shock ALWAYS turn the air cleaner OFF and disconnect the plug from electrical outlet, and clean Cell before turning unit back ON. The...will depend on the environment in the LCD display. WARNING! When all 10 bars appear, clean Collecting Cell. MAINTENANCE CLEANING SCHEDULE Your air cleaner also has built=in cleaning reminders to be cleaned earlier depending on the environment. Icons on the LCD and flashing lights will alert the...
Operation Manual
Page 9
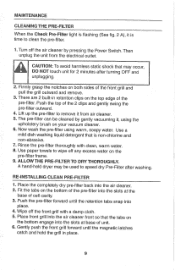
... can be used to clean the pre-filter. 1. Now wash the pre-filter using the upholstery brush on the bottom engage into the air cleaner front so that is time to speed dry Pre-Filter after turning OFF and [_ unApUluTgIgOinNg:. Use a mild dish washing liquid detergent that ... vacuuming it, using warm, soapy water. There are 2 built-in place. 9 Then unplug the unit from air cleaner. 5. Gently push the front grill forward until the retention tabs snap into the air cleaner. 2. MAINTENANCE CLEANINGTHE PRE-FILTER When the Check Pre-Filter light is flashing (See fig. 2 A), it is...
... can be used to clean the pre-filter. 1. Now wash the pre-filter using the upholstery brush on the bottom engage into the air cleaner front so that is time to speed dry Pre-Filter after turning OFF and [_ unApUluTgIgOinNg:. Use a mild dish washing liquid detergent that ... vacuuming it, using warm, soapy water. There are 2 built-in place. 9 Then unplug the unit from air cleaner. 5. Gently push the front grill forward until the retention tabs snap into the air cleaner. 2. MAINTENANCE CLEANINGTHE PRE-FILTER When the Check Pre-Filter light is flashing (See fig. 2 A), it is...

Operation Manual
Page 10
Plug the air cleaner back into a properly grounded 3-prong outlet. 8. CLEANING THE CELL (See Fig. 3) When the Check Cell light is flashing, it is time to reset it. Remove ... turning OFF and -i unApUluTgIgOinNg:. Press the power On button. 9. Press the Check Preofilter button to clean the cell. 1. WARNING: Some edges of the air cleaner. Turn Off the air cleaner by pressing the Power Button. Then unplug the unit from the electrical outlet. To avoid harmless static shock that is also a good time to...
Plug the air cleaner back into a properly grounded 3-prong outlet. 8. CLEANING THE CELL (See Fig. 3) When the Check Cell light is flashing, it is time to reset it. Remove ... turning OFF and -i unApUluTgIgOinNg:. Press the power On button. 9. Press the Check Preofilter button to clean the cell. 1. WARNING: Some edges of the air cleaner. Turn Off the air cleaner by pressing the Power Button. Then unplug the unit from the electrical outlet. To avoid harmless static shock that is also a good time to...

Operation Manual
Page 11
... remove cell. 3. Follow instructions RE-INSTALLING CLEAN PRE-FILTER to remove any tool, brush or similar object to 160°F.) and add detergent. Plug the Air Cleaner into the air cleaner and swing handles inward. 8.
... remove cell. 3. Follow instructions RE-INSTALLING CLEAN PRE-FILTER to remove any tool, brush or similar object to 160°F.) and add detergent. Plug the Air Cleaner into the air cleaner and swing handles inward. 8.
Operation Manual
Page 12
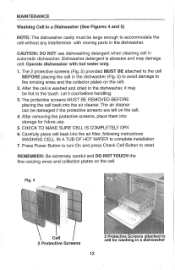
...the cell. 2, After the cell is abrasive and may be large enough to accommodate the cell without any interference with hot water only. 1. The air cleaner can be damaged if the protective screens are left on the cell. Fig. 4 Cell 2 Protective Screens 2 Protective Screens attached to cell for future..., following instructions WASHING CELL IN A TUB OF HOT WATER to complete installation 7. Carefully place cell back into the air cleaner. REMEMBER: Be extremely careful and DO NOTTOUCH the fine ionizing wires and collection plates on the cell. 4. CAUTION: DO NOT use . 5. Operate...
...the cell. 2, After the cell is abrasive and may be large enough to accommodate the cell without any interference with hot water only. 1. The air cleaner can be damaged if the protective screens are left on the cell. Fig. 4 Cell 2 Protective Screens 2 Protective Screens attached to cell for future..., following instructions WASHING CELL IN A TUB OF HOT WATER to complete installation 7. Carefully place cell back into the air cleaner. REMEMBER: Be extremely careful and DO NOTTOUCH the fine ionizing wires and collection plates on the cell. 4. CAUTION: DO NOT use . 5. Operate...

Operation Manual
Page 13
... soft, damp cloth to clean cabinet or grills. Cover the air cleaner and store in the previous two sections. Turn Off the air cleaner by pressing the Power Switch. DO NOT pour or splash water on the air cleaner. Clean cabinet and grills. Thoroughly dry all parts. 3o ALWAYS... and cell before storing. 4. MAINTENANCE Extra Cleaning of Cell Occasionally, a few particles of the Air Cleaner Cabinet 1. Then unplug the unit from the cabinet and grills. Turn Off the air cleaner by pressing the Power Button. STORAGE 1. The cell will begin making snapping sounds. GENERAL CLEANING...
... soft, damp cloth to clean cabinet or grills. Cover the air cleaner and store in the previous two sections. Turn Off the air cleaner by pressing the Power Switch. DO NOT pour or splash water on the air cleaner. Clean cabinet and grills. Thoroughly dry all parts. 3o ALWAYS... and cell before storing. 4. MAINTENANCE Extra Cleaning of Cell Occasionally, a few particles of the Air Cleaner Cabinet 1. Then unplug the unit from the cabinet and grills. Turn Off the air cleaner by pressing the Power Button. STORAGE 1. The cell will begin making snapping sounds. GENERAL CLEANING...
